Nettio Designs

Design + Creativity + Adventure = LOVE

  • HOME
  • JOIN THE 2023 MONTHLY FAVES
  • THE SHOP
  • ABOUT
  • CONTACT
You are here: Home / Archives for Project Love / Summer Love 2013 Mini Course

Summer Love Mini Course | The Completed Albums

POSTED ON August 15, 2013 IN Summer Love 2013 Mini Course

summerlovemini-logoAw, sad day, the final day of the Summer Love Mini Course is upon us. If you’ve followed along with us this summer, WOOHOO, 1000 gold stars to you! I hope you’ve enjoyed our mini album adventures this summer.

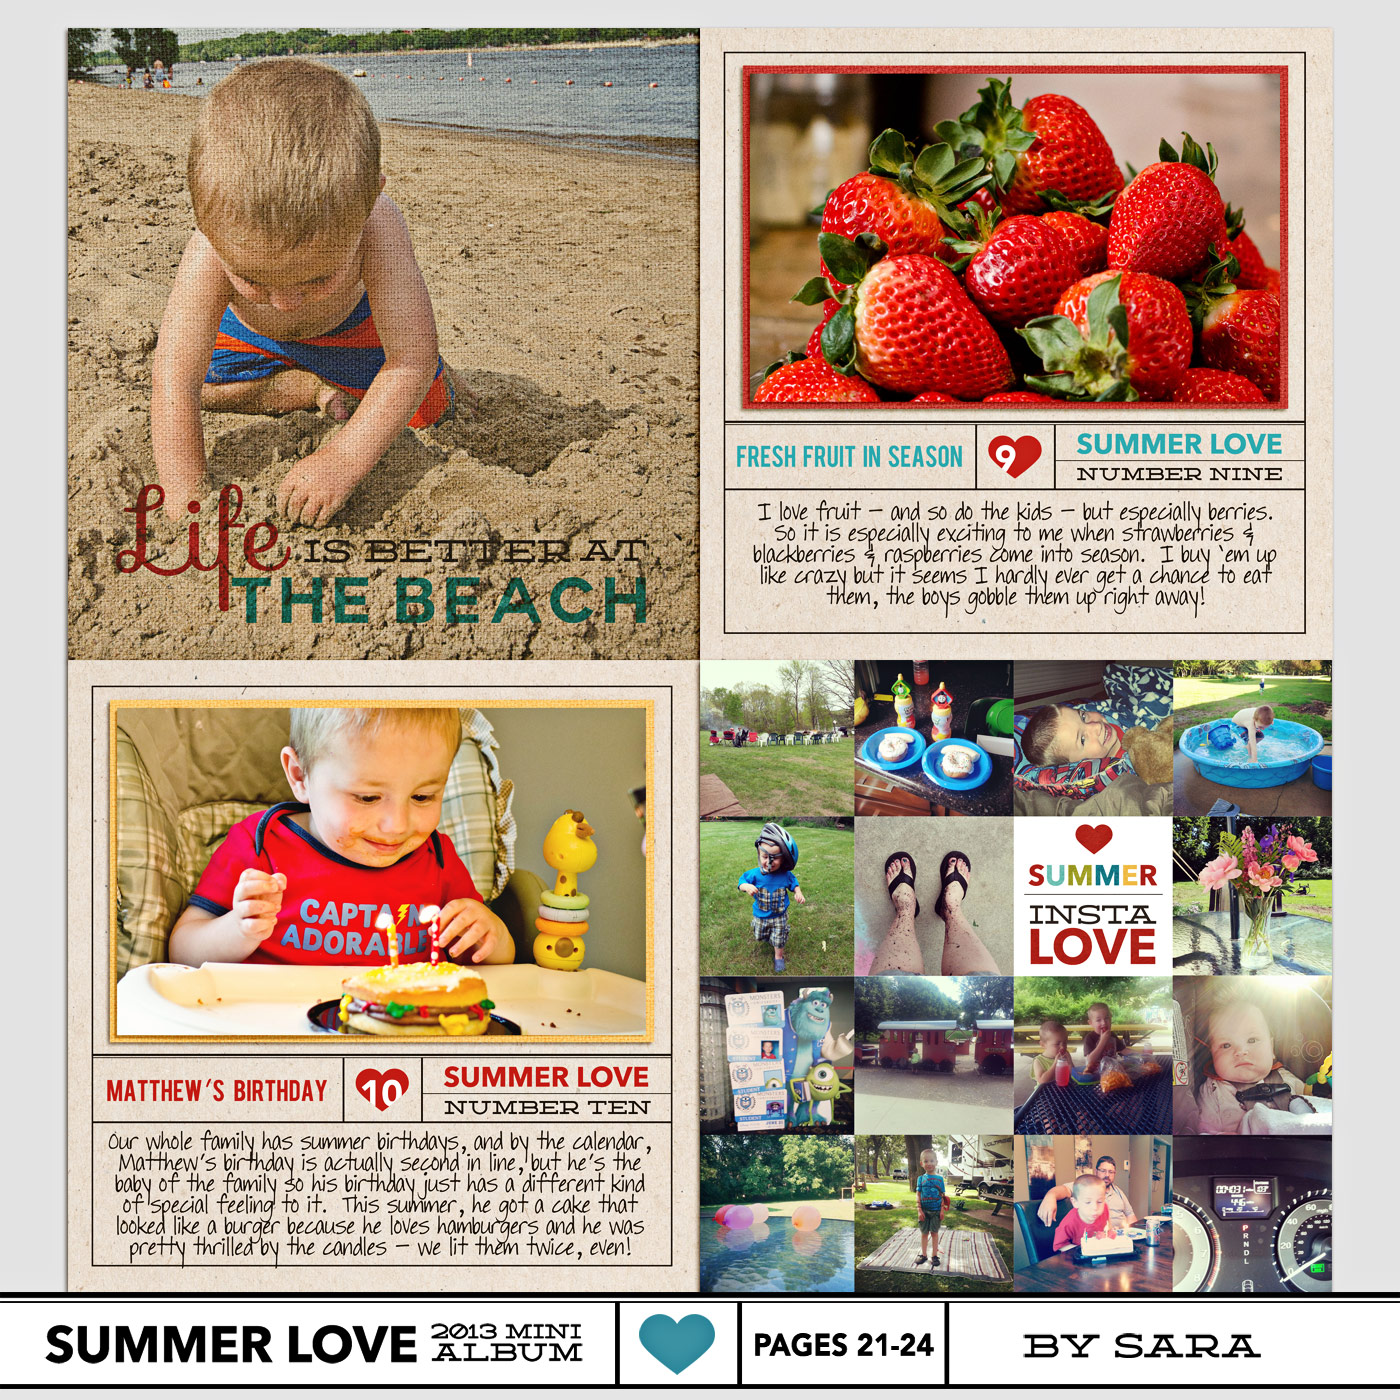
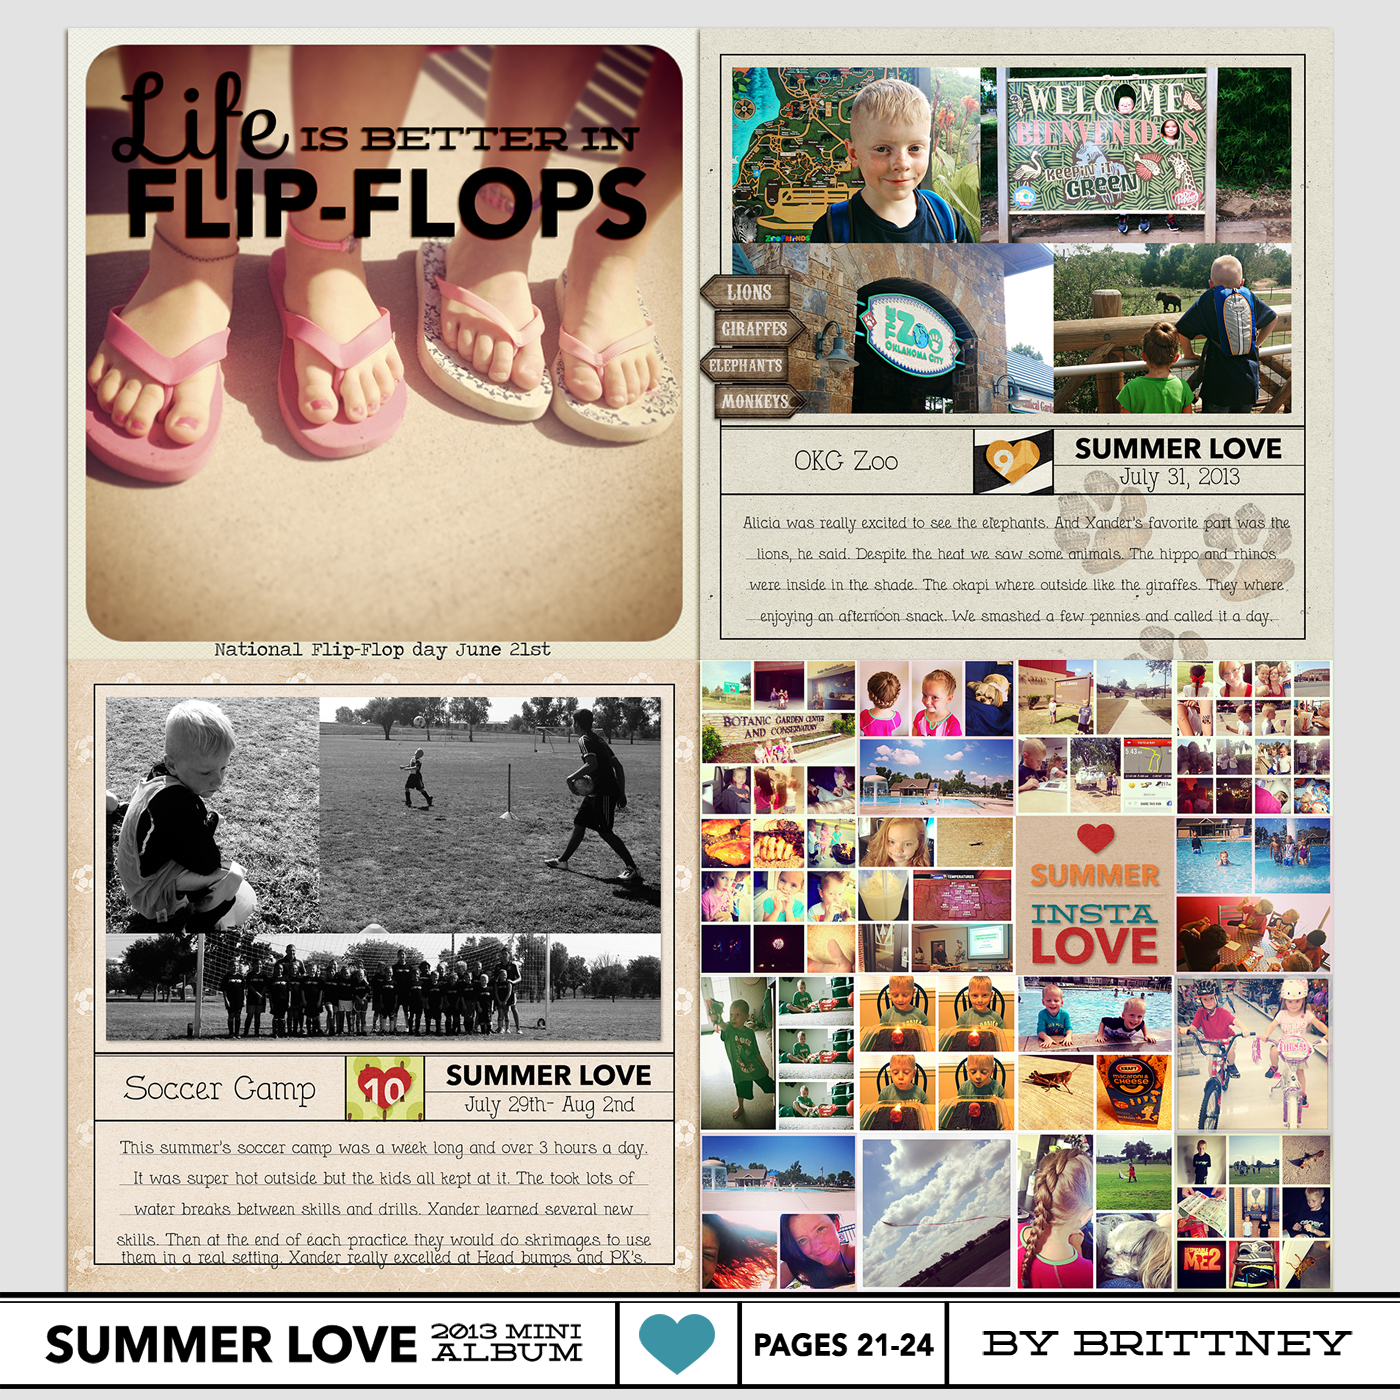
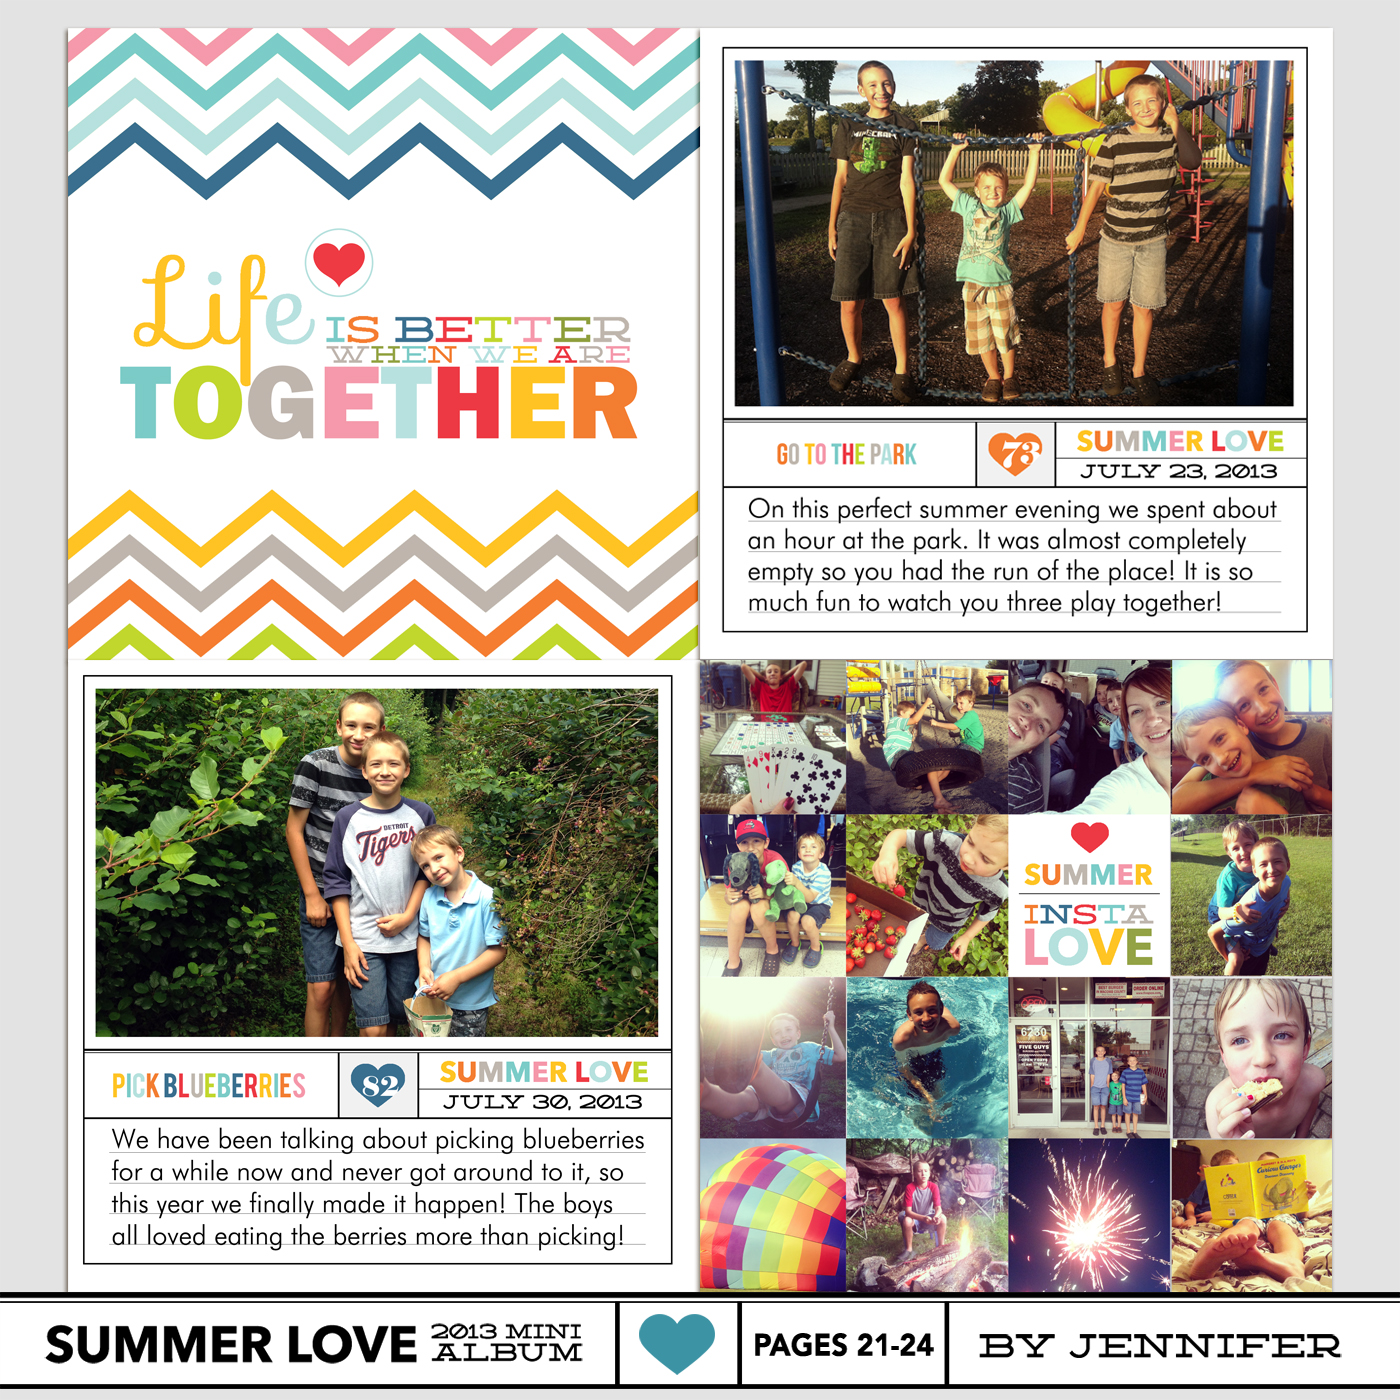
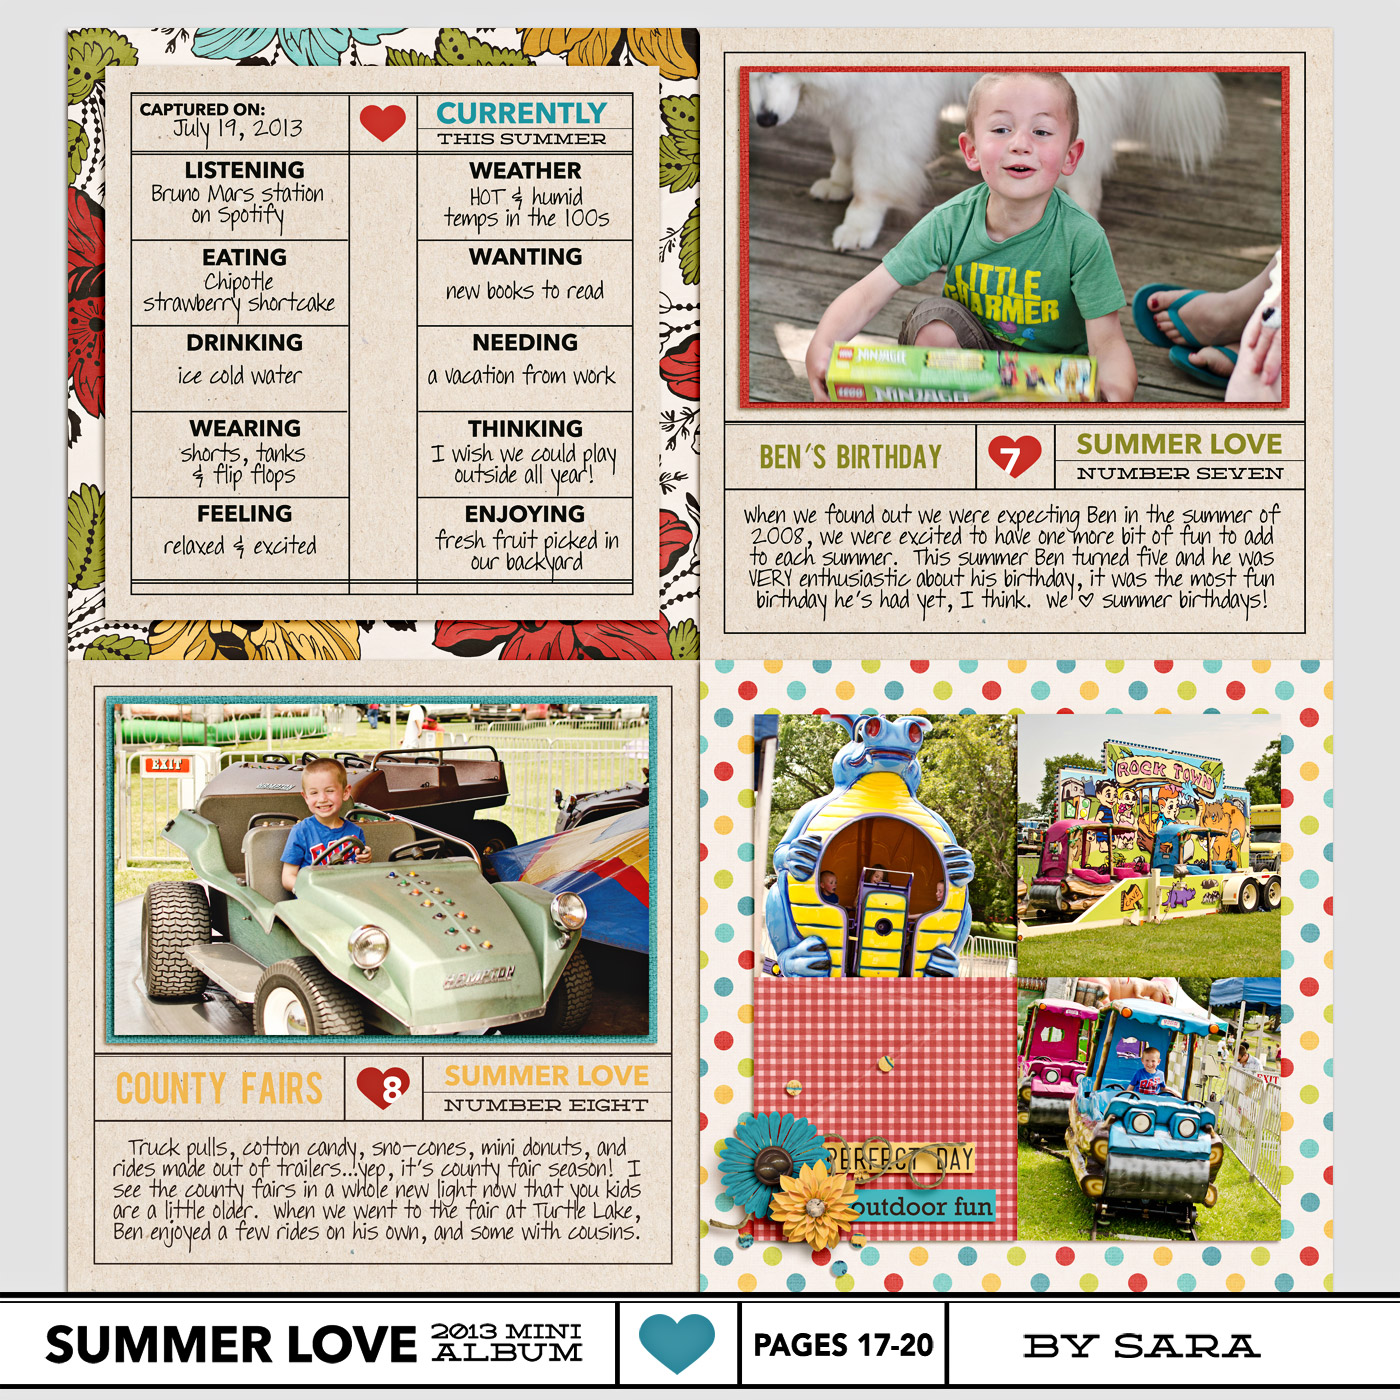
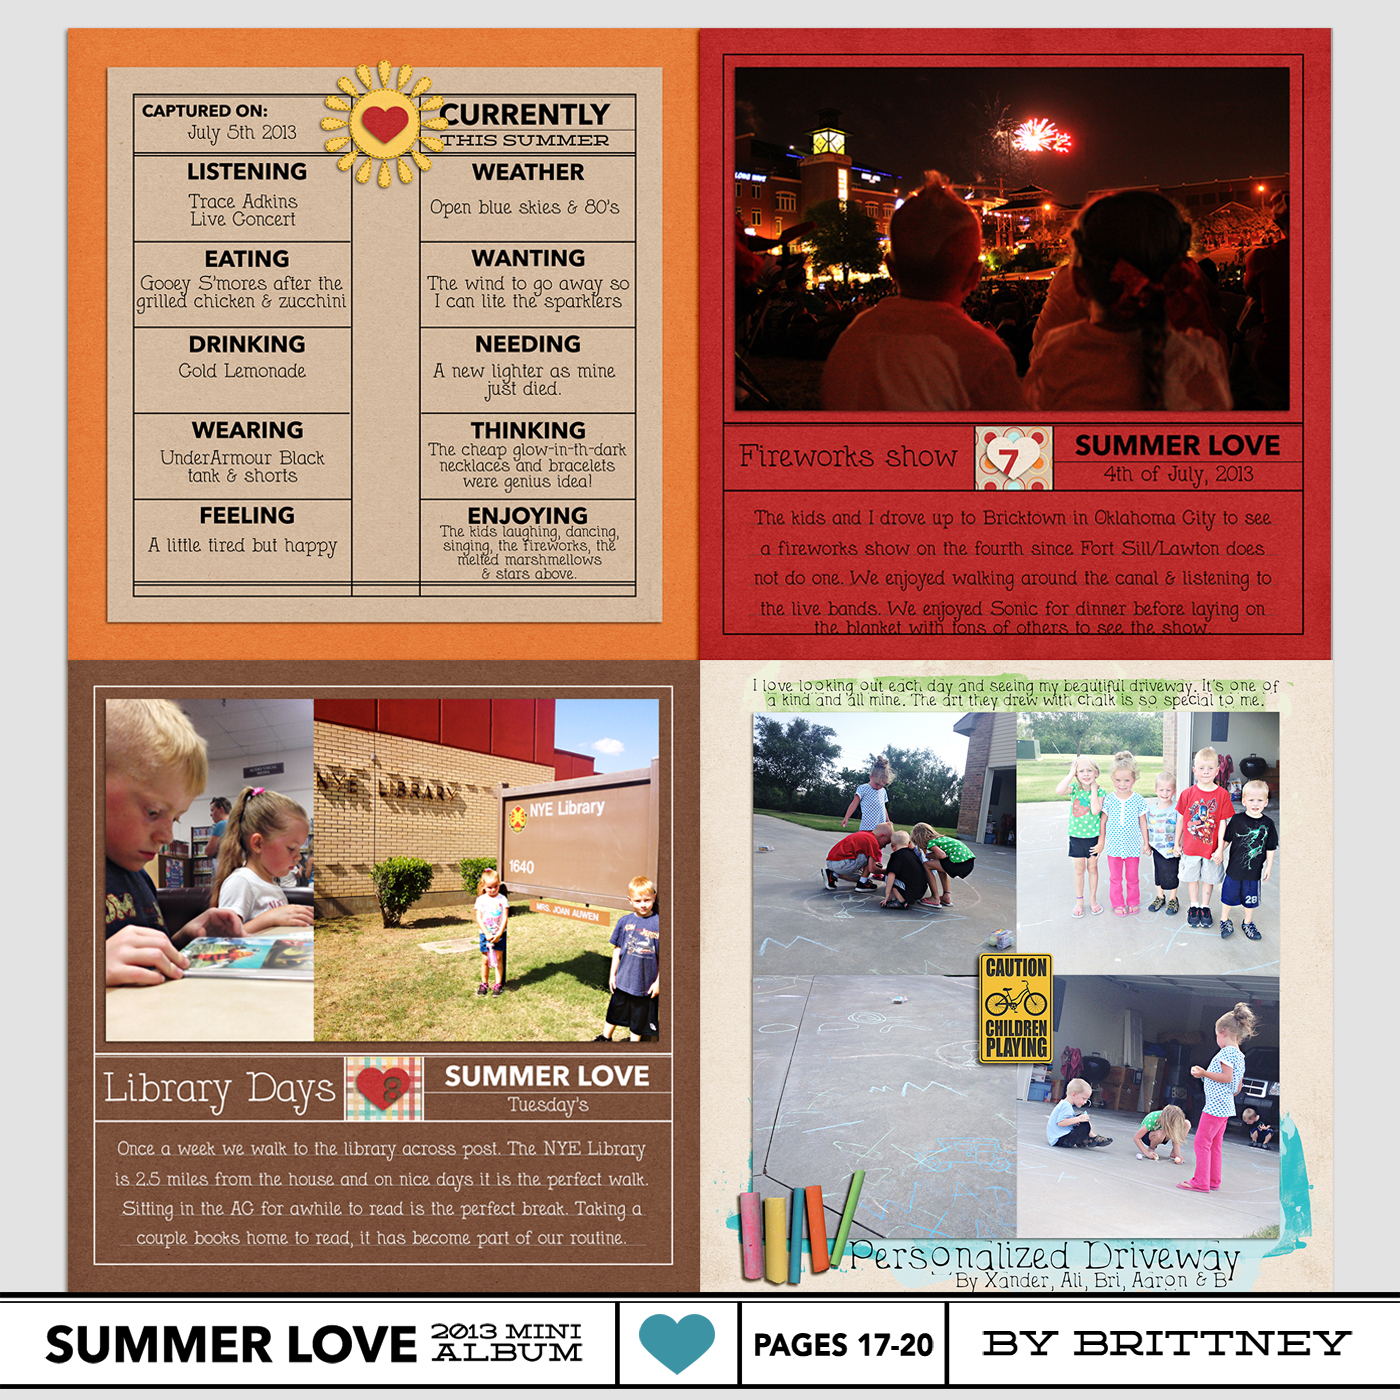
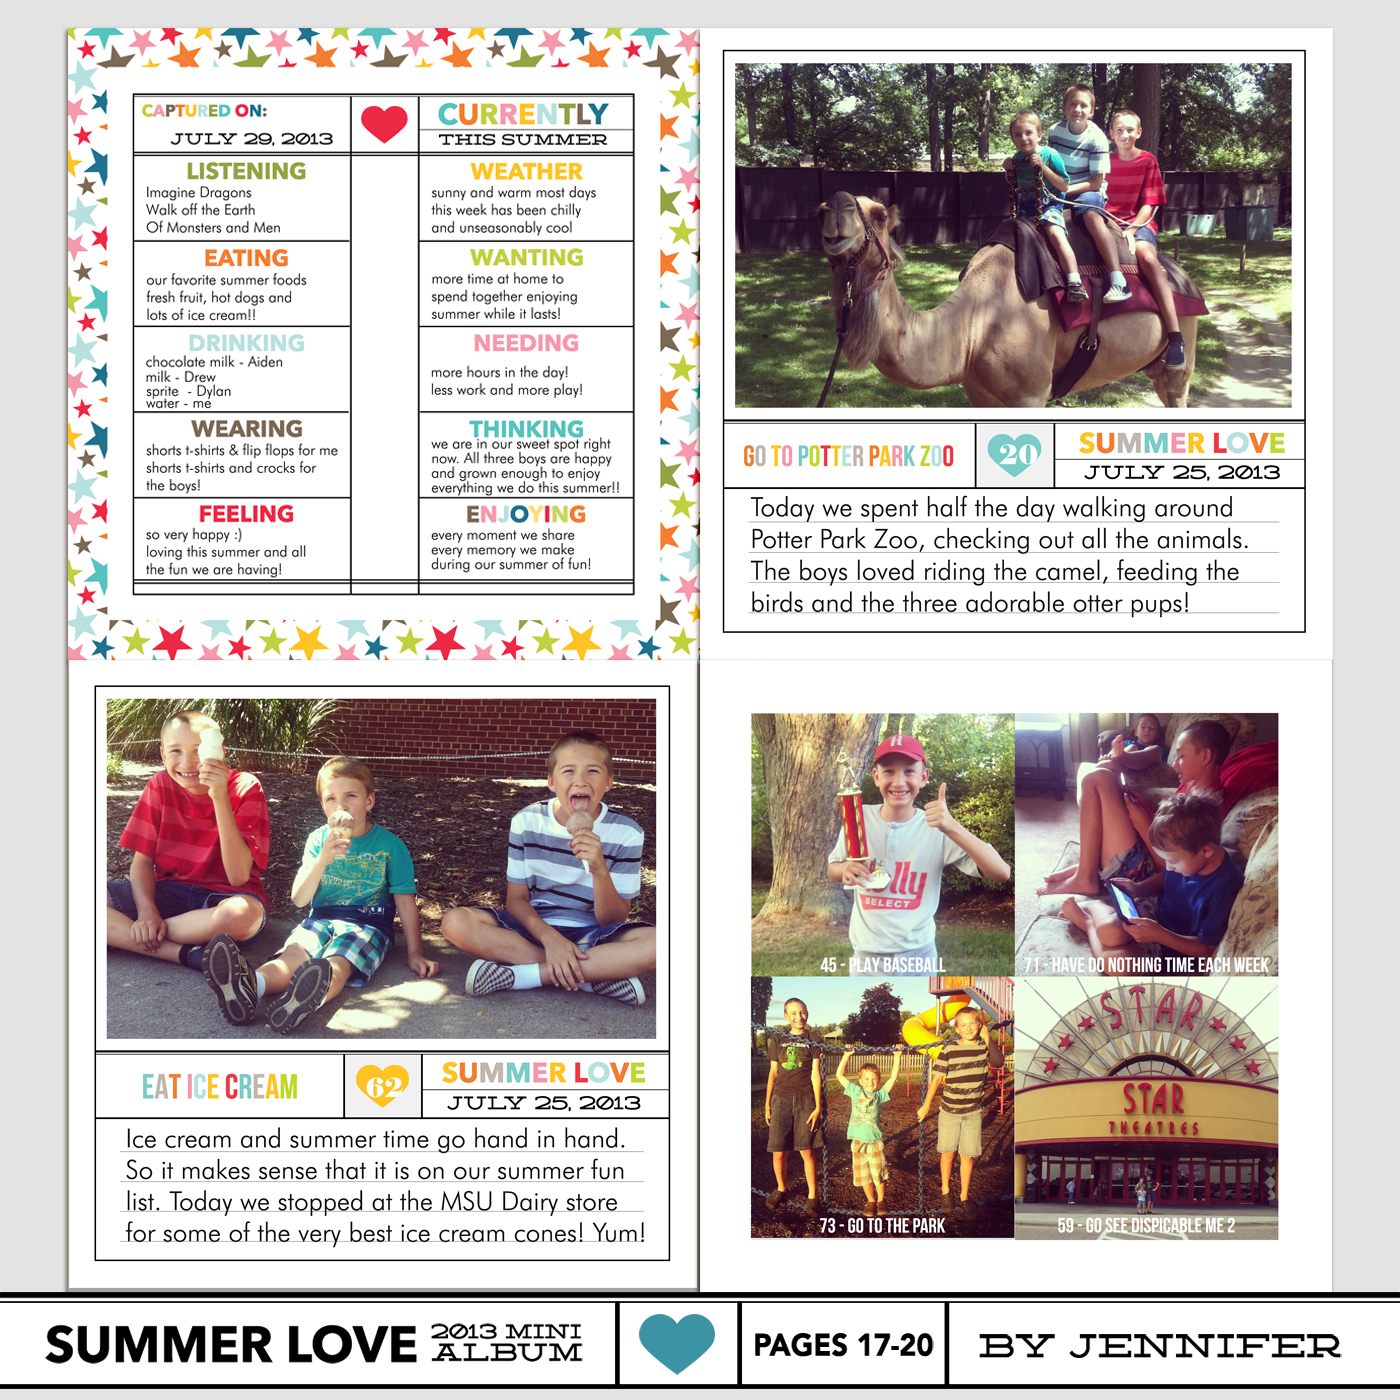
Of course we have one final post for you today, in which myself and Team Awesome members Jen & Sara will be sharing some photos of our completed albums and photos books to give you an idea how it’ll all look when your album is all printed out. *Spoiler alert: all the work this summer was totally worth it.*

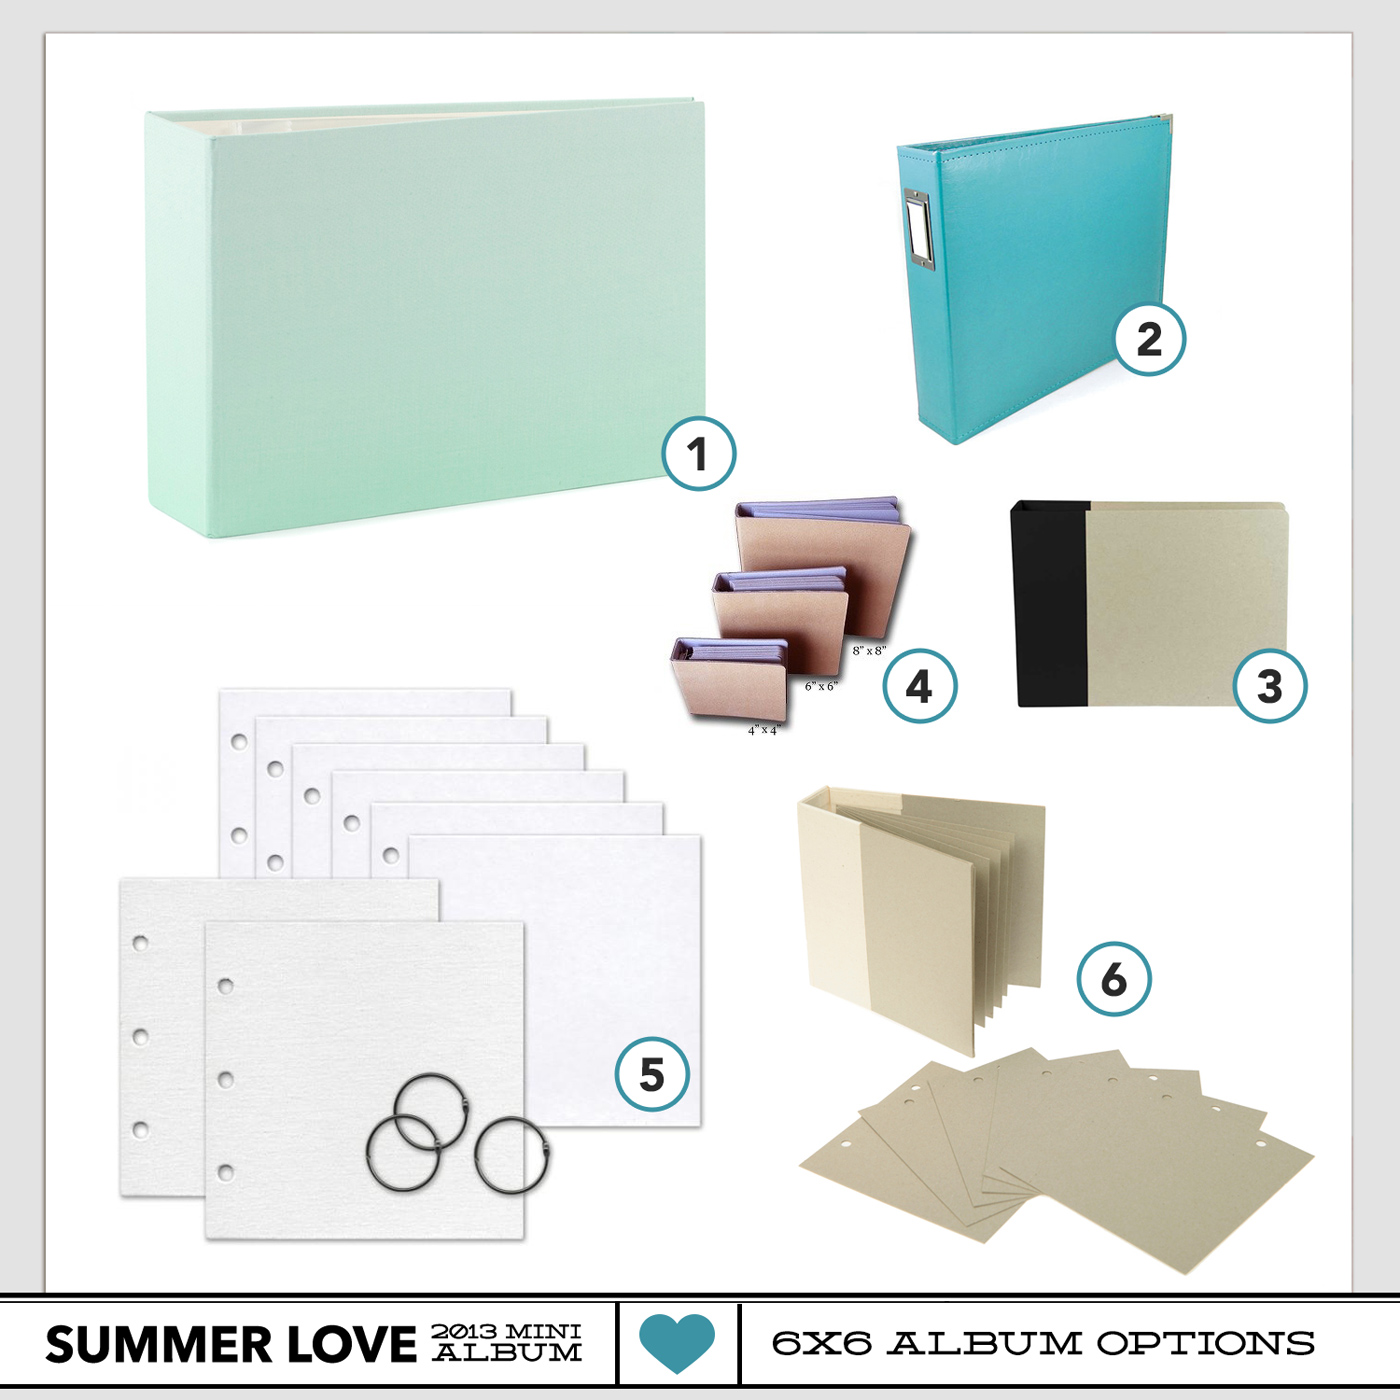
Both Sara and I chose to have our Summer Love Mini Albums printed as 6×6 photobooks from AdoramaPix. This was my first time printing with AdoramaPix and let me just say, they’re a little pricey but the quality is SO worth it.
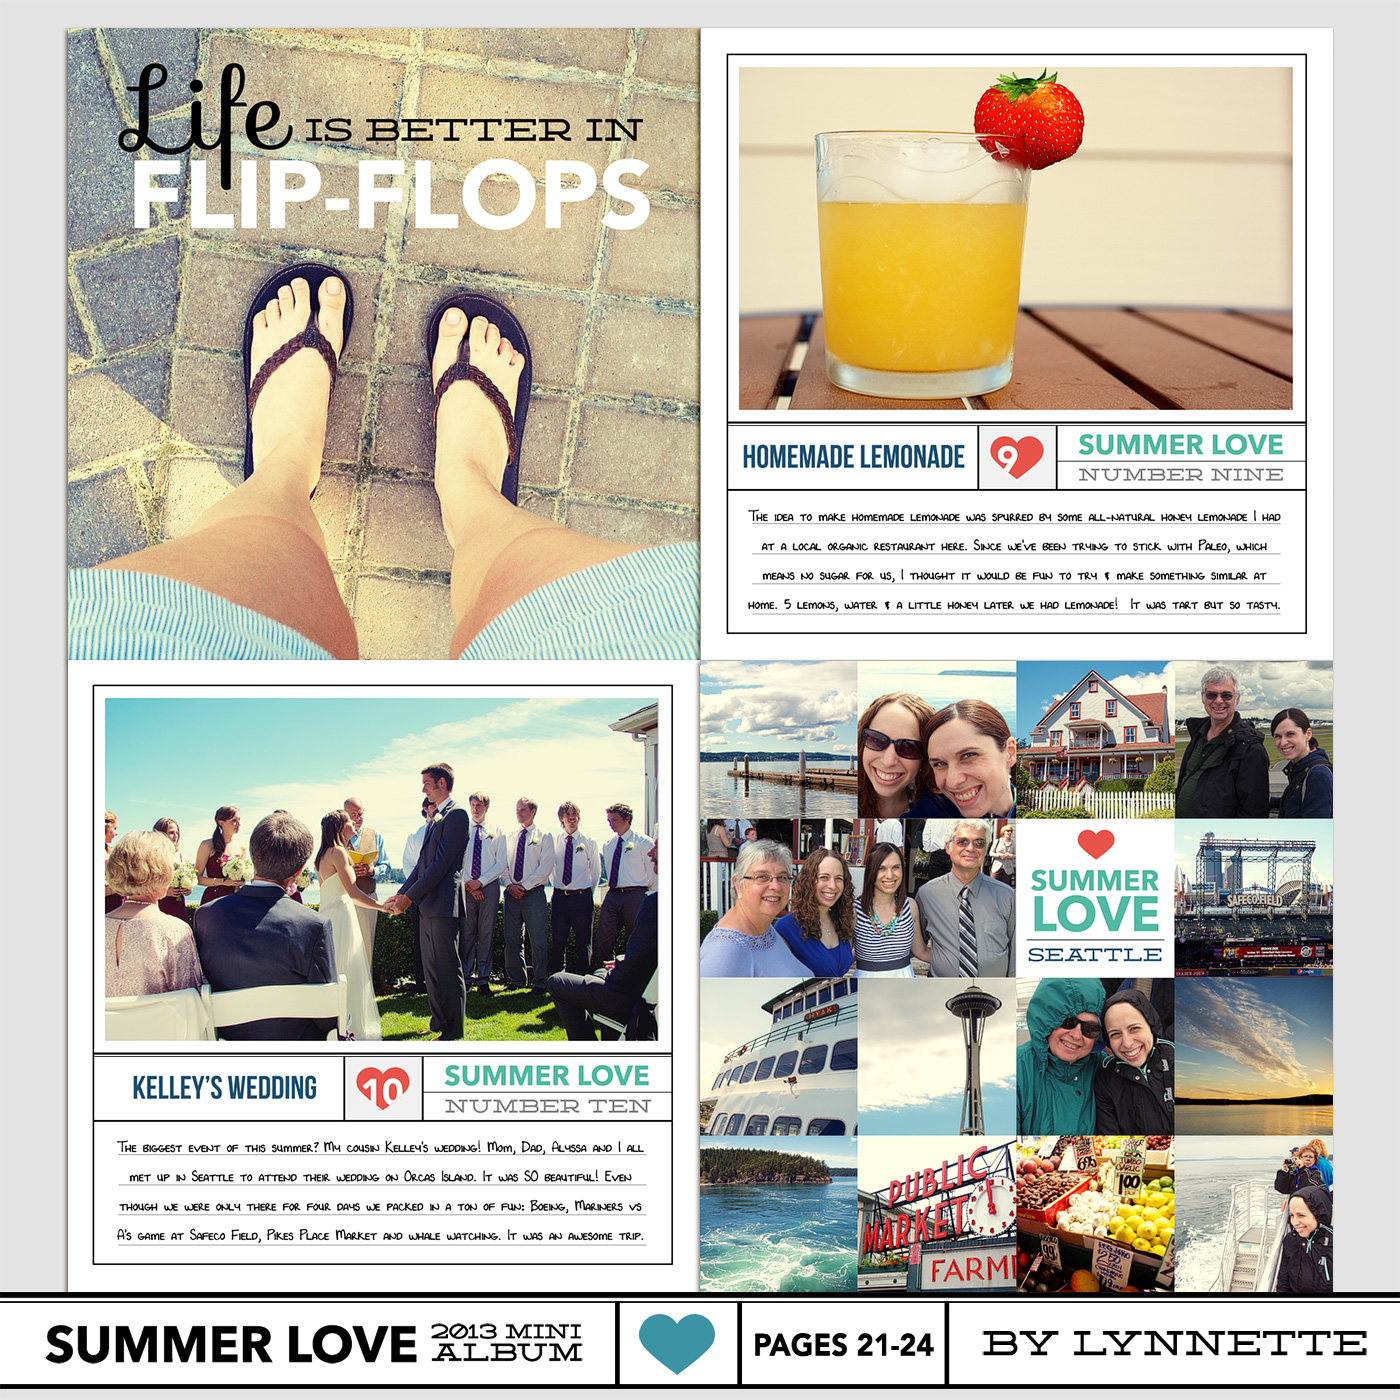
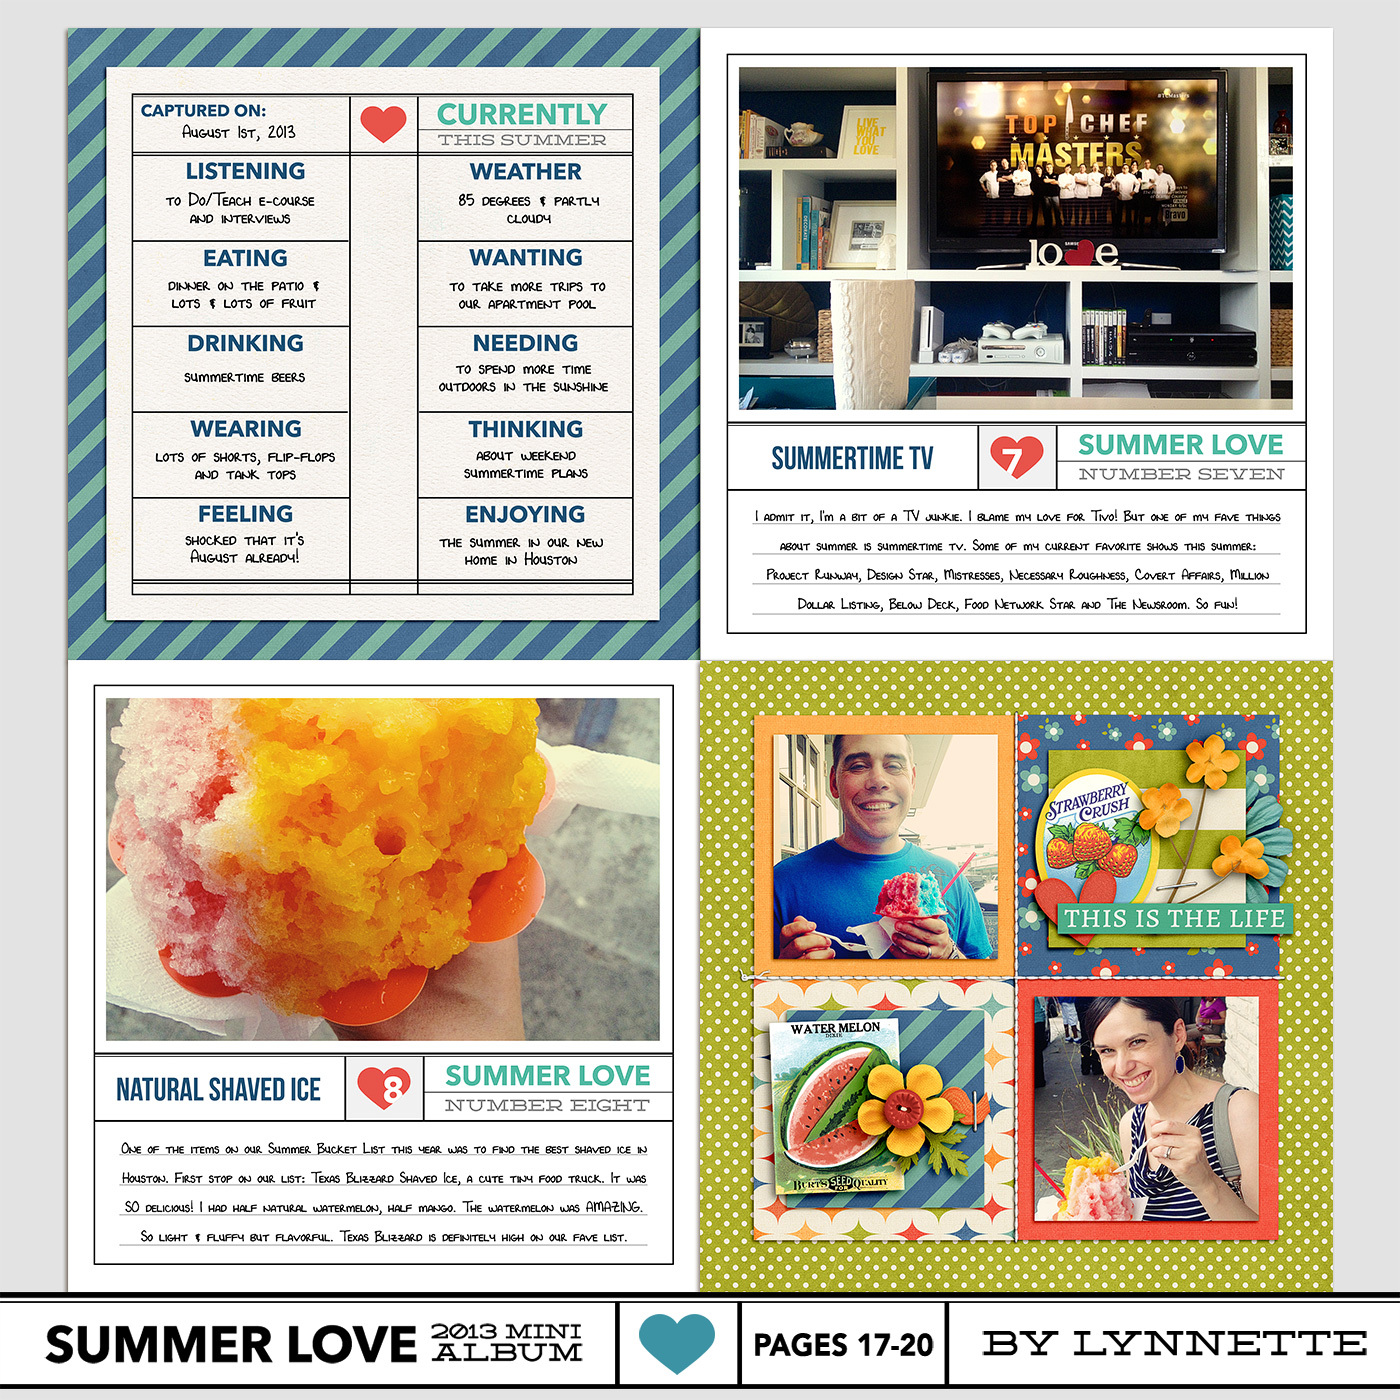
By Lynnette

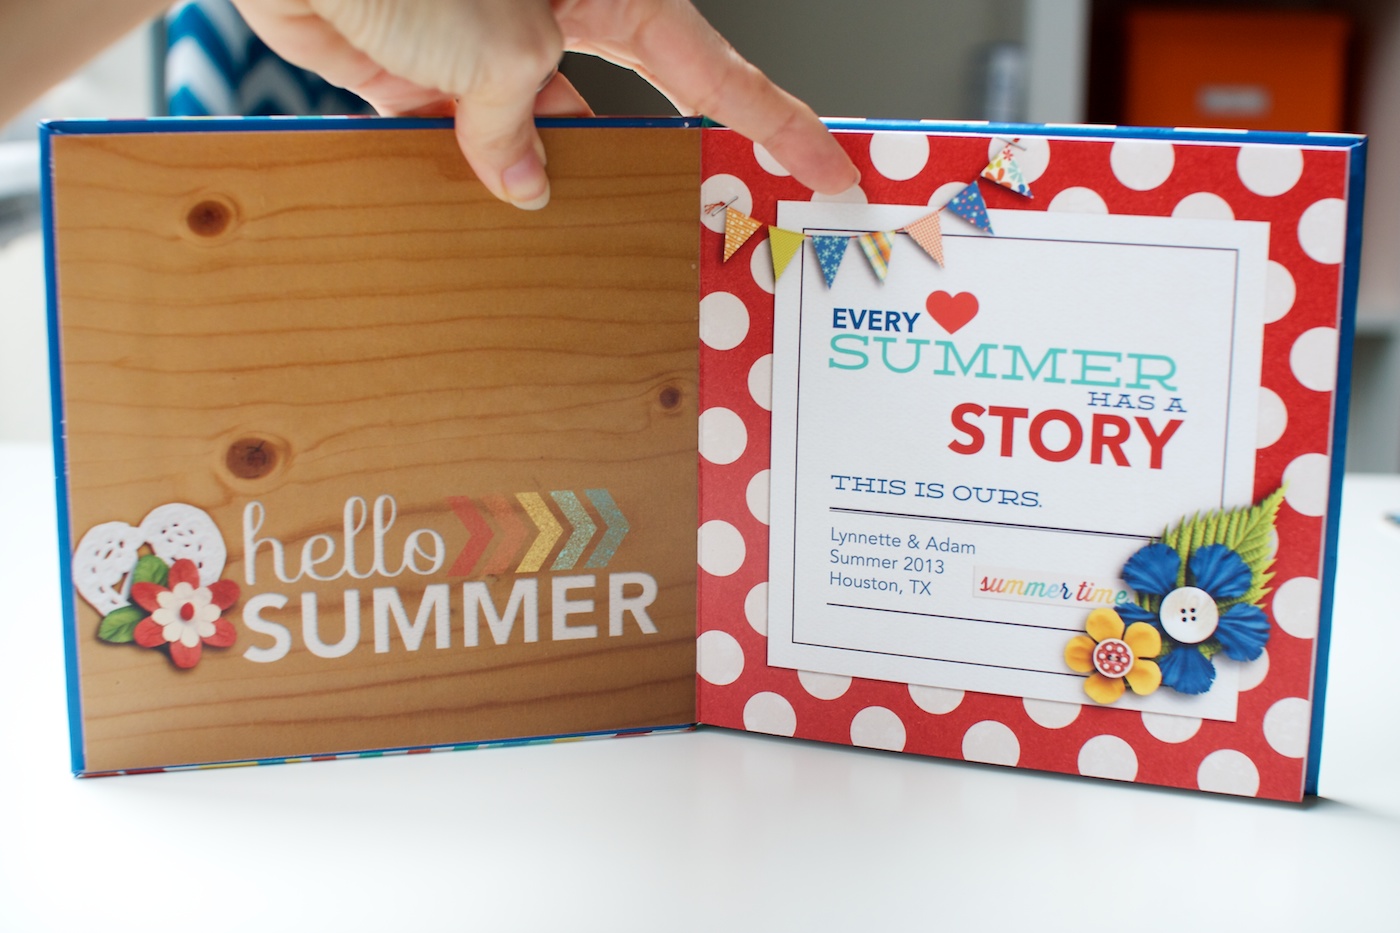
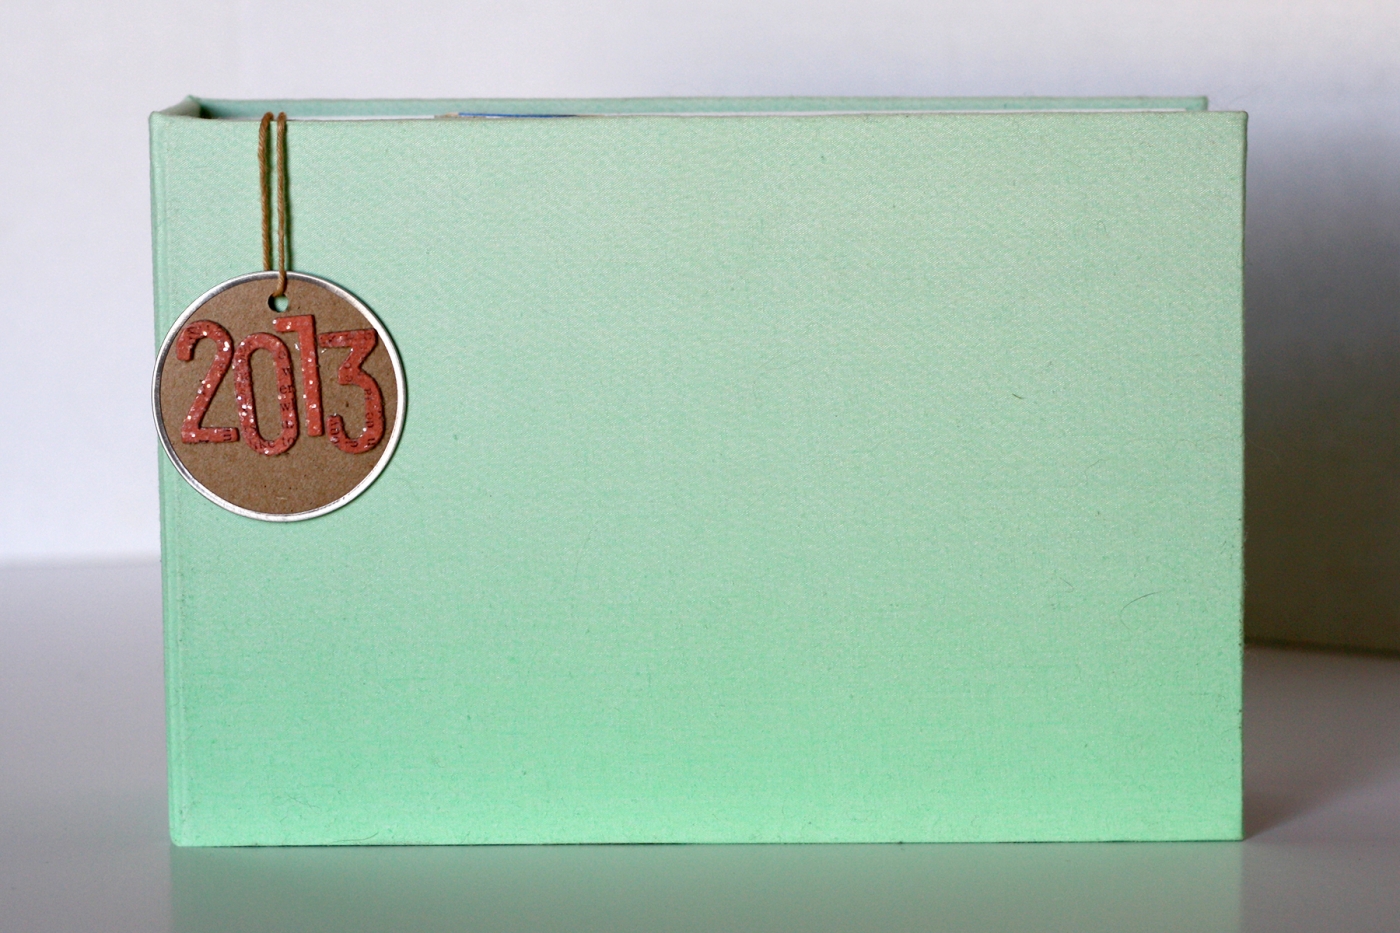
Here’s a look at the cover of my mini album. It’s hard to tell from the photo but the cover actually has this really nice metallic sheen to it.

nettiodesigns_Summer-Love-Mini-Album-Final_01

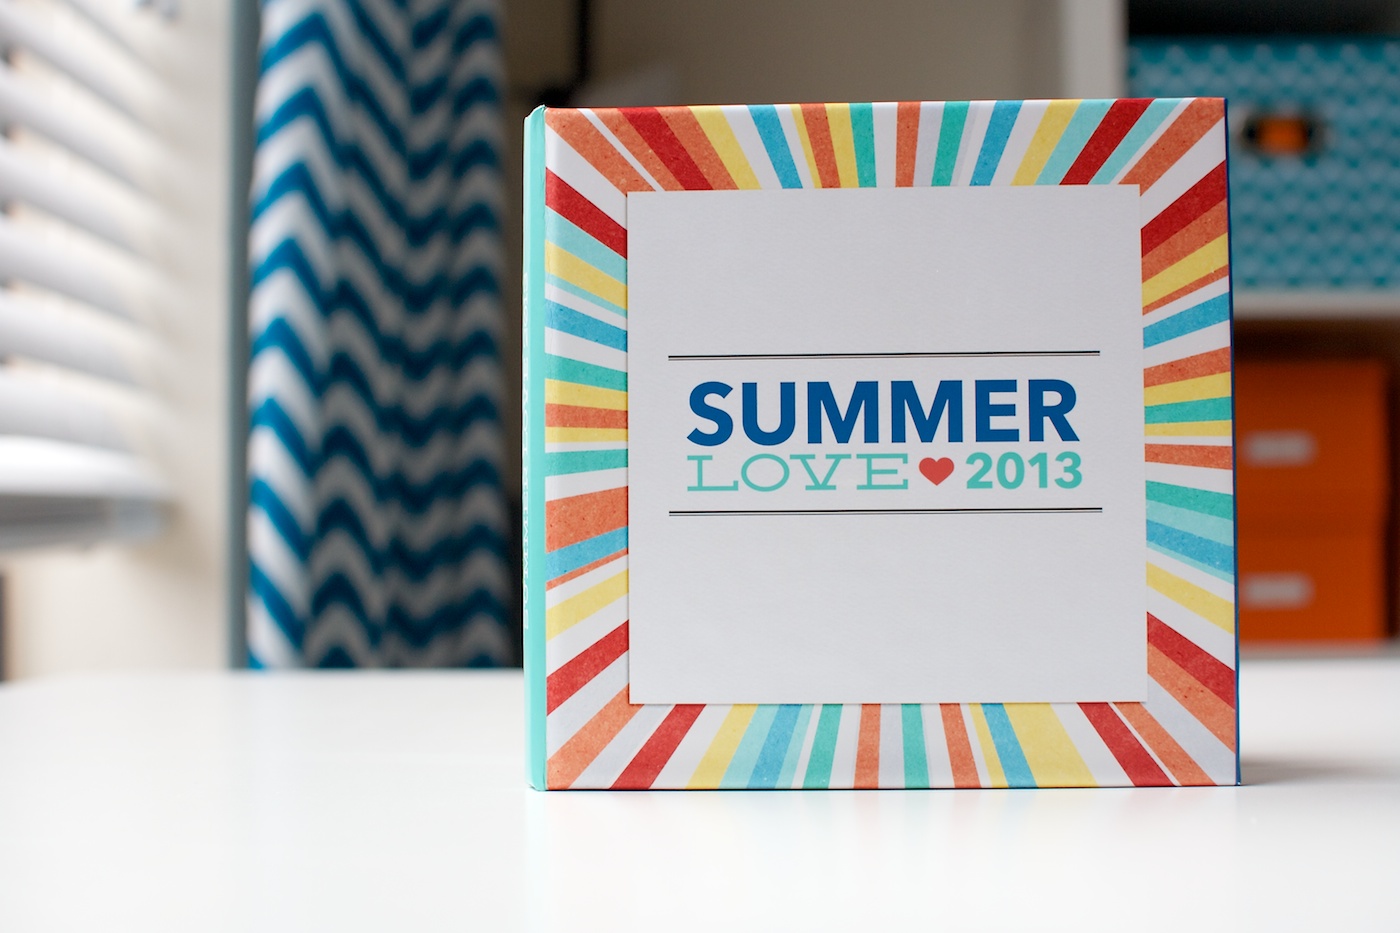
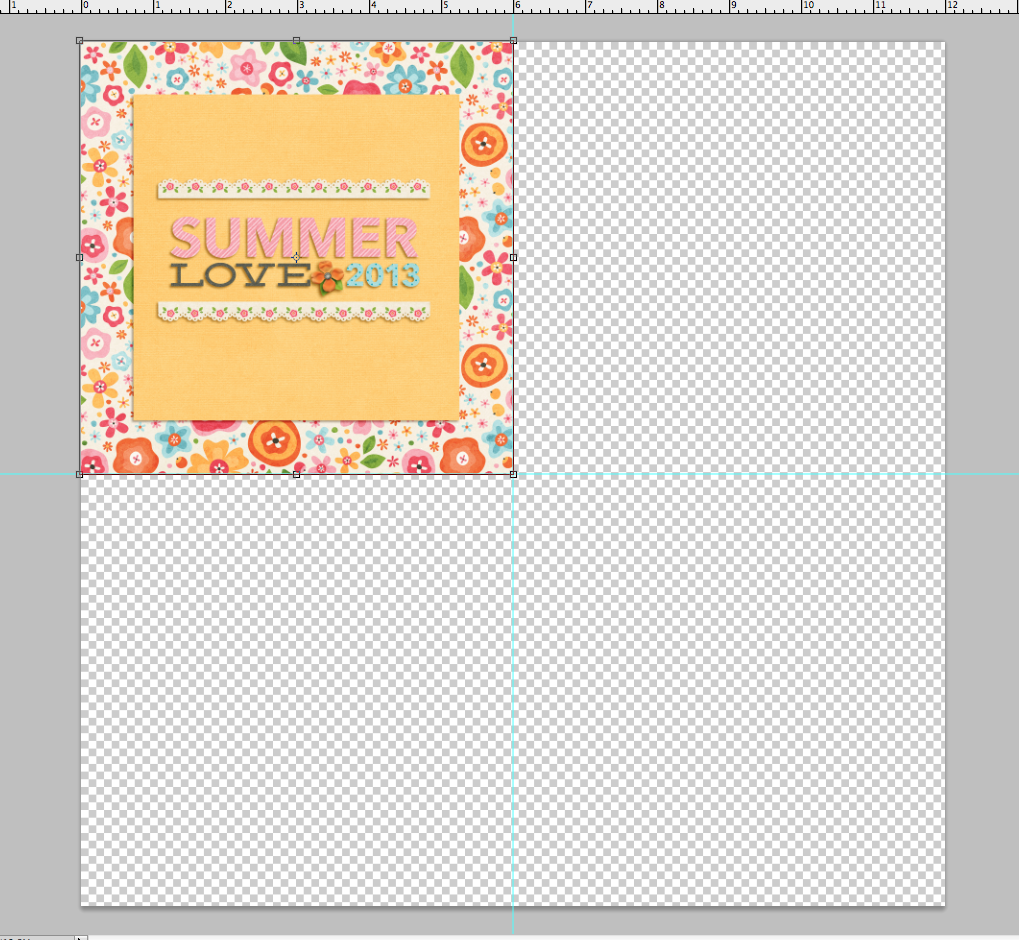
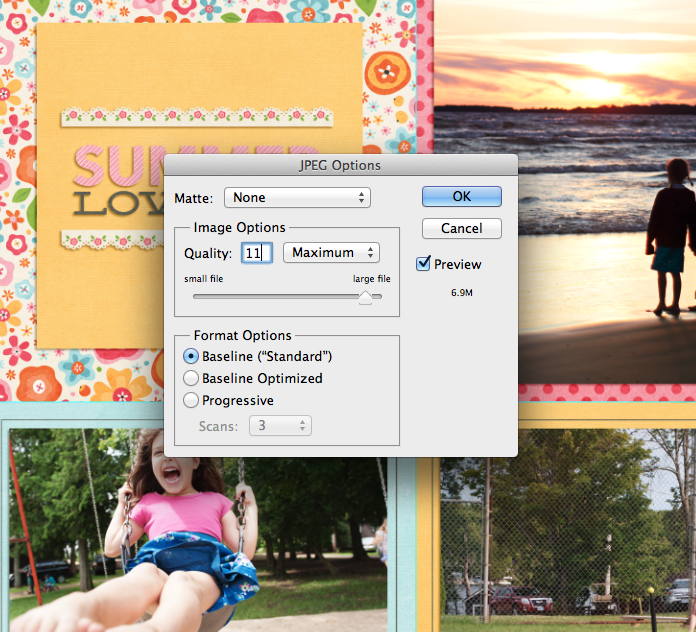
I created a custom cover for my mini album. If you want to do this I highly recommend downloading AdoramaPix’s Photoshop cover templates because even using those it took me a few tries to get it just right. It printed exactly how I wanted so I was happy to see that after all the trouble I had.

nettiodesigns_Summer-Love-Mini-Album-Final_02

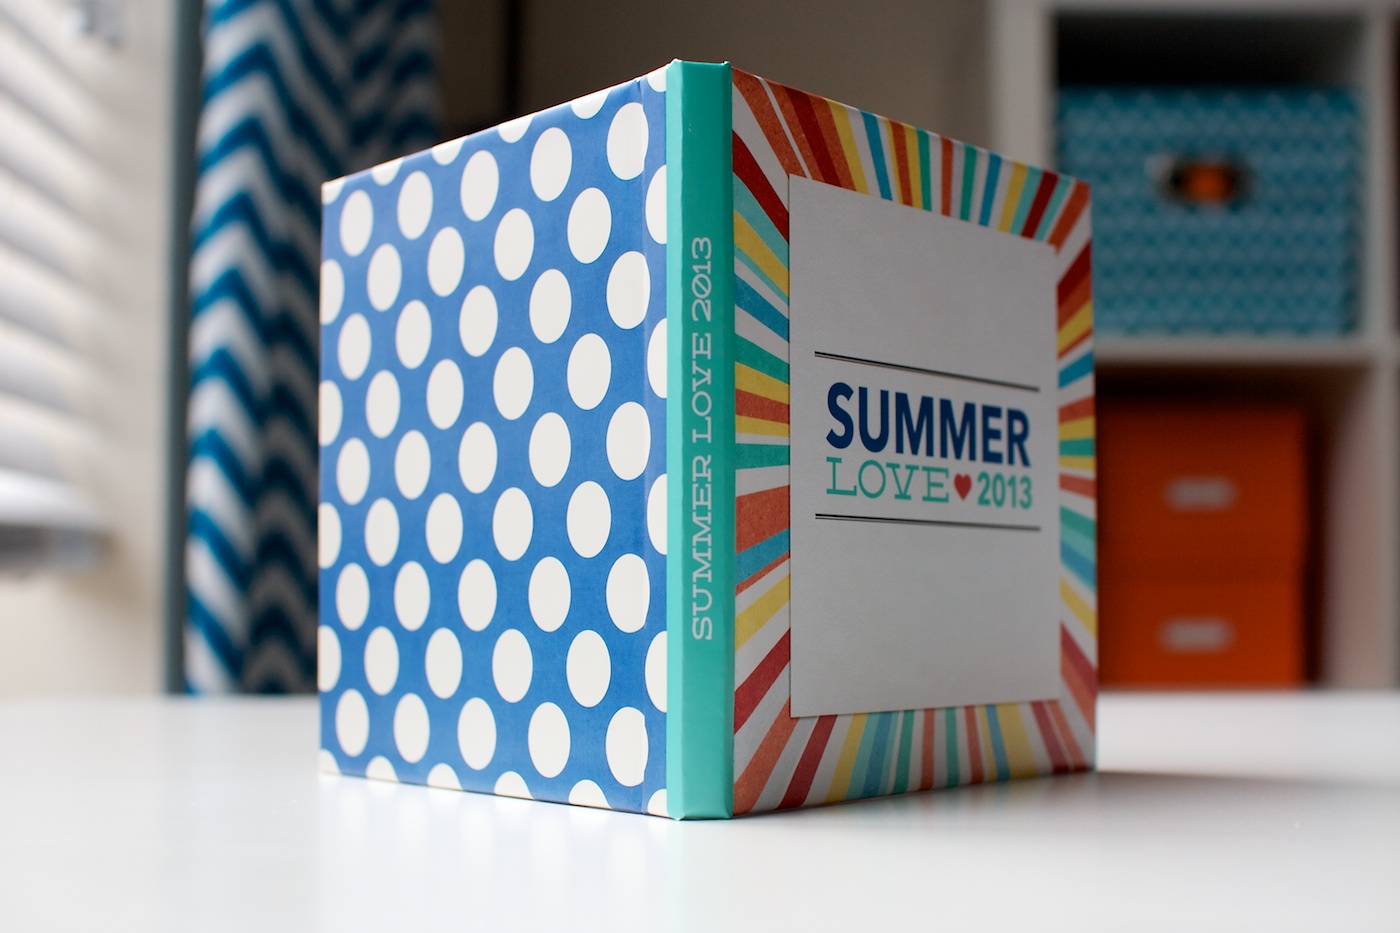
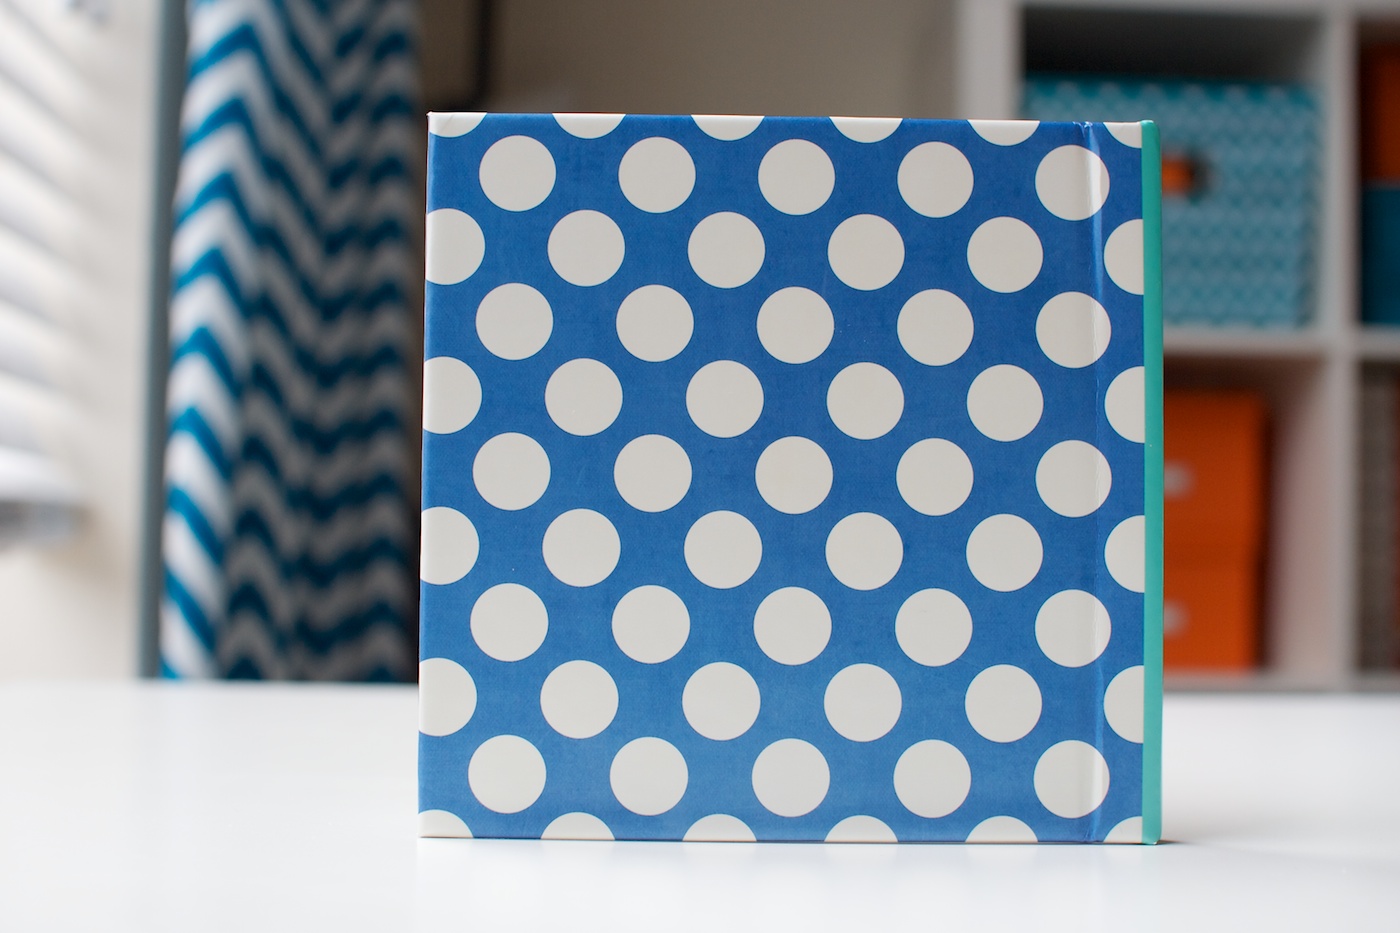
Back of the album. The cover is really nice and sturdy – I had no trouble standing it up on it’s own and I definitely wouldn’t worry too much about people looking through it.

nettiodesigns_Summer-Love-Mini-Album-Final_03

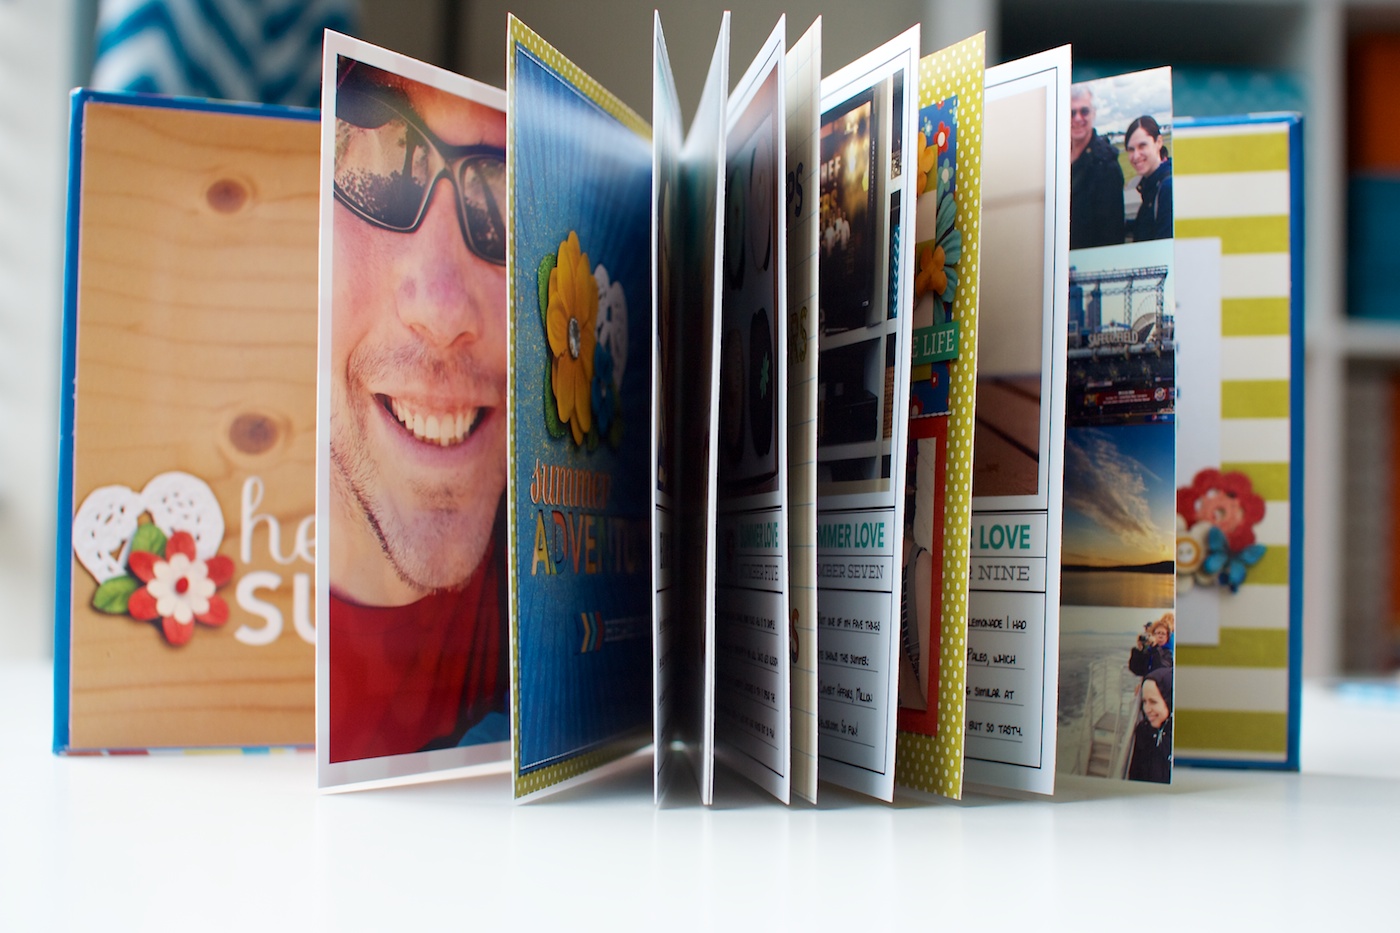
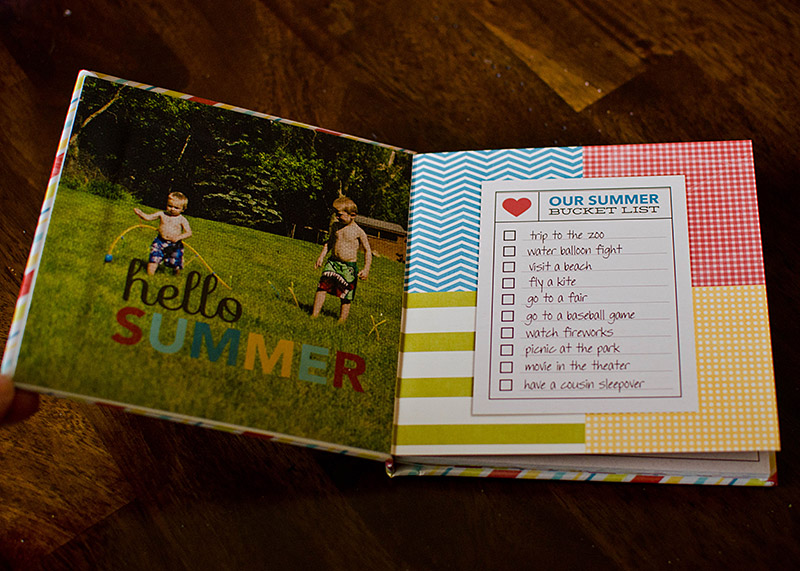
The inside pages are nice & sturdy – much sturdier than any other photo book I’ve printed before. They aren’t as thick as chipboard. I’d say, they’re more like a really thick card stock.

nettiodesigns_Summer-Love-Mini-Album-Final_04

One of the options when creating your photo book is to either add a set of free blank pages at the front and back of your album or to have the first and last page of your album be glued to the front and backside of the cover. I chose to go with the glued option and while I was worried it might be weird, I really like how it turned out.

nettiodesigns_Summer-Love-Mini-Album-Final_05

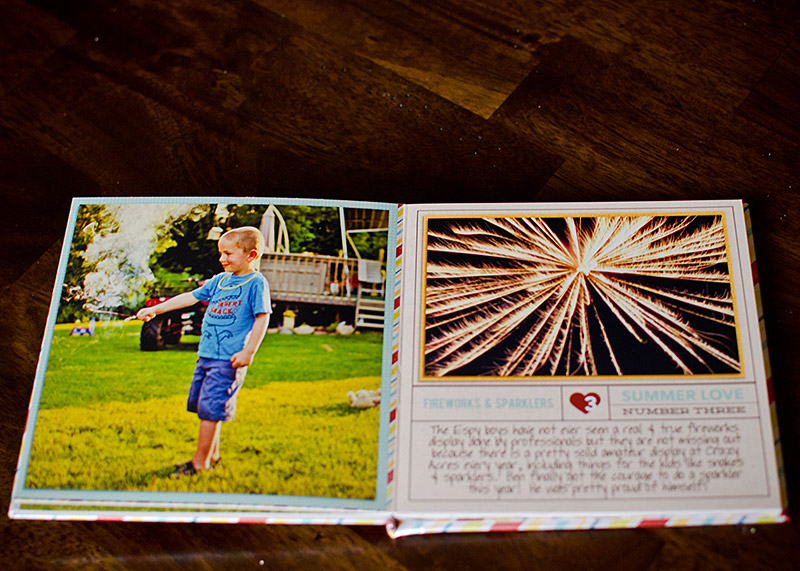
One of my favorite features of the AdoramaPix photo books is the lay flat binding. No worrying about details getting lost in the gutter of the book which is awesome for digiscrap pages.

nettiodesigns_Summer-Love-Mini-Album-Final_06

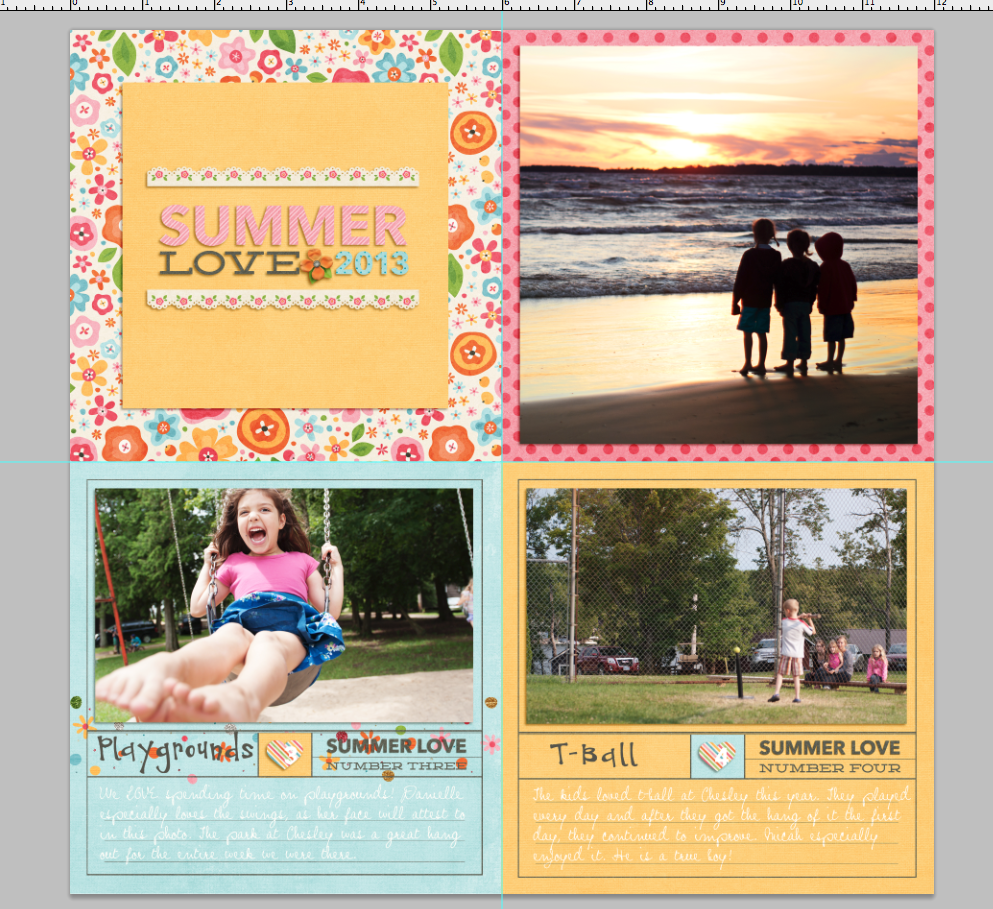
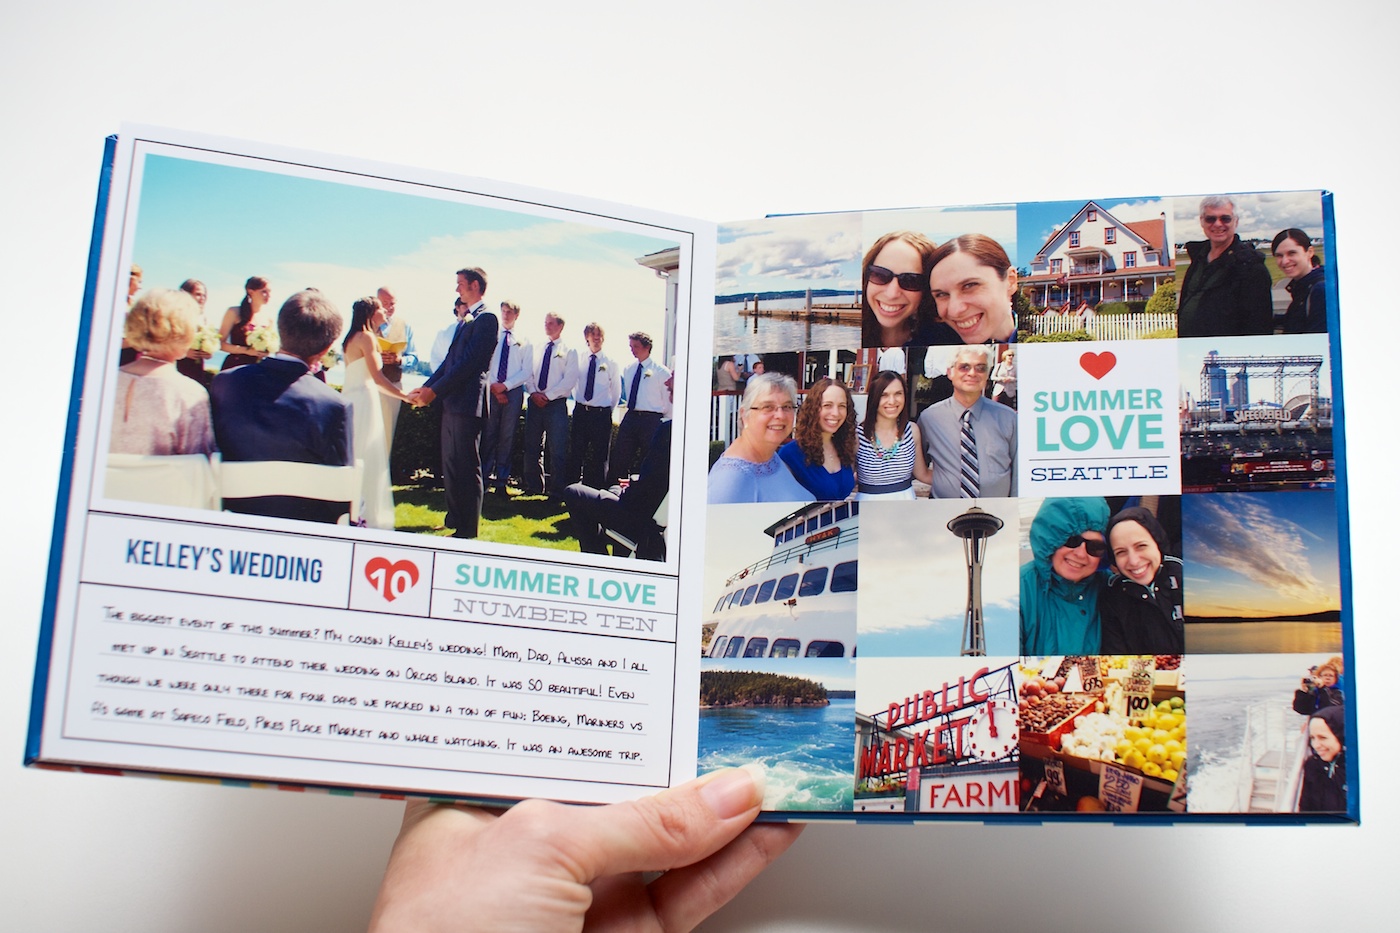
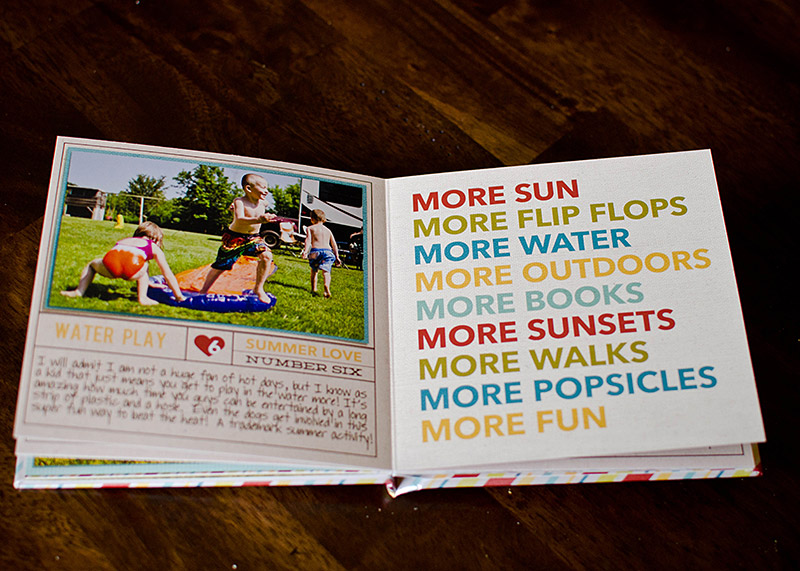
Here’s a few more of the interior pages of my book:

nettiodesigns_Summer-Love-Mini-Album-Final_07

nettiodesigns_Summer-Love-Mini-Album-Final_08

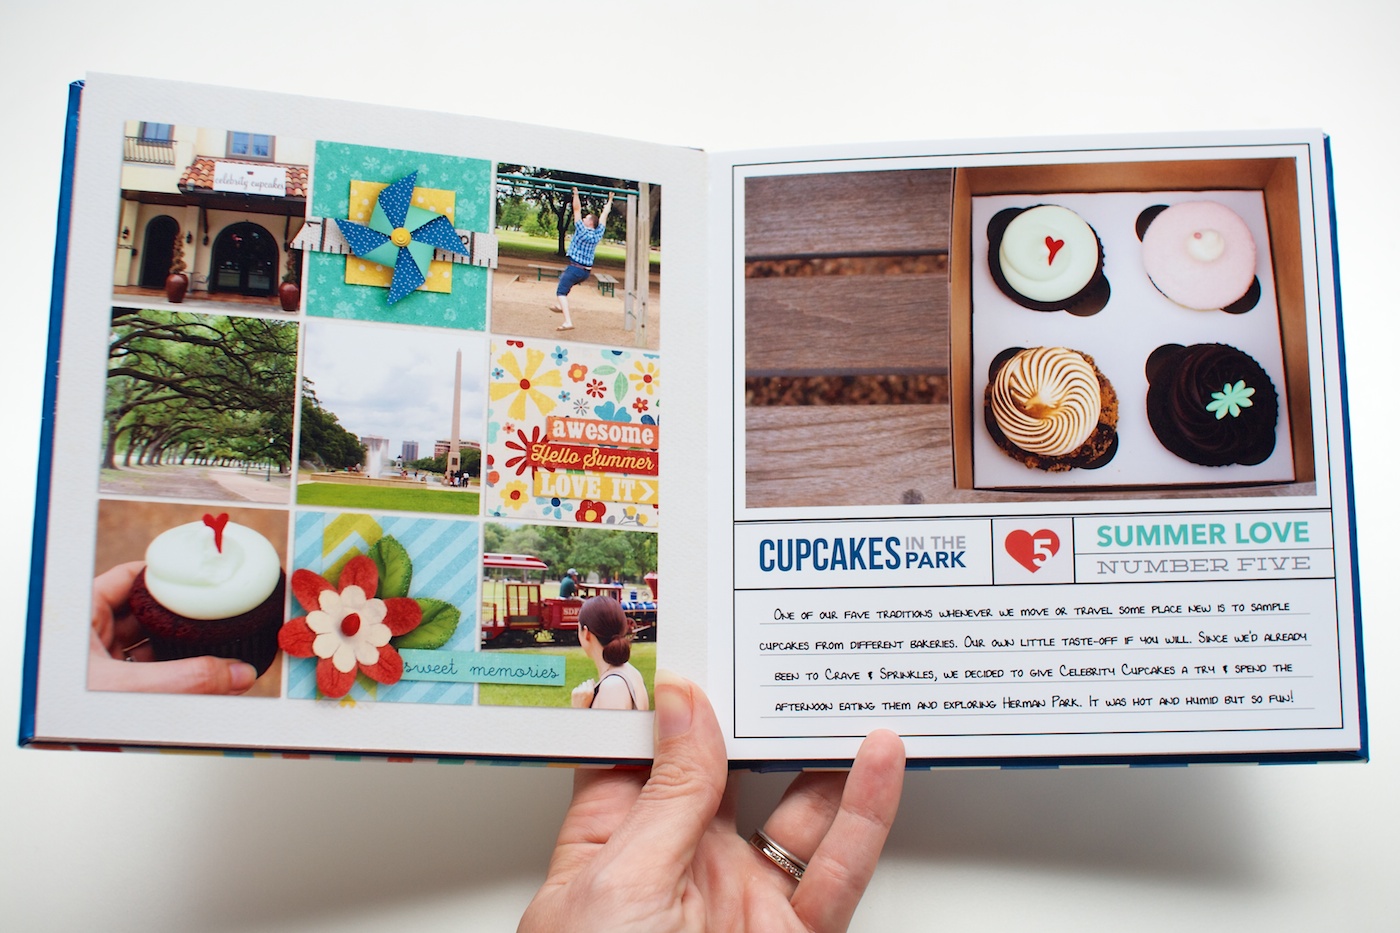
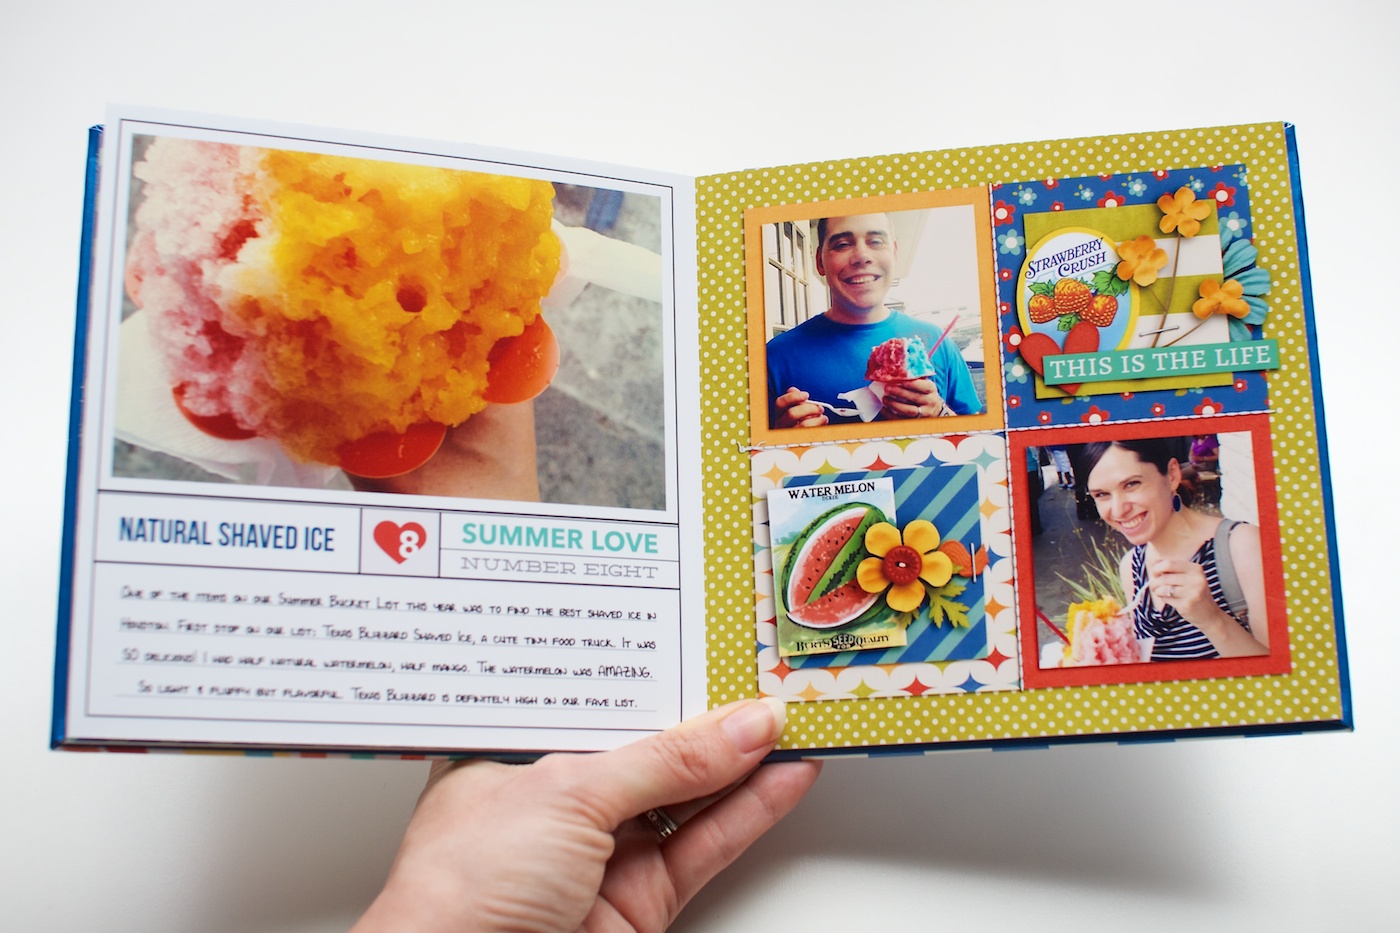
This grid page on the right had me a bit nervous because during the upload process, it showed I had quite a bit of important stuff outside the safe-zone (you know like tops/sides of heads, haha). I debated about shrinking down the grid and printing it with a border instead but I loved the full-bleed look so much I decided to take a chance – and I’m so glad I did! Only a tiny bit of edges got trimmed off and nothing anyone would ever notice.

nettiodesigns_Summer-Love-Mini-Album-Final_09

A look at the final page in the album. The Goodbye Summer page is glued down to back of the cover but you really can’t tell when looking at the album – it just looks like a normal page.

nettiodesigns_Summer-Love-Mini-Album-Final_10a

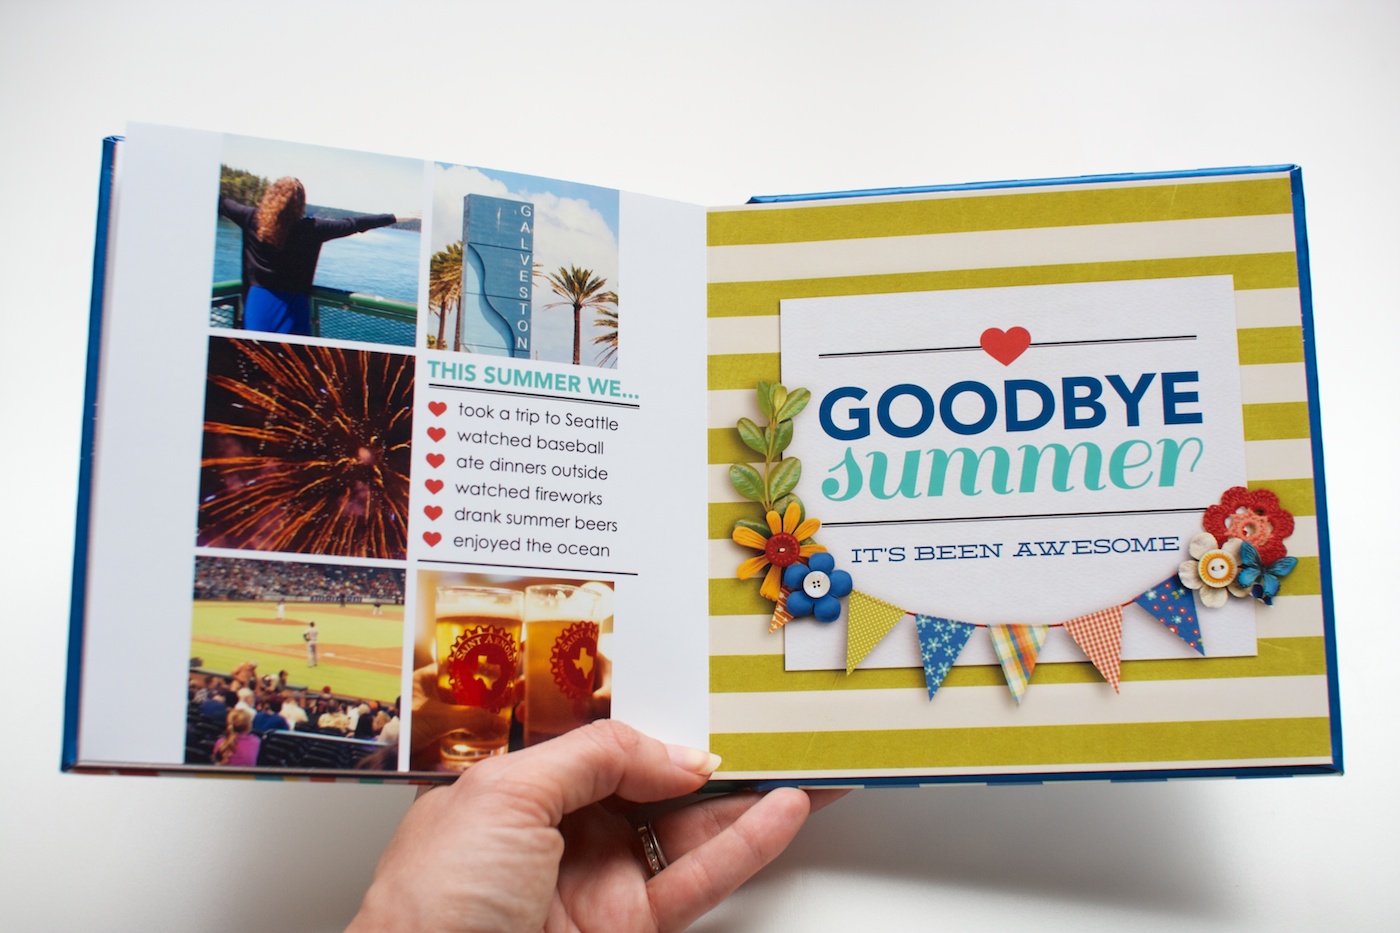
A funny story – I don’t know if you can tell from the photo but the green & cream striped paper looks like it has some creases in it and when I first got my book, I had a momentary panic when I was like, “Oh no, is it wrinkled?”

…And then realize the “wrinkle” was on the digital paper and not the actual book, haha.  #digiscrapperfail

Overall I’m highly impressed with my AdoramaPix photo book and would definitely consider ordering from them again in the future. They get the Nettio official stamp of approval.
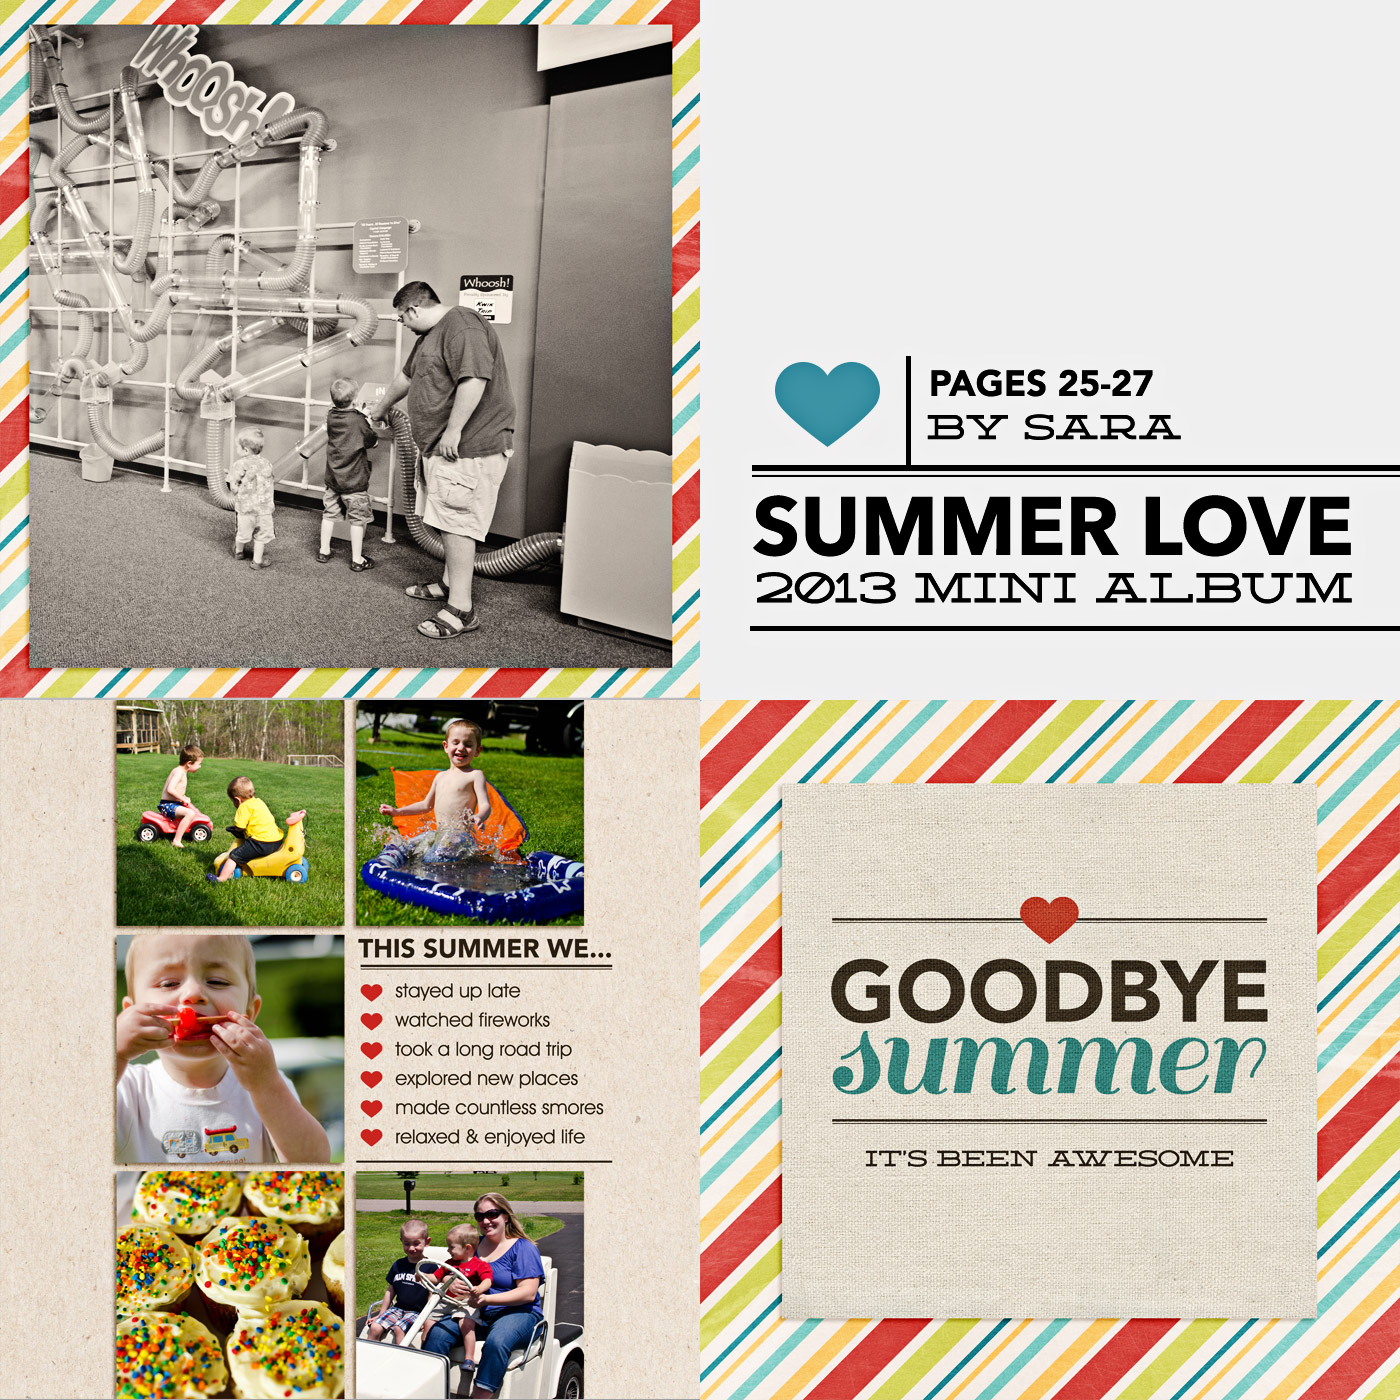
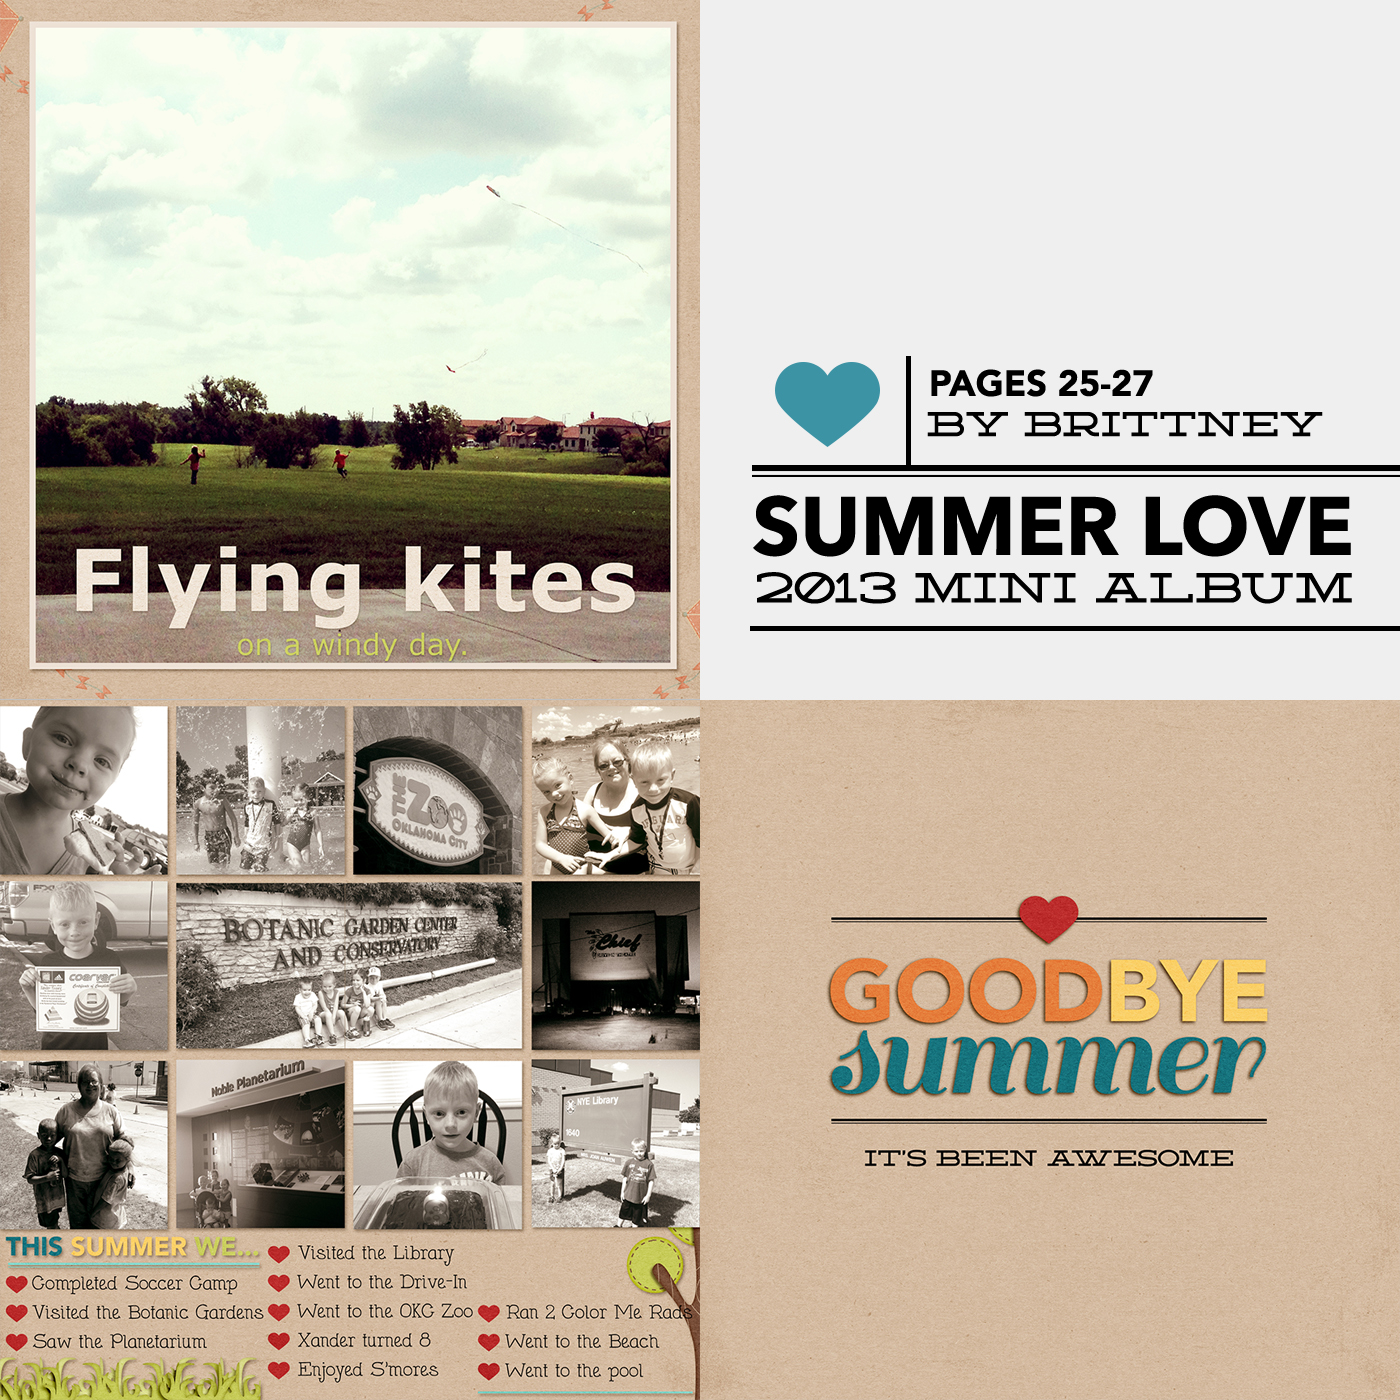
By Sara

Sara also had her Summer Love mini album printed at AdoramaPix and here’s a peek at her album to give you another perspective. I think her album turned out really cute!
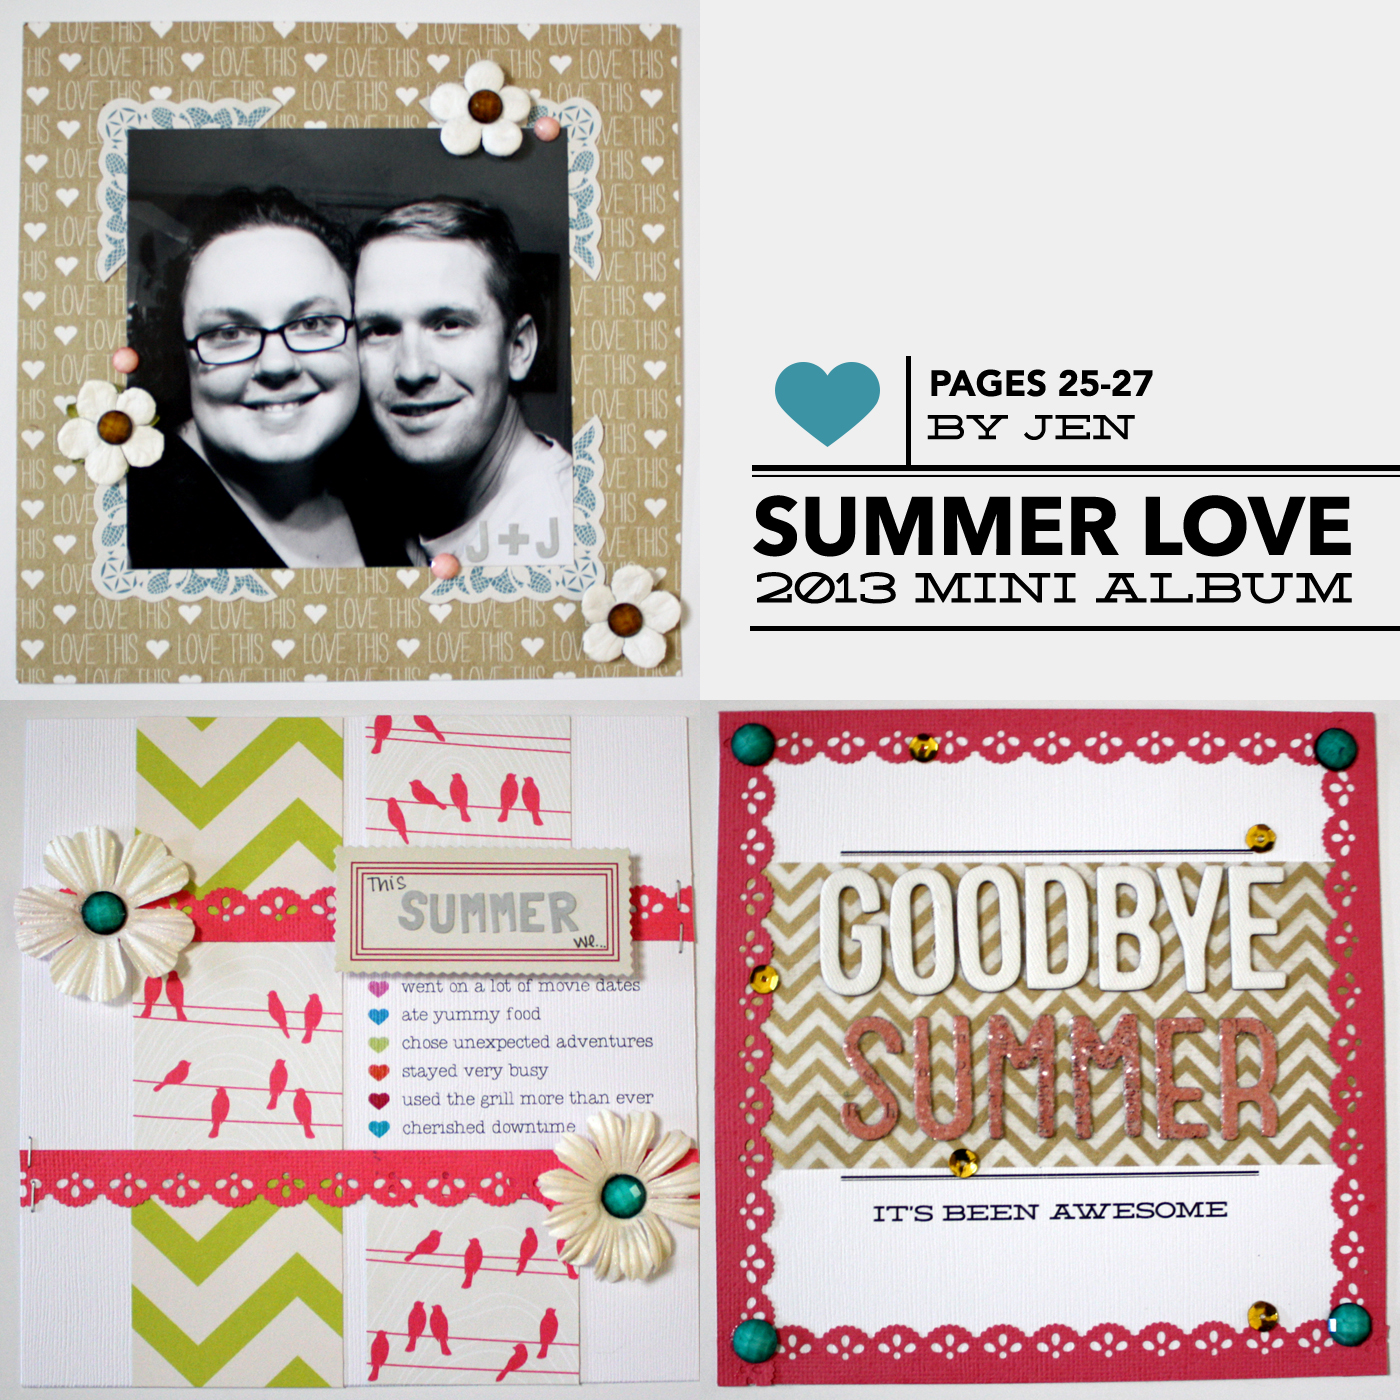
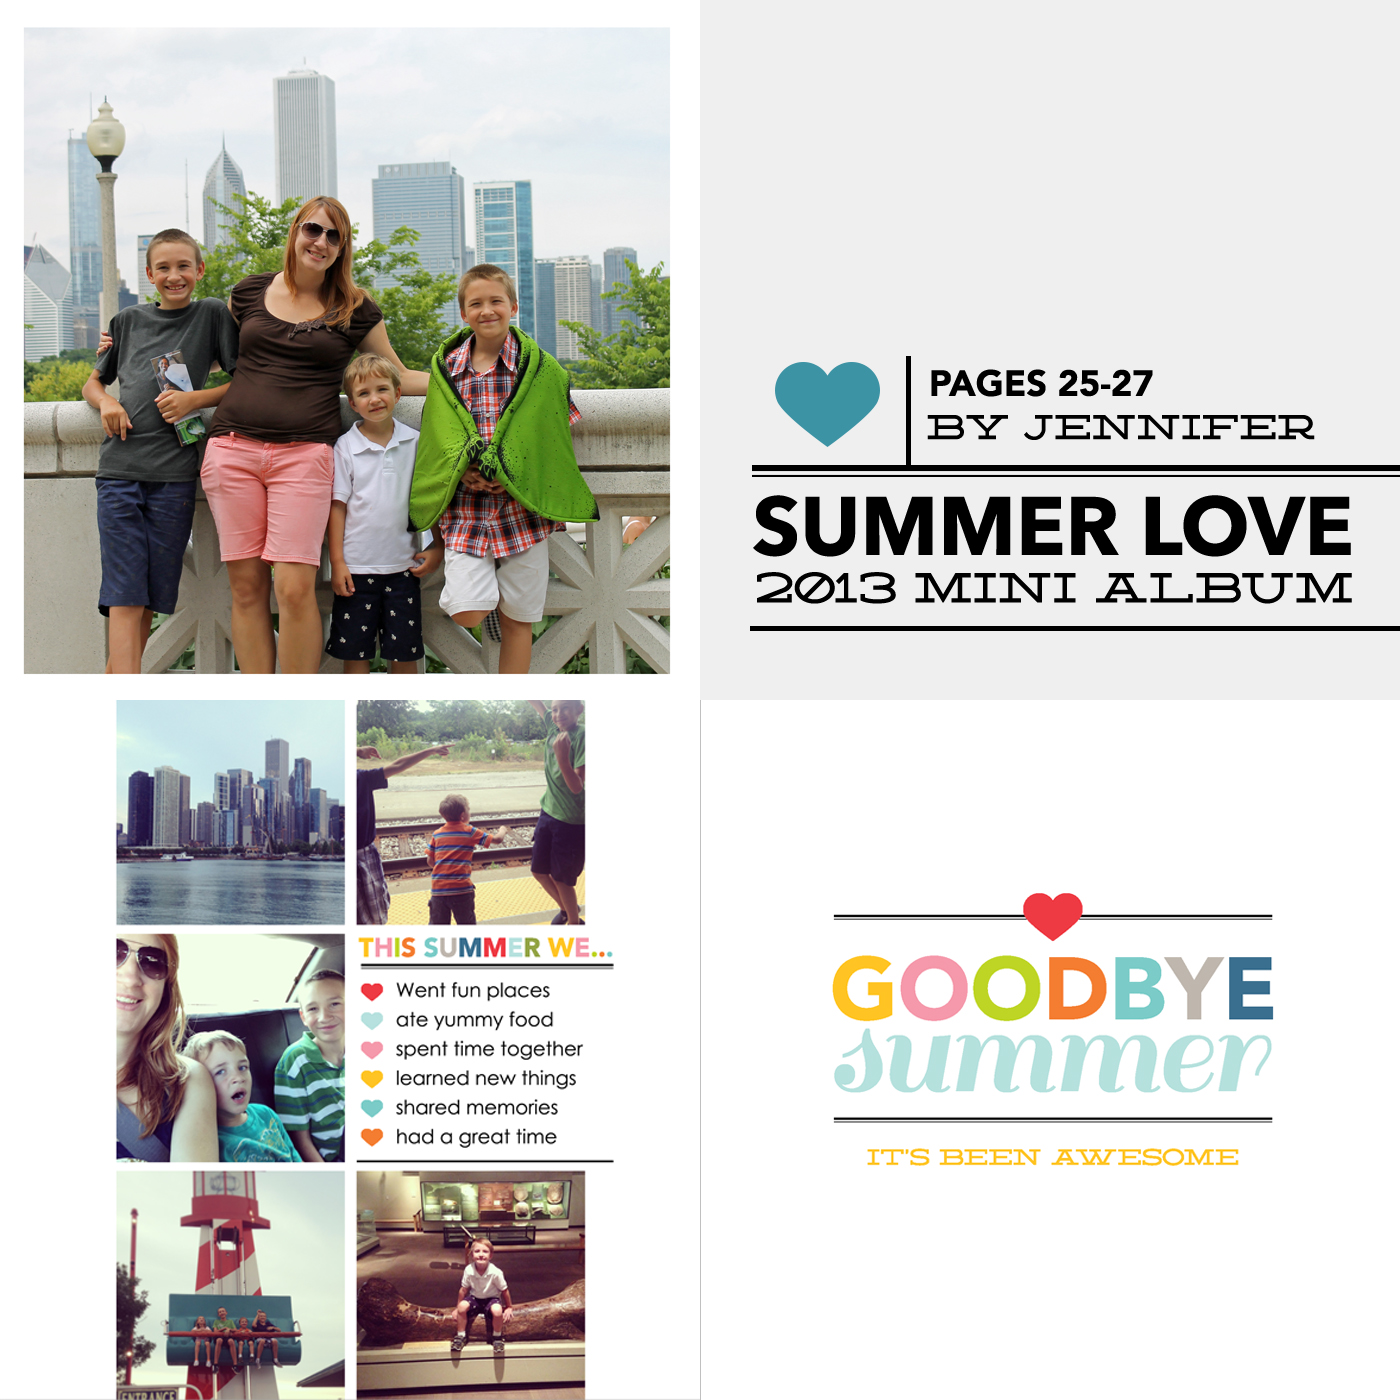
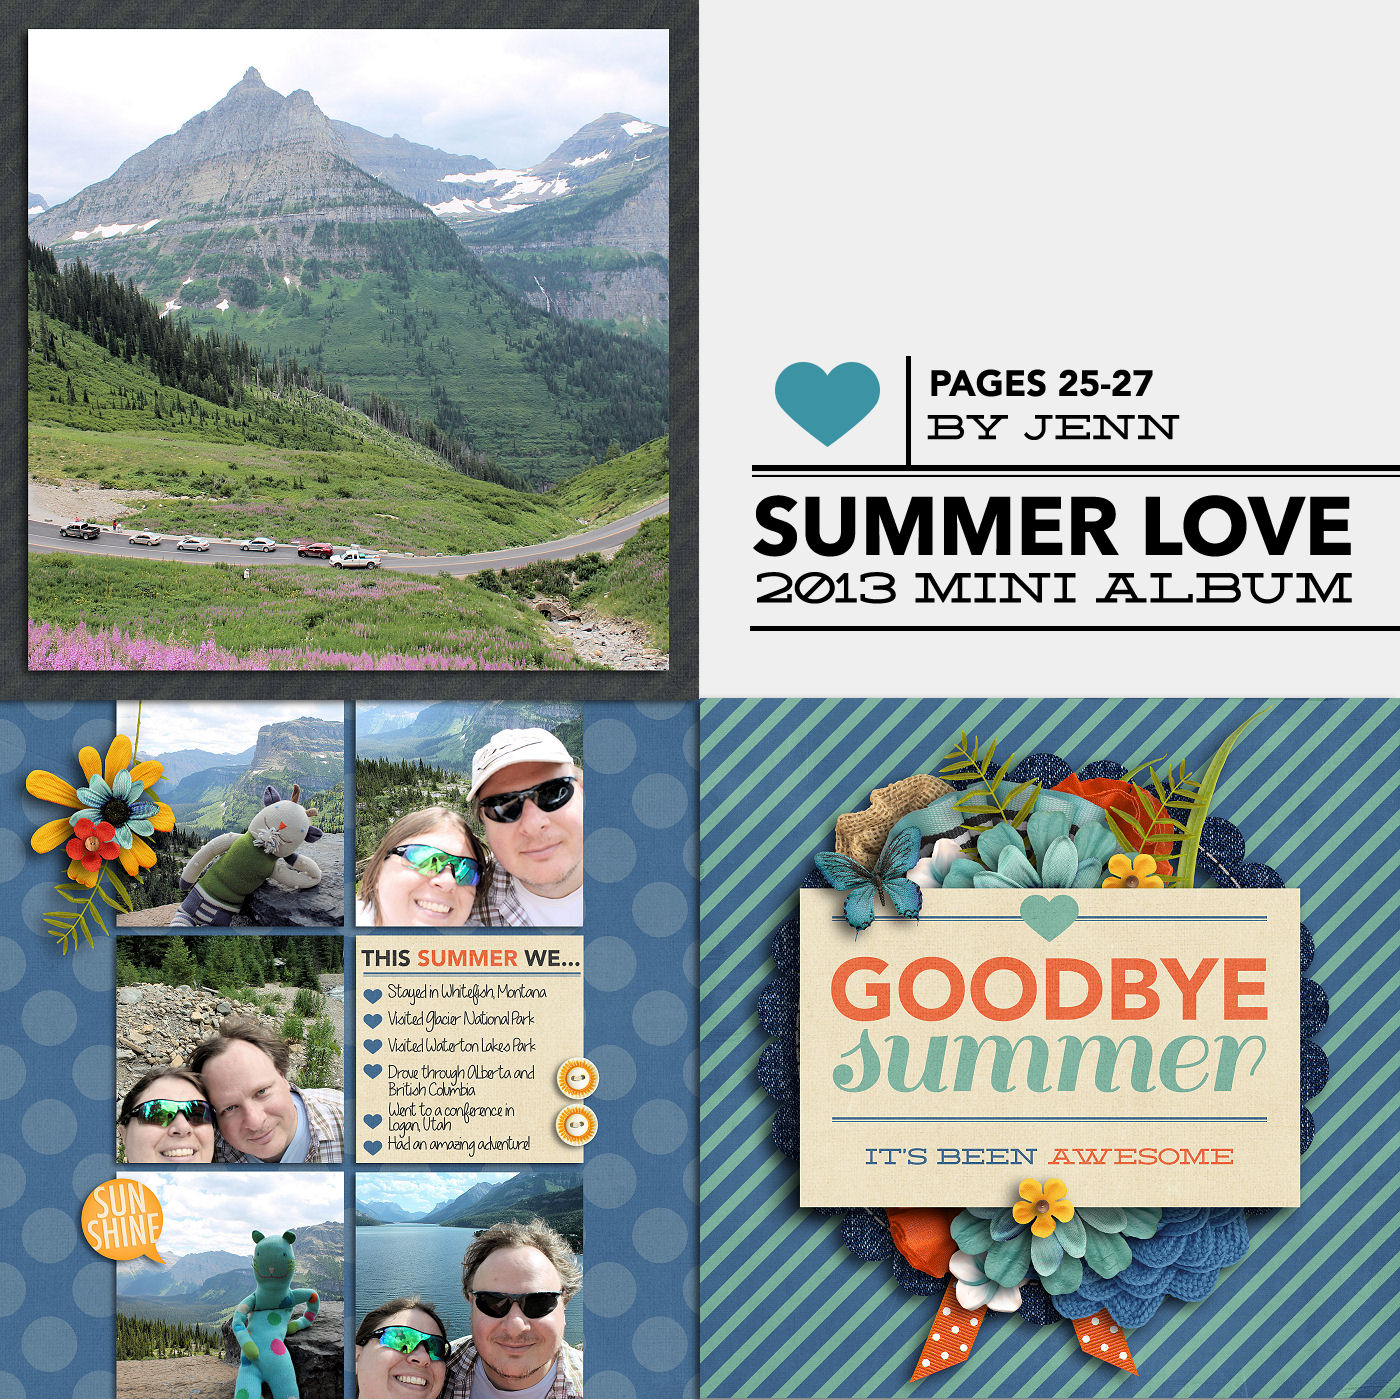
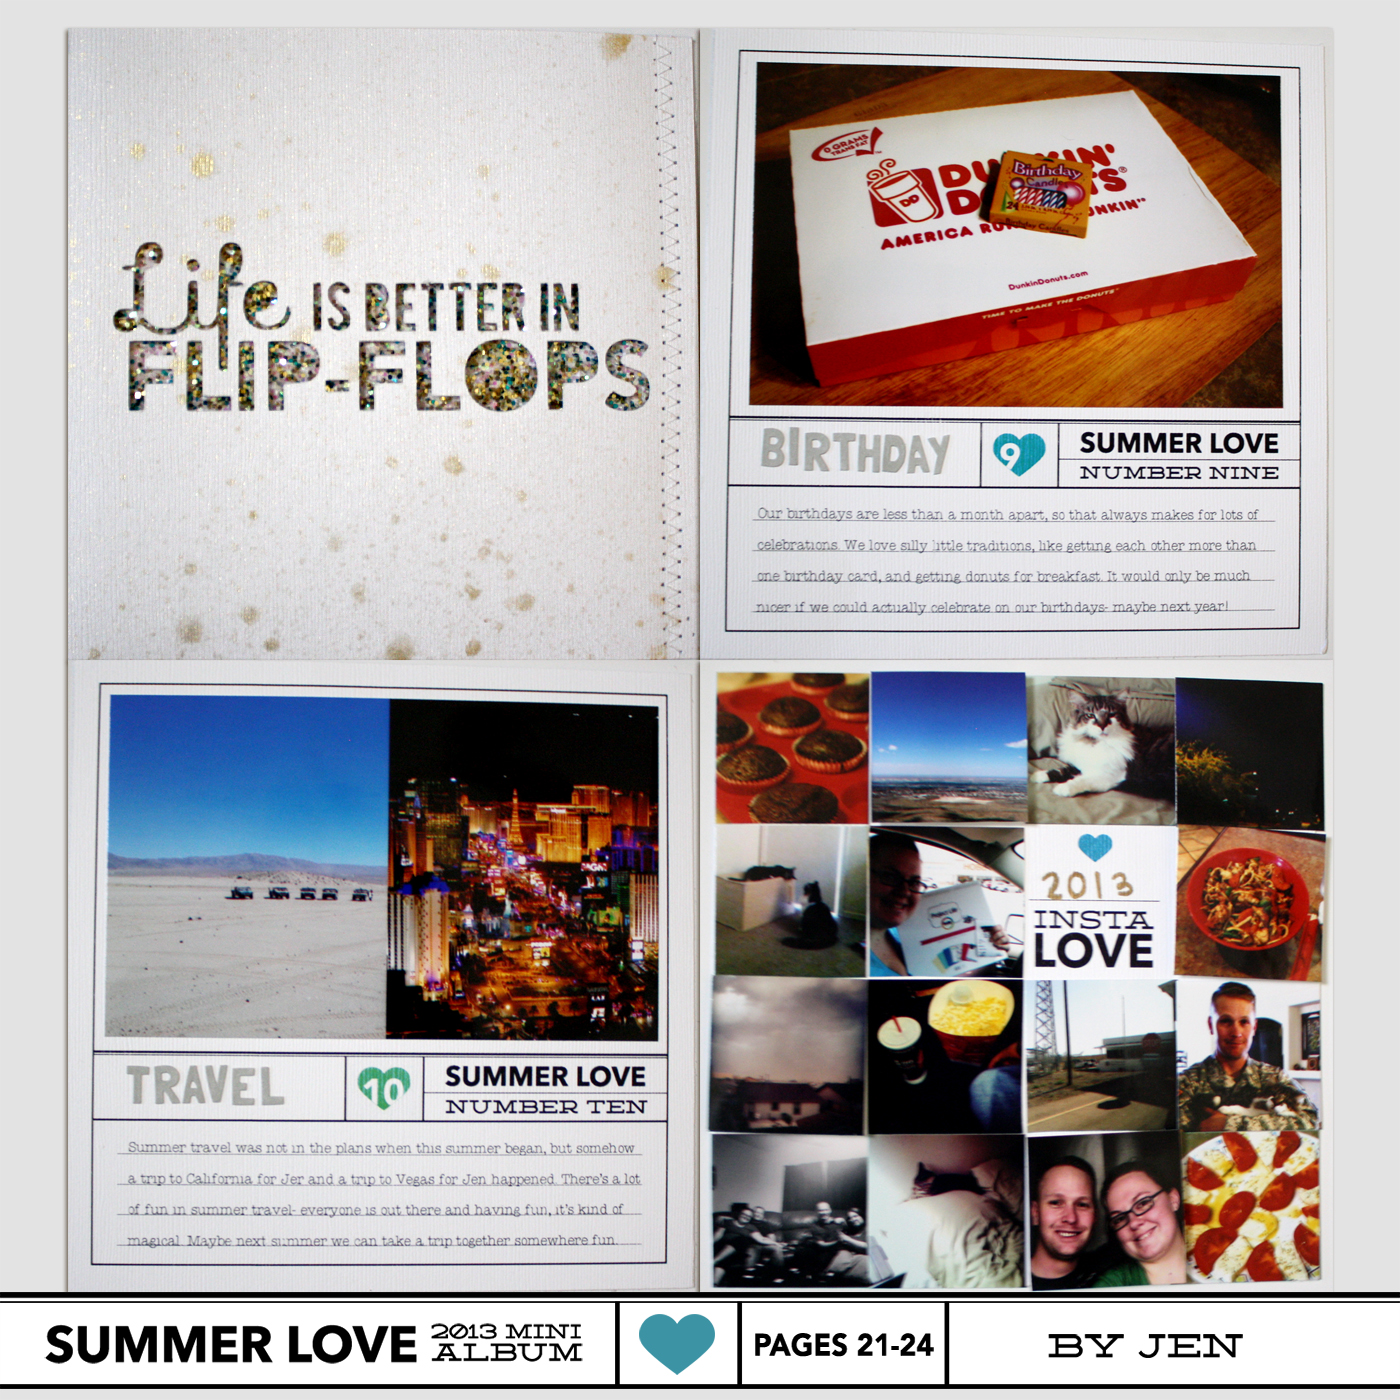
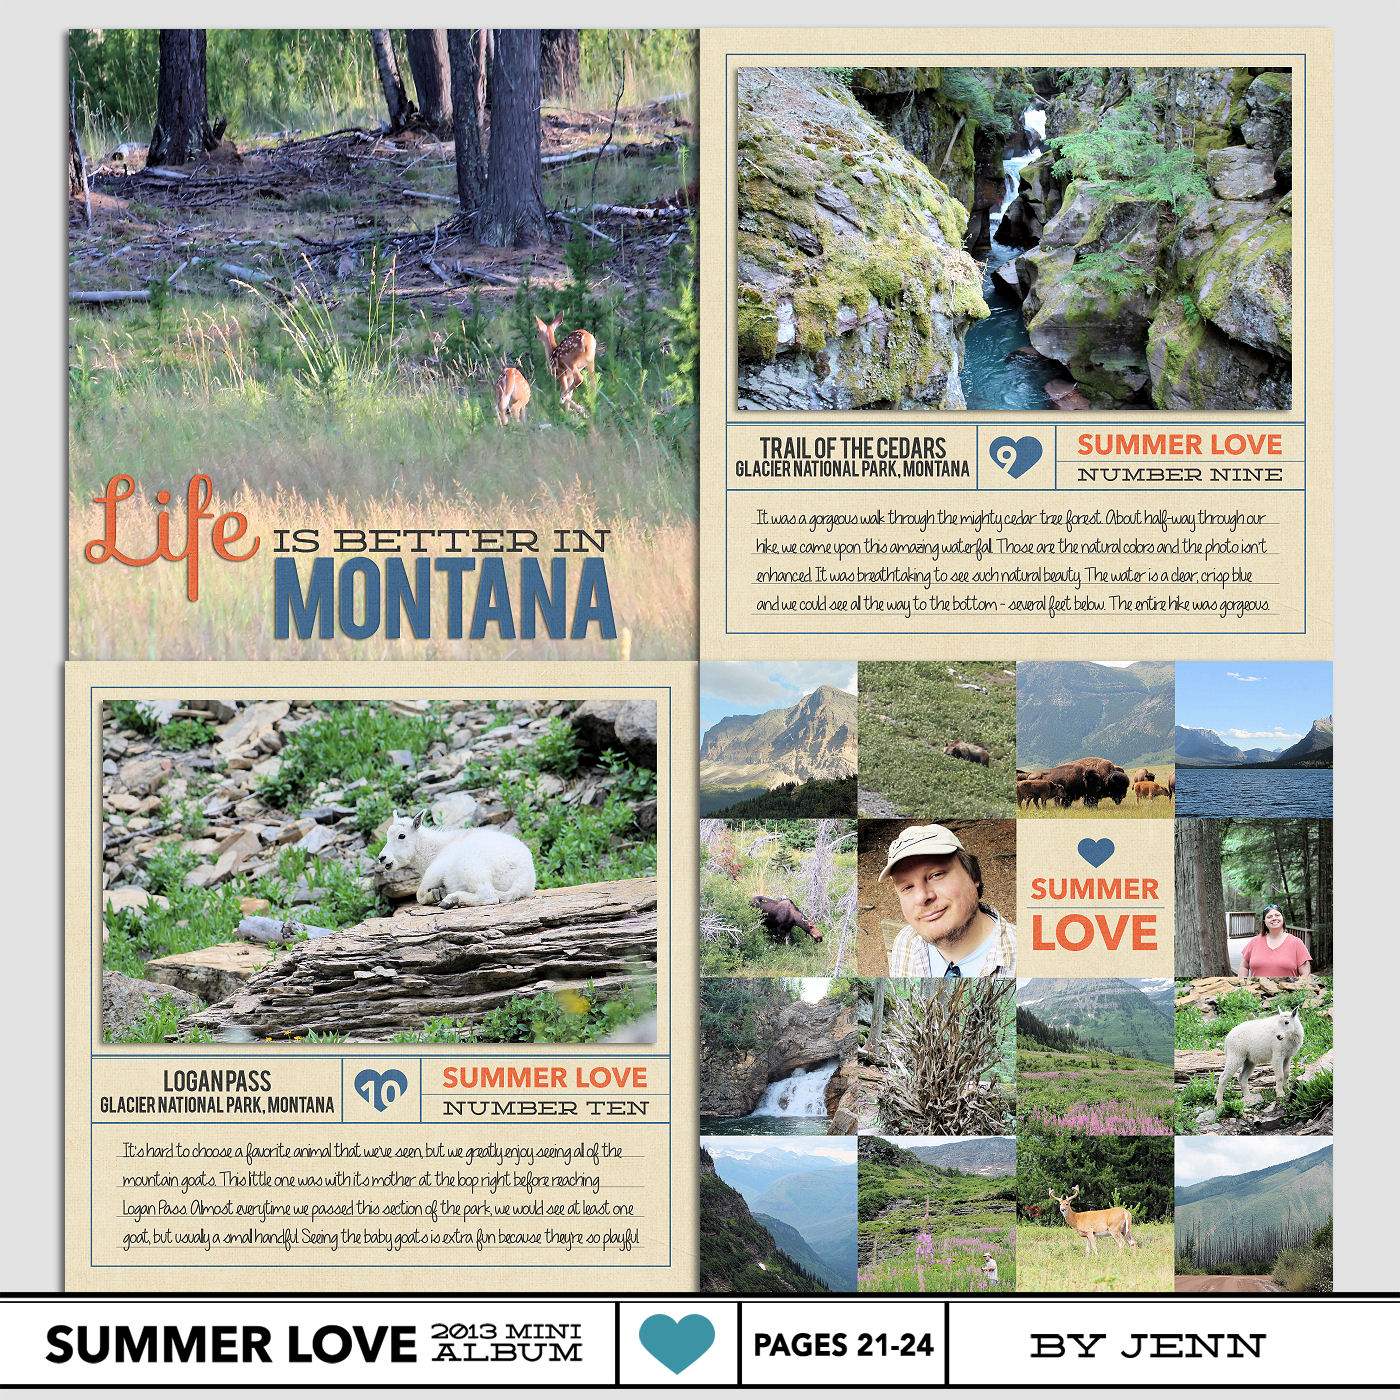
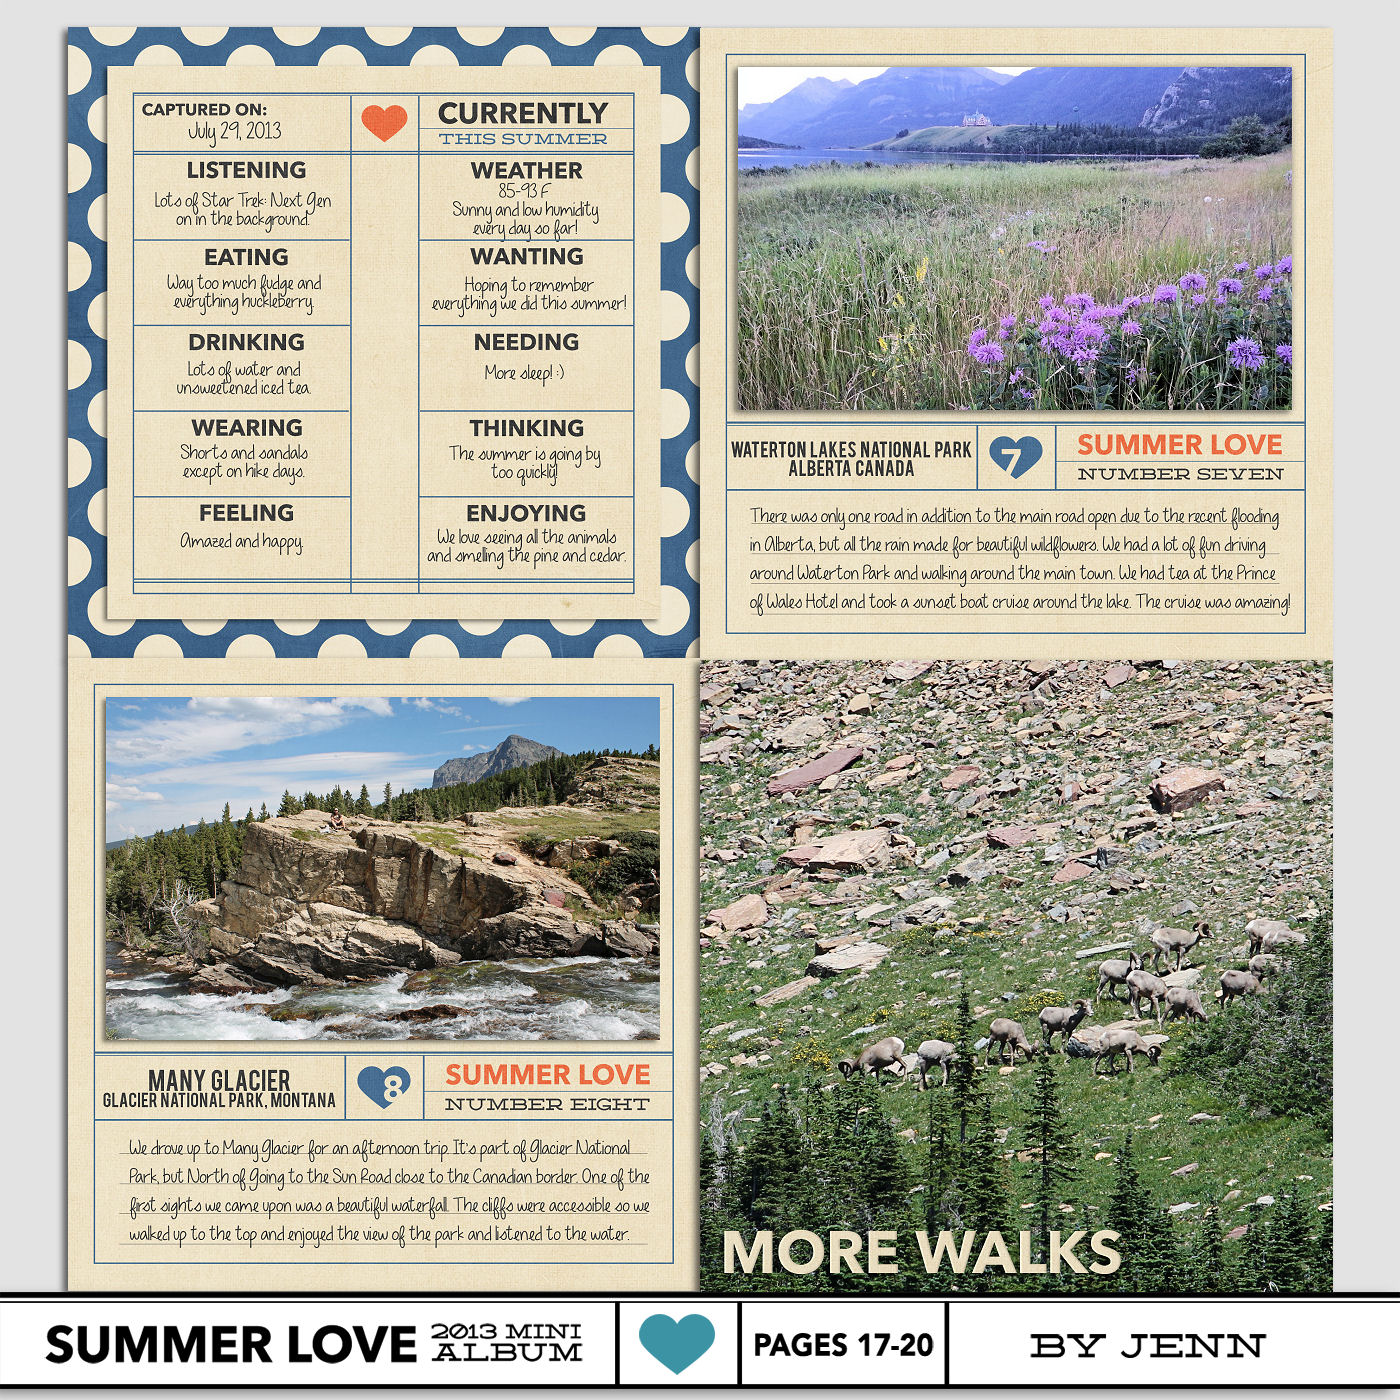
sara_minialbum-cover sara_summer-album-sample-pages2 sara_summer-album-sample-pages3 sara_summeralbum-sample-pages1

By Jen

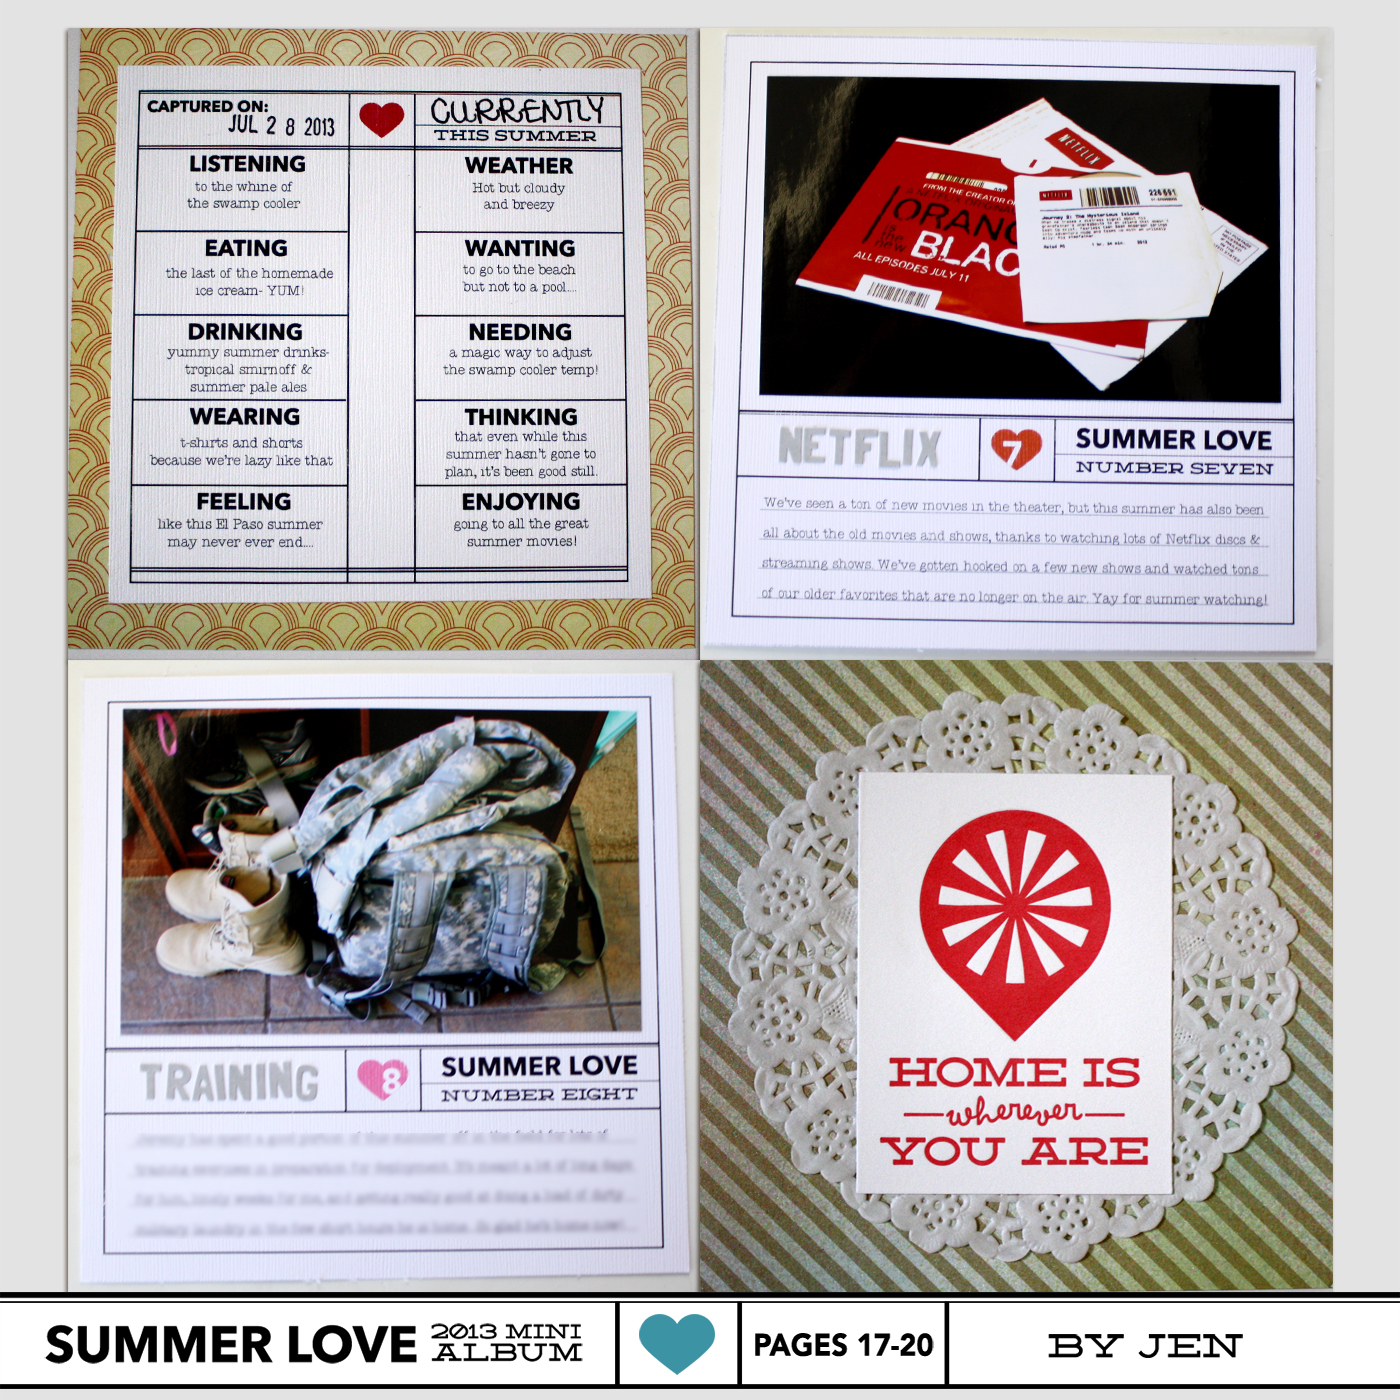
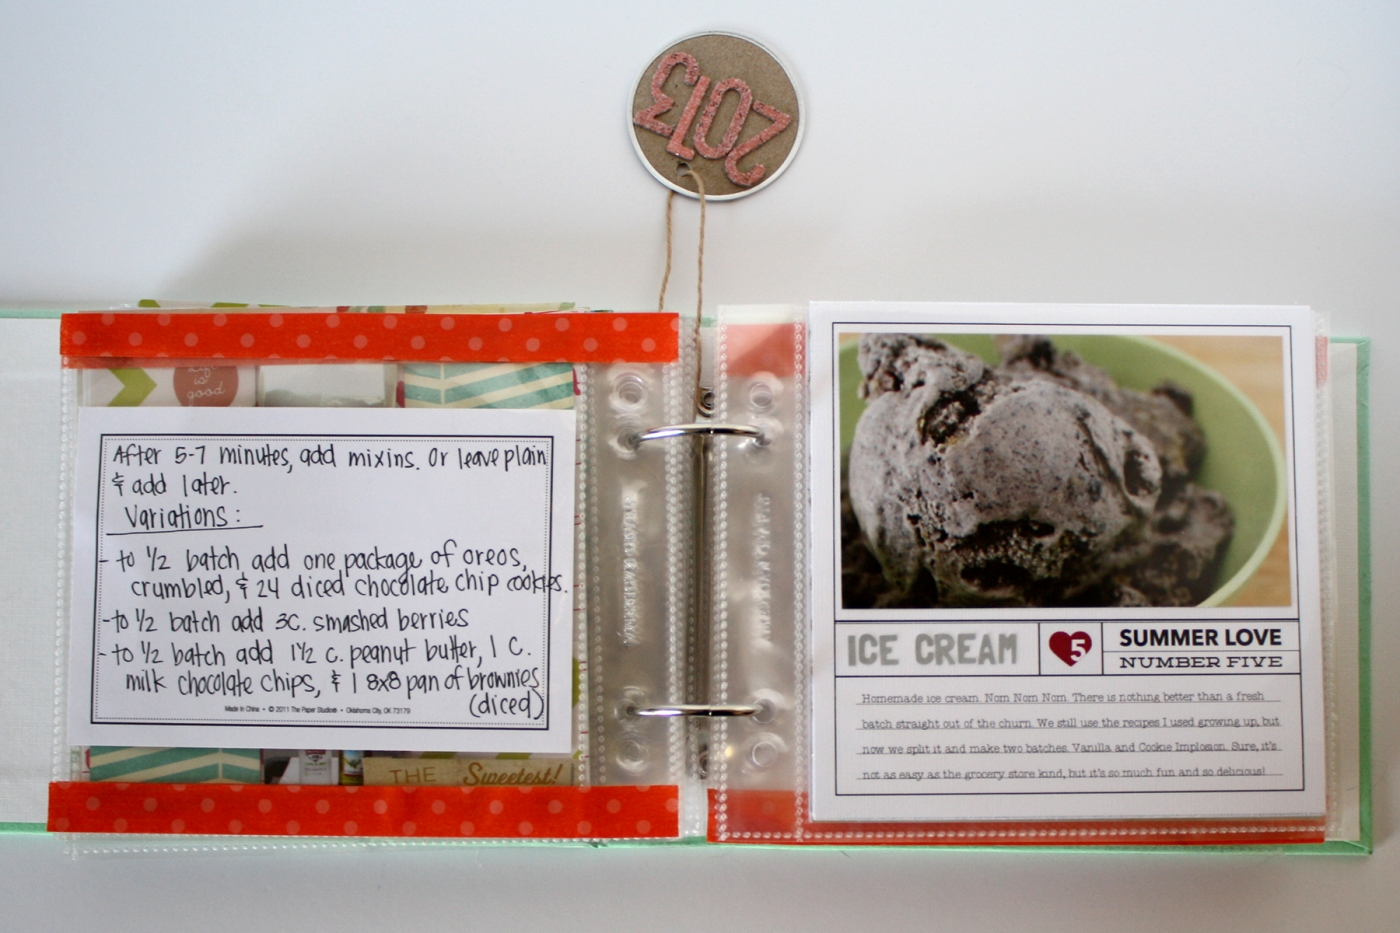
And finally our resident hybrid gal, Jen, was kind enough to take some photos of her Summer Love mini album. She chose to bind her album using the Dear Lizzy album I linked to in this post. I especially love the little 2013 hanging tag she made to go with it.

jen_summer-mini-cover jen_summer-mini-double-photos jen_summer-mini-inside-1

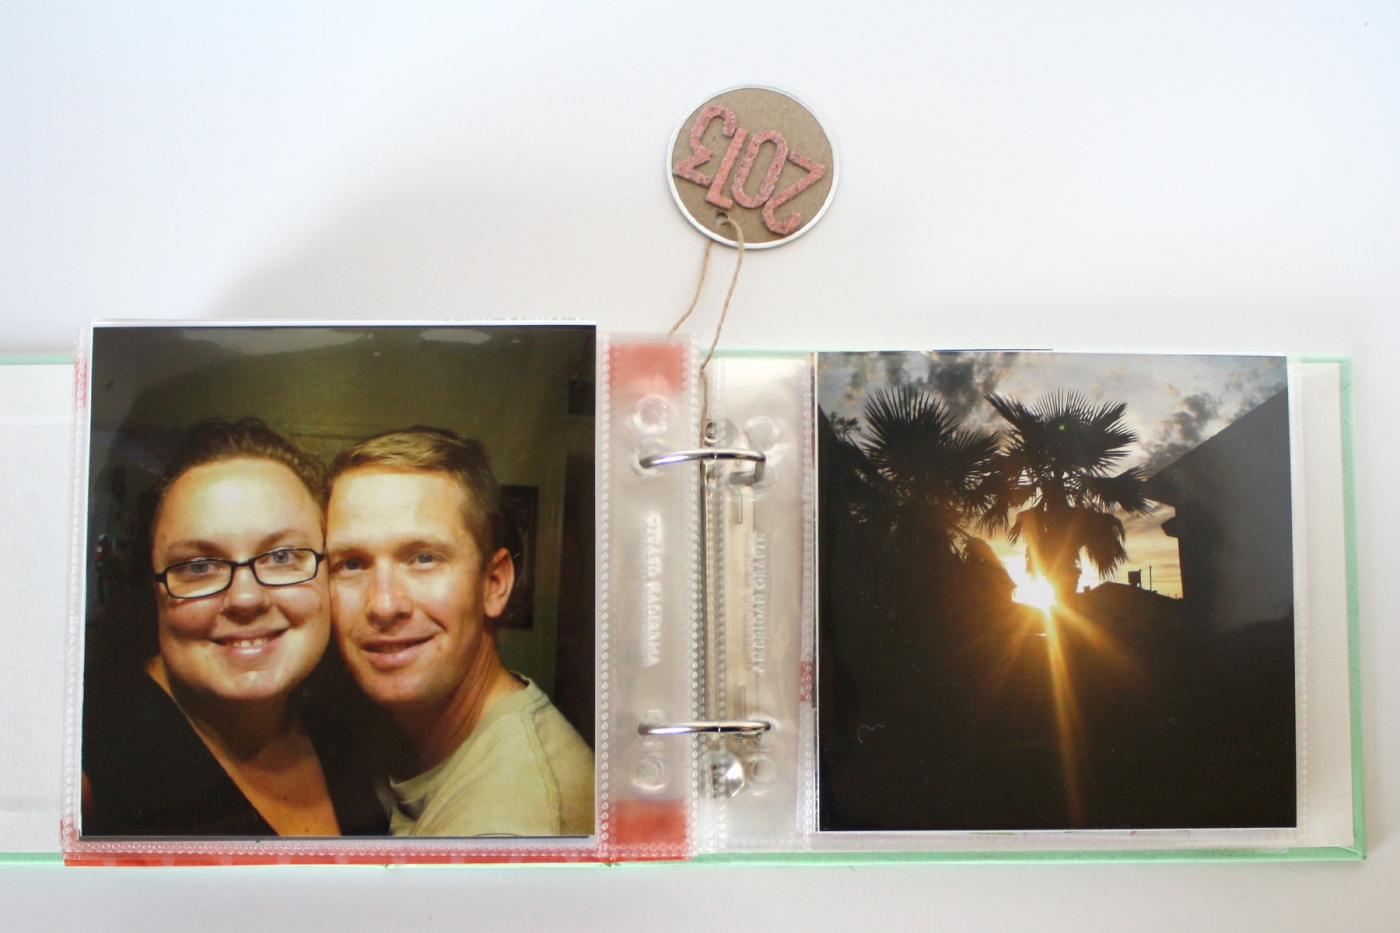
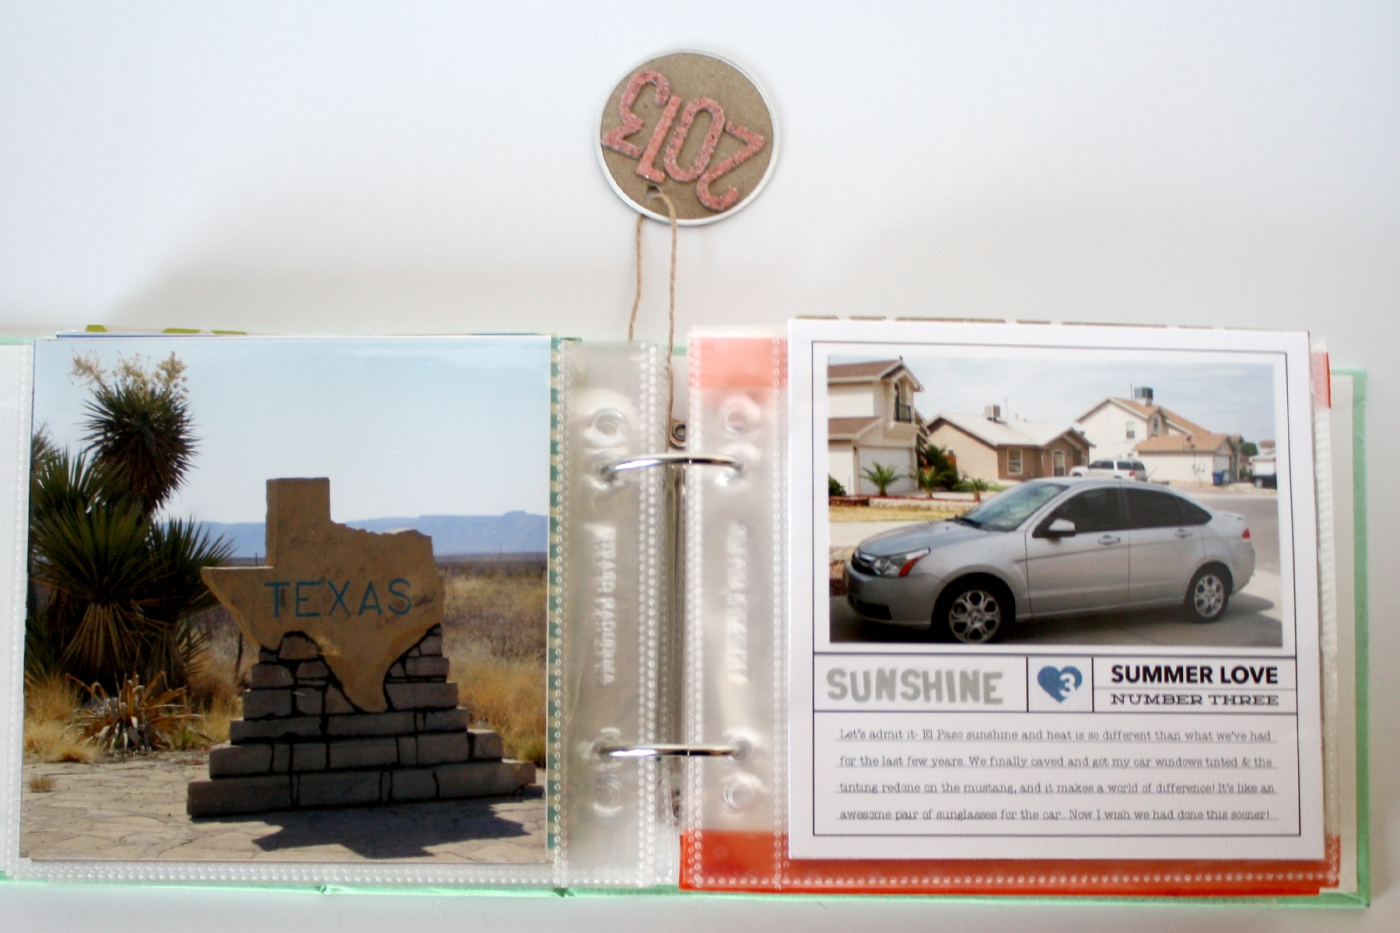
Here’s a look at how Jen added memorabilia into her album using the page protectors and a little washi tape. Such a quick and easy idea!

jen_summer-mini-memorabilia

Well, there ya have it: three different takes on our completed Summer Love Mini Albums. I hope this gives you some ideas and inspiration for finishing off your own album.

I will tell you that every time I do one of these projects, whether it be Holiday Faves, Week In the Life, or my Summer Love Mini Album, it can feel like a lot of work in the moment. But once I get the end result in my hot little hands, it makes all the time and energy so so so worth it.

Seriously, if you’re one of those scrapbookers who’s never printed any of your layouts, do me a favor and stop reading this right now and go upload some layouts for print. Seeing your layouts in a printed form will totally change the way you look at your layouts, in an amazingly awesome way.

And with that, I’m going to bring the Summer Love Mini Album Course to a close! I hope you’ve enjoyed playing along with Team Awesome and I this summer.  If at any time you’d like to share your own Summer Love Mini Album with us, feel free to link us up over at Sweet Shoppe Designs or in the comments section below this post.

And if you enjoyed this course and don’t want to miss out on others like it, be sure to sign up for my Nettio Designs email list here so you’ll be the first to know about all the happenings around here. You never know what I may have up my sleeve next.

[catalyst_hook_box name=”summerlovesignup”]

__________________________________________________________________

Previous Summer Love Mini Course posts:

  • Options for Binding Your Mini Album
  • Summer Loves No. 9 & 10
  • Summer Highlights & Final Pages

View all Summer Love Mini Course posts here.

Note: No perks of any kind were received from AdoramaPix in exchange for this post. We’re just a couple of happy digiscrappers sharing our experience. 

How Can Customers Lower Their Remedy Costs

POSTED IN Summer Love 2013 Mini Course

Summer Love Mini Course | Summer Highlights & Final Pages

POSTED ON August 13, 2013 IN Summer Love 2013 Mini Course

summerlovemini-logoIt’s here, it’s here, the final week of the Summer Love Mini Course! My printed photo book from AdoramaPix is currently on it’s way here via a big brown truck and I’m SO excited to see the final result!

I’ll be sharing photos of my printed album as well as some of Team Awesome’s albums on Thursday, but before we get to that, we have one final set of pages to share today, pages 25-27 in our Summer Love Mini Books.

Summer Highlights Pages 25-27

Here’s a look at the Summer Love 6×6 Mini Album templates for pages 25-27:

nettiodesigns_SummerLove-pg25-27-templates

By Lynnette

Here’s a look at my page 25-27 layouts. Because AdoramaPix limits the page count to a specific number for their custom cover photobooks, in this case 26 pages, I chose to leave page 25 out of my album and only include pages 26-27 instead.

nettiodesigns_SummerLove-pg25-27-Lynnette

Here’s a look at Team Awesome’s pages 25-27:

By Sara

Another round of cute pages from Sara! The cupcake lover in me is eyeing those cupcakes on highlights page.

nettiodesigns_SummerLove-pg25-27-sara

By Jen

Here’s a look at Jen’s hybrid take on the Summer Love Mini Album. I’ll be sharing more photos of her completed album on Thursday in case you’re curious how she bound it all together.

nettiodesigns_SummerLove-pg25-27-Jen

By Brittney

I love the way Brittney adapted the Summer Highlights page to include more photos. This is one of the great perks of templates – y0u can really adapt them to your own adventures as needed.

brittney_nettiodesigns_SummerLove-pg25-27

By Jennifer

Aww, I love Jennifer’s big family photo here! So sweet and such a great wrap up to her album.

JenniferH_SummerLove-pg25-27

By Jenn

I absolutely adore the way Jenn layered all her details under the Goodbye Summer text. Such a stunning use of clustering!

nettiodesigns_SummerLove-pg25-27-JENN

By Sherly

Aww, I love Sherly’s family photo here! Love her use of elements too – her pages always pop.

sherly_SummerLove-pg25-27

Well, that’s it from us today! If you’re still playing along and would like to share your mini album progress, you can add them to my designer gallery at SSD and link us up in this thread at Sweet Shoppe Designs.

Coming up next…Last day of the Summer Love Mini Course, where Team Awesome and I will be sharing our completed albums. I can’t wait!

[catalyst_hook_box name=”summerlovesignup”]

__________________________________________________________________

Previous Summer Love Mini Course posts:

  • Summer Currently & Loves No. 7 & 8
  • Options for Binding Your Mini Album
  • Summer Loves No. 9 & 10

View all Summer Love Mini Course posts here.

Can diabetes cause erectile dysfunction

POSTED IN Summer Love 2013 Mini Course

Summer Love Mini Course | Summer Loves 9 & 10

POSTED ON August 8, 2013 IN Summer Love 2013 Mini Course

summerlovemini-logoWoohoo, welcome back to the Summer Love Mini Course. Today Team Awesome and I are sharing our Summer Loves No. 9 & 10, which are pages 21-24 in our Summer Love Mini Albums. Our final set of Summer Loves, I can hardly believe we’re here. Is it just me, or did this summer FLY by?

Summer Loves 9 & 10 Pages 21-24

Here’s a look at the Summer Love 6×6 Mini Album templates for pages 21-24:

nettiodesigns_SummerLove-pg21-24-Templates-1400

By Lynnette

Here’s a look at my page 21-24 layouts. I decided to save the best for last with my Summer Love No. 10: my trip to Seattle for my cousin’s wedding back in June. Since I had so many photos from the trip, I used the InstaLove template to showcase photos from our trip.

A quick tip: when you want to add a little fancy photo editing to a large group of photos:  add them to a grid first and then run your filter or action to the entire group at once (I used Totally Rad RadLab here). Not only will it save you time editing but it’ll add a nice, consistent coloring to your photos that’ll help tie them all together.

nettiodesigns_SummerLove-pg21-24-Lynnette-1400

Of course, Team Awesome has been scrapbooking right along with me so here’s a look at their pages 21-24:

By Sara

I love the randomness of Sara’s InstaLove photos. They’re exactly what I envisioned when I designed that template. I love the subtle blending of her large photo as well. That’s an easy way to add texture to your photo.

nettiodesigns_SummerLove-pg21-24-sara

By Jen

So I admit, non-digital glitter scares me a little (the mess, oh the mess!), but I LOVE how Jen used the glitter behind her flip-flop title. Such a fun way to add a little sparkle to the page.

nettiodesigns_SummerLove-pg21-24-Jen

By Brittney

Brittney’s use of the grid within the grid for her InstaLove page is so fun! What an awesome way to add more photos onto the page.

brittney_nettiodesigns_SummerLove-pg21-24-1

By Jennifer

Jennifer’s pages are always so bright and colorful and these are no exception. I love how she adapted the Life is better in flip-flops title work to fit with her family.

JenHignite_SummerLove-pg21-24

By Jenn

So I have been to Montana & Glacier National Park many many moons ago but Jenn’s photos are so making me want to go back! She’s done such an awesome job capturing her adventures with this little album.

nettiodesigns_SummerLove-pg21-24-jenn

Well, that’s it from us today, but now we’d love to hear from you!

Want to share your mini album progress? Feel free to add them to my designer gallery at SSD and link us up in this thread at Sweet Shoppe Designs.

Coming up next…Home stretch, baby! On Tuesday, Aug 13th, we’ll be sharing the final pages of our Summer Love Mini Albums and then on Thursday, Aug 15th, we’ll be sharing our completed albums. See you then!

[catalyst_hook_box name=”summerlovesignup”]

__________________________________________________________________

Previous Summer Love Mini Course posts:

  • Tips for Printing Your Mini Album
  • Summer Currently & Loves No. 7 & 8
  • Options for Binding Your Mini Album

View all Summer Love Mini Course posts here.

How do I purchase Levitra without going to the doctor

POSTED IN Summer Love 2013 Mini Course

Summer Love Mini Course | Three Options for Binding Your 6×6 Summer Mini Album

POSTED ON August 6, 2013 IN Summer Love 2013 Mini Course

summerlovemini-logoWoohoo, welcome back to the Summer Love Mini Course! We’re on the home stretch baby! Today marks the final tips & tricks article of the course so I figured I’d build on Amy’s tips for printing your Summer Love Mini pages post from last week and share three non-photobook options for binding your printed Summer Love Mini Album pages.

6×6 Summer Love Mini Binding Options

nettiodesigns_SummerLoveMini-6x6AlbumOptions

AC Dear Lizzy / WRMK / AC Modern / Maya Road / Little Yellow Bicycle / Bo Bunny

1) Use a Pre-made Album with Page Protectors

One of the easiest solutions for binding your 6×6 Summer Love Mini pages is to buy a ready-made 6×6-inch scrapbooking album from a company like American Crafts (No. 1 & 3) or We Are Memory Keepers (No. 2).

Simply print your pages 6×6, slip them into the included page protectors and you’re good to go! No messy resizing or hole punching necessary.

2) Use a Chipboard Mini Album or Binder

Another option, if you’d like to get a little more crafty, is to use a 6×6-inch naked chipboard mini album like the ones from Maya Road (No. 4), Little Yellow Bicycle (No. 5), or Bo Bunny (No. 6).

The awesome thing about these naked chipboard albums is you aren’t tied into any specific color-scheme like you are with a pre-made scrapbooking album – you can customize your cover however you’d like using alphas, paint, fabric or even printed digital elements. Then simply print out your Summer Love Mini pages, glue them back to back and hole punch them using the chipboard cover as a guide.

If you’d like to see the Maya Road mini album binder in action, you can see how I customized one for my 30 Days of Lists mini album here.

3) Make Your Own Mini Album

The final mini album option, and my personal fave, is to create your own mini album cover using book board or art board from the craft store and then bind it using binder rings from the office supply store.

If you want to get really fancy, you can even add a fabric spine to your mini to really give it a polished look. I’ve done this for my last two Holiday Faves mini albums and I love the way it makes them look like real little books.

Well I hope this gets the wheels turning for how to bind your Summer Love Mini Album! If you haven’t yet, be sure to check out Amy’s article from last week for tips for printing your pages. We’re on the home stretch but if you’ve fallen behind, never fear! There’s still plenty of time to catch up on your Summer Minis before the class ends.

Coming up next…On Thursday, August 8th, Team Awesome and I will be sharing our Summer Loves No. 9 & 10 and our Summer InstaLoves. See you then!

[catalyst_hook_box name=”summerlovesignup”]

__________________________________________________________________

Previous Summer Love Mini Course posts:

  • Summer Loves No. 5 & 6
  • Tips for Printing Your Mini Album
  • Summer Currently & Loves No. 7 & 8

View all Summer Love Mini Course posts here.

Can I take Levitra if I am taking other remedies at the same time

POSTED IN Summer Love 2013 Mini Course

Summer Love Mini Course | Summer Currently & Loves 7 & 8

POSTED ON August 1, 2013 IN Summer Love 2013 Mini Course

summerlovemini-logoHappy August everyone! Can you believe we’re only two short weeks away from the end of the Summer Love Mini Course? Craziness! In today’s installment, Team Awesome and I are showing off our Summer Currently and Loves No. 7 & 8, which are pages 17-20 in our Summer Love Mini Albums.

Summer Loves 7 & 8 Pages 17-20

Here’s a look at the Summer Love 6×6 Mini Album templates for pages 17-20:

nettiodesigns_SummerLove-pg17-20-templates-1400

By Lynnette

Here’s a look at my page 17-20 layouts. I’ve been waiting for this Currently page to come since I first designed it so I’m geekily excited it’s finally time to use it! I’m also really digging the clean & graphic vs paper-lovin’ balance in my page design this week.

nettiodesigns_SummerLove-pg17-20-Lynnette-1400

Here’s a look at Team Awesome’s pages 17-20:

By Sara

I’m loving the way Sara’s pages are coming together. The clean and simple kraft background paper grounds everything nicely.

nettiodesigns_SummerLove-pg17-20-sara

By Jen

Another week, another round of hybrid pages from Jen! Really love how her album is coming together so far.

nettiodesigns_SummerLove-pg17-20-Jen

By Brittney

I love the way Brittney used the four-grid page this week with her chalk drawing photos. Very cute!

brittney_nettiodesigns_SummerLove-pg17-20

By Jennifer

I really love the way Jennifer’s adapting the Summer Love mini album templates to her summer. It looks like they’re having a blast!

JenniferH_SummerLove-pg17-20-

By Jenn

I’m really loving all of Jenn’s photography and big photos in her album. Such a great way to tell her story!

nettiodesigns_SummerLove-pg17-20-Jenn

That’s it from us today, but now we’d love to hear from you! How are you feeling now that we’re halfway through our mini albums?

Want to share your mini album progress? Feel free to add them to my designer gallery at SSD and link us up in this thread at Sweet Shoppe Designs.

Coming up next…On Tuesday, Aug 6th, I’ll be sharing ideas for binding your Summer Love Mini Album. See you then!

[catalyst_hook_box name=”summerlovesignup”]

__________________________________________________________________

Previous Summer Love Mini Course posts:

  • Silhouette Mini Album Tutorial
  • Summer Loves No. 5 & 6
  • Tips for Printing Your Mini Album

View all Summer Love Mini Course posts here.

How Can Customers Lower Their Remedy Costs

POSTED IN Summer Love 2013 Mini Course

Summer Love Mini Course | Printing Your Summer Love Mini Album

POSTED ON July 30, 2013 IN Guest Posts, Summer Love 2013 Mini Course, Tips from Team Awesome

summerlovemini-logoWe’re nearing the end of our Summer Love Mini Course which means it’s time to start thinking about finishing touches, like printing. Today Team Awesome member Amy is sharing her tips for printing your Summer Love Mini Album. Take it away, Amy!

By now our Summer Love Mini Album is getting close to being finished which means it’s time to start thinking about on important aspect of any album: printing!

There are so many different album printing options to choose from, but the main two are printing as a bound photo book, or printing on photo paper and putting in an album. Both are great options, but it’s up to you to decide how you want to gaze upon these lovely summer memories you’ve compiled in the coming seasons and years.

Photo Book Printing

First we’ll look at some photo book options available. The Summer Love Mini templates are designed to print at 6×6 inches so it would be important to make sure the company you choose has that size available. Both AdoramaPix and Artscow offer 6×6 photobooks.

If your photobook printer of choice doesn’t offer 6×6 photobooks, 7×7 or 8×8 would also be acceptable as long as you save your layouts at the highest quality possible. You could also add a simple border to your 6×6 pages to make them 7×7 or 8×8 as well.

This site has a breakdown of the top ten photo book printing services: 2013 Best Photo Book Services. That website provides you with the links to those 10 service websites, so take a look at the comparison charts and see if there is an option or two for you there.

Two services not on that list that are still worth looking into are Blurb and Mpix. Lynnette has previously published articles sharing her experiences with both companies so be sure to check out the following helpful links:

  • It’s Blurbtastic
  • Designing a Hybrid Mini Photo Book (and printing with Mpix)
  • Video Tutorials on Creating a Photo Book and Uploading to Blurb

The Daily Digi also has a great review of 12 photobook printers here.

The only service I’ve personally tried is Blurb, and I am a happy customer so I have not seen the need to try anything else 🙂

What to Look for in a Photo Book Service

The things you want to keep an eye out for when you’re choosing a photo book service are:

  1. Good quality printing and paper options. Upgrading your paper option will cost more, but it’s usually worth it. Your pictures really pop when they are printed properly and on great paper.
  2. The ability to create a custom cover. I love my Blurb books all the more since I was in charge of the design process from start to finish, including the cover created by me in Photoshop!
  3. The ability to customize the pages yourself. Some photo books will force you to use their pre-made templates, but for printing our Summer Love Mini Album, we need to be able to upload our layouts and have them print full bleed on every page.
  4. Fair pricing. Upgrades will cost you more money, so you need to figure out what’s important to you. Also, most printing companies are based in the USA so if you live in a different country, take shipping and customs costs into effect. Sometimes this can double the cost of your photo book! Before you order, check online for coupon or promo codes that can save you some pennies, or sign up for e-mail newsletter lists and order during the next sale.

Individual Page Printing

Your other option is to print your layouts on photo paper and insert into a scrapbook. This site has a breakdown of 10 printing services: 2013 Best Scrapbook Printing Services so that is worth checking out. Lynnette uses Persnickety Prints for all her prints (her review can be found here) but I personally print all my digital layouts at my local Costco. I find that printing on glossy photo paper really bring out the detail in my photos, elements and shadows.

There are many printers to choose from, but I will show you a quick way to prepare your 6×6 Summer Love Mini Album pages on 12×12 prints ready to go for Costco (in Photoshop).

How to Print Four 6×6 Pages on One 12×12 Page at Costco

Step 1: Create a new document at 300dpi and 3600×3600 pixels or 12×12 inches.

Screen Shot 2013-07-16 at 9.59.48 PM

Step 2: Create guides at the 6 inch (or halfway) mark vertically and horizontally.  You can do this by selecting the move tool, turning your rulers on if they aren’t already (shortcut is ALT+R on PC or Command+R on a Mac) and dragging out from the rulers to reveal a blue guide line.

Screen Shot 2013-07-16 at 10.03.20 PM

Step 3: Save your layouts at .jpgs and then drag them onto your 12×12 canvas, lined up with the guides you created.

Screen Shot 2013-07-16 at 10.17.35 PM

Screen Shot 2013-07-16 at 10.25.51 PM

Step 4: Once you have four of your layouts on the canvas, save it as a .jpg. I save at the highest quality possible, which was 11 for this print since Costco will not allow uploads to their photo site over 8mb.

Screen Shot 2013-07-16 at 10.30.12 PM

Step 5: Once you have your album set up into these 12×12 .jpgs, upload them to the Costco website software and order them as 12×12 prints. Like I said, I prefer glossy, and make sure you have the border option unchecked and don’t allow them to color correct your prints. Once you pick them up (or have them shipped to you), use a paper cutter to chop them up into individual layouts and insert into the 6×6 album of your choice!

As you can see here, there are a lot of different printing options out there. I hope this helps you narrow it down a little bit. Happy Scrapping!

Thanks so much Amy! If you have any printing questions, feel free to ask them in the comments section below. And if you’re looking for ideas for binding your non-photobook printed pages, I’ll be sharing some ideas for that next Tuesday.

Coming up next…On Thursday, August 1st, Team Awesome and I will be sharing our Summer Loves No. 7 & 8 and our summer currentlys. See you then!

[catalyst_hook_box name=”summerlovesignup”]

__________________________________________________________________

Previous Summer Love Mini Course posts:

  • Summer Loves No. 3 & 4
  • Silhouette Mini Album Tutorial
  • Summer Loves No. 5 & 6

View all Summer Love Mini Course posts here.

Can diabetes cause erectile dysfunction

POSTED IN Guest Posts, Summer Love 2013 Mini Course, Tips from Team Awesome

  • 1
  • 2
  • 3
  • Next Page »
HI I'M LYNNETTE. Graphic designer, tech-lovin’ memory keeper and lover of bold colors & patterns, good food and the great outdoors. Here at Nettio Designs, I share a behind the scenes peek at my own creative & life adventures. Read more...

KICKSTART YOUR CREATIVITY


By popular demand, photo book templates are back! Grab all three sets in the shop.
ADVENTURES IN ORGANIZING
GOAL-SETTING
MEMORY KEEPING
PROJECT LOVE
LIFE ADVENTURES
TIPS & TRICKS
BEHIND THE SCENES

POPULAR PROJECTS

TO SEE ALL MY PROJECTS, CLICK HERE

MUST READ POSTS

  • WHY EVERY SCRAPPER SHOULD SCRAP A FAVES PAGE
  • HOW TO CREATE A SCRAP-WORTHY MAP WITH PHOTOSHOP
  • REMEMBERING THE IMPORTANCE OF TELLING YOUR STORY
  • WHAT DOES IT MEAN TO CREATIVELY CAPTURE YOUR LIFE ADVENTURES?
  • BROWSE BY CATEGORY

    BROWSE THE ARCHIVES

    GET IT FOR FREE

    Copyright © 2025 ·Dynamik Website Builder · Genesis Framework by StudioPress · WordPress · Log in