Nettio Designs

Design + Creativity + Adventure = LOVE

  • HOME
  • JOIN THE 2023 MONTHLY FAVES
  • THE SHOP
  • ABOUT
  • CONTACT
You are here: Home / Archives for Memory Keeping / Ask Nettio

Ask Nettio: How Do You Remember Your Faves?

POSTED ON October 18, 2011 IN Ask Nettio, the Faves

As I mentioned in my last post, after getting a bit behind over the summer on my 2011 Faves layouts, I have finally gotten caught up through August. Only September left to go!
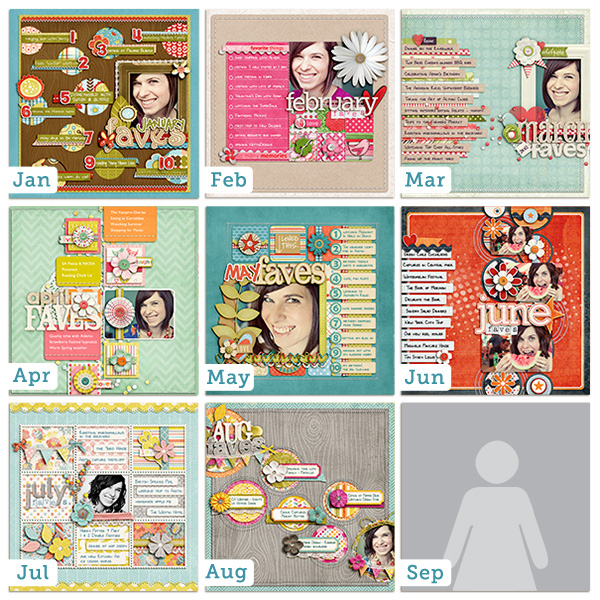
Faves2011

But that brings up a question I have been asked quite a few times and that is:

How do you remember your Faves when your scrapbooking, say, a July page in September or a June page in October?

 
Well as much as I’d love to say I’m a super organized scrapbooker who keeps a running list of her Faves each month, I am most definitely not, haha.

But that’s good news for you because it means YOU can use the same tricks I do for creating your own awesome Faves pages long after any month is over.

So without further ado, here is a list of my go-to tricks for remembering my Faves each month:

1) Browse Your Photos

As a scrapbooker I take a lot of photos over the course of the month on a random variety of topics: events, places, people, things.

So the first place I look when I’m starting a new Faves page is my photos from that month.

Not only do they provide a visual representation of all the moments that mattered to me most that month but odds are if I took the time to document something, there’s a good chance it’s a fave of mine.

2) Browse Your Completed Layouts

In the same vein as photos, the stories I scrapbook say a lot about what matters most to me at a given time. If I take the time to scrap a certain story, like my love for Pinterest or our trip to Sea World, it’s probably something I was lovin’ at that time.

3) Check Your Social Media Accounts

Facebook, Twitter, IM, texts, emails and forums are all great places to look for your Faves because thanks to the wonders of technology, it’s easy to go  back in your history and see what loves you’ve been chatting about recently.

4) Include an Old Standby

We all have those favorite things of ours that don’t change month to month. For me this would include things like: hanging out with Adam, my iPhone, American Eagle jeans, cheese, margaritas, traveling, etc.

So anytime I need a few more Faves for my monthly list, I know I can call on one of these stand-bys to fit the bill.

5) Don’t Stress About the Date

Number 5 on this list is perhaps the most important lesson I have learned in 2 years of doing this Faves project, and that is this:

No one, including you, will remember a year or even a couple of months from now, whether something was actually a Fave of yours that specific month or not.

So if all you can remember is you loved a certain television show over the summer but don’t know whether it was on in June or July, don’t worry about it.

Yes, the foundation of the Faves project is themed around the idea of monthly Faves, but the truth is the date doesn’t matter. What is most important is that you took the time to document you and your Faves in the first place.

Don’t let your date perfectionism get in the way of getting more of YOU into your scrapbooks.

So there you have it! Five of my go-to tricks for getting my Faves scrapbooked. I hope this helps you get your Faves scrapbooked too! 

Psst…Want a little extra help documenting your Faves? Be sure to check out my FAVE-O-RITES templates Volumes 1, 2, 3 and 4 in the NettioDesigns Shoppe.

Psssst…have a burning question you’d like to see answered in a future installment of Ask Nettio? Send me a note or leave a comment and let me know!
Benefits Of Using Canadian Pharmacy

POSTED IN Ask Nettio, the Faves, Digital Scrapbooking, Tips & Tricks

Ask Nettio: How Do I Crop A Two-Page Template?

POSTED ON September 29, 2011 IN Ask Nettio

Last week I released my first ever FREE two-page template here at NettioDesigns. Since then I’ve gotten some questions about the best way to crop the template into a 12×12 page so I’ve whipped up a little tutorial with some tips to show you just how easy it is to do.

If you haven’t already, you can download your own copy of the template here.

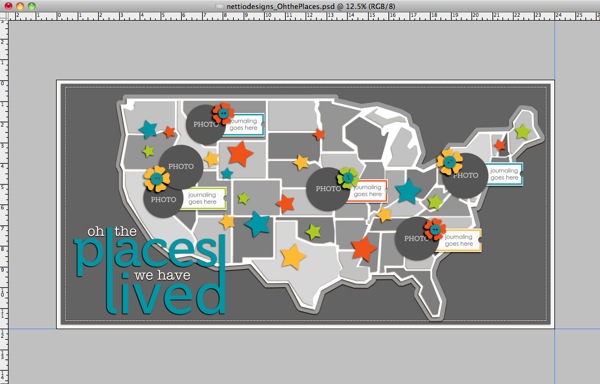
Step 1: Open the template in your scrapbooking program of choice (for me that is Photoshop CS3). The template is 12×24 inches so it’s really two 12×12 pages side-by-side in a single document.

Usacrop 01

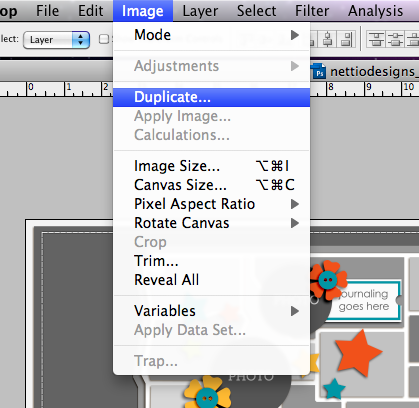
Step 2: Save a duplicate copy of the template so you don’t accidentally crop your original copy.

To do this, you can either go to File>Save As to save the existing document with the new name or you can go to Image>Duplicate to create a copy and then Save the duplicate copy. I recommend using Image>Duplicate so that you can have both the new cropped version and the original template open in Photoshop at the same time.

Usacrop 02

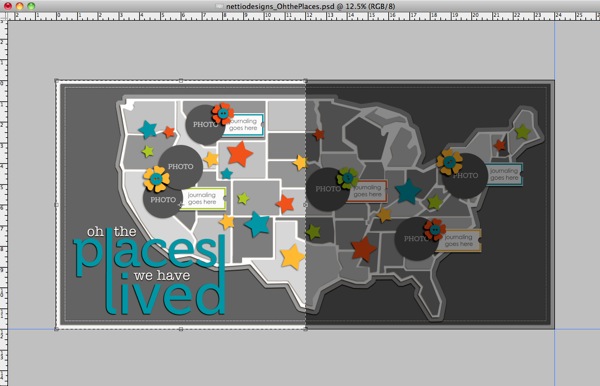
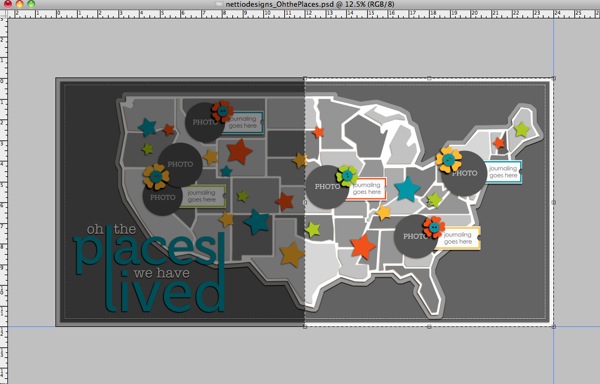
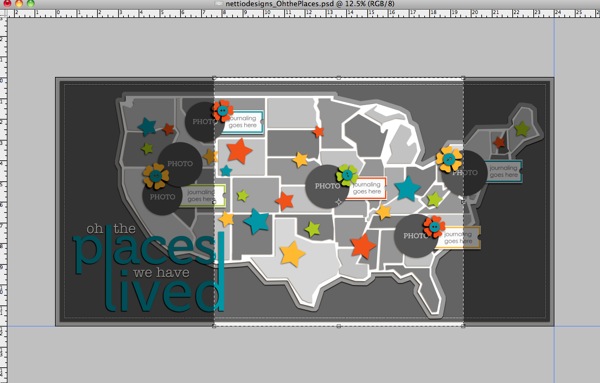
Step 3: Grab your Crop tool Crop tool and starting in the top left or right corner (top left corner for the West Coast, top right corner for the East Coast), hold down the Shift key and drag a box out towards the center of the template. Holding down the Shift key is key because it will guarantee you get a perfect square crop.

Your crop box would now look like this for the West Coast:

Usacrop 03 west

This for the East Coast:

Usacrop 03 east

Or you can even go with something like this for the Mid West:

Usacrop 03 mid

Once you’ve drawn out your crop box, check to make sure any elements or states you want to include are within the highlighted crop box.

If they’re not, cancel the crop and move those elements into the area you plan to crop so they won’t get lost when you crop the template. You can also transform the map to a smaller size to include more states or move the states closer to the left side of the page if you want to include more of the Western half of the US.

Step 4: Once you’re happy with the area within your crop box, press Enter to crop the template.

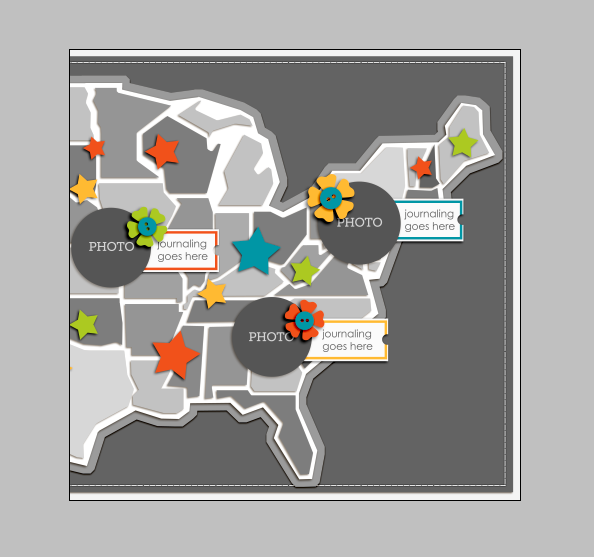
Your template should now look something like this:

Usacrop cropped

Step 5: Now add your own papers, photos and elements to the template like you normally would to create your page!

If you’d like to use the entire two page template, create your page first and then follow these same directions to crop each left and right page to 12×12 so you can upload them to be printed later on.

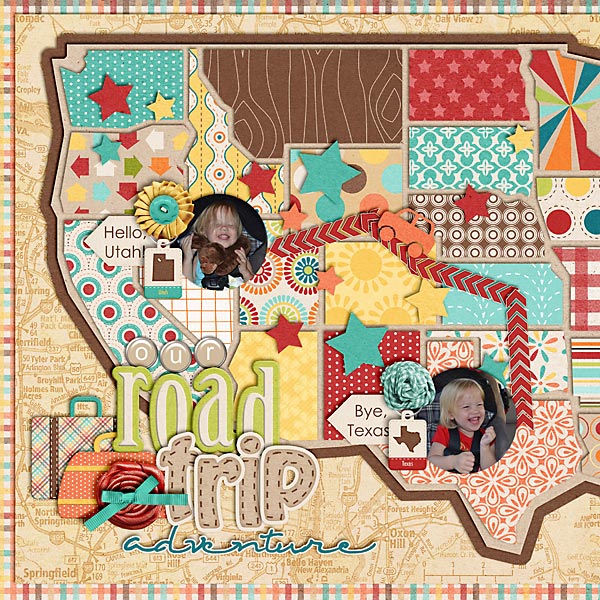
And in case you’re in need of some layout inspiration, check out this super cute Road Trip page from NettioDesigns CT Member Natalie. She moved the map portion of the template closer to the left hand side of the page to get more of the Western US and then cropped her page to 12×12. I just love the little car zipping between the states!

2011 06 30 07 11 Our Road Trip Adventure copy

Hope this helps and if you have any questions, just let me know!

Can diabetes cause erectile dysfunction

POSTED IN Ask Nettio, Digital Scrapbooking, Template-y Goodness, Tips & Tricks

HI I'M LYNNETTE. Graphic designer, tech-lovin’ memory keeper and lover of bold colors & patterns, good food and the great outdoors. Here at Nettio Designs, I share a behind the scenes peek at my own creative & life adventures. Read more...

KICKSTART YOUR CREATIVITY


By popular demand, photo book templates are back! Grab all three sets in the shop.
ADVENTURES IN ORGANIZING
GOAL-SETTING
MEMORY KEEPING
PROJECT LOVE
LIFE ADVENTURES
TIPS & TRICKS
BEHIND THE SCENES

POPULAR PROJECTS

TO SEE ALL MY PROJECTS, CLICK HERE

MUST READ POSTS

  • WHY EVERY SCRAPPER SHOULD SCRAP A FAVES PAGE
  • HOW TO CREATE A SCRAP-WORTHY MAP WITH PHOTOSHOP
  • REMEMBERING THE IMPORTANCE OF TELLING YOUR STORY
  • WHAT DOES IT MEAN TO CREATIVELY CAPTURE YOUR LIFE ADVENTURES?
  • BROWSE BY CATEGORY

    BROWSE THE ARCHIVES

    GET IT FOR FREE

    Copyright © 2025 ·Dynamik Website Builder · Genesis Framework by StudioPress · WordPress · Log in