Nettio Designs

Design + Creativity + Adventure = LOVE

  • HOME
  • JOIN THE 2023 MONTHLY FAVES
  • THE SHOP
  • ABOUT
  • CONTACT
You are here: Home / Archives for Project Love

How One Day and 35 Layouts Changed the Way I Scrapbook

POSTED ON January 30, 2015 IN the Faves, The Faves Project

How One Day and 35 Layouts Changed the Way I Scrapbook | NettioDesigns

The year was 2009.

After being a child-free digital scrapbooker for three years, I’d reached a point where I was ready for something new with my scrapbooking. A new challenge. A new idea. I loved the layouts I’d created but I felt like my album lacked a cohesive story and at times they didn’t feel like me.

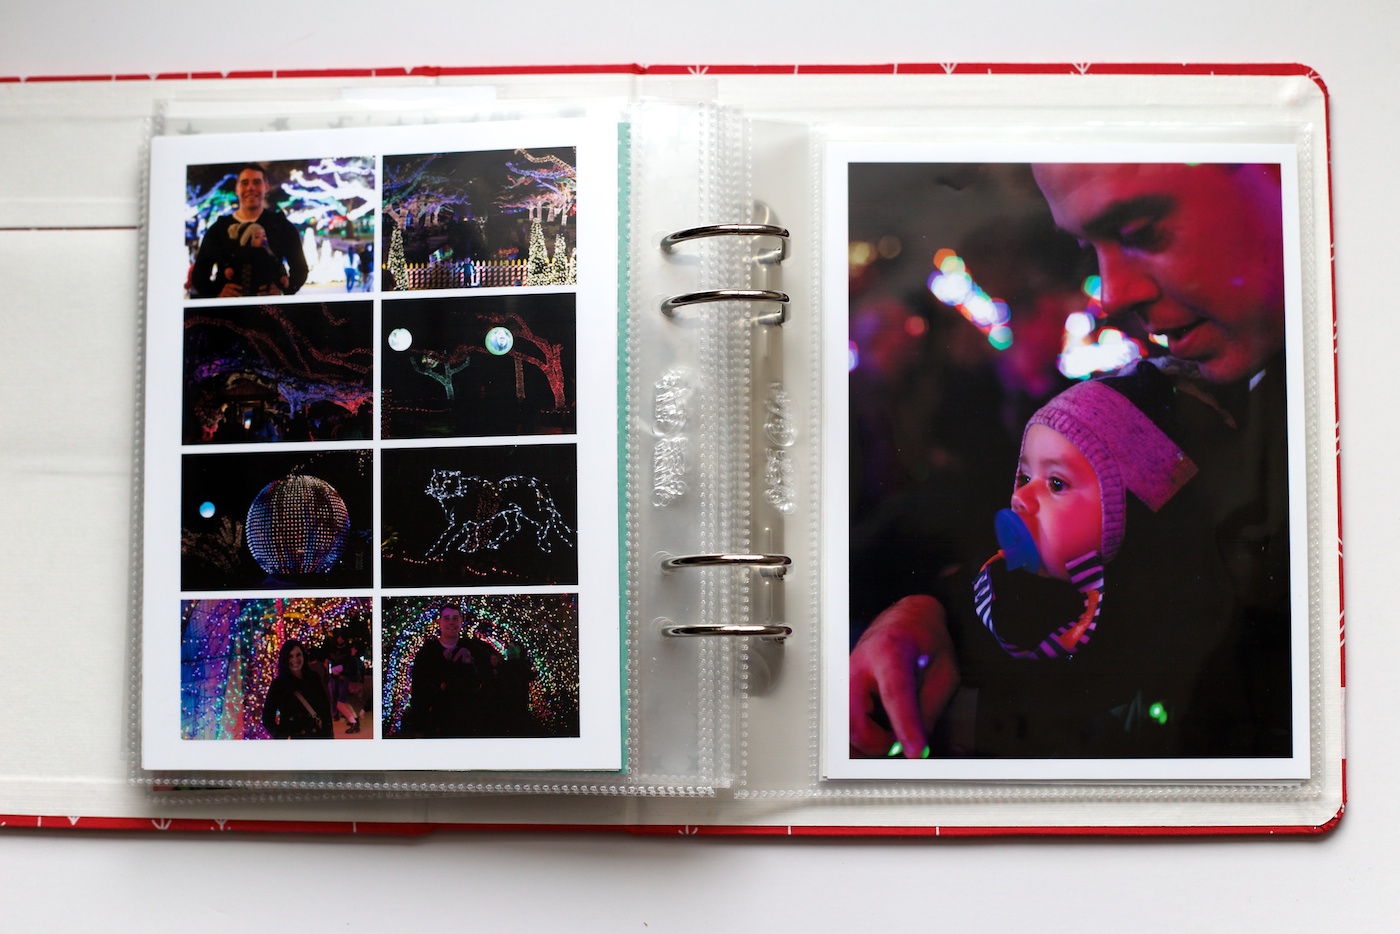
On one cold, wintery day in January 2009, my husband Adam and I drove the two hour trek from Colorado Springs to Loveland, CO so he could go skiing while I relaxed in the lodge. Strapping sticks to my feet so I can careen down the hill with snow blowing in my face is not this California-girl’s idea of a good time. 

While I was sitting in the lodge, laptop out, Lady Gaga playing in my headphones, I started working on a scrapbooking layout. When I started, I didn’t have a clear picture in mind of what I wanted my story to be so, as I often did at the time, I started playing around with papers and elements until eventually an idea came to me.

“Hmm, what if I use these little paper strips for a top ten list?”

I decided on a quick list of things I loved at the time and titled it “January 2009 Faves.”

How One Day and 35 Layouts Changed the Way I Scrapbook | NettioDesigns

I loved it.

I loved that it captured a snapshot of my life.

I loved that the design and colors felt like me.

But most of all I loved how easy it was to put together. As someone who tended to stress about every word of journaling she wrote like she was being graded on an English essay, I loved how easy a top ten list of my favorite things was to write.

I had an idea: what if I did one of these every month for the entire year?

While I wasn’t great at finishing year-long projects, I decided to give it a go. To keep things simple I set a few loose guidelines to follow every month:

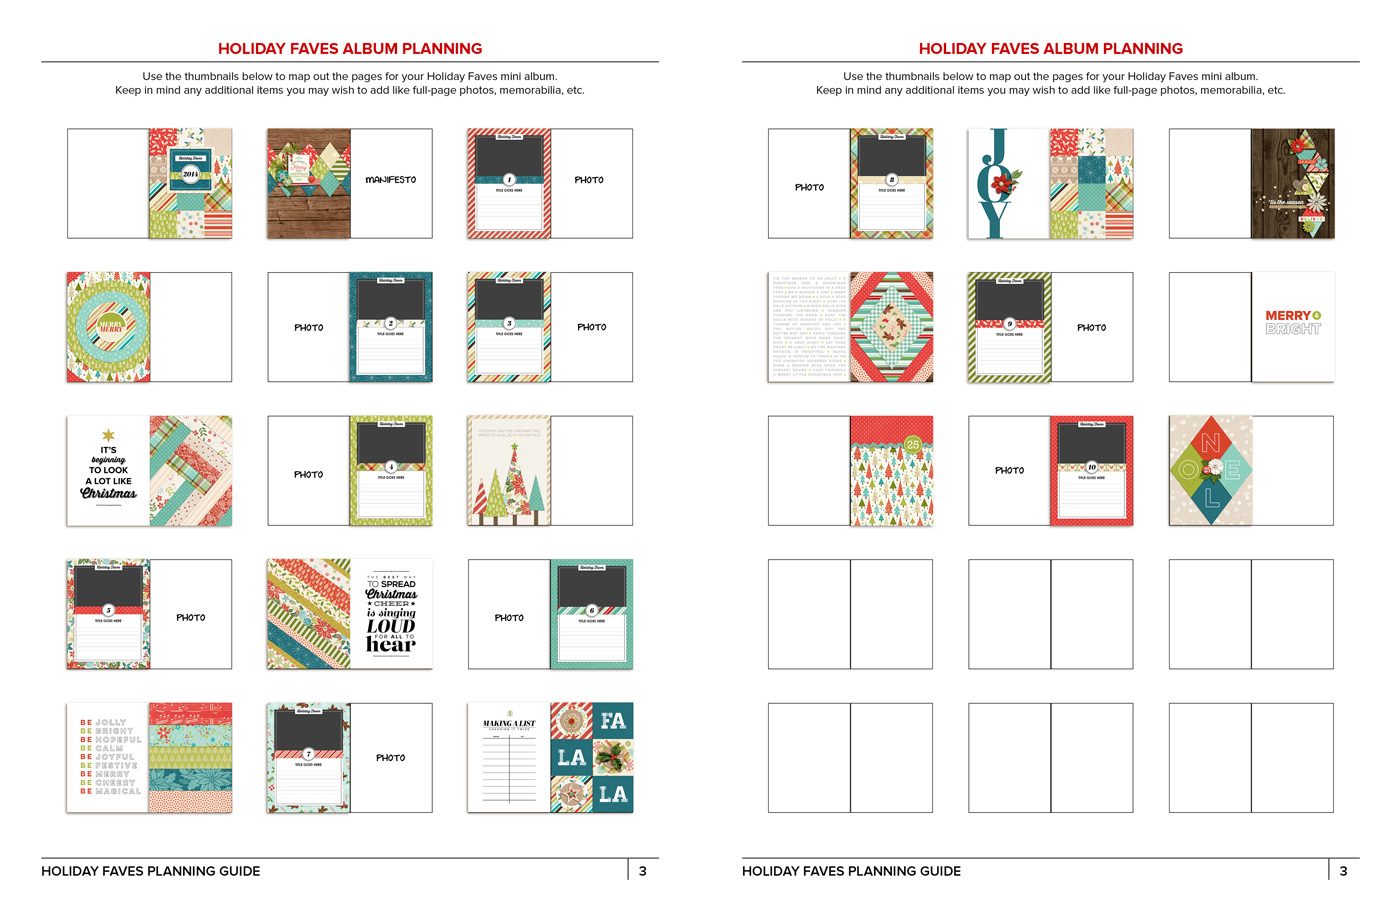
  • My list had to include exactly ten items – no more, no less.
  • Journaling had to be in list form but numbers were optional.
  • The title for the layout had to include the month followed by the word FAVES.
  • Each layout had to include a NEW self-portrait taken during that specific month.

Everything else was entirely up to me – color, design, kit, etc.

In February I scrapbooked my February Faves layout. Then March, April, May and before I knew it was November.

In the rush of the holidays I missed December. But overall it was still a win in my book.

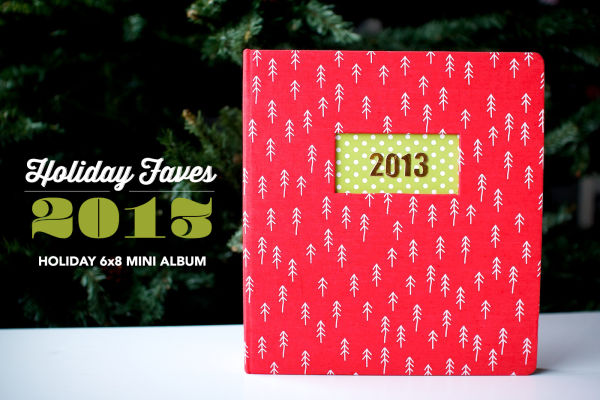
In 2011, I challenged myself to complete the Faves again. And then again in 2013. Each time keeping the rules the same but pushing myself to think outside of my own box with the design.

How One Day and 35 Layouts Changed the Way I Scrapbook | NettioDesigns

Thirty-five layouts later, the Faves layouts are still hands-down some of my most favorite layouts ever. They added exactly what my scrapbooking albums needed: a consistent story, a snapshot of my life and a healthy dose of creative design.

What’s more, the Faves remind me time and time again that telling your personal story doesn’t have to be hard.

It’s easy to think you need to reinvent the wheel each time but you don’t. In fact, when you have a clear plan for your layouts, your mind is free to be more creative, not less.

Instead of racking your brain or searching through photos for a new idea each time, you can focus on the fun, creative side of telling your personal story.

And that’s always a fave in my book.

Next week I’m going to be opening the doors for the 2015 edition of the Faves: The Faves Project: Monthly Faves.

If you’re in need of a new creative challenge, want to get more of YOU in your scrapbooks or just feel like you’re unsure what to scrap about and want to know more: get on the exclusive Faves Project list.

You’ll be the first to hear when The Faves Project opens.

How do I purchase Levitra without going to the doctor

POSTED IN the Faves, The Faves Project

My Word for 2015: OPEN

POSTED ON January 14, 2015 IN One Little Word

nettiodesigns_One-Little-Word-2015-open You know what I find fascinating about the whole One Little Word® concept? Some years a word will come to me loud and clear and other years my word will show up as quiet whisper. And I’m never quite sure in any year which one will happen.

Last year I skipped OLW because I was pregnant, just barely out of that exhausting first trimester and I just didn’t feel like I needed something else added to my plate. And really, there wasn’t any word that felt like it could capture all that 2014 had in store.

This year it’s the complete opposite. Back in November my OLW for 2015 came to me in a burst of inspiration and it was like YES, THAT IS MY WORD. Love when that happens.

Some of the words I’ve had in the past have been: focus, connect, adventure and determination, with adventure hands down being my favorite of the bunch so far.

So what’s my word for 2015?

OPEN

Why open?

Well I loved that it could be a noun, adjective or verb. I loved that it had a large variety of definitions that could be applied to my life in multiple ways.

But what I love most of all is that it’s a word outside my comfort zone.

Despite being an extroverted-leaning ambivert and running an online scrapbooking design business, I’m actually a pretty private person by nature. I’ve always been that way. I’m not an oversharer. I’m cautious about what I share to the point where I definitely over think it. I talk myself out of sharing things I’m excited about for way too many reason to share here, most of which I’m sure are totally lame.

Being open means being vulnerable and being vulnerable isn’t something I naturally do very well. But I think it’s time to change that.

Back in 2009 when Adam deployed to Afghanistan, I chose the word adventure. At the time I didn’t feel adventurous. I didn’t feel like an adventurer. But I knew it was what I needed to be to make it through that year.

And I loved it.

It pushed me outside my comfort zone in ways I hadn’t expected. I tried new things (like flying an airplane), got out and met new people and it was ultimately that year that gave me the courage to launch NettioDesigns.

It was a word that stuck with me ever since. The quote you find at the bottom of this website is there because of that word. It changed me, became a part of me, and I’m feeling hopeful that this year OPEN will do the same.

As part of that I decided this year instead of taking Ali’s One Little Word class, I would choose three goals/intentions to focus on with my word this year.

Here is my list:

1) OPEN book

At the top of my list for my word this year is to share more. I want to push myself to be an open book, not necessarily to the point of over sharing but I would love to be more open about why I do what I do and what lessons I’ve learned especially when it comes to running a creative business.

I know I’ve learned so much from people who’ve been open with me that it’s high time I return that favor.

2) OPEN to new ideas

This past year felt like a bit of a lost year for me both creatively and with my business. Part of that had to do with having a baby midway through the year and adjusting to motherhood and part of it had to do with me simply ready for something new.

What that new thing is, I don’t know yet, but this year I want to find out. I want to be open to new ideas, move outside my existing bubble and play, experiment, and try new things to see what shakes out.

3) OPEN to new adventures

Our family of three is making a pretty major change mid-year – as of May 2015, we will no longer be a military family. This is something we’ve be thinking about and working towards for several years and with Ryan being so young now feels like the time to go for it. We’re ready to make this leap but it’s still a little nerve wracking to leave behind the only lifestyle you’ve known for the past nine years.

So my goal this year is simply to keep an open mind and be open to whatever comes next. Really that could be the theme for this entire year which is why this word feels so perfect. I’m excited to see how it plays out!

What about you? Have you chosen a word for 2015? I feel like good things happen in years that end in multiples of five so I’m feeling pretty optimistic about 2015.

One Little Word® is a year-long project created by Ali Edwards. You can learn more about it on her site here.

Benefits Of Using Canadian Pharmacy

POSTED IN One Little Word

Holiday Faves 2014 | Faves No. 6-10

POSTED ON January 12, 2015 IN Holiday Faves 2014

nettiodesigns_Holiday-Faves-2014-intro-2

The last two days leading up to my trip to California saw me furiously trying to finish my Holiday Faves mini album. At the time I’d wished I hadn’t set myself a deadline of Dec 29th to get it done because I sure could have used a little more time, but now that I’m on the other end of things, I’m super happy I finished this project before the start of the new year.

Since I shared the first half of my album before I left, I figured today would be a good day to share the second half of the album with you.

Back of Fave No. 5 | We left off at Holiday Fave No. 5 so the accent page on the left is on the back of the last page of Fave No. 5. On the right I added a foundation page that included a photo from December 15th when Ryan turned six months old. I didn’t worry about it being truly chronological in terms of the order of my Faves – I just added it in where I felt the album needed some more pizazz.

nettiodesigns_Holiday-Faves-No910-9

The “six months” title I added using some small letter stickers from Basic Grey.

nettiodesigns_Holiday-Faves-No910-10

On the back of the six months page, I added another accent page. Then to separate Holiday Fave No. 6 a bit, I added a star transparency with a gold star sticker on it.

nettiodesigns_Holiday-Faves-2014-18

Behind the transparency is the first photo for Fave No. 6, which I used as a pseudo title page for the section. (This photo was taken before I added in the accent page so ignore that it doesn’t quite match what’s seen above.)

nettiodesigns_Holiday-Faves-No68-3

Holiday Fave No. 6 | Holiday Fave No. 6 was our trip to the Houston Zoo Lights event. It was our first time going and it was so neat!

nettiodesigns_Holiday-Faves-No68-4

Holiday Faves journal card with digital accents.

nettiodesigns_Holiday-Faves-No68-5

I had a lot of photos from this event so I used an eight photo collage template as well as multiple 6×8 photos. Photo collages definitely take a lot more time to put together but man do I love them once they’re done.

nettiodesigns_Holiday-Faves-No68-6

On the back of the 6×8 photo, I added another accent/foundation page spread so I could include a photo of Ryan’s stocking. I’ve been working on it all fall but I finished it the night of Christmas Eve, just in time for Santa to arrive.

nettiodesigns_Holiday-Faves-No910-12

The label tag I added in Photoshop (an old product of mine no longer available) and the Joy wood chip is from Studio Calico.

nettiodesigns_Holiday-Faves-No910-13

Holiday Fave No. 7 | Holiday Fave No. 7 was my Grandma’s Cinnamon Rolls. This is something my Grandma Beryl used to make every time we came to visit but this was my first attempt at making them.

nettiodesigns_Holiday-Faves-No910-14

To hold more photos I added a pocket page protector on the right and used one of the 4×6 Holiday Faves Themed cards to hold a copy of the recipe.

nettiodesigns_Holiday-Faves-No910-15

On the back are more photos of the process and an accent page.

nettiodesigns_Holiday-Faves-No910-16

Holiday Fave No. 8 | Holiday Fave No. 8 was our trip to Moody Gardens for the Festival of Lights holiday display. Moody Gardens is right along the water in Galveston so they had a bunch of ocean-themed light displays right on the beach. It was neat!

nettiodesigns_Holiday-Faves-No68-8

On the large 6×8 photo I added a Kelly Purkey sticker. I have to say, I love the ease of adding pre-done stickers, but the digital scrapbooker in me still often wishes I could resize/recolor things.

nettiodesigns_Holiday-Faves-No68-9

Since I had a bunch of photos from this event, but didn’t want it to end up looking to similar to Fave No. 6,  I decided to try something different and take one of the photos and increase the size of it to 12×5 inches so it spanned across the page. Then I added a few smaller square photos along the bottom. I really like how it turned out!

nettiodesigns_Holiday-Faves-No68-10

Gift List | On the left I added a few more photos from Moody Gardens and then on the right I made a little pocket to hold a list of gifts I purchased for family.

nettiodesigns_Holiday-Faves-No910-17

The paper for the list actually came from a Gap shopped bag but I loved the stripes so I trimmed it out to use in my album. To make the pocket, I trimmed down a 6×8 page protector and closed up the edge with some washi tape.

nettiodesigns_Holiday-Faves-No910-18

On the back is a scaled down version of the Making A List page, with a simple list of what I bought for everyone (and what Adam bought me). I love looking back at these sorts of lists since I rarely can remember what everyone got.

nettiodesigns_Holiday-Faves-No910-19

Holiday Traditions | On the back of the Merry & Bright accent page, I added another accent page and a page protector to hold a few more photos and the Holiday Traditions card.

nettiodesigns_Holiday-Faves-No910-20

The traditions card talks about the Baby’s 1st Christmas ornament I bought for Ryan and I admit – I kind of wish I’d made this a full Fave instead. But I was running out of Faves at this point so I decided to add it into the album this way instead.

nettiodesigns_Holiday-Faves-No910-21

On the back is another new ornament we got this year.

nettiodesigns_Holiday-Faves-No910-22

On the right is the start of Holiday Fave No. 9. I thought it needed a bit more division so I added a woodgrain transparency in front of it.

nettiodesigns_Holiday-Faves-No910-23

Holiday Fave No. 9 | Holiday Fave No. 9 was our Christmas Eve walk around the neighborhood. As sort of an intro page, I added a 6×8 photo I took on the walk.

nettiodesigns_Holiday-Faves-No910-24

On the photo I added some gold stars in Photoshop before printing (from Kristin Cronin-Barrow’s A Fairytale Christmas kit).

nettiodesigns_Holiday-Faves-No910-25

My Fave No. 9 journal card spread.

nettiodesigns_Holiday-Faves-No910-26

On the back is a two-photo collage followed by an foundation page with a photo from our Christmas Eve dinner (tamales!). This too could have been a Fave on it’s own but I was running out of room for Faves by this point!

nettiodesigns_Holiday-Faves-No910-27

I added the label in Photoshop before printing and then added the gold star after.

nettiodesigns_Holiday-Faves-No910-28

On the back of the tamale page is an accent card followed by another transparency and the start of Holiday Fave. No 10.

nettiodesigns_Holiday-Faves-No910-29

I wasn’t thinking when I trimmed out this transparency – I should have trimmed it larger than 6×8 so I could add it directly into the album. But I decided to add it directly in a page protector instead and I think it worked out fine.

nettiodesigns_Holiday-Faves-No910-30

Holiday Fave No. 10 | Holiday Fave No. 10 is Christmas Day so the first page is a 6×8 photo of our tree with all the presents.

nettiodesigns_Holiday-Faves-No910-31

For Christmas Day I used the Holiday Faves No. 10 journal card, followed by several pocket page protectors.

nettiodesigns_Holiday-Faves-No910-32

The photos kind of loosely follow the flow of our day: opening presents in our pajamas, putting together Ryan’s new toys, him playing. If you’re wondering about the sock, that’s a Baby’s First Christmas sock from Adam’s first Christmas which my mother-in-law sent to Ryan.

nettiodesigns_Holiday-Faves-No910-33

I decided to leave one pocket open so you could see through to the next page. The clear transparency card is from Kelly Purkey and the wood stars are from Studio Calico. I thought I might have to seal the pocket closed to keep the stars from falling out but so far they’re staying put.

nettiodesigns_Holiday-Faves-No910-34

More photos and a piece of the wrapping paper from Santa. On the right I included a post-opening aftermath photo (taken holding the camera high above my head, haha) and photo showing the majority of Ryan’s gifts.

nettiodesigns_Holiday-Faves-No910-35

I added the text in Photoshop before printing.

nettiodesigns_Holiday-Faves-No910-36

On the back are a few more photos from our Christmas breakfast and cookie gorging, followed by a family photo in front of our tree.

nettiodesigns_Holiday-Faves-No910-37

I added a hashtag brush from Ali Edwards followed by a little text about the photo.

nettiodesigns_Holiday-Faves-No910-38

And a final accent page to close out the album!

nettiodesigns_Holiday-Faves-No910-39

The very last thing I did to finish up the mini album was go back to the beginning and fill in a few sections I had skipped before, like the Holiday Decorations section. I’d originally planned to make this section a bit more extensive but our weather didn’t cooperate with photo taking so I just snapped a few and called it good.

nettiodesigns_Holiday-Faves-No910-1

This page has the only handwritten journaling card in the album, which I don’t love but I’m went with it to get it done.

nettiodesigns_Holiday-Faves-No910-2

On the back of the page protector I added a few more photos and some accent details.

nettiodesigns_Holiday-Faves-No910-3

A picture to see where it fits in the album – the page on the right is the start of Holiday Fave No. 3.

nettiodesigns_Holiday-Faves-No910-4

The second set of photos I went back to add to was Holiday Fave No. 3: Ryan’s 1st Christmas. The 2×2 photo pocket page protector on the left was largely empty before so I printed out about six more photos and added some details and patterned paper to it.

nettiodesigns_Holiday-Faves-No910-5

I’m a fan of squares so I really love how this page turned out! It may be one of my favorites in the album.

nettiodesigns_Holiday-Faves-No910-6

A look at the back of the page protector. The through the years card is a 3×4 letterpressed card from Kelly Purkey that I trimmed down to fit into the pocket.

nettiodesigns_Holiday-Faves-No910-7

This is how the full spread looks now.

nettiodesigns_Holiday-Faves-No910-8

And that’s pretty much it for my Holiday Faves 2014 Mini Album! If you’d like to see the full album all together, here’s a slideshow that shows how all the pages flow together.

Holiday Faves 2014 Mini Album Slideshow

Overall, I’m feeling really good about how this album came together. It was a sprint to the finish to get it done at the end of December but I’m so glad I was able to move into 2015 with this project in the done pile. Until next year, Holiday Faves.

Missed Holiday Faves No. 1-5? You can check out the first half of my album here.

Benefits Of Using Canadian Pharmacy

POSTED IN Holiday Faves 2014

Holiday Faves 2014 | Faves No. 1-5

POSTED ON December 22, 2014 IN Holiday Faves, Holiday Faves 2014

nettiodesigns_Holiday-Faves-2014-intro-15

Behind the scenes here at NettioDesigns HQ, I’ve been spending my days hanging out with an awesome group of ladies as part of the first ever Holiday Faves Mini Album Project Class. Those in the class have seen the progress I’ve made on my Holiday Faves album every week, but since Christmas is fast approaching, I wanted to share the first half of my Holiday Faves mini album here with you.

Holiday Faves is one of my favorite yearly scrapbooking projects and this year has been no exception. I skipped it last year with being pregnant so I’ve loved getting back into it again this year.

For my album this year I am using a 6×8-inch Studio Calico Handbook (purchased last year) along with the 6×8 mini album templates I created for the Holiday Faves Project Class.

nettiodesigns_Holiday-Faves-No12-1

Inside Cover Page | One new thing I’ve done this year is put all my pages in page protectors, which is nice because it makes it easy to move pages around and protects the pages should Ryan want to look through it one day.

nettiodesigns_Holiday-Faves-No12-2

Back of cover page | On the back of the inside cover page, I have an accent page followed by a journaling card template for my holiday manifesto. This is basically a “why I made this album” page but I find it’s a good way to kick off the album and I love looking back at my why’s each year. I also try to include our ages and where we live since as a military family it tends to change often.

nettiodesigns_Holiday-Faves-No12-3

Holiday Fave No. 1 | Holiday Fave No. 1 is the Christmas countdown calendar I finally finished earlier this year (after two years!). For the photo page I used one of the photo page templates and added a gold star from Studio Calico for some dimension.

nettiodesigns_Holiday-Faves-No12-4

On the back of the Fave No. 1 spread is another accent page, followed by a 4×6 photo attached to a gold glitter scrapbooking paper from Teresa Collins. I love all the digital pages, but I also find adding actual scrapbooking paper and physical elements into the album keeps things interesting.

nettiodesigns_Holiday-Faves-No12-5

I’m not a huge embellisher with paper (I’d probably be the most boring paper scrapbooker ever, haha) but I did add a few details to this page. At the bottom I added a label – the star is from Studio Calico and the sticker label is from Kelly Purkey.

nettiodesigns_Holiday-Faves-No12-6

At the top I added a little Merry wood chip piece from Studio Calico.

nettiodesigns_Holiday-Faves-No12-7

Holiday Fave No. 2 | Holiday Fave No. 2 is our “watch Elf and drink hot chocolate night.” It was late and the light wasn’t great but I decided not to overthink it and just went with the photos I had. Holiday Faves is much more about the story than it is perfectly staged photos.

nettiodesigns_Holiday-Faves-No12-8

On the photo, I added a digital stamp from Ali Edwards to fill up some of the white space from the TV screen.

nettiodesigns_Holiday-Faves-No12-9

And at the bottom of the journal card I added some digital elements. I love digital elements because you can layer them to your heart’s content but they don’t make your page actually thicker like real elements do.

nettiodesigns_Holiday-Faves-No12-10

In between my journal card and photo page, I added a printed transparency of one of the Holiday Faves templates I designed.

nettiodesigns_Holiday-Faves-No12-11

On the second page of the Holiday Fave No. 2 spread I used a two photo page template to create a collage. I’m not going to lie – I’m not 100% happy with this page yet. I think it needs some embellishment of some kind but I couldn’t decide on something that wouldn’t interfere with the look of the transparency page, so for now I’m leaving it as is and figure I can always add to it later if I want.

nettiodesigns_Holiday-Faves-No12-12

One of the reasons I chose to create my Holiday Faves mini album as a hybrid album rather than a straight digital album this year is due to one big thing: pocket pages.

If you’ve been around scrapbooking the past year, you probably already know that pocket scrapbooking has become all the rage thanks to Project Life and those pocket-style pages have trickled down into smaller albums as well. The Studio Calico album I’m using includes a handful of pocket page protectors in various combinations of 3×4 & 4×6 pocket sizes and I plan to use these pages in a few different ways in my album.

Below is a look at the back of my Holiday Faves No. 2 page. For now the page on the left is blank but I plan to add a photo of our Christmas tree. On the right I plan to use the themed card to write a little bit about our decorations.

nettiodesigns_Holiday-Faves-No3-1

On the back of the pocket page (below left), I plan to add photos of our decorations. Since this will likely be our last Christmas living here, I want to make sure I capture all those details as part of my album.

Holiday Fave No. 3 | For Holiday Fave No. 3 I chose Ryan’s First Christmas since it’s a pretty big deal around here. To start the section, I made a sort of sudo title page featuring a cute photo of him.

nettiodesigns_Holiday-Faves-No3-2

One of my favorite things about his first Christmas is watching him experience everything for the first time. The looks on his face as he tries to figure out what in the world is happening is just priceless! So I plan to use another pocket page protector to hold a collection of those types of photos from the entire holiday season.

nettiodesigns_Holiday-Faves-No3-3

This pocket page has 2×2-inch squares and is by Simple Stories so it doesn’t quite fit into my album as is (it’s slightly taller) but I just punched new holes using my Crop-o-dile punch and it fits fine.

You can see I’ve kept it pretty simple for now but I plan to add more embellishments and details once I have a better idea of how many photos I’ll have all together. I’ll also likely live some of the pockets blank, or with small embellishments so you can see through to the journal card behind.

nettiodesigns_Holiday-Faves-No3-5

Once you turn the page protector you can see the Holiday Faves No. 3 journaling card with a photo of Ryan putting his very first ornament on the tree (with a bit of help, of course).

nettiodesigns_Holiday-Faves-No3-4

On the backside of the Holiday Faves No. 3 journal card, I added an accent page followed by a foundation page with a 4×6 photo on it.

nettiodesigns_Holiday-Faves-No45-1new-

The 4×6 photo captures where we were at exactly Dec 12, 2014 at 15:16 (aka 3:16), so 12-13-14 at 15:16. It’s only taken me a decade to capture a photo like this but since it’s the last one I’ll see in my lifetime, I figured I’d better get on it! The letter stickers are from Kelly Purkey and the gold star is from Studio Calico.

nettiodesigns_Holiday-Faves-No45-15

On the bottom of the photo I added a Kelly Purkey label tag with a little note about where we were. This is what I mean about my handwriting font being a little bit neater – the letters here are a wee bit wonky.

nettiodesigns_Holiday-Faves-No45-16
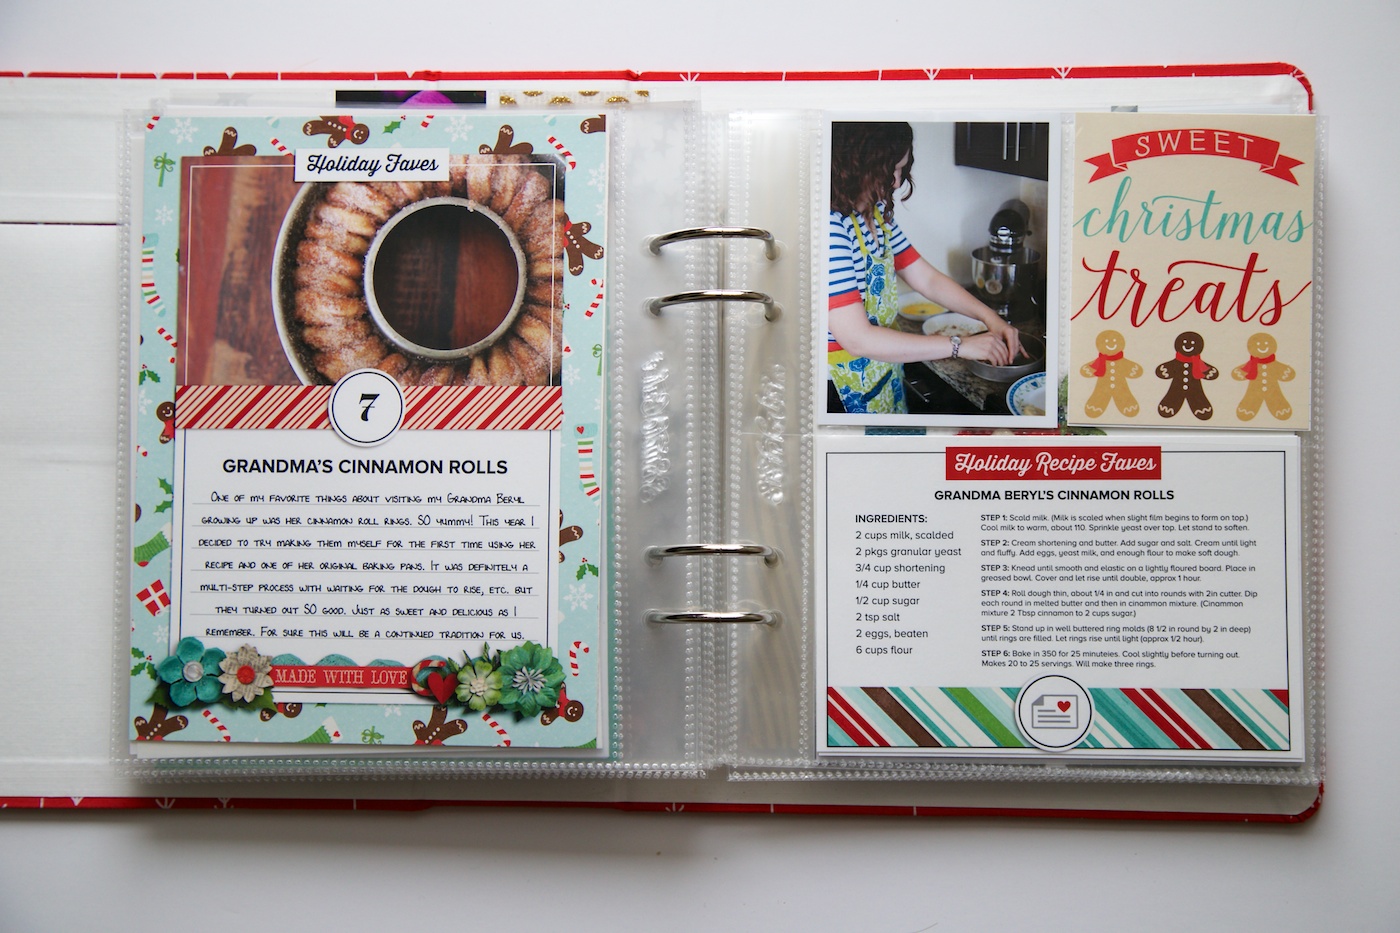
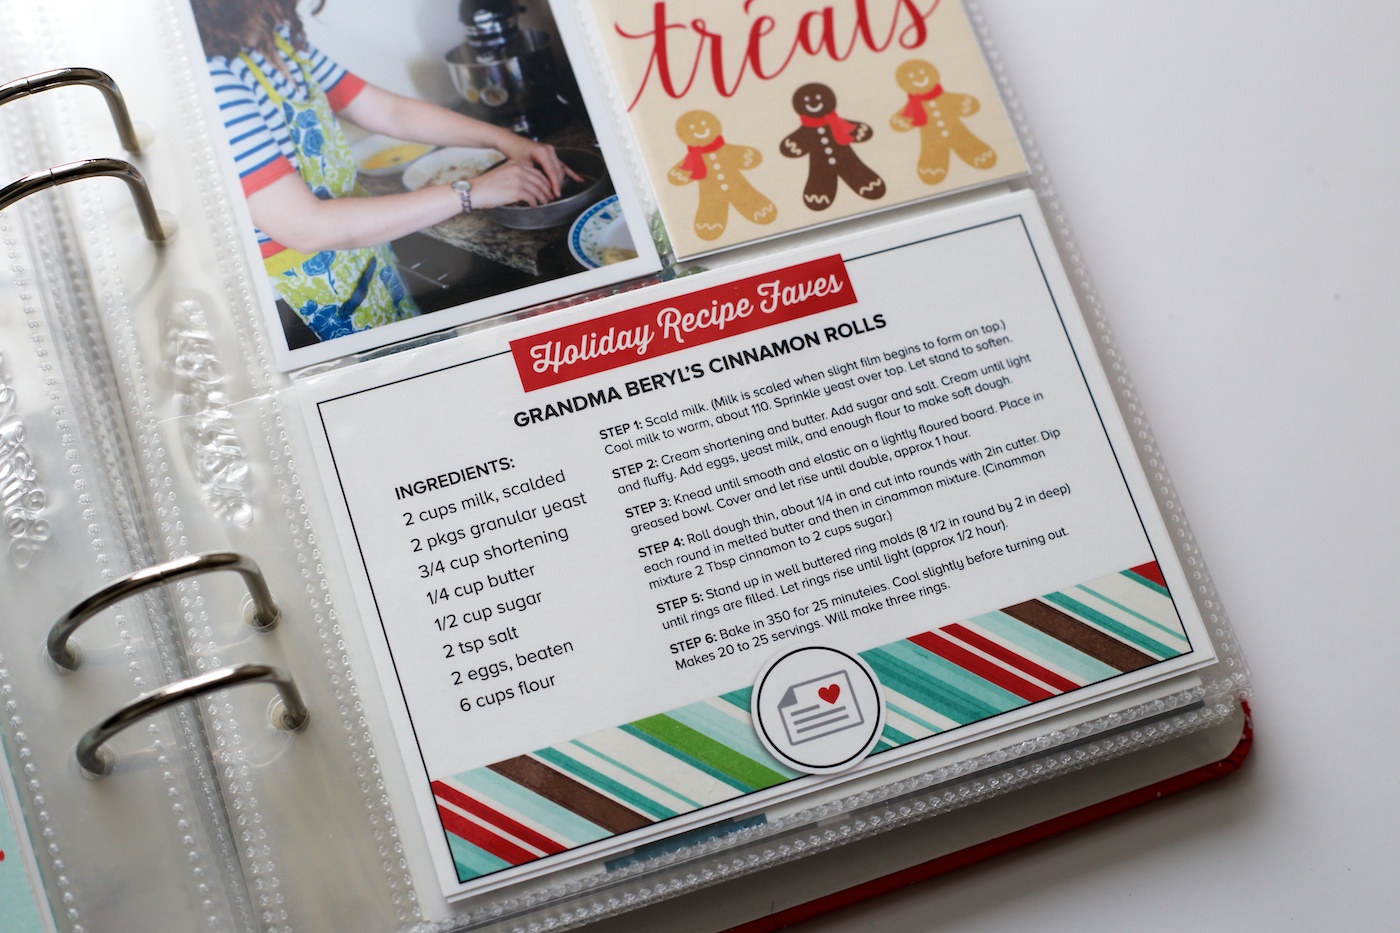
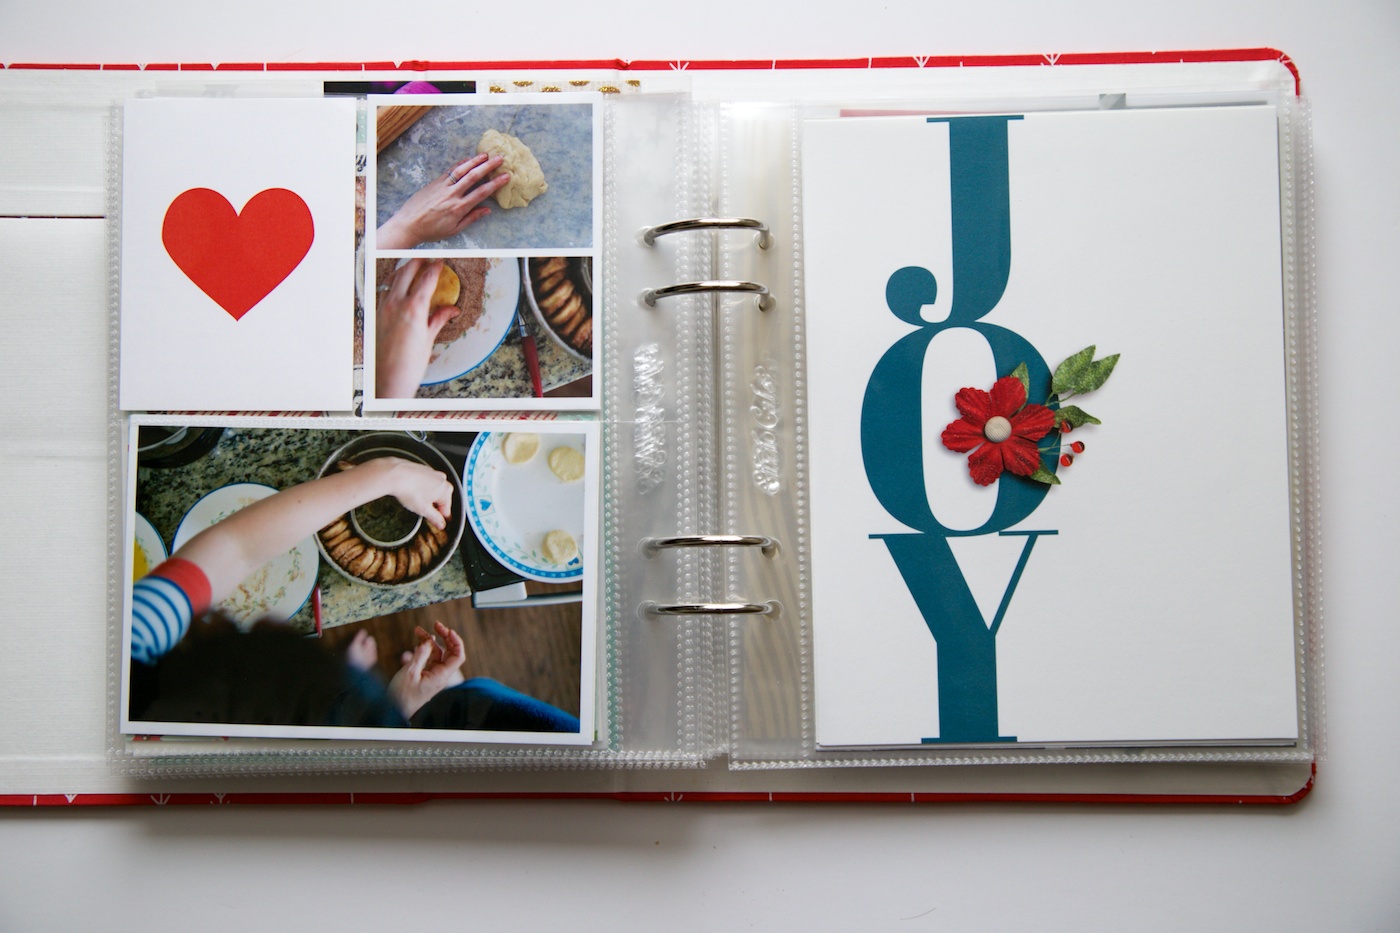
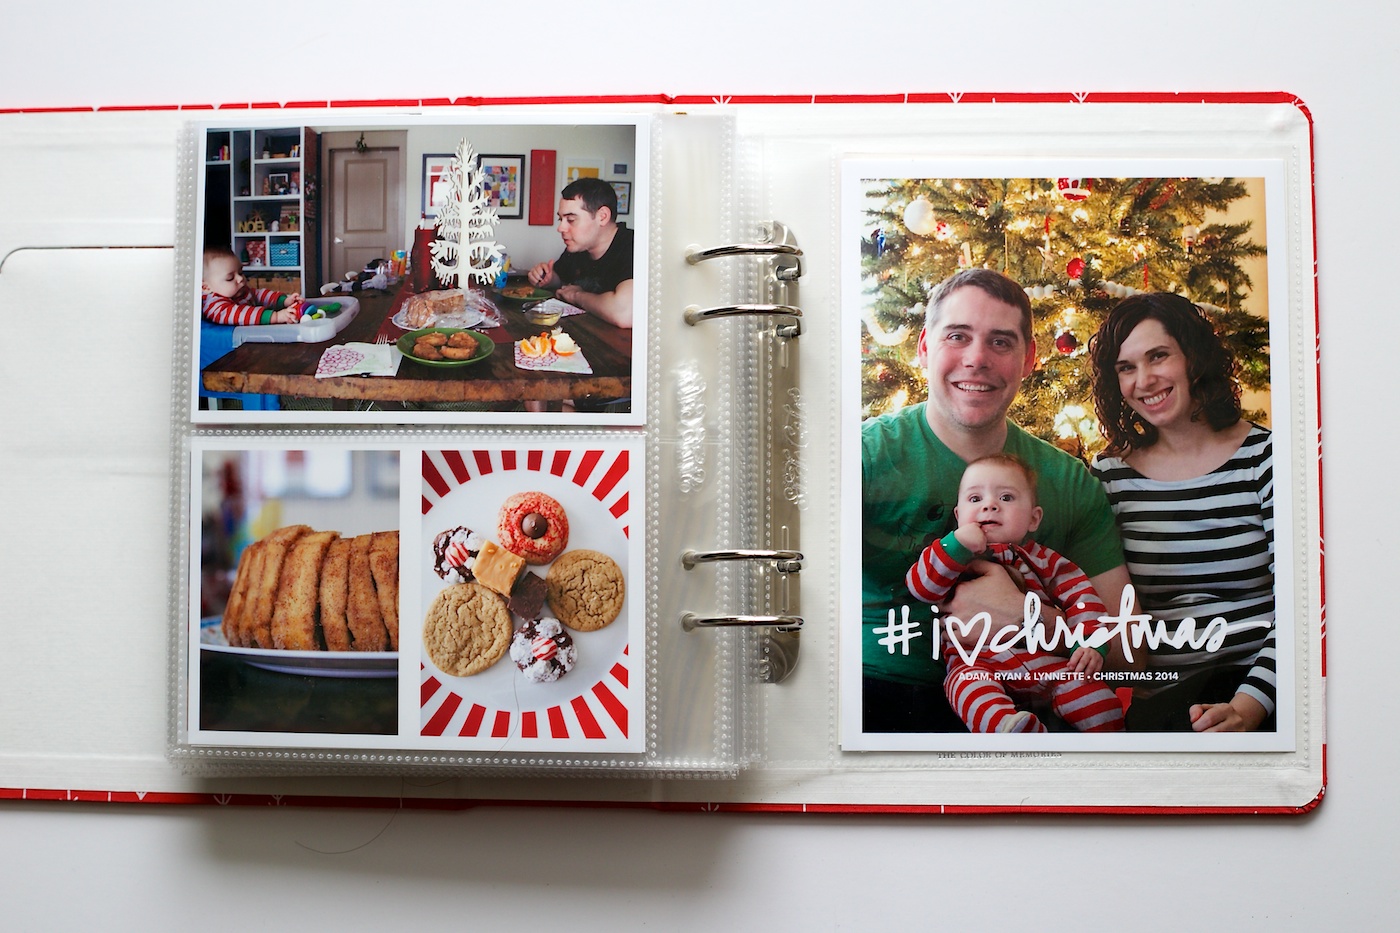
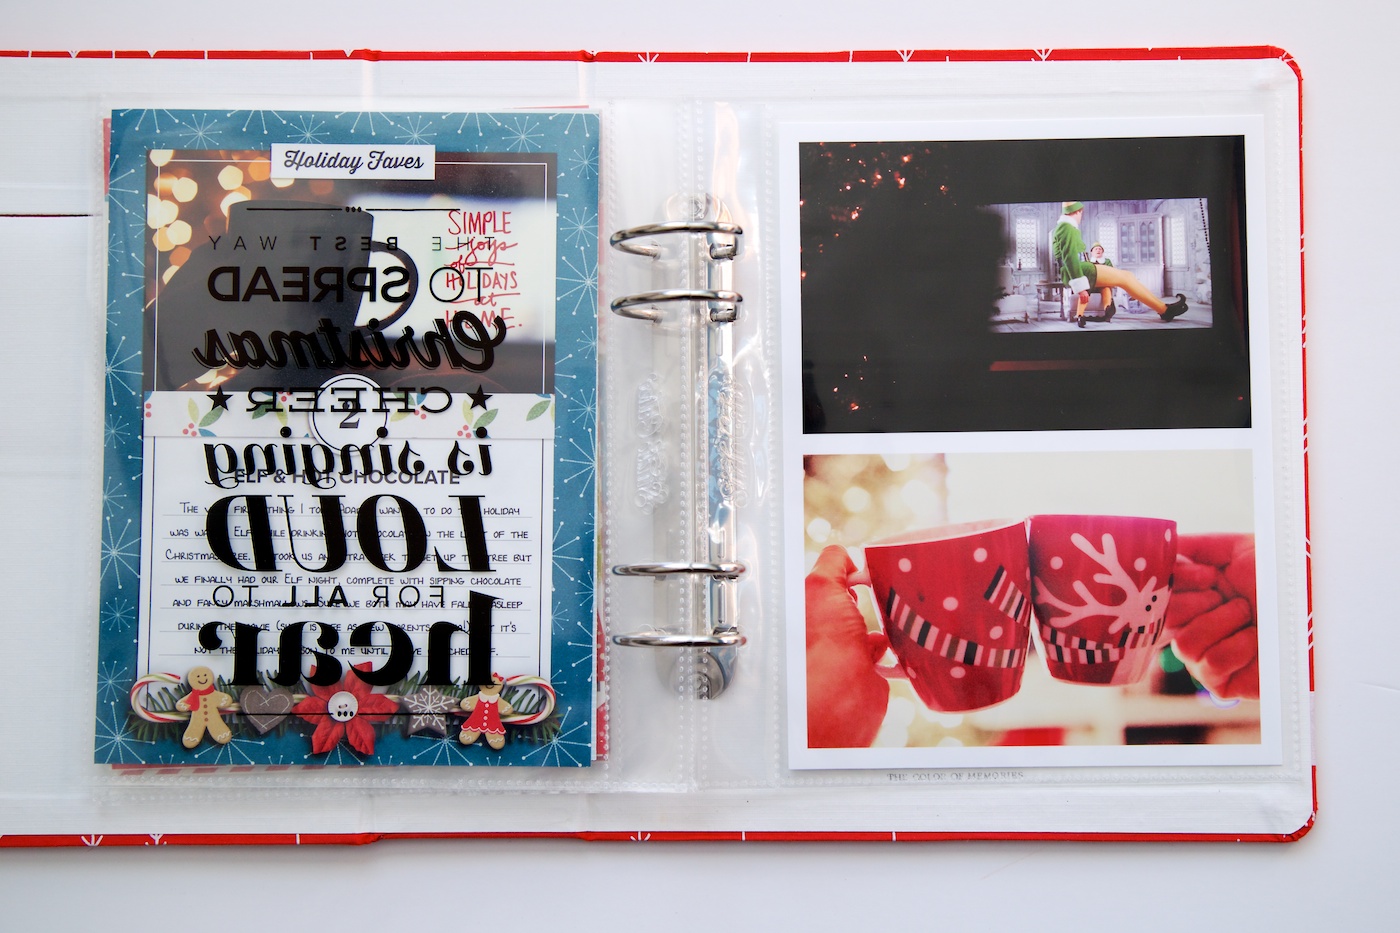
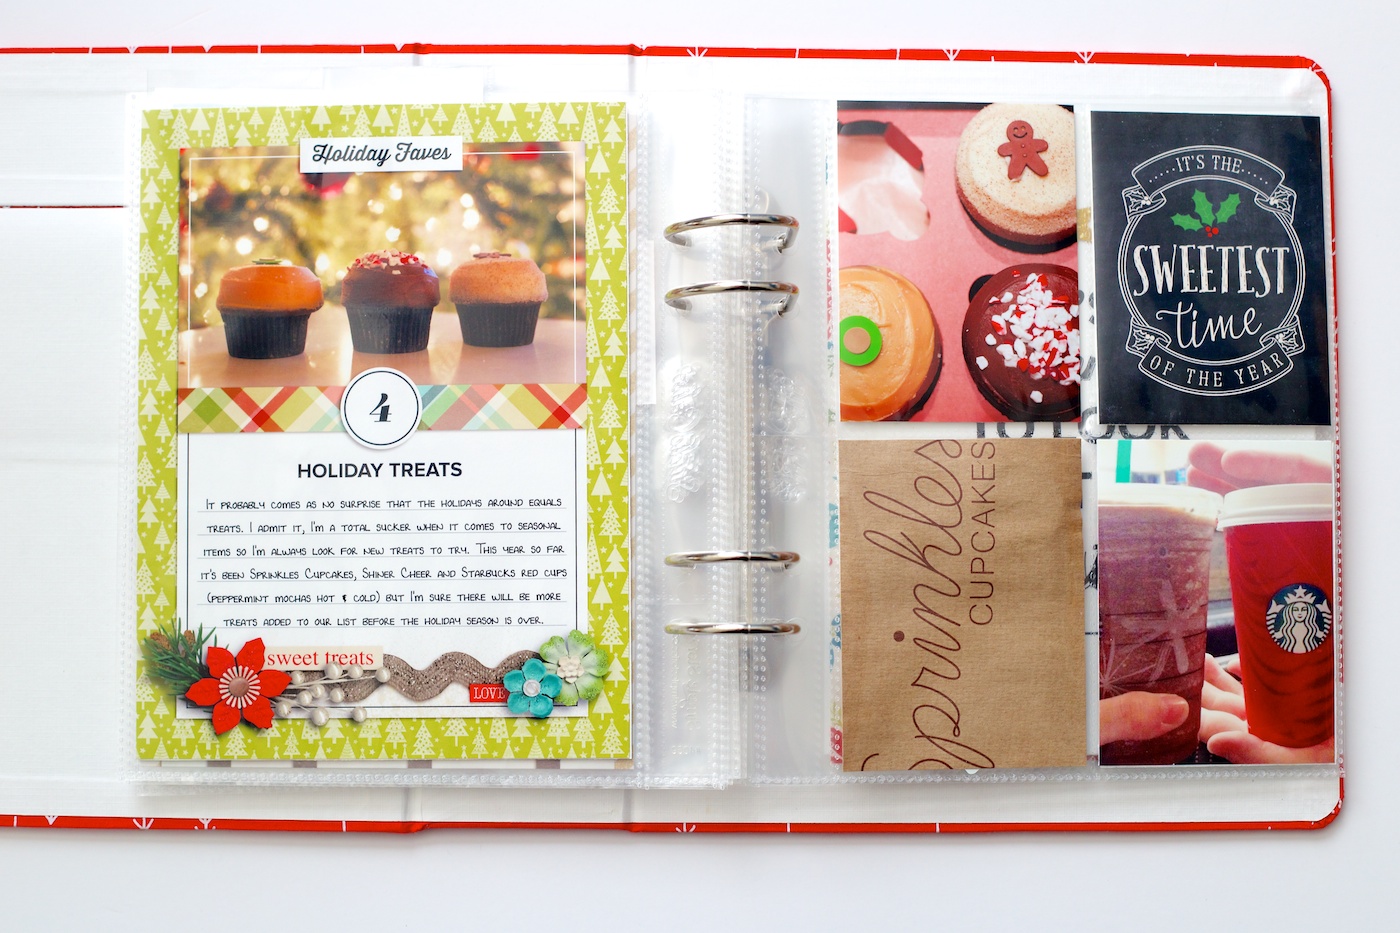
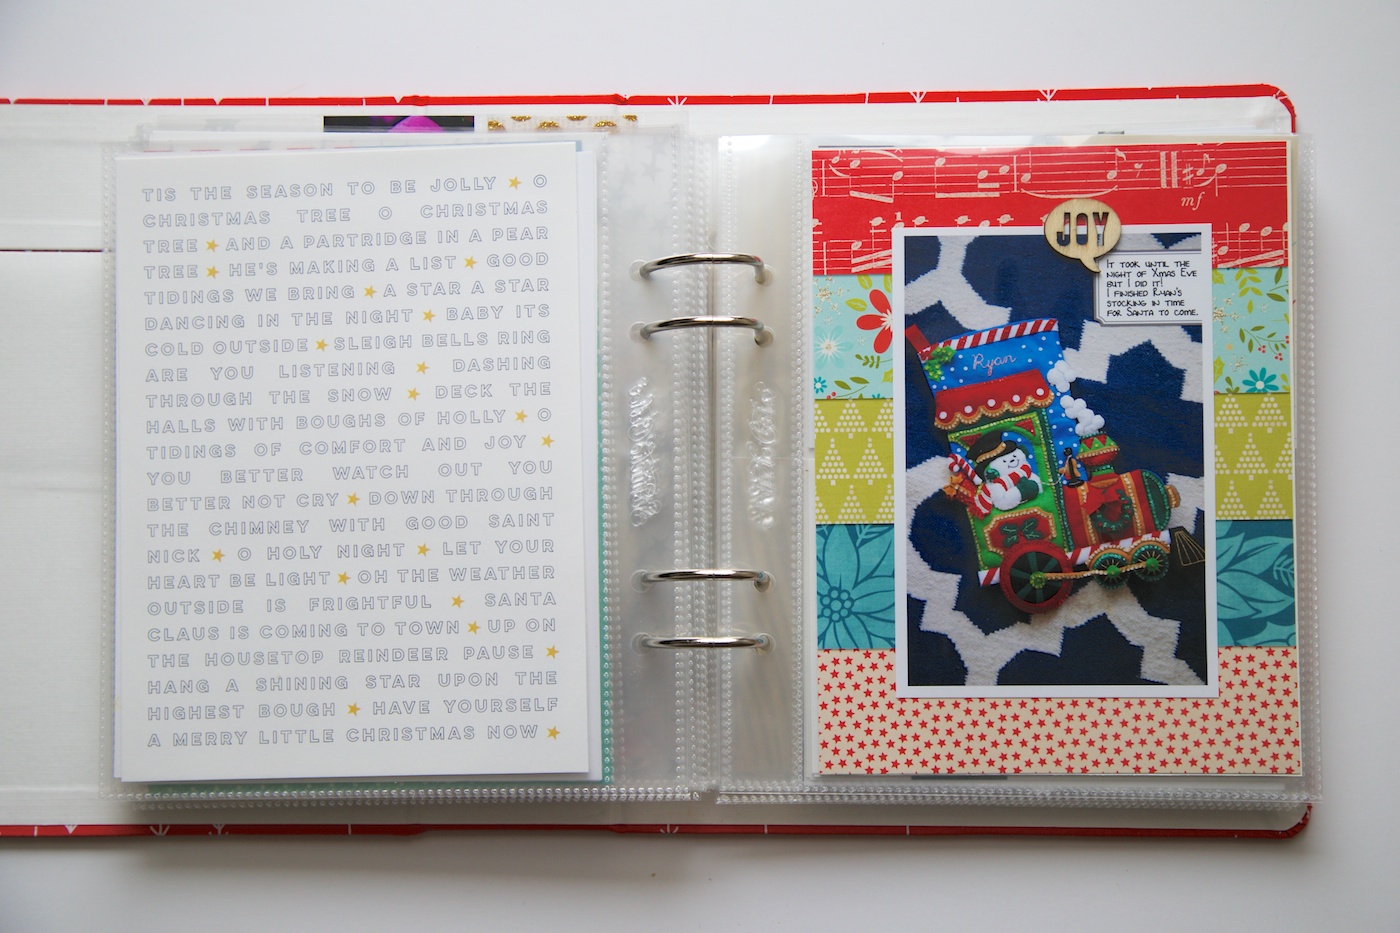
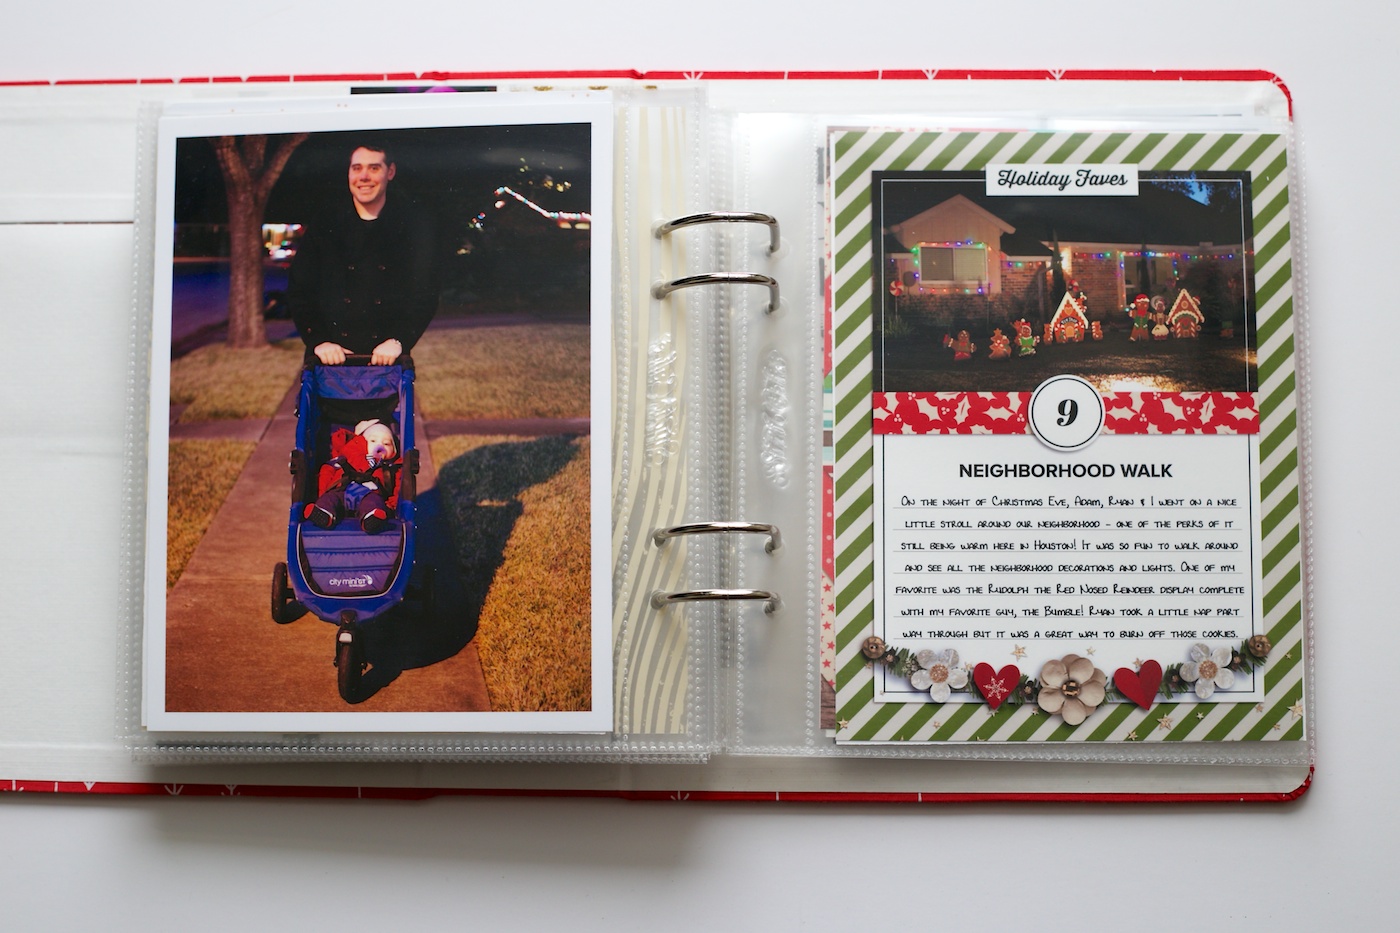
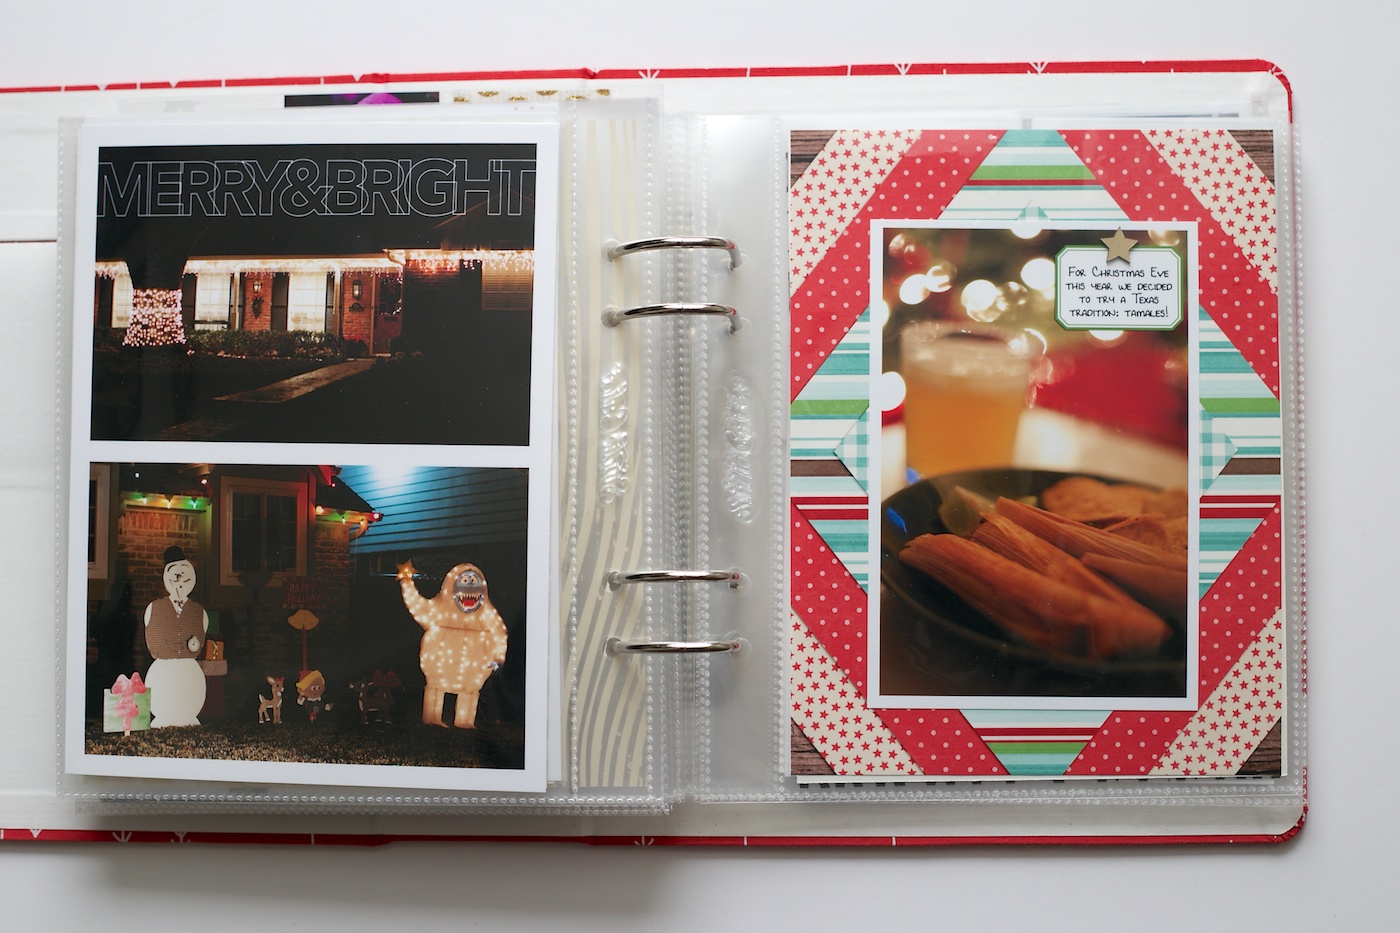
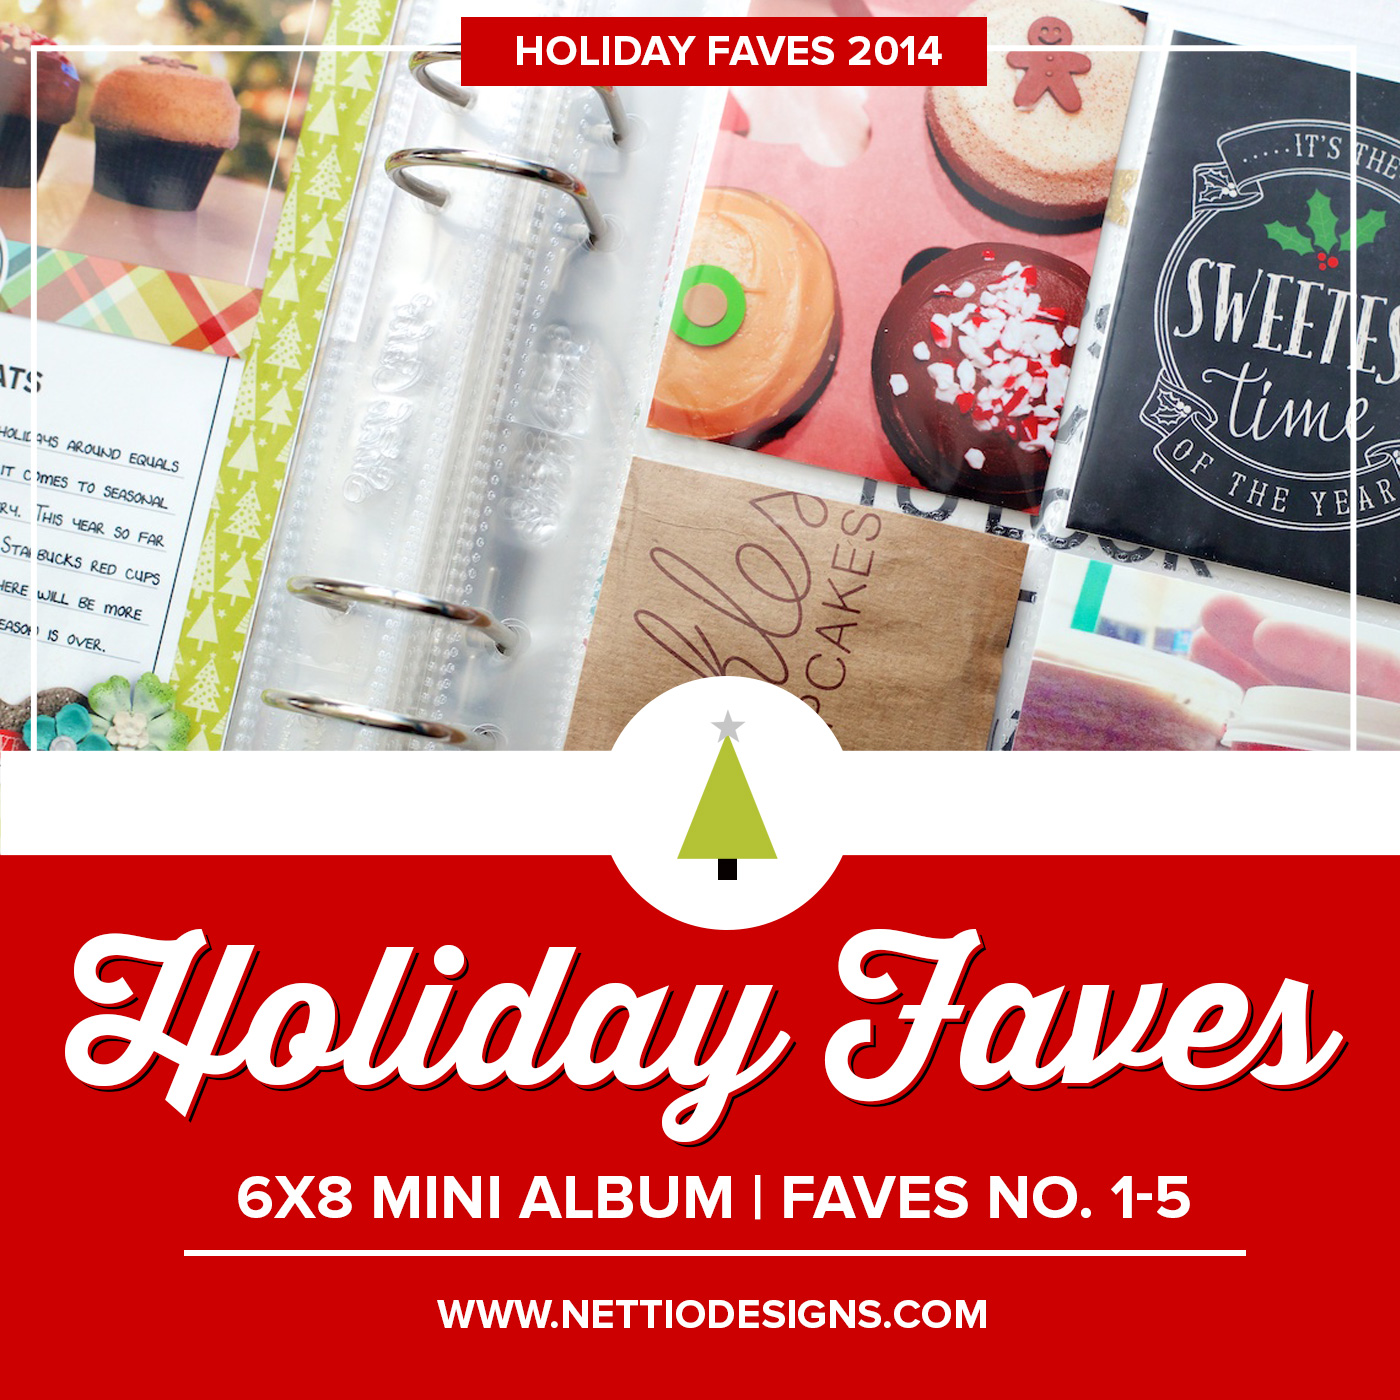
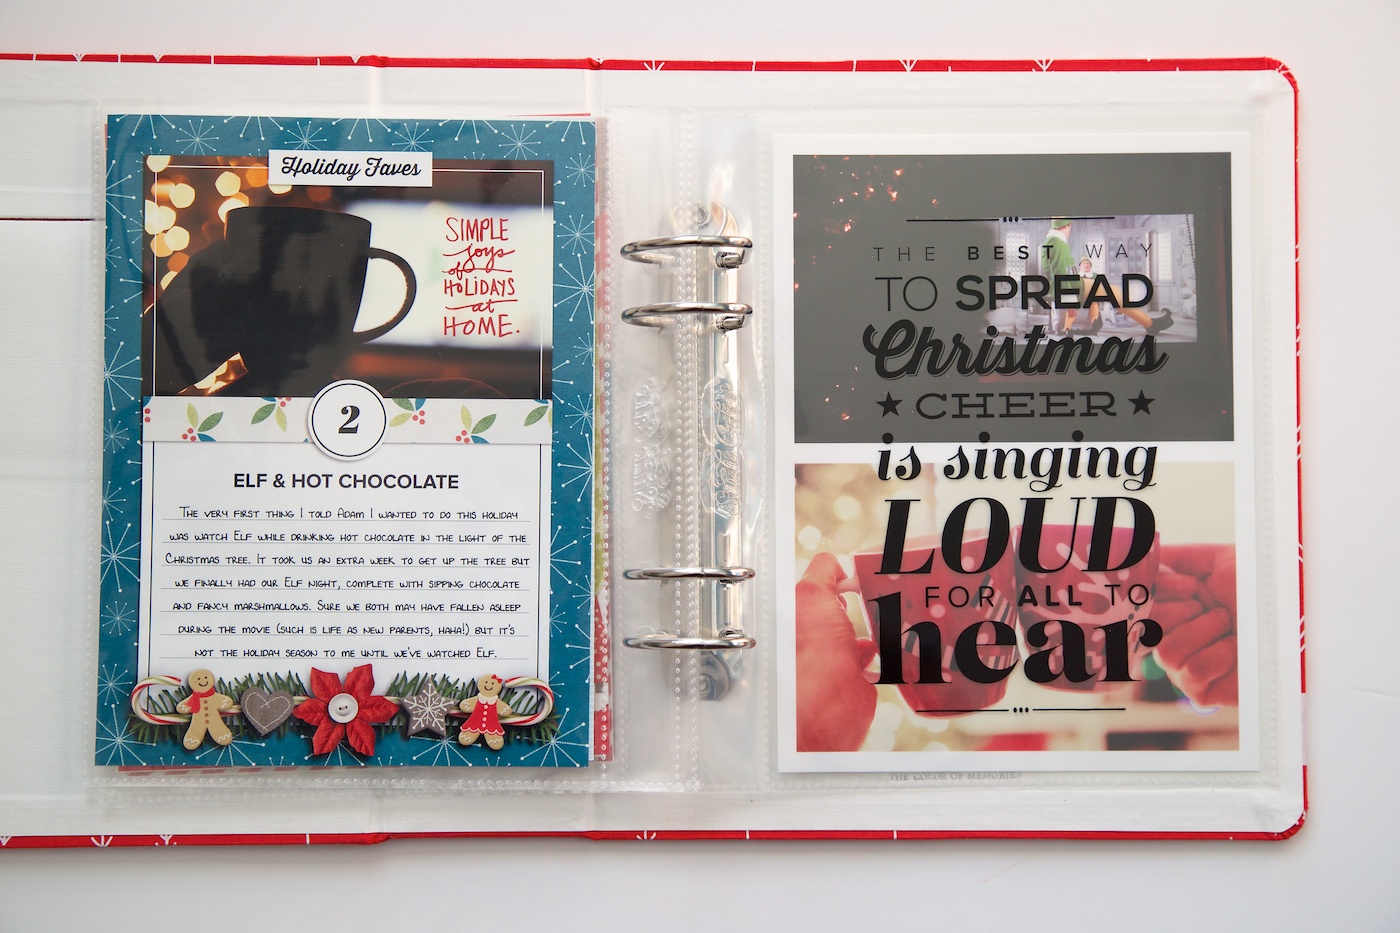
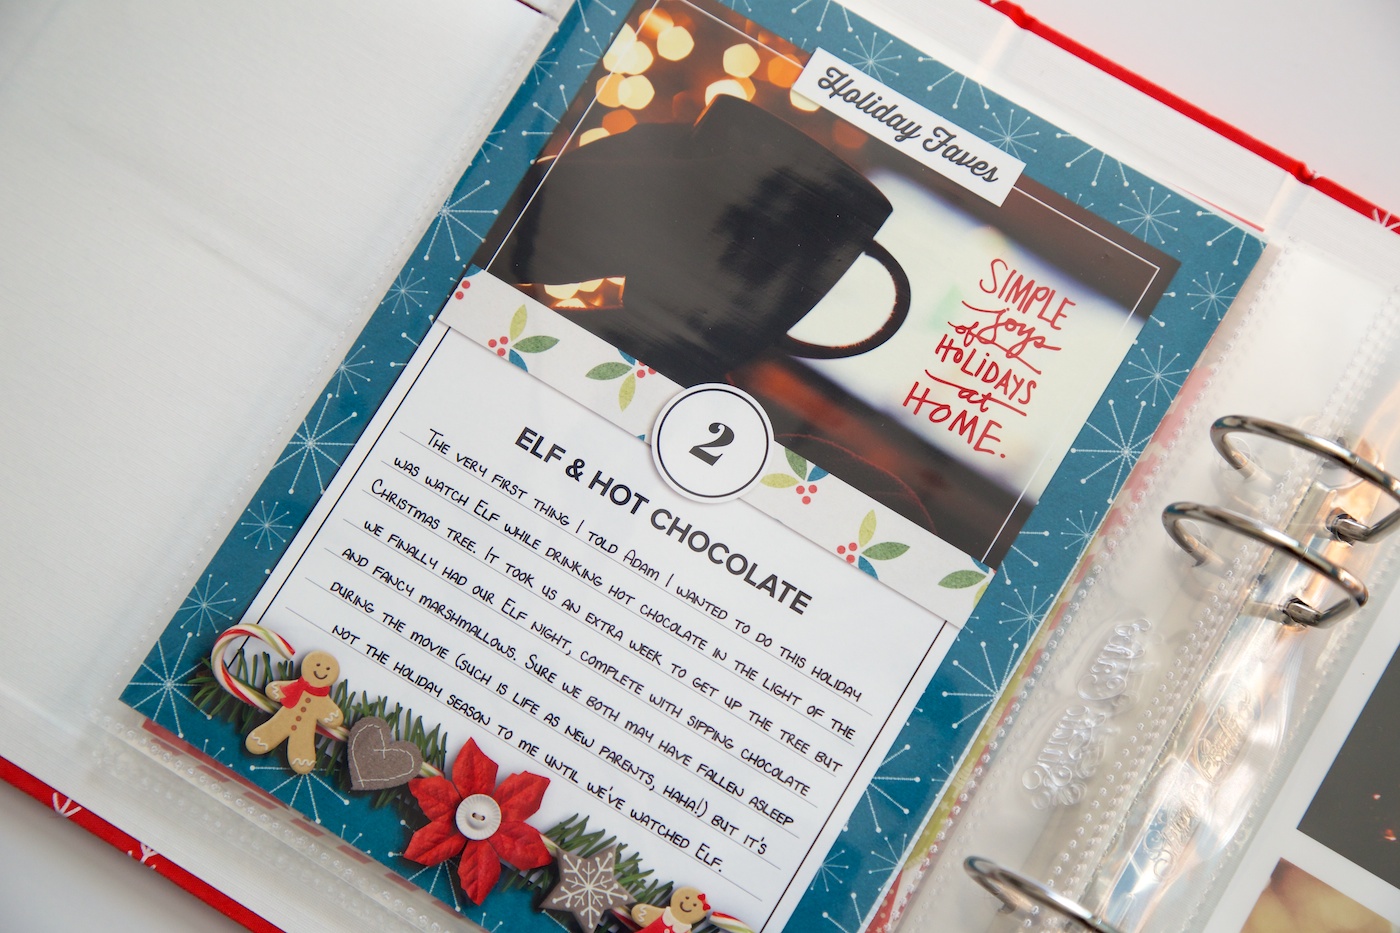
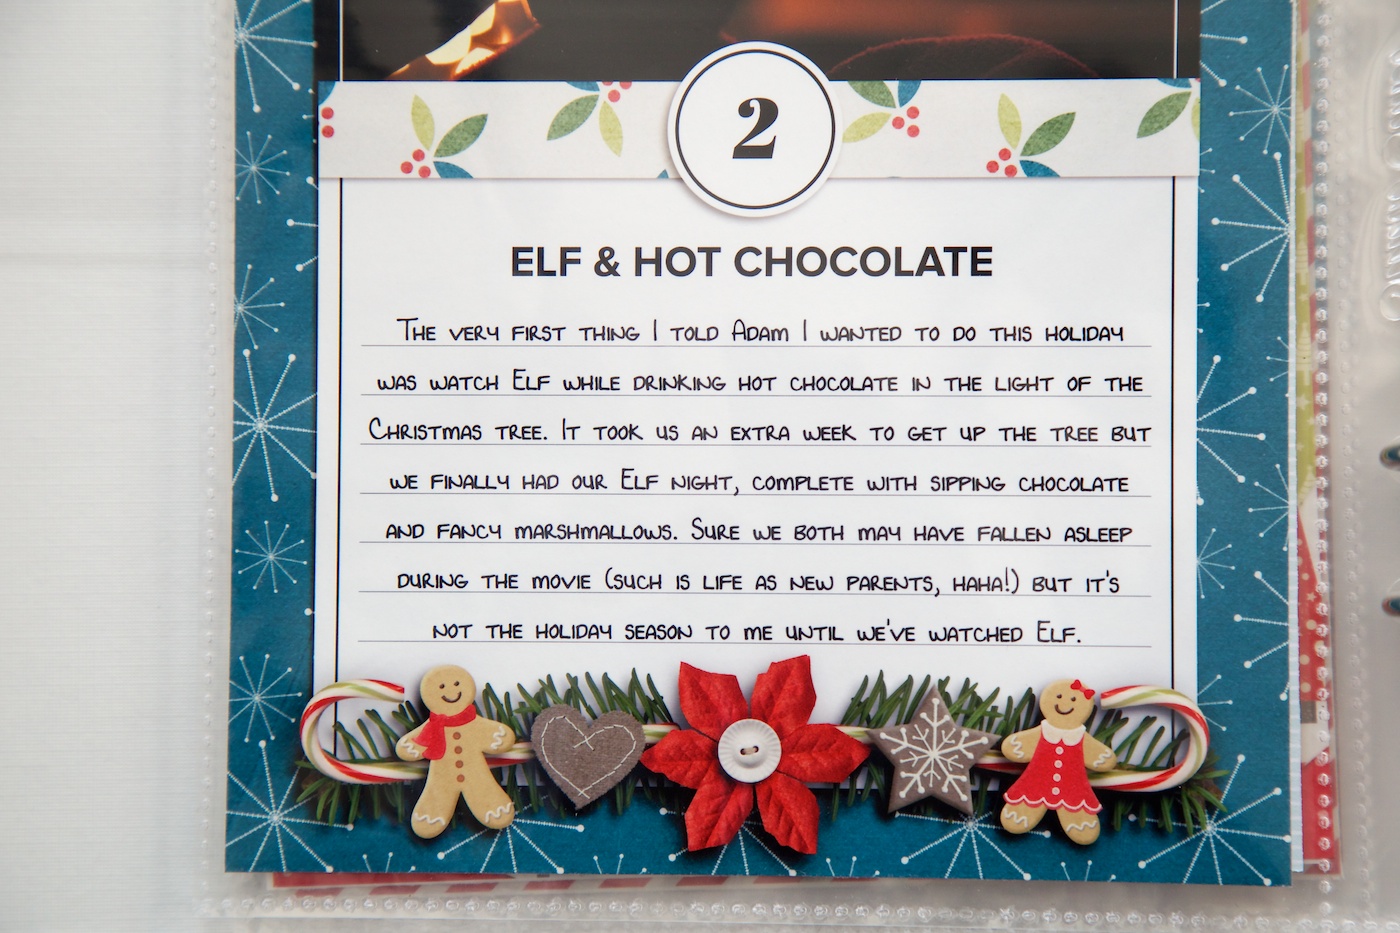
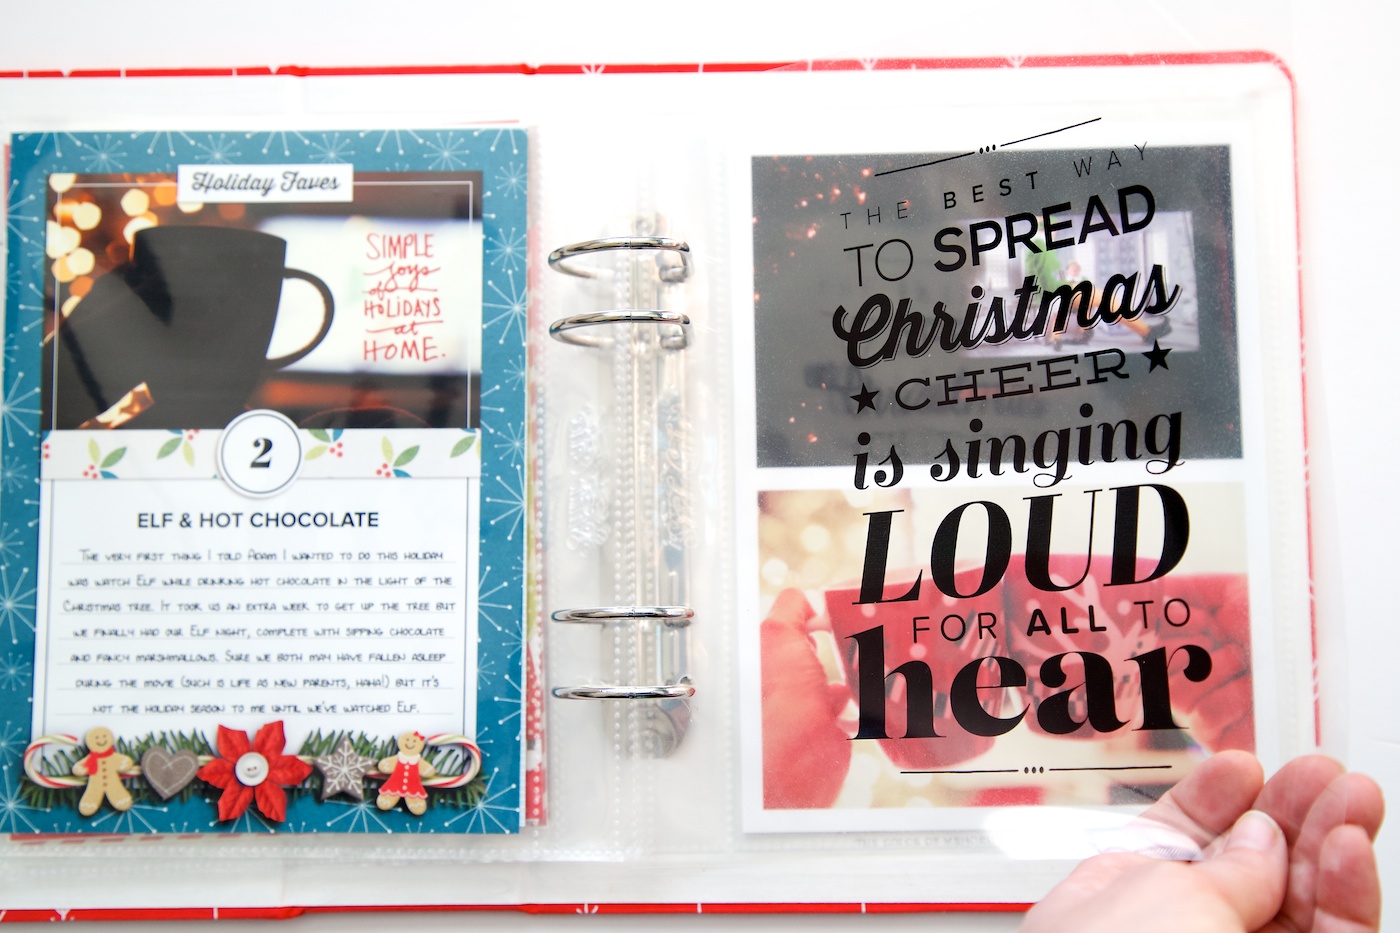
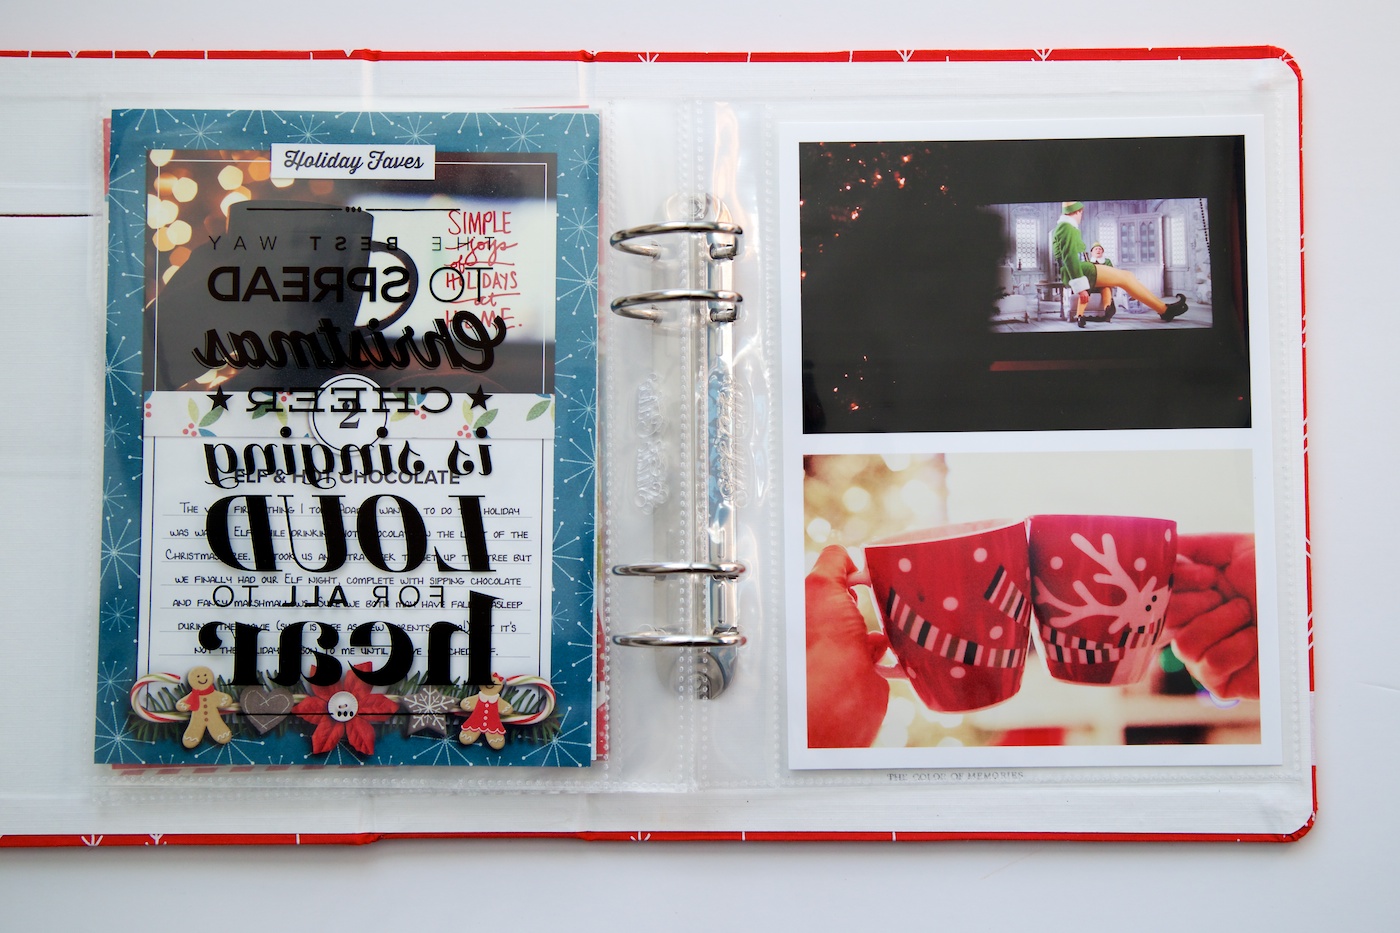
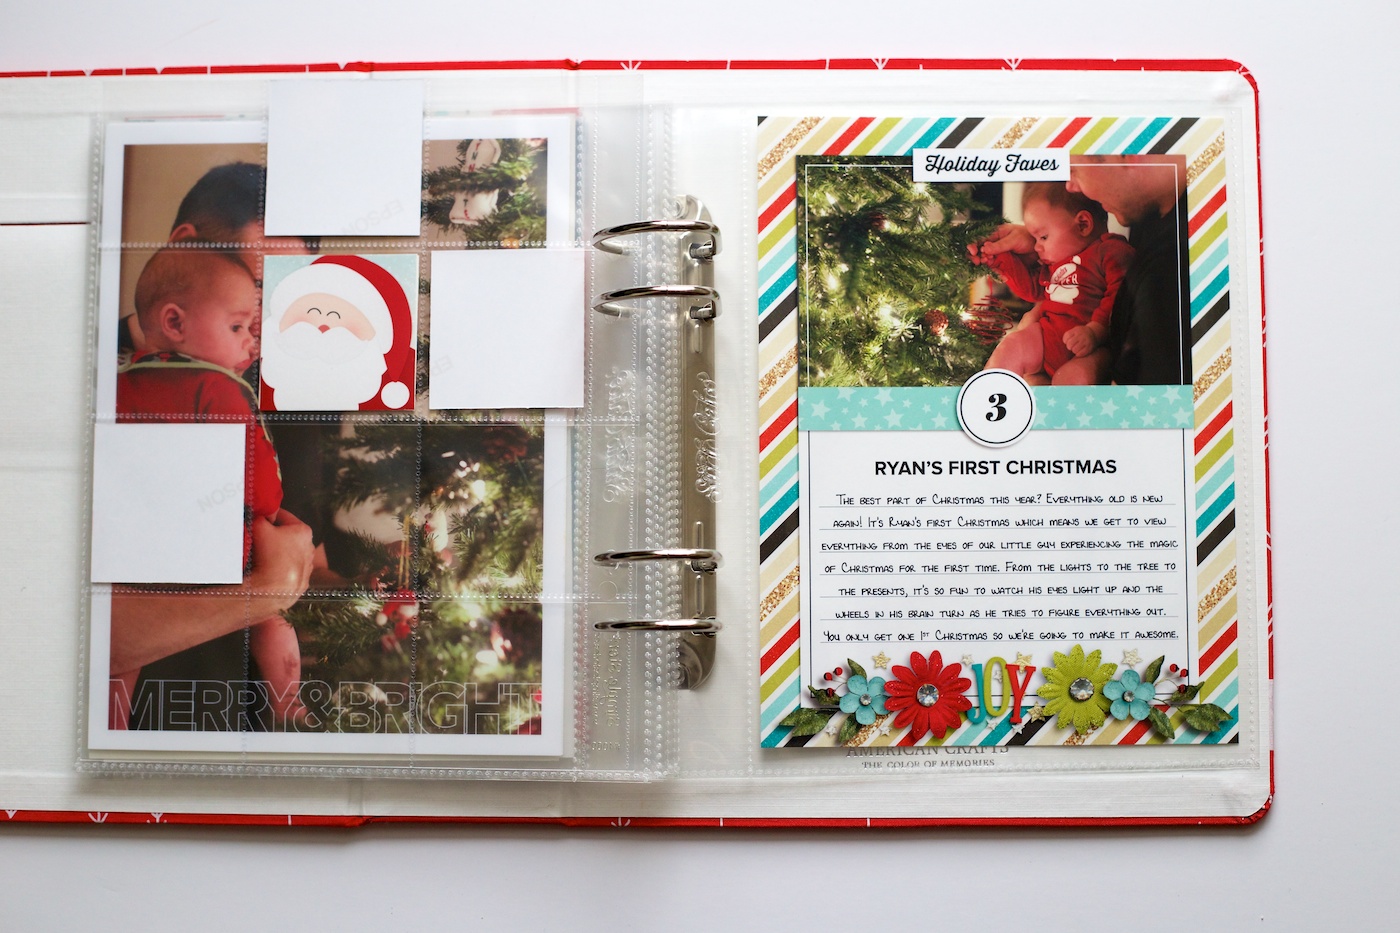
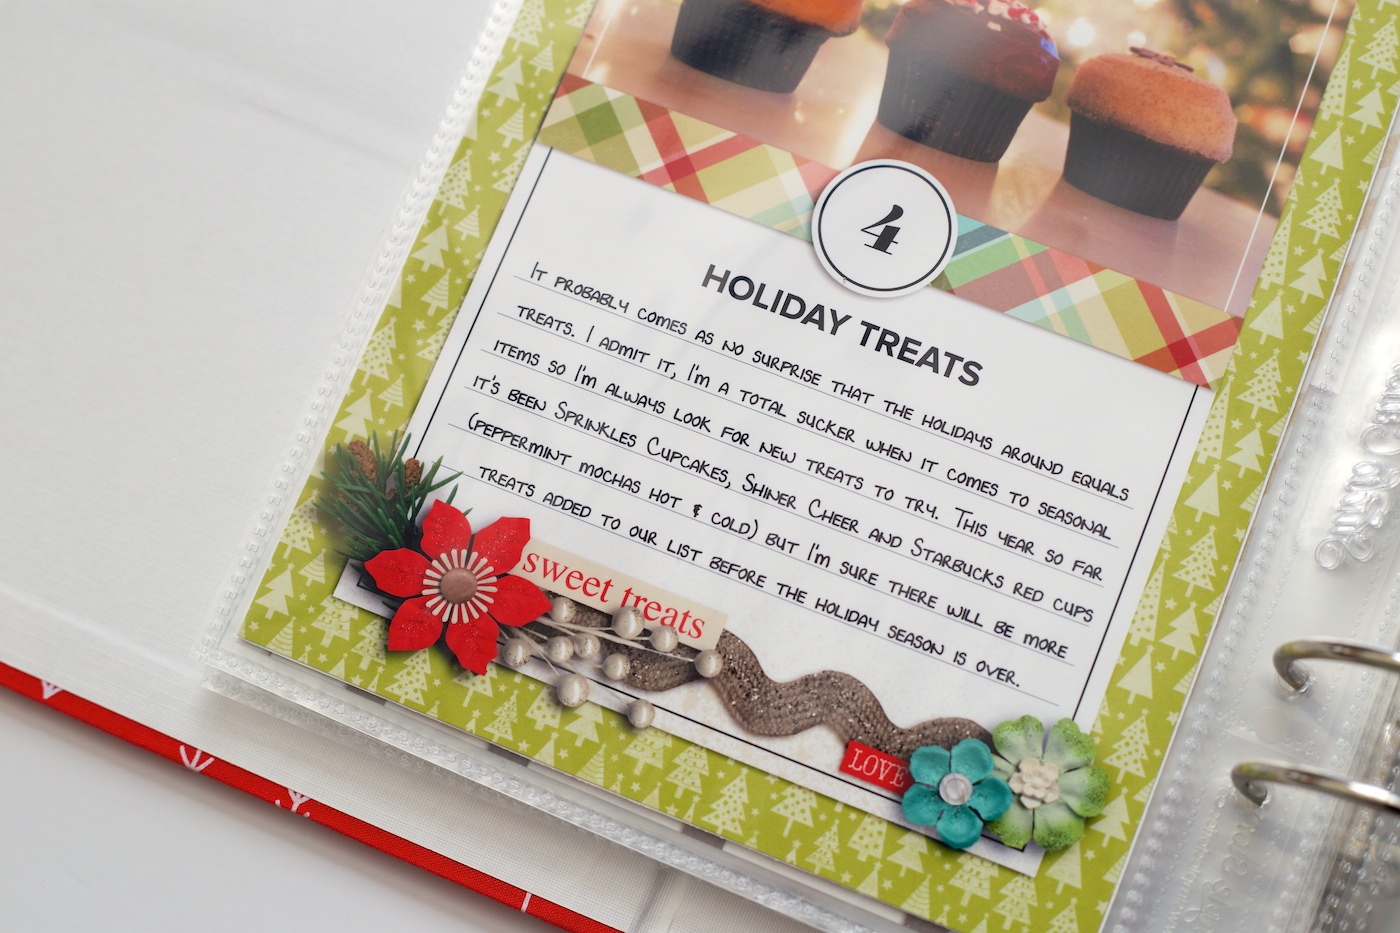
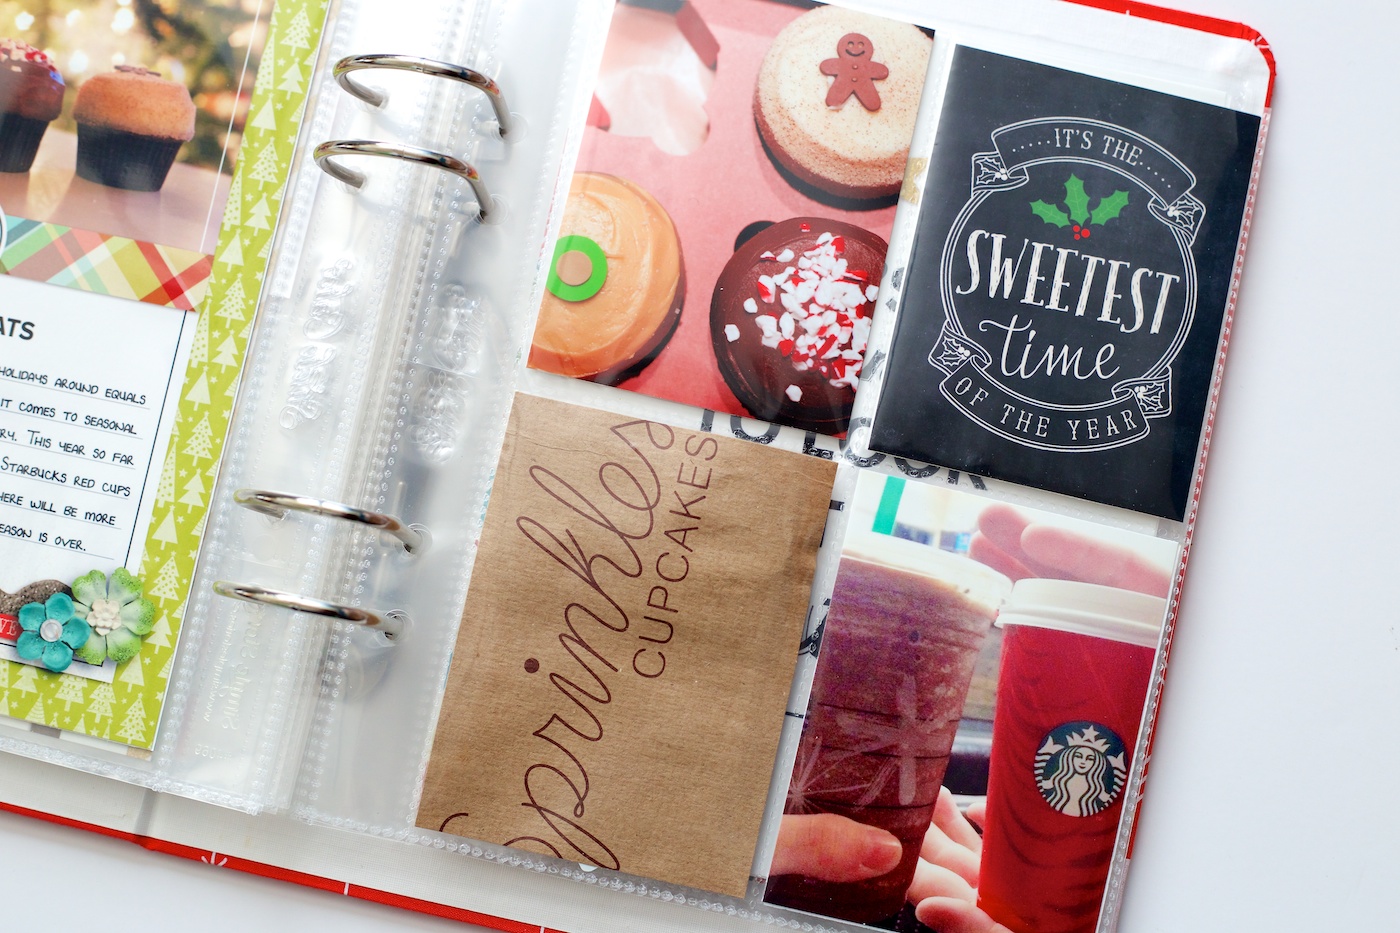
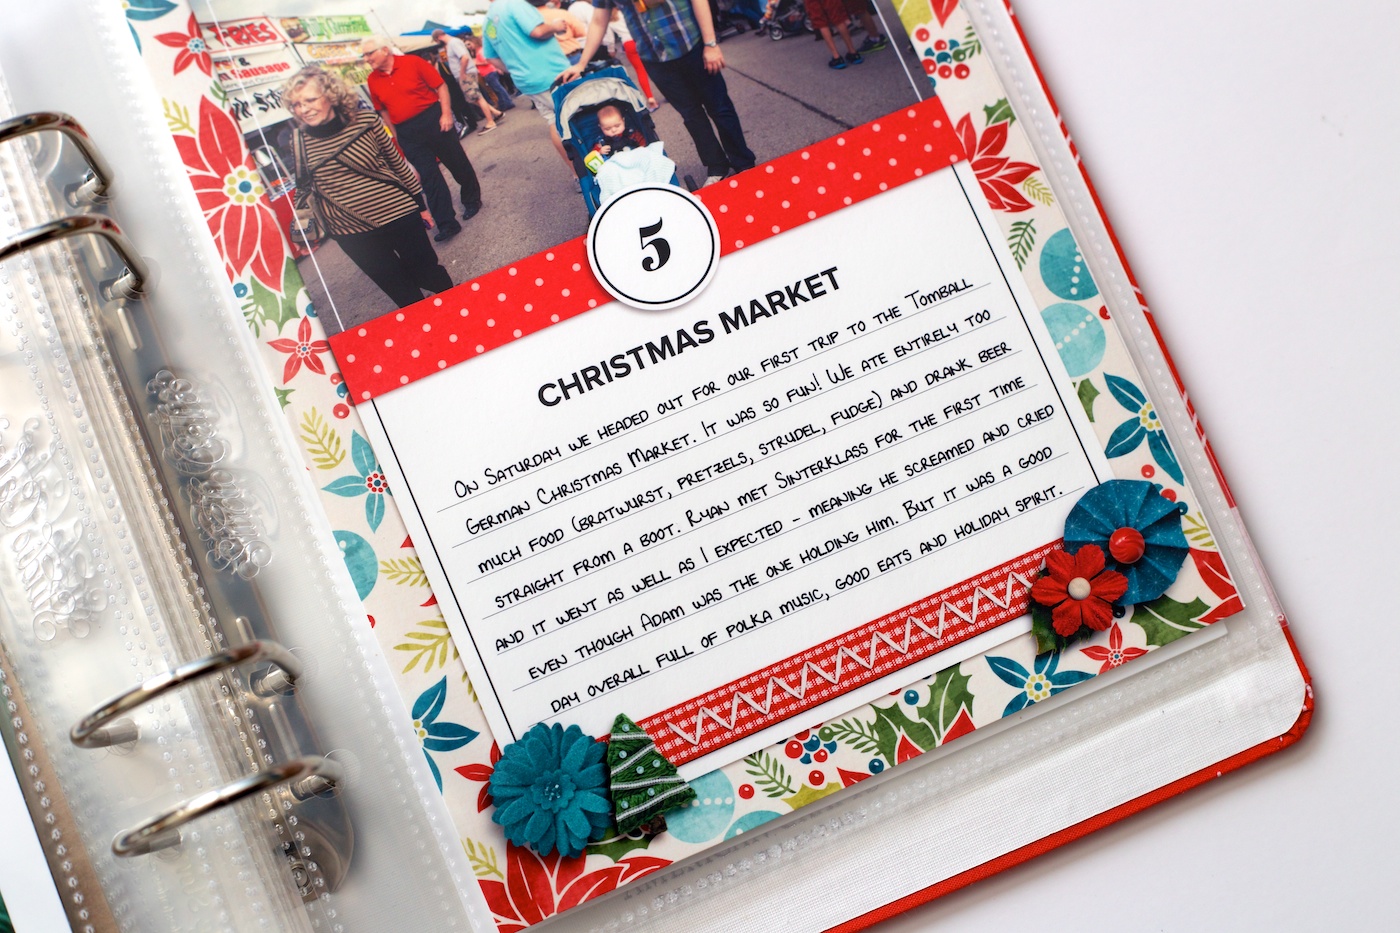
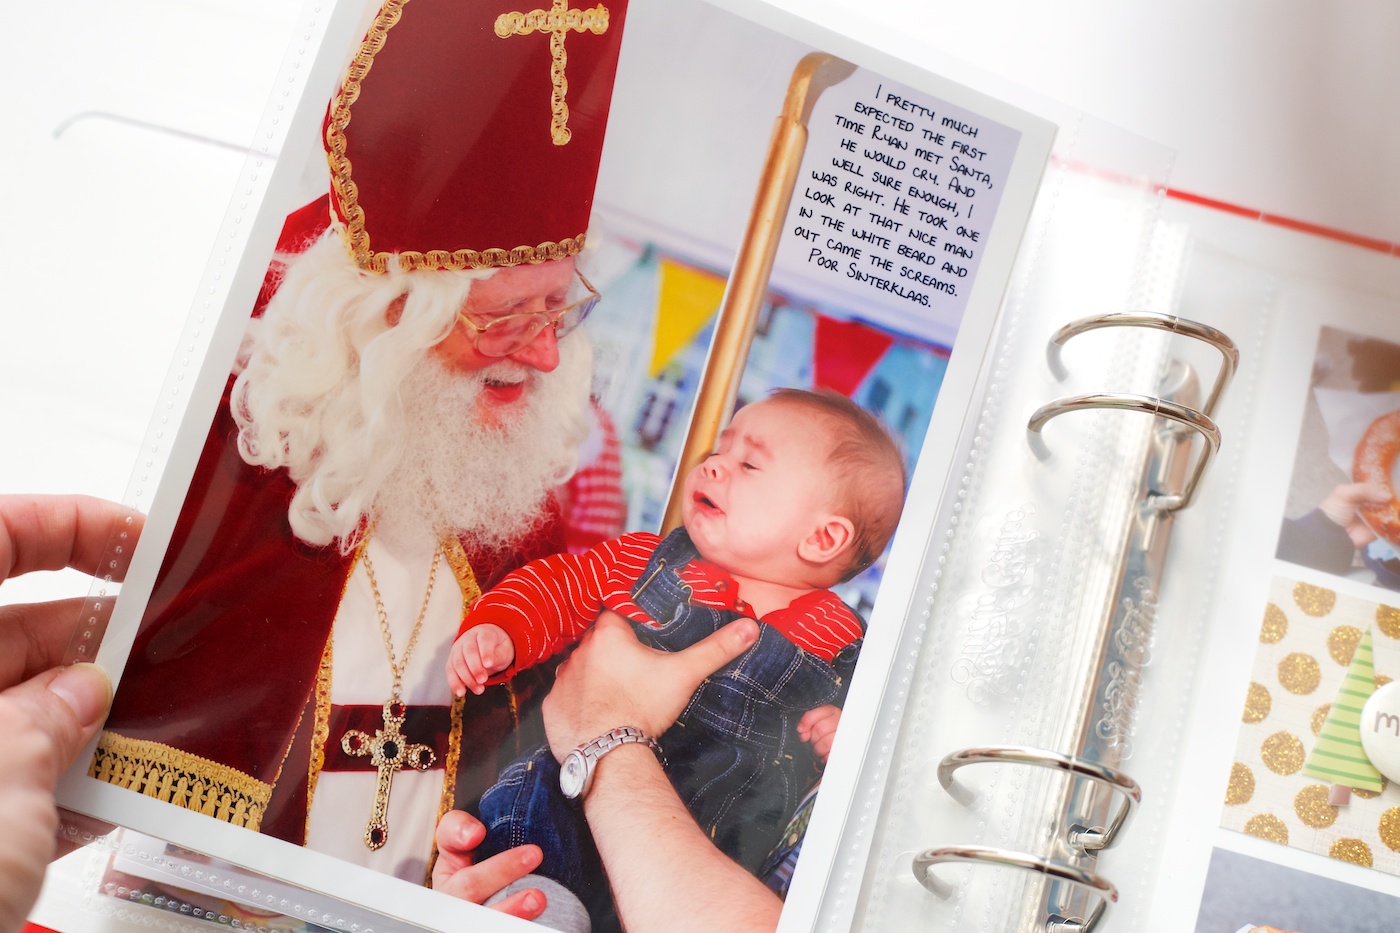
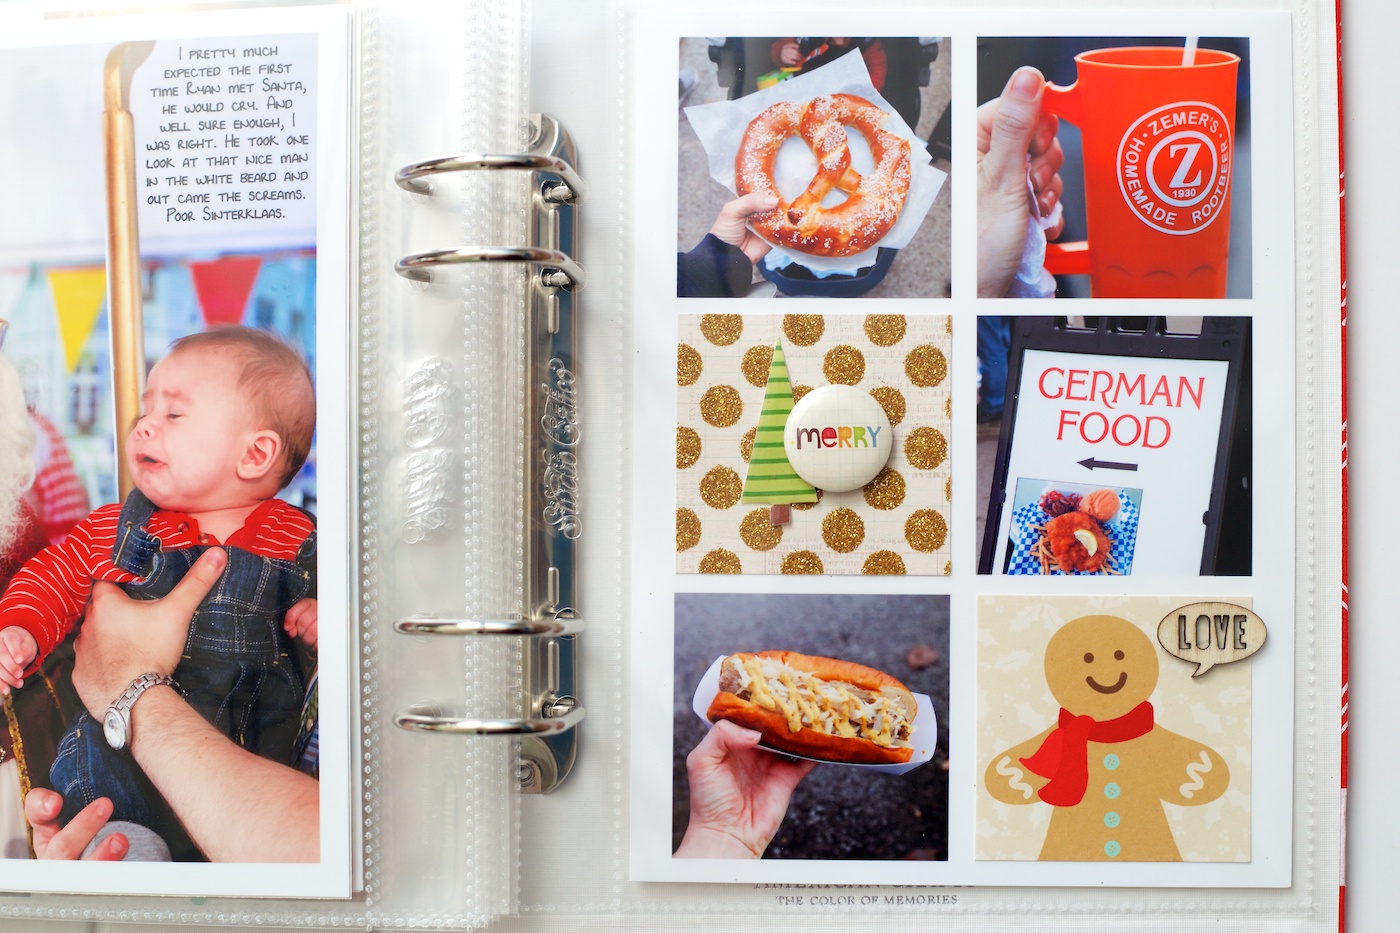
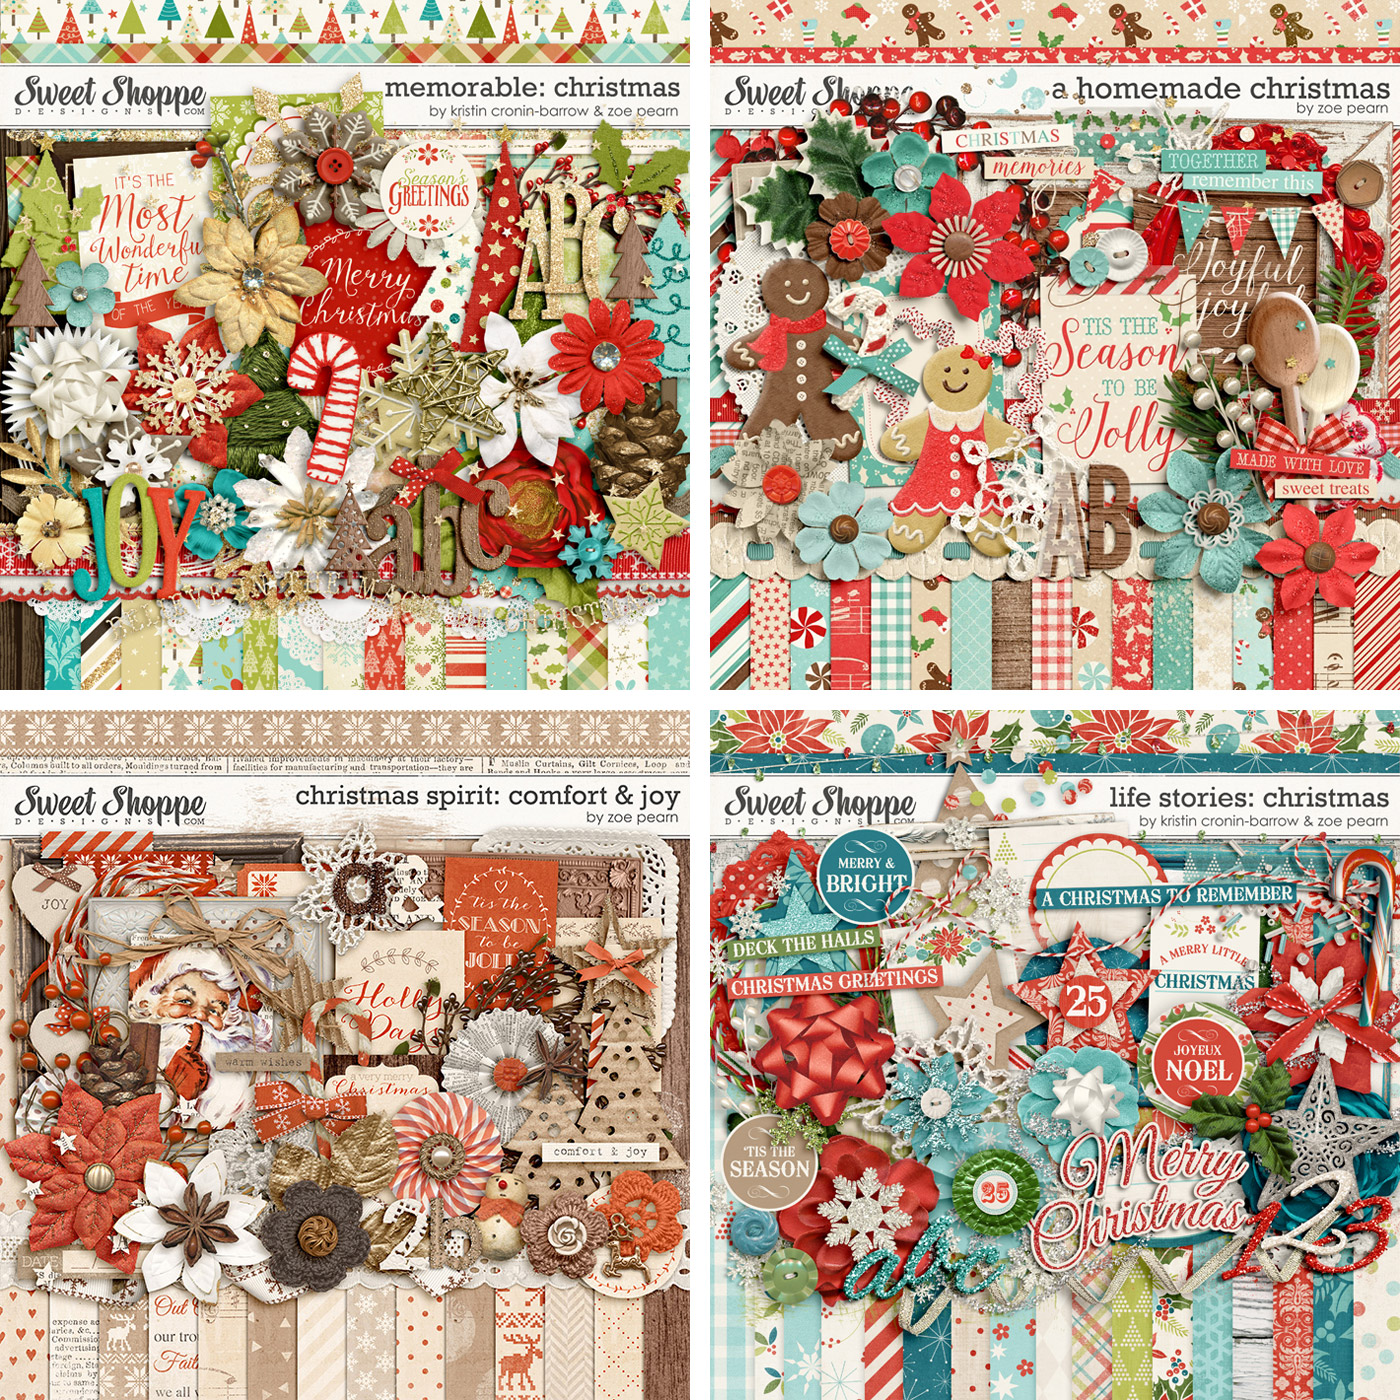
Holiday Fave No. 4 | For Holiday Fave No. 4, I chose to focus on Holiday Treats because what’s the holiday season without a little indulgence, right?

nettiodesigns_Holiday-Faves-No45-2new-

On the left I included the Holiday Faves No. 4 journal card template with some digital elements on it from a variety of kits.

nettiodesigns_Holiday-Faves-No45-13

On the right, I included a four pocket page protector which includes photos, memorabilia and an 3×4-inch accent card. The Sprinkles Cupcakes is a piece of the bag I trimmed down to 3×4-inches and the accent card is from Kristin Cronin-Barrow’s A Fairytale Christmas: Sweet digital kit.

nettiodesigns_Holiday-Faves-No45-12

On the back of the page protector are two more photos, another accent card and memorabilia. I added some digital text to one photo and a digital label to the other before I printed the photos.

nettiodesigns_Holiday-Faves-No45-10

Here’s a closer look at the bottom of the page protector. The bottle cap on the right does make the page a little puffy but no more than any other dimensional embellishment. I just glued it down using a little Tombow liquid adhesive.

nettiodesigns_Holiday-Faves-No45-9

On the right side of the spread is another accent page.

nettiodesigns_Holiday-Faves-No45-3

Holiday Fave No. 5 | Holiday Fave No. 5 was the Tomball German Christmas Market. I’m technically half-German but this was our first time going to a German Christmas Market. It was a lot of fun!

nettiodesigns_Holiday-Faves-No45-4new-

One thing I realized while putting together my Fave No. 5 pages is while I love the look of photo collages, they definitely add quite a bit of time to the process, especially when I have to select and edit all of the photos first. Adding them to the photo template is the quick part!

This page is actually a 6 square photo collage that I adjusted a bit on the right side for the one vertical photo I wanted to include. And yes that’s a boot of beer, haha, but it’s actually the same one because they were $21 a piece! The strap on the cup seemed a little dorky but it did come in handy when we were trying to carry food, beer and push a stroller at the same time.


nettiodesigns_Holiday-Faves-No45-8

On the right is another Holiday Faves journal card with digital elements.

nettiodesigns_Holiday-Faves-No45-5new-

On the back of the journal card is a 6×8 photo of Ryan meeting Sinterklaas and on the right is another photo collage.

nettiodesigns_Holiday-Faves-No45-5

As you can see Ryan wasn’t exactly a fan of the man in the white beard, haha. To keep things simple, I added some journaling on the photo before printing.

nettiodesigns_Holiday-Faves-No45-7

For the photo collage on the right, I used a 6 square photo template again, but this time I turned off the squares for photos 3 & 6 and added scrapbooking paper and a printed 3×4 card (trimmed down) after I printed the page. I really love the mix of digital and paper. And yes, we ate entirely too much food – this wasn’t even all of it, haha.

nettiodesigns_Holiday-Faves-No45-6

And that’s where I’m at with my album so far! Overall, I’m really happy with how it’s coming together. I’m always hesitant when I first start putting it together and then once I start seeing the album come together, I get more and more excited to see it make it to the finished version. As we get closer to Christmas, my momentum definitely picks up and this year is no exception.

A little note about credits: Digital elements include a variety of Christmas kits by Zoe Pearn & Kristin Cronin-Barrow, primarily Memorable: Christmas, A Homemade Christmas and Life Stories: Christmas.  I didn’t include links for any of the paper products I used because they were all purchased in years past and are quite possibly not available any more. But if you feel like hunting any of them down, you should be able to do a Google search using any of the names I mentioned. 

Benefits Of Using Canadian Pharmacy

POSTED IN Holiday Faves, Holiday Faves 2014

Holiday Faves 2014 Mini Album | Digital Foundation Pages

POSTED ON December 5, 2014 IN Holiday Faves 2014

nettiodesigns_HolidayFaves-DigitalFoundations-0

You know what my favorite part of Holiday Faves is? Finally getting to put together my pages! Since it’s December 5th already, I’ve been feeling a little behind the eight ball in getting my album ready as I’ve been busy with the Holiday Faves Mini Class, but that’s exactly what I love about Holiday Faves. If I were doing a daily holiday album, I’d already be five days behind and stressed out but instead I know I’m exactly where I need to be. Love that.

This year for my hybrid mini album I’m using a Studio Calico Handbook 6×8 ring album I purchased last year (seen here) with a mix of single 6×8 page protectors and pocket page protectors to hold additional photos and elements.

Since this year is Ryan’s first Christmas, I’m also thinking I may reprint the digital pages as a photo book that would be easier for him to flip through when he gets older. Kind of depends on how my album comes together this year, but that’s one of the many perks of digital – duplicate copies without duplicating the work.

I admit this year I really struggled with choosing my digital scrapbooking supplies because there are SO many good ones out there. But I finally narrowed it down to these four kits from Zoe Pearn & Kristin Cronin-Barrow (all available at Sweet Shoppe Designs): Memorable: Christmas, A Homemade Christmas, Christmas Spirit: Comfort & Joy and Life Stories: Christmas (and a paper or two from A Fairy Tale Christmas: Noel).

nettiodesigns_HolidayFaves14-Foundation-kits-new

Once I had my supplies chosen, I got to work putting my pages together using the Holiday Faves Mini Album templates. I also planned out the order of my pages using the interactive Holiday Faves planner (which is included as part of the Holiday Faves mini class). This is the first time I’ve planned out my album this way and I have to say – it’s was so much fun moving all the tiny thumbnails around! As you can see, I’ve left a lot of blank pages in the album – those will either be filled up with photos, paper scrapbooking pages or I’ll combine some of the pages back to back and remove the blank pages altogether if I don’t need them.

nettiodesigns_HolidayFaves14-Foundation-planner-text

Since I haven’t printed out my digital pages yet (that’s on my to-do list for this weekend), I thought I’d share the digital versions of my Holiday Faves Mini Album pages with you. I love this stage of the process because it’s really when the templates start to come alive.

nettiodesigns_HolidayFaves-DigitalFoundations-1

Since I’m planning to print out a copy of my album as a photo book once the album is done, I’m planning to add my journaling and photos to the Holiday Faves journal cards digitally rather than handwritten like I’ve done in the past. I’m also planning to add digital elements at the bottom of each card but I’m waiting to do that until I know how much journaling I’ll have on each card.

nettiodesigns_HolidayFaves-DigitalFoundations-2

One new thing I’m trying this year is printing several of the accent pages as black text on white card stock. I’ve been loving the mix of black and white lately and I think it’ll add a nice dose of contrast and balance to all the patterned digital pages.

nettiodesigns_HolidayFaves-DigitalFoundations-3

nettiodesigns_HolidayFaves-DigitalFoundations-4

One thing I do know about my album is that the order of some of the pages will definitely change and evolve as I add photos and stories to the album. Plus I’m pretty sure I don’t need three pages with red polka dots in the last six pages. I plan to keep my interactive album planner updated as I create the album so when I go to print my photo book after Christmas, I’ll know exactly what order to put the pages.

nettiodesigns_HolidayFaves-DigitalFoundations-5

And that’s a quick look at my foundation pages for my Holiday Faves Mini Album this year! I can’t wait to start capturing my Holiday Faves and adding actual photos and stories to the pages – that’s when the real fun begins.

Want to join in the Holiday Faves fun? Registration for Holiday Faves 2014 ends Monday, December 8th. Get all the details here.


Can I take Levitra if I am taking other remedies at the same time

POSTED IN Holiday Faves 2014

FREE Holiday Faves 6×8 Printable & Template | Making A List

POSTED ON December 3, 2014 IN Free Stuff, Holiday Faves 2014

nettiodesigns_HolidayFaves-Free-List

The Holiday Faves 6×8 Mini Album & Project Class is in full-swing behind the scenes here at Nettio Designs, so today I wanted to give those of you who haven’t joined in yet a chance to try out one of the templates from the class…for FREE!

The Making A List free download includes one 6×8-inch layered Photoshop (.PSD) file for you to customize as well as one printable 6×8 JPG you can use as is. Print them at 6×8 to use in your holiday mini album or scale them down to 3×4 inches to slip into your pocket scrapbooking.

Download the Holiday Faves Free 6×8-inch Printable & Template here!

Of course, if you’d like to join me and almost 50 other Holiday Favers in scrapbooking your favorites holiday memories and moments in a fun and creative way, sign up up for the Holiday Faves 2014 Mini Album & Project Class. Class started Monday but we’re just getting started so there’s still plenty of time to jump in.

For only $25, you’ll not only receive an exclusive set of 6×8-inch mini album templates designed by me (one student told me the templates alone are worth the price!) but you’ll also receive a printable planning guide, interactive album planner, exclusive tutorials and downloads for printing and putting your album together and access to a private Facebook group where you can connect with me and a whole group of kickass memory keepers.

It’s everything you need to actually complete your holiday mini album this year.

Registration ends December 8th, so don’t delay – sign up now.

Benefits Of Using Canadian Pharmacy

POSTED IN Free Stuff, Holiday Faves 2014

  • « Previous Page
  • 1
  • 2
  • 3
  • 4
  • …
  • 18
  • Next Page »
HI I'M LYNNETTE. Graphic designer, tech-lovin’ memory keeper and lover of bold colors & patterns, good food and the great outdoors. Here at Nettio Designs, I share a behind the scenes peek at my own creative & life adventures. Read more...

KICKSTART YOUR CREATIVITY


By popular demand, photo book templates are back! Grab all three sets in the shop.
ADVENTURES IN ORGANIZING
GOAL-SETTING
MEMORY KEEPING
PROJECT LOVE
LIFE ADVENTURES
TIPS & TRICKS
BEHIND THE SCENES

POPULAR PROJECTS

TO SEE ALL MY PROJECTS, CLICK HERE

MUST READ POSTS

  • WHY EVERY SCRAPPER SHOULD SCRAP A FAVES PAGE
  • HOW TO CREATE A SCRAP-WORTHY MAP WITH PHOTOSHOP
  • REMEMBERING THE IMPORTANCE OF TELLING YOUR STORY
  • WHAT DOES IT MEAN TO CREATIVELY CAPTURE YOUR LIFE ADVENTURES?
  • BROWSE BY CATEGORY

    BROWSE THE ARCHIVES

    GET IT FOR FREE

    Copyright © 2025 ·Dynamik Website Builder · Genesis Framework by StudioPress · WordPress · Log in