Nettio Designs

Design + Creativity + Adventure = LOVE

  • HOME
  • JOIN THE 2023 MONTHLY FAVES
  • THE SHOP
  • ABOUT
  • CONTACT
You are here: Home / Archives for Mini Albums

Holiday Faves Album | Intro & Faves #1 & 2

POSTED ON December 6, 2011 IN Holiday Faves, Holiday Faves 2011

Welcome to my Holiday Faves Album Update #1 – the Intro Page and Faves #1 & 2!

I’m not going to lie – this little Holiday Faves album and I got off to a bit of a rocky start this weekend, due to some printing issues and my inability to punch holes on the proper side of the page, haha.

But despite that little non-digital reality check, I’m feeling good about how things are coming together so far.

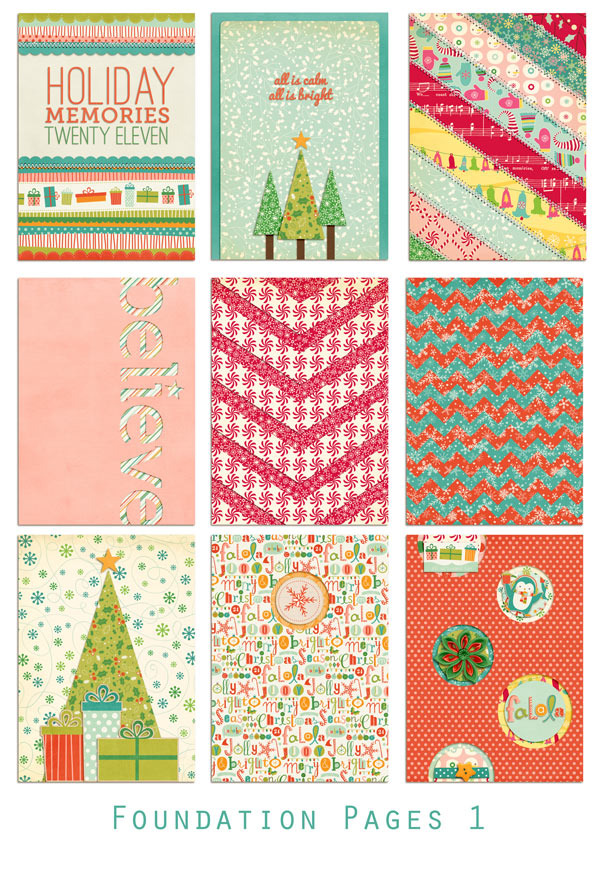
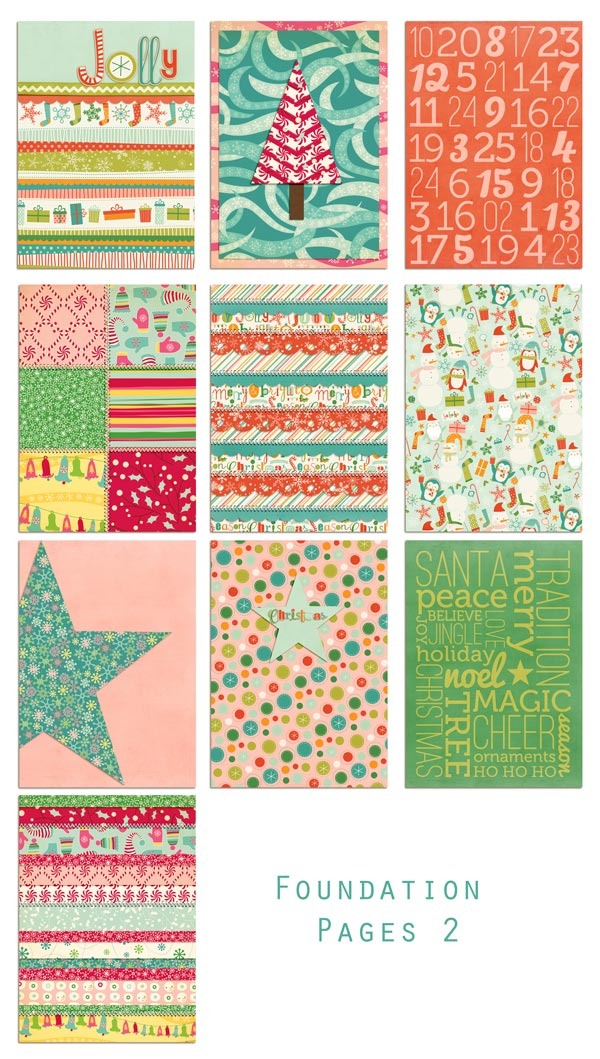
As I mentioned in my Foundation Pages post, on the backside of the cover page, I planned to add an intro page. Here’s a look at what I did:

Nettio Faves1 2 1

Here’s a close-up look at the intro page. And no, my handwriting is not usually that neat, haha. I added the journaling onto the card in Photoshop using my custom handwriting font from Darcy Baldwin and then printed the entire card out at once. So it’s my handwriting but WAY more perfect, haha.

Nettio Faves1 2 4

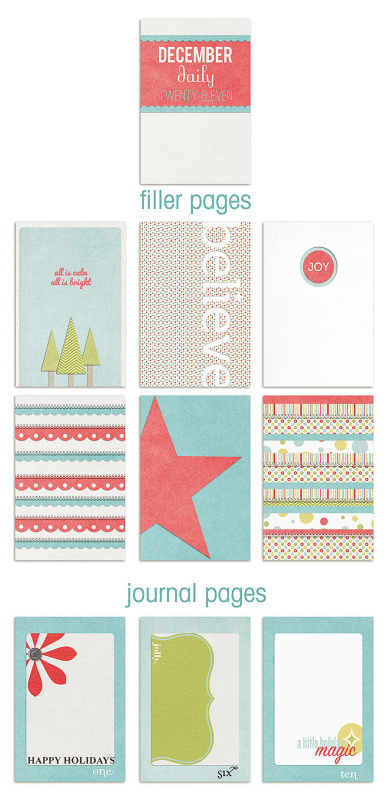
On the transparency page on the right side, I added one of the free downloads from Shimelle’s Journal Your Christmas class. On the front is a fill-in-the-blank card…

Nettio Faves1 2 2

And on the back is a copy of the Christmas Manifesto from this year’s class. Sums up my thoughts on the season perfectly.

Nettio Faves1 2 3

For Fave #1 in my album I went with Thanksgiving or you know, that holiday you have to get through to get to Christmas, haha.

On the left page I glued one of our extra Thanksgiving paper napkins down as a background and then added a turkey I cut out from the center of one of the paper plates.

(And of course my buying them had nothing to with the fact that I thought they’d look adorable in my album. That would be craziness, hehe.)

Nettio Faves1 2 7

Here’s a close-up look at the turkey – isn’t he cute?

Nettio Faves1 2 8

As you can see, the paper strip journaling says “so thankful to spend this holiday with you” which as much as I love that little turkey, would have made WAY more sense had that page been next to the page I’d originally intended, this lovely 5×7 photo of Adam…

Nettio Faves1 2 9

But I suppose that’s what happens when you don’t pay close enough attention to which side of the page you should be punching holes on, haha.

I’ll admit, I was really really tempted to reprint the Faves #1 journaling card and 5×7 give thanks photo (I’d already glued them together) but in the end I decided to embrace it’s imperfectness figuring no one but me will know. Well and all of you now, haha.

A close up of the text I added onto the photo. I just added a simple stroke to my text and reduced the Fill of the text layer to 0.

Nettio Faves1 2 10

Here’s the backside of the Thanksgiving photo collage page. On the transparency page on the right, I added a little 12 days of Christmas element from Making Memories.

Nettio Faves1 2 11

For Fave #2, I decided to write about some of the local events we attended Thanksgiving weekend. The photo on the right is from downtown San Antonio, the Friday after Thanksgiving. It was SO crowded down there due to the Holiday River Parade but I loved the contrast of the Alamo next to the giant Christmas tree too much not to include it, crazy cotton candy seller and all.

Nettio Faves1 2 12

On the backside of the Alamo page, I added some photos from the San Antonio River Parade, one of my favorite holiday-themed events here in San Antonio.

On the right side, I added a page from the River Parade program that I trimmed down and folded to fit my 5×7 size. On the back of the folded part of the page, I stapled one of our tickets from the parade using my Tim Holtz Tiny Attacher (love that thing!).

Nettio Faves1 2 13

Here’s a close-up of the ticket. I also punched two holes and added some baker’s twine to make it a little easier to open the flap.

Nettio Faves1 2 14

Here’s a look at the whole page folded out. It wasn’t too long but just long enough that there was no way for me to trim it to fit without cutting out part of the poem.

Nettio Faves1 2 15

A closer look at the page. I love the way they rewrote Twas the Night Before Christmas to be River Parade themed – it summed up the spirit of the event quite nicely.

Nettio Faves1 2 16

On the back of the program page I included a map of the parade route as well as some journaling about that weekend’s events.

Nettio Faves1 2 17

If you’re wondering how I added the titles and journaling to the two Faves cards, the answer is I ended up adding the text in Photoshop and then reprinting the cards, which was not my initial plan. My attempts at printing the titles directly onto the pre-printed cards didn’t work (I couldn’t get the spacing quite right) and my handwriting looked crazy messy due to the pen I used. Clearly I need to mess with this a little more because I really don’t want to reprint all 8 of the other Faves cards I’ve already printed.

On the last page of the Faves #2 section, I included two more pieces of memorabilia – one from the place we had dinner at after the parade and one from the Holiday Renegade Craft Fair we went to in Austin on that Saturday.

I mention both of these events in my journaling but I think I may end up adding another photo card in between these two pages. Right now it feels a bit unfinished.

Nettio Faves1 2 18

What I have learned so far

So with 1/5th of my Holiday Faves Album completed (2 of 10 Faves), here are few of my take-aways so far:

1) It doesn’t have to be perfect. Really.

And I’m going to repeat this to myself 8 million times a day until I believe it.

2) It’s OK if I don’t tell every story.

Right now I’m aiming for about 2 Faves a week to keep me on track, which is much more do-able than a page a day. Yes it means I can’t share every little thing that happens but I’m ok with that.

3) I really really need to practice my handwriting.

And find a pen that I like. Because my first attempts at handwriting my journaling? Not pretty.

So that’s my adventures with my Holiday Faves Album so far. Anyone else super picky about the pens they use? (Adam will tell you horror stories of me browsing the pen aisle at Office Max in college. Maybe it’s a lefty thing?)

How is your own Holiday Album going? If you’ve finished any pages be sure to link me up in the comments so I can check them out. I’d love to see them!

PS…In case you missed it, I have a FREE Holiday Album Idea Book available for download in this post. It’s a little Christmas gift from my CT and I. : )

Can I take Levitra if I am taking other remedies at the same time

POSTED IN Holiday Faves, Holiday Faves 2011, Hybrid Scrapbooking, Mini Albums

Holiday Faves Album: The Foundation Pages

POSTED ON November 29, 2011 IN Holiday Faves, Holiday Faves 2011

Happy week-after-Thanksgiving everyone! Since Thanksgiving officially marks the start of the holiday season around here, I figured it was time to share my completed Holiday Faves Album foundation pages now that I have them all nice and pretty and printed.

As I mentioned before, I am using my Holiday Faves 5×7 Mini Album Templates to create a hybrid foundation for my 5×7 mini album which I’ll then be adding photos and journaling and memorabilia to the album as the holiday season goes along.

For my foundation pages, I mixed two fun digital kits: Tis the Season by Zoe Pearn and Kitschy Christmas by Jenn Barrette and Sahlin Studios. Since I wanted to keep my album fairly flat at this point (I know it’ll expand as the holiday season progresses), all of the elements I added onto my pages are digital. The only exception right now are the transparency pages I printed, some stitching and some pocket page protectors I added at the back.

My Holiday Faves Foundation Pages

Here’s a look at my cover page. Right now it’s just printed card stock but I plan on adding a thicker chipboard cover as well to make the album a bit more sturdy. This page will then become the first page inside the album.

Nettio FoundationPage 1

Here’s a look at the back of the cover page:

Nettio FoundationPage 2

Right now it’s blank but I plan to add an intro for the album here. On the right side, I added one of the transparencies I printed over an accent page. I haven’t entirely decided how I want to use the transparency pages so for I may end up moving them around as I add stuff to the album.

Because I printed all my pages on double-sided paper (I used Epson’s Premium Presentation Matte Double-Sided paper), I have quite a few blank pages and spreads in the album like this:

Nettio FoundationPage 3

For now I’m choosing to leave them blank figuring I will either add photos, memorabilia or patterned paper to them as I put the album together, or if I end up not needing those pages, I can simply glue the two blanks together to make a single page. Plus this gives me more flexibility if I end up needing to move pages around.

Here’s a look at one of the journaling spreads. I chose to leave the right page blank figuring I will likely add a photo/photos to it.

Nettio FoundationPage 4

Here’s a look at one of the foundation-accent page spreads. I plan to add a smaller photo on the left page (either a 4×6 photo or some 2×3-ish Instax photos) and leave the right side as is.

Nettio FoundationPage 7

It’s a little hard to tell in this photo but I also added some real stitching onto left page. So easy to do – I just ran the paper right through my sewing machine. I was worried it might be a little odd having digital stitching on the right page (the circles) and real stitching on the left but I actually really like the extra dimension the real stitching adds to the page.

Another look at one of the ink-jet transparency pages. Right now I have the majority of the transparency pages placed in front of the journaling cards with the idea that I’ll add a 5×7 photo in there, but I may end up moving them depending on how the album comes together.

Nettio FoundationPage 19

At the end of the album, I included some divided page protectors that I plan to use as holders for some of my Instax photos. Since I’m not sure where I want to use them quite yet, I’m leaving them in the back of the album and will move them once I’m ready to use them.

Nettio FoundationPage 30

If you’re wondering how I made the page protectors, the one on the left is an American Crafts 8.5×11 inch divided page protector that I trimmed down to 5×7 – I got lucky that the pocket size worked for the size I needed.

The two page protectors on the right side are both 6×12 inch American Crafts page protectors that I trimmed down to 5×7 and then stitched to create four pockets sized for my Instax photos (which are around 2×3 inches).

Here’s a look at all of the pages in my album:

This slideshow requires JavaScript.

A Little Creative Team Inspiration

And if you’re wondering how the NettioDesigns Team Awesome is using the Holiday Faves 5×7 Mini Album Templates, here’s a peek at what some of the lovely ladies are up to…

Aly

 Brynn Marie

Crystal

Sherly


MissKim (See more on her blog here)

Inga (See more on her blog here)


I have to say I’m totally loving seeing all the different takes on these albums. It’ll be so fun to see the albums come together over the holiday season!

So what about you? Do you have your Holiday/December Daily album foundation pages all ready to go? Are you getting excited to start documenting yet? I’d love to see what you’re up to so feel free to link me up in the comments!

Psst…want to make your own Holiday Faves-style album? Pick up the Holiday Faves 5×7 Mini Album Templates here.

Can diabetes cause erectile dysfunction

POSTED IN Holiday Faves, Holiday Faves 2011, Hybrid Scrapbooking, Mini Albums

How To Use the Holiday Faves Templates To Create Your Own Holiday Album

POSTED ON November 17, 2011 IN Holiday Faves, Holiday Faves 2011

As I mentioned in Tuesday’s post, I’ve released my first-ever mini album templates in the NettioDesignsShoppe: the Holiday Faves 5×7 Mini Album Templates:

Nettio HolidayFavesMini preview

I’m sure there are some of you are wondering how you can use the mini album templates to build the foundation for your own Holiday album, so today I wanted to offer you a little glimpse into how I’m using these templates to build my own album.

As I mentioned on Tuesday, my Holiday Faves mini album is going to be a 5×7 hybrid mini album so I will be creating the foundation of my album digitally using these templates and then printing out my pages and adding photos and accents directly to the album during the holiday season.

For the purpose of this post, I’m going to assume you’ll be creating a hybrid album as well but if you’re wanting to use these templates 100% digitally, the process is the same, you’ll just be printing out everything after you’ve finished your album rather than before the holiday season starts.

How To Use the Holiday Faves Mini Album Templates

Ok, so, the Holiday Faves mini album templates include four types of pages which can be mixed and match to create your album: Foundation & Accent Pages, Journaling Pages, Overlay Pages and Photo Pages.

Screen Shot 2011 11 17 at 3 34 00 PM

Let’s dive a little deeper into the difference between all these pages and when you’d actually use them:

Foundation Pages

The Foundation Pages are designed to be the pages on which you build the well, foundation, of your album. All of the foundation page templates are made of simple paper strips or paper blocks, with the idea being that you will clip digital papers to them to pretty them up, print them, and then add photos, memorabilia, journaling or accents to them during the holiday season.

Before Afters foundation

Accent Pages

The Accent Pages go along with the Foundation pages in building your album, but rather than adding anything to these pages during the holiday season, they’re designed to stand on their own as is and be the pretty jewels of your album.

I’m planning to embellish my accent pages digitally since I’m going to be traveling and would like to keep my album as flat as possible, but you could definitely add your papers to the templates and then embellish them with real world paper accents as well.

Before Afters accent

Journaling Pages

The journaling pages are the pages where you’ll add your stories: in my case, my Holiday Faves. I’m planning to add my journaling by hand so I’ll be printing all my journaling pages out at the same time as my accent and foundation pages, but if you would rather add your journaling digitally, you can wait to print your journaling pages until after you’ve typed up your story.

Before Afters journal

Overlay Pages

The Overlay Pages aren’t really pages as much as they are transparent PNG files you can use to create your own printable ink jet transparency pages for your album.

If you’ve seen Ali Edwards’ December Daily albums, you probably know what I’m talking about but the Overlay pages are like clear accent or foundation pages that allow you to see the pages behind it, sort of like this:

Before Afters overlayrt

Then when you turn the overlay transparency page, you reveal the photo page beneath it like this:

Before Afters overlaylt

I love to include overlay pages like this because it adds some fun dimension to the album without adding to much bulk so I’ll be sharing more about how I print the overlays onto the ink jet transparencies next week.

Photo Pages

Unlike the Foundation, Accent and Journaling pages, the Photo Pages are not meant to be printed out ahead of time as part of your album foundation. I included them in the templates as any easy way for you to create multiple photo 5×7 sized pages to your album after the holiday season starts. Just clip your photos and print the page out on photo paper and add it to your album.

Before After photo

Putting All the Pages Together

So how do you go about actually combining all these different types of pages to create your album?

Well it’s really it’s up to you!

All of the templates are designed to be completely mix and match so there’s really no “right” way to combine them.

But a few things you might want to consider as you’re ordering your pages are:

  • making sure to leave room to add photos and/or memorabilia
  • how often you want to include journaling
  • whether you’re planning to add additional non-digital pages into your album as well (like fabric pages, page protectors, etc)

I’ll be sharing my full Holiday Faves mini album foundation next week, but here’s a glimpse at a six page grouping I’m planning to include in my album to give you an idea about how I’m combining all the pages together.

My Mini Album Foundation Before:


Album before

As you can see, I’ve included 2 Accent Pages, 1 Foundation Page, 1 Journaling Page and 1 Overlay Page. I also left the back of the Foundation Page blank so I can add a 5×7 photo later and I’ve left the journaling text off the journaling card so I can add my journaling by hand.

Here’s a look at what these same six pages might look like after I start adding in my photos and stories:

My Mini Album Foundation After:


Album after

So you can see how I left the accent pages alone but added a 4×6 photo to the front of the foundation page and 5×7 photo to the back. I also added my journaling onto the journaling page and I added a photo page behind the clear overlay page.

Anyway, I hope that gives you some ideas of how you can use the Holiday Faves 5×7 Mini Album templates to create your own Holiday mini album. As I mentioned I’ll be back next week to share by full mini album foundation but if you have any questions in the meantime, feel free to ask away in the comments section of this post.

Psst…Ready to get your Holiday Mini Album scrapbooking on? Stop by the NettioDesigns Shoppe and pick them the Holiday Faves 5×7 Mini Album Templates here.

Benefits Of Using Canadian Pharmacy

POSTED IN Holiday Faves, Holiday Faves 2011, Mini Albums, Template-y Goodness, Tips & Tricks

Introducing December Daily, NettioDesigns-Style

POSTED ON November 15, 2011 IN Holiday Faves, Holiday Faves 2011

Wow, November is half over! The holidays will be here before we know which means it’s time for one of the scrapbooking projects I most look forward to every year: December Daily.

For those new to the December Daily concept, December Daily is a scrapbooking album project made popular by the lovely and talented Ali Edwards so I’ll let her tell you about it in her own words:

December Daily is an album project that documents the 25 days leading up to Christmas. Many people start their documentation earlier and many people go longer.

One of the keys to success in this project is getting an album structure set-up in advance of December so that during December you can enjoy the season & enjoy the process of documenting your days without having to be putting the entire thing together at the same time. It is not meant to be stressful. It is meant to be a way to creatively celebrate the season and document you special holiday memories in one album.

For my December Daily album last year, I created a 7×9 mixed-size paper mini book and I have to say I LOVED it.

Of all the scrapbooking projects and layouts I completed in 2010, this little album is the one that I haven’t been able to stop thinking about.

There is just something magical about putting together the foundation of the album ahead of time and then seeing it fill up with memories over the course of the holiday season.

Since last Christmas, I’ve been thinking a lot about my December Daily album, what I loved and what I didn’t and this is the list I came up with:

What I Loved About December Daily:

  • Collecting memorabilia – LOVED picking up bits & pieces of life throughout the season knowing I already had a home for them
  • Mini Album– Loved the mini album size and I especially loved being able to flip through the pages everyday. An 8×8 all digital album is definitely not for me.
  • Photos – Loved printing photos at home to include in my album right away


What I Didn’t Love About December Daily:

  • The Daily-ness – As much as I love the concept, I’ve realized that a page a day is WAY too much work for me. I want to be able to skip a day and not feel guilty or even close the album on the 26th and call it done.
  • Mixed Sized Pages – While I love the look of the pages showing behind each other, the mishmash of sizes made it too complicated to put together each day.
  • The Cost – Paper supplies expensive. Plus it made me a little sad to see all the beautiful digi kits out there and not have a reason to use them.
  • Not As Travel Friendly – Last year we stayed home for Christmas so it was fine but this year we’ll be traveling which means I need an album I can easily take with me on the go.

So with all these points in mind, I’ve come up with new plan for a not-so-daily December Daily album which is much more me. A 5×7 hybrid mini album complete with foundation pages which I’ll print and then fill up with goodness over the Holiday season. And I have to admit, I may have done a happy dance or two in excitement over it. Maybe.

And what’s even more exciting, you can create your own not-so-daily December Daily mini album right along with me thanks to the new release that’s up in the NettioDesigns Shoppe today!

Holiday Faves 5×7 Mini Album Templates

That’s right, I’m taking my Faves on a Holiday spin, 5×7 hybrid mini album-style with my first ever set of mini-album digital scrapbooking templates. I am a HUGE fan of mini albums so I can’t even tell you how excited I am about this. Seriously, lots of oh-so-excited happy dances are going on over here, haha.

You can read about all the details of the Holiday Faves 5×7 Mini Album Templates in the NettioDesigns Shoppe but here are a few specific things I want to point out:

  • The mini album templates are 5×7 inches which for me is the perfect balance of size and at-home printability since you can print 2 5×7 pages on a single 8.5×11 pages. Woohoo for saving trees!
  • I designed the templates to be a starting point for building your Holiday album foundations pages so I kept the design simple so you can dress them up or down depending on your personal style. The goal is to let your photos, memorabilia and memories take center stage.
  • I will be going with a Holiday Faves theme for my album with my plan being to document my top ten favorite things from this Holiday season (with the backup plan being if I only get to say, 5, it’ll be ok). But if you’re not a Faves fiend like I am, haha, I also included a “Holiday Memories” cover and journaling option as well as a list of the fonts I used so you can customize your own.

Starting Thursday here on the NettioDesigns Blog, I will be sharing more details on how I’m personally using these templates to create the foundation for my own Holiday Faves album and of course throughout December I’ll be showing how it all comes together as well. It’s going to be fun!

The Holiday Faves 5×7 Mini Album Templates are up in NettioDesigns Shoppe now and are 20% off through Thursday, November 17th, no coupon needed,  so now’s a great time to get yourself ready to scrap your little holiday heart out.

I’m know I’m really excited about this project so I hope you’ll join along in the fun with me!

Can I take Levitra if I am taking other remedies at the same time

POSTED IN Holiday Faves, Holiday Faves 2011, Mini Albums, Template-y Goodness

  • « Previous Page
  • 1
  • 2
  • 3
HI I'M LYNNETTE. Graphic designer, tech-lovin’ memory keeper and lover of bold colors & patterns, good food and the great outdoors. Here at Nettio Designs, I share a behind the scenes peek at my own creative & life adventures. Read more...

KICKSTART YOUR CREATIVITY


By popular demand, photo book templates are back! Grab all three sets in the shop.
ADVENTURES IN ORGANIZING
GOAL-SETTING
MEMORY KEEPING
PROJECT LOVE
LIFE ADVENTURES
TIPS & TRICKS
BEHIND THE SCENES

POPULAR PROJECTS

TO SEE ALL MY PROJECTS, CLICK HERE

MUST READ POSTS

  • WHY EVERY SCRAPPER SHOULD SCRAP A FAVES PAGE
  • HOW TO CREATE A SCRAP-WORTHY MAP WITH PHOTOSHOP
  • REMEMBERING THE IMPORTANCE OF TELLING YOUR STORY
  • WHAT DOES IT MEAN TO CREATIVELY CAPTURE YOUR LIFE ADVENTURES?
  • BROWSE BY CATEGORY

    BROWSE THE ARCHIVES

    GET IT FOR FREE

    Testing testing

    links goes here

    Copyright © 2026 ·Dynamik Website Builder · Genesis Framework by StudioPress · WordPress · Log in