Nettio Designs

Design + Creativity + Adventure = LOVE

  • HOME
  • JOIN THE 2023 MONTHLY FAVES
  • THE SHOP
  • ABOUT
  • CONTACT
You are here: Home / Archives for Project Love

Ask Nettio: How Do You Remember Your Faves?

POSTED ON October 18, 2011 IN Ask Nettio, the Faves

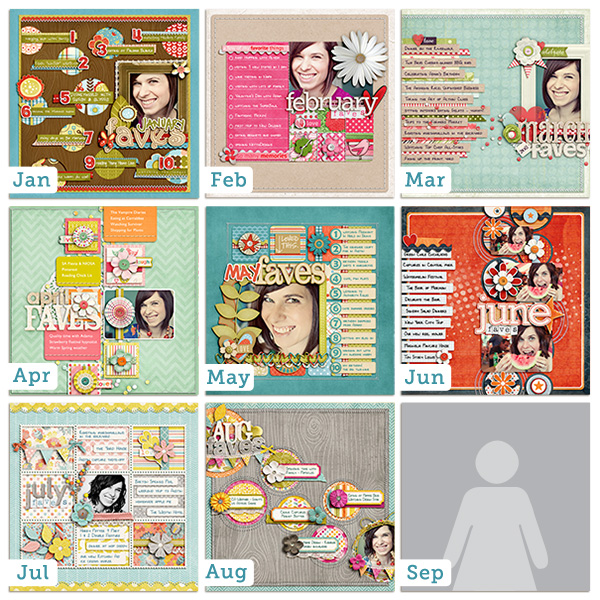
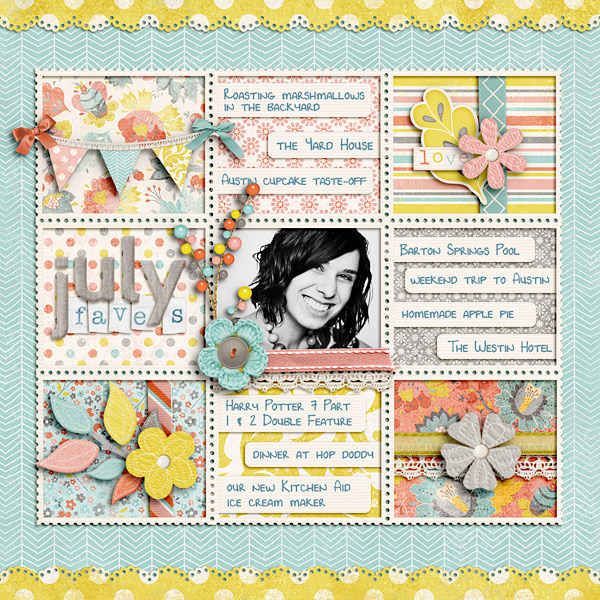
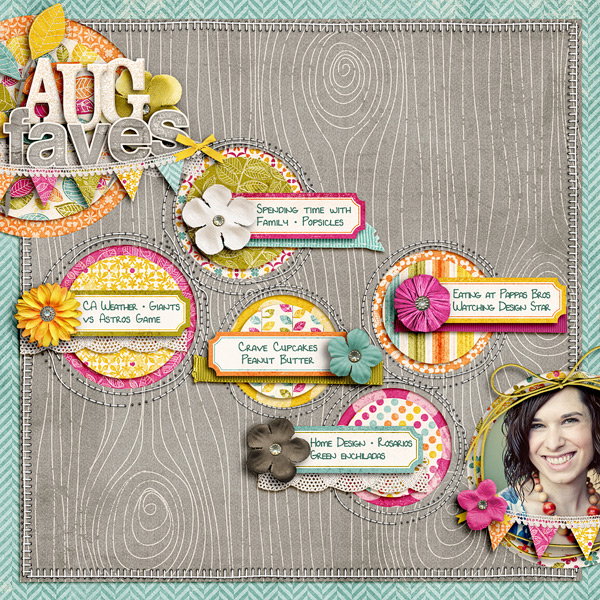
As I mentioned in my last post, after getting a bit behind over the summer on my 2011 Faves layouts, I have finally gotten caught up through August. Only September left to go!

Faves2011

But that brings up a question I have been asked quite a few times and that is:

How do you remember your Faves when your scrapbooking, say, a July page in September or a June page in October?

 
Well as much as I’d love to say I’m a super organized scrapbooker who keeps a running list of her Faves each month, I am most definitely not, haha.

But that’s good news for you because it means YOU can use the same tricks I do for creating your own awesome Faves pages long after any month is over.

So without further ado, here is a list of my go-to tricks for remembering my Faves each month:

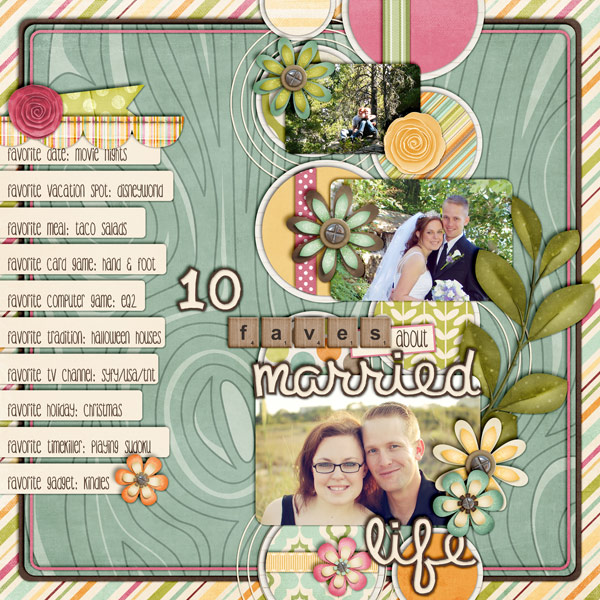
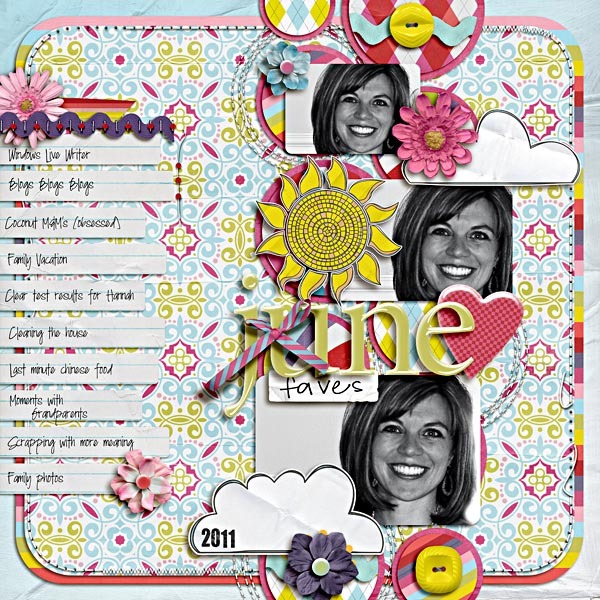
1) Browse Your Photos

As a scrapbooker I take a lot of photos over the course of the month on a random variety of topics: events, places, people, things.

So the first place I look when I’m starting a new Faves page is my photos from that month.

Not only do they provide a visual representation of all the moments that mattered to me most that month but odds are if I took the time to document something, there’s a good chance it’s a fave of mine.

2) Browse Your Completed Layouts

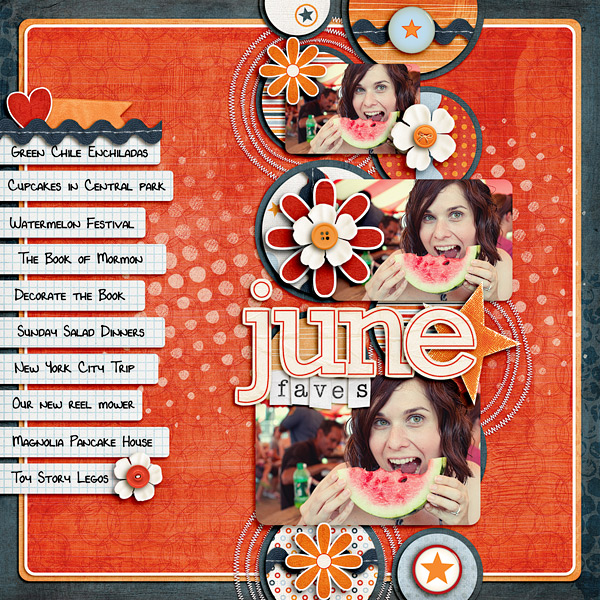
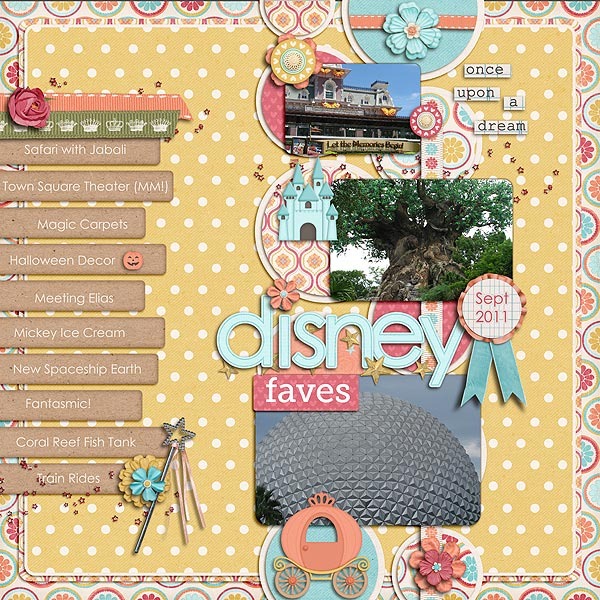
In the same vein as photos, the stories I scrapbook say a lot about what matters most to me at a given time. If I take the time to scrap a certain story, like my love for Pinterest or our trip to Sea World, it’s probably something I was lovin’ at that time.

3) Check Your Social Media Accounts

Facebook, Twitter, IM, texts, emails and forums are all great places to look for your Faves because thanks to the wonders of technology, it’s easy to go  back in your history and see what loves you’ve been chatting about recently.

4) Include an Old Standby

We all have those favorite things of ours that don’t change month to month. For me this would include things like: hanging out with Adam, my iPhone, American Eagle jeans, cheese, margaritas, traveling, etc.

So anytime I need a few more Faves for my monthly list, I know I can call on one of these stand-bys to fit the bill.

5) Don’t Stress About the Date

Number 5 on this list is perhaps the most important lesson I have learned in 2 years of doing this Faves project, and that is this:

No one, including you, will remember a year or even a couple of months from now, whether something was actually a Fave of yours that specific month or not.

So if all you can remember is you loved a certain television show over the summer but don’t know whether it was on in June or July, don’t worry about it.

Yes, the foundation of the Faves project is themed around the idea of monthly Faves, but the truth is the date doesn’t matter. What is most important is that you took the time to document you and your Faves in the first place.

Don’t let your date perfectionism get in the way of getting more of YOU into your scrapbooks.

So there you have it! Five of my go-to tricks for getting my Faves scrapbooked. I hope this helps you get your Faves scrapbooked too! 

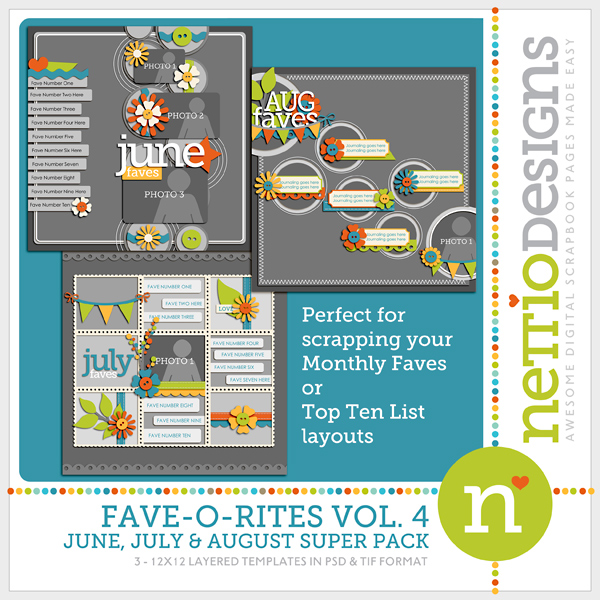
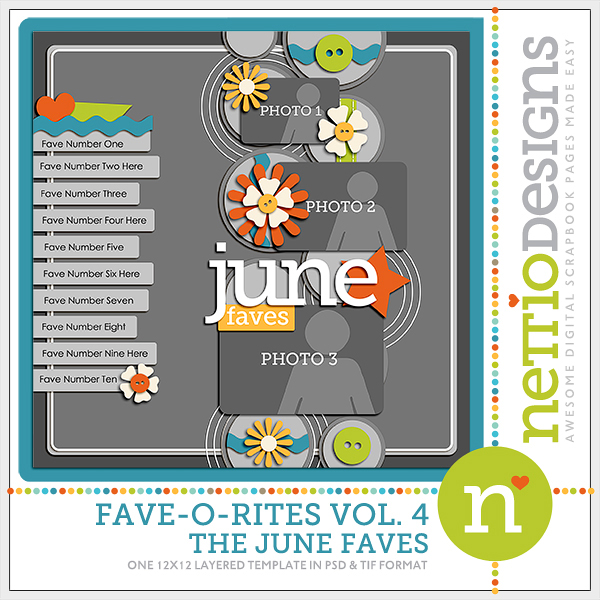
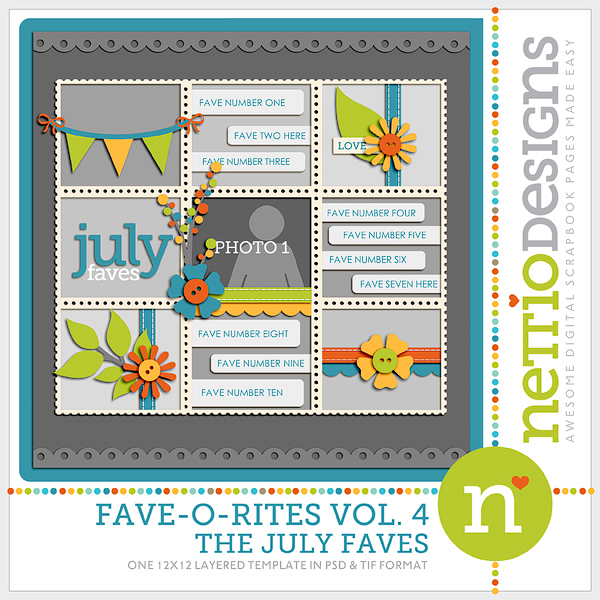
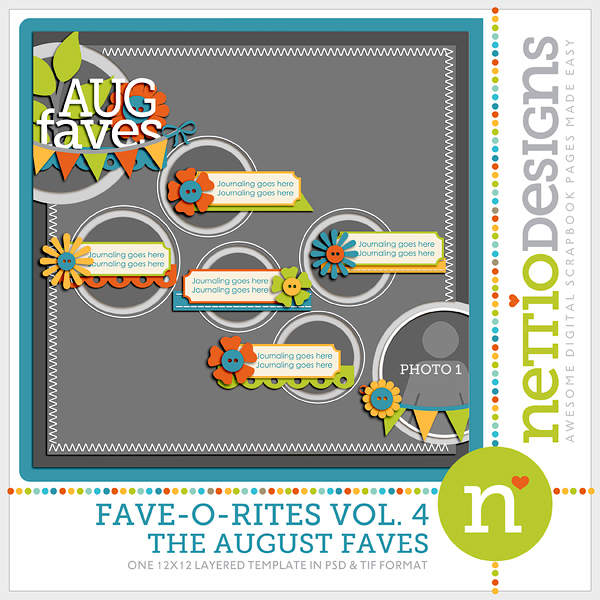
Psst…Want a little extra help documenting your Faves? Be sure to check out my FAVE-O-RITES templates Volumes 1, 2, 3 and 4 in the NettioDesigns Shoppe.

Psssst…have a burning question you’d like to see answered in a future installment of Ask Nettio? Send me a note or leave a comment and let me know!

Benefits Of Using Canadian Pharmacy

POSTED IN Ask Nettio, the Faves, Digital Scrapbooking, Tips & Tricks

Getting Caught Up With My FAVE-O-RITES

POSTED ON October 13, 2011 IN Announcements, the Faves

My quest to get caught up on my 2011 Faves layouts has been going along swimmingly.

I am now caught up through August which means I only have September left to do and I’ll be officially caught up. I’m not one to use the phrase “caught up” in scrapbooking very often but in this case I’m pretty excited to be able to say that.

Don’t they look fun together?

The good news for you Faves fans is this means I have a brand-new FAVE-O-RITES template super pack being released in the NettioDesigns Shoppe today!

FAVE-O-RITES Vol. 4 Super Pack

FAVE-O-RITES Vol. 4 includes three 12×12 digital scrapbooking templates based on my June, July and August Faves layouts.

My June Faves layout (I heart that photo, haha):

Credits: Full Throttle by Fee Jardine; Blissful Stitches: Curves by Traci Reed; Alpha from Birthday Girl by Zoe Pearn; Teeny Type Alpha by Zoe Pearn (retired); Choose Happiness by Kristin Cronin-Barrow and Shawna Clingerman; Everyday Moments by Lauren Grier and Jenn Barrette; Pumpkin Parade by Heather Roselli; Font is DJB Lynnette by Darcy Baldwin


And the June Faves template:

My July Faves layout:

Credits: Beautiful You by Zoe Pearn; Blissful Stitches Straight by Traci Reed; Teeny Type Alpha by Zoe Pearn (retired); Font is DJB Lynnette by Darcy Baldwin


And the July Faves template:

My August Faves layout:

Credits: Indian Summer by Zoe Pearn; Alpha from Those Who Want to Sing by Zoe Pearn; Blissful Stitches Square by Traci Reed; Bad Sewing Machine XXIV: Small 'N Round by Traci Reed; Font is DJB Lynnette by Darcy Baldwin


And the August Faves template:

And of course, what’s a New Release day without some NettioDesigns Team Awesome inspiration!

I always love seeing their take on my templates because they really show just how versatile these templates they can be.


The FAVE-O-RITES Vol. 4 Super Pack is up NOW in the NettioDesigns Shoppe and is 20% off thru Friday, October 14.

Pick up FAVE-O-RITES Vol. 4 right here.

Can I take Levitra if I am taking other remedies at the same time

POSTED IN Announcements, the Faves, Template-y Goodness

A Week In the Life 2011: It’s Blurb-tastic

POSTED ON September 20, 2011 IN A Week In the Life, A Week In the Life 2011

Friday was an awesome day around here. Sure it may have officially been my little sister’s birthday (happy belated birthday, Alyssa!) but the FedEx man arrived with a special gift just for me…

…my A Week In the Life Blurb photobook!

And as promised, I am back with photos of my new prized possession as well as some final thoughts about my entire A Week In the Life 2011 adventure.

Having never ordered a Blurb photo book before (or any photo book for that matter), I’ll admit I was a bit nervous about what to expect. So nervous in fact, that I let the box sit unopened until Adam came home and made me open it, haha.

But I have to say, all my worry was for nothing, as the photo book is gorgeous. In fact, I think my response when I opened it was something like, “wow, it’s like I’ve been published!” Somehow I didn’t expect it to be so, uh, officially book-like, haha.

Here’s my AWITL photo book in all it’s hardcover glory. I went with the Image Wrap option which meant my custom designed cover is printed directly on the book and wraps around to the back.

I love love love it.

Nettio blurb01

The first and last pages of the album are a really nice grey linen-ish paper.

Nettio blurb03

I’m chose the Premium photo paper for my book and I’m so glad I did. You can definitely tell it’s photo paper – the pages are nice and sturdy without being too thick.

Nettio blurb05

A look at one of the 10×10 photo spreads. These were the pages I was most concerned about because I wasn’t sure how the image would look being spread across the gutter.

Nettio blurb06

I had seen directions online about how to duplicate parts of the image to fill the gutter, but there was a lot of variables involved (like page and book thickness), and no guarantee it would work, so I decided to instead make sure whatever part of the image that was in the gutter was non-essential. If I were to do this again, I might play around with it more but I think it worked out mostly fine.

If you look closely at the bottom of the photo you can see where the computer screen doesn’t quite match up but in person it’s a lot less noticeable than in this photo.

I did have one page where the text ended up in the gutter. I’m not sure what happened but I suspect the title moved when I was doing all my journaling and I somehow didn’t realize it. Lesson learned, definitely double-check that all your text is in that lovely grey safe area box!

Nettio blurb07

If you open the page a little farther, you can see the end of the title, it’s just a wee bit closer than it should have been. Oops. Poor cutoff title.

Nettio blurb08

On a happier note, this might be one of my favorite spreads. I really love that photo blocking on the left page.

Nettio blurb09

A look at two of the highlights pages:

Nettio blurb010

Nettio blurb011

On the last page of the album Blurb included their cute little logo.

Nettio blurb013

A little peek at the spine:

Nettio blurb015

The back cover…

Nettio blurb016

And the entire cover all together:

Nettio blurb017

On the outside spine of the book, I included the title of the album and the date. I can totally imagine a bunch of these books lined up on a shelf.

Nettio blurb014

A Week In the Life 2011: My Final Thoughts

Blurb Photo Book: Blurb definitely gets my stamp of approval. I’d heard a lot of horror stories from other scrapbookers who have printed photo books from other companies, so I wasn’t really sure what to expect, but the quality of the Blurb book is fantastic and the color and trim on the pages is totally true to what I saw on my screen. Plus using their PDF to Book InDesign Plug-in made the whole bookmaking and uploading process SO easy.

Photobooks in general: I definitely see more photo books in my future. I absolutely LOVED the clean photos + words format. I can see so many uses for it. I don’t see myself switching to printing my digital layouts in photobooks any time soon, but this project has definitely inspired me to tackle some of the photobook projects I’ve been wanting to do for awhile, like our wedding book and our year in Korea album.

A Week In the Life: I heart this project. A lot. Sure it’s a TON of work but the end result is so so worth it. Adam said it best – it’s like a time capsule of our life. And that is so so very cool.

Favorite AWITL moment: Adam’s dramatic reading of day one of my A Week In the Life album. If you think it’s weird to have other people read your journaling, try having them read it to you out loud in a dramatic fashion. Totally awkward and hi-larious.

More than anything, what I’m taking from this A Week In the Life 2011 adventure is this: I can do this. I can set out to do one of these major scrapbooking projects and actually finish it. Maybe not as quickly as someone else but as long as I stay focused, I’ll get there in my own time.

As someone who tends to leave behind a wake of unfinished projects, that is one awesome lesson to have learned.

What about you? Have you learned any awesome life lessons lately? Have you seen the photo book light like I have? Have any photo book adventures of your own to share? Feel free to let me know in the comments!

Psst…want more A Week In the Life goodness? See all my AWITL 2011 posts here.

Interested in creating your own album? Check out the Photobook Frenzy Photoshop templates in the shop.

Fraudulent Drugs Are A Huge Global Problem

POSTED IN A Week In the Life, A Week In the Life 2011, Digital Scrapbooking

A Week In the Life 2011: Bringing It All Together with Aperture & InDesign

POSTED ON September 15, 2011 IN A Week In the Life, A Week In the Life 2011

On Tuesday, I shared my completed A Week In the Life album (you can see it in all it’s photo-y goodness here). Now I don’t know about you, but I am always curious nosy when it comes to how people tackle large projects like this, so today I wanted to offer a little behind-the-scenes peek at how I put my Week in the Life photo book together.

Let me preface this by saying that this was my first attempt at creating a photo book so by no means do I consider myself a photo book expert. I’m just sharing what worked for me.

The tools I used:

  • Apple Aperture
  • Adobe InDesign


Yes, you read that right. No Photoshop.

Ok, well, that’s not entirely true. I did use Photoshop to run my most favorite Totally Rad “Lux” action on my big 8×10 and 10×10 focal photos.

If you’re wondering why I chose for this project to go with my first Adobe love, InDesign, over my old scrapbooking standby, Photoshop, there were a couple of reasons:

1) InDesign is designed for multi-page projects

In order create this photo book in Photoshop, I would have had to create a separate document for each page of my album. But because InDesign is built for multi-page print publications (think magazines, newspapers, books, etc), I was able to create one single file that included all 46 pages of my album.

Definitely WAY easier than keeping track of 46 individual Photoshop documents.

2) The Blurb InDesign PDF to Book plug-in

One of the reasons I chose to go with a Blurb is they offer a free downloadable PDF to Book plug-in for InDesign that creates a custom book template for you based on the size and number of pages you want in your photo book. And it includes all of the trim and bleed information right in the template so you don’t have to worry about parts of your text or images getting cut off. Plus you can save the entire file as a PDF and upload it directly to print. So so easy.

Now if you’re wondering if this means you need InDesign to your long digital goodies wish-list, the answer is NO. You can absolutely use Photoshop to create a photo book – lots and lots of scrapbookers do.

BUT if you’re one of those scrapbookers who happens to own the Adobe Creative Suite and has always wondered what you could use InDesign for scrapbookingwise, this post will give you a little overview about the awesomeness that is InDesign.

But before we get to InDesign, I want to talk a little bit about the first big hurdle for this project – the photos.

Part 1: Organizing Photos in Aperture

Over the course of A Week in the Life, I took over 750 photos. That’s a lot of photos! So I needed an easy way to select and edit my most favorite photos.

Enter Apple Aperture.

In another post I’ll explain more about why I’ve made the switch from Adobe Lightroom to Apple Aperture but for now, all you really need to know is that if I didn’t already love Aperture before, this project totally made me head over heels in LOVE with it.

After uploading all my photos from my Canon Digital Rebel XT, my Nikon P&S and my iPhone, I started organizing them in Aperture.

First I made a project folder for A Week In Life 2011 and added Smart Folders that pulled photos taken during the week divided by days:

Awitl aperture sf

Next I added a five star rating to all the best photos, being careful to limit the number of too similar photos:

Awitl aperture 5star

Once I had my five-star photos selected, I created Albums for each section of my days (I called them Routines) and dragged the five-star photos into their correct albums:

Awitl aperture routine

My final step was to Flag the small number of photos I wanted to include on my page. These are the only photos I edited and exported as JPGs to use in InDesign. As I mentioned, I used Aperture to edit the majority of my photos. The only photos that went to Photoshop were the large focal photos so I could add a little extra punch to them with my Totally Rad Actions.

My flagged photos (which you can also see in the earlier photos but only because I’ve already done the project, haha):

Awitl aperture flags

I then repeated this process for each daily routine album.

If you’re wondering why I chose to mix the flags with the star ratings, the answer is personal preference. I liked that it was easy to see the flagged photos rather than trying to see the difference between say 3-star and 5-star photos. You could definitely do it a different way, this was just what worked best for me.

Writing it all out it seems like a lot of steps but it actually went rather quickly. For all you fellow math nerds, here’s a little numbers breakdown of the photos at each step:

  • 162: Number of photos taken on Monday
  • 99: Number of photos that received a 5-star rating
  • 40: Number of 5-star photos which were moved to the Monday Morning routine album
  • 8: Number of flagged photos for Monday Morning which were then edited and exported as JPGs
  • 6: Number of photos that made it onto the final version of the Monday Morning routine page in the photo book

Because I already had my design planned out, I had to be pretty ruthless since I knew at most I could only have 7 photos per spread.

Once I had all my photos edited and exported, it was time for some InDesign fun.

Part 2: Putting It All Together In InDesign

I don’t want to get too detailed about how I use InDesign, only because, if I did we’d be here all day and this post is already getting long, haha.

But I did want to show you the highlights of how I put my album together with InDesign. So if you’re curious in knowing more about InDesign or would like some more specific details/questions answered, please feel free to ask in the comments section.

My first step in InDesign was to download and install the Blurb PDF to Book plug-in. You can find the plug-in here.

Once you have the plug-in installed, you’ll be able to go to the File menu and find the Blurb Template Creator, which will bring up a dialog box that looks like this:

Awitl blurb dialog

There you’ll choose the size of your book and the type of paper you want (some paper is thicker than others) as well as the number of pages.

If you’re not sure how many pages you’ll need, don’t worry about it. You can always add and remove pages as you work. The only time the correct page count matters is when creating your cover so make sure you don’t create your cover until you’re completely done with your book (or at least 100% sure on your finished book page count).

Once you’ve inputted all your book information, Blurb will create a book template that looks like this, a two page side-by-side spread just like you would have in the finished book:

Awitl blurb temp

That main area is where you’ll design your pages and on the right side of the window, you have a list of all your spreads.

At the top of the page Blurb has included some bleed/trim information for the book. Here’s a closer look:

Awitl blurb info

Included are are three sets of lines: one for the safe area, one for the trim area and one for the bleed area.

The black trim line represents the physical edge of the book pages while the big grey box is considered the “safe zone.” Anything important (like text) should go in that grey box as due to trimming inconsistences, Blurb can’t guarantee that anything outside that box will for sure not be trimmed. It shouldn’t be, but it’s a better-to-be-safe kind of thing.

The red outer line represents the bleed line. If you want your photos to bleed to the edge, aka no white edges, you want to make sure your photos go all the way to that red line.

In terms of designing the album, InDesign is a lot more simple than Photoshop in that you don’t deal with layers in the same way. It’s pretty much all boxes: either image boxes or text boxes.

The weekend prior to AWITL, I created two master pages (essentially templates) to serve as foundation pages for my design. This is what my two master pages looked like:

8×10 Focal Photo:

Awitl indesign master2

10×10 Photo:

Awitl indesign master3

haha, yes, those are our wedding photos. They happened to be in an easily to grab folder along with these other prints.

To create my pages, I simply replaced the photos (in InDesign it is MUCH easier than Photoshop to replace and resize photos into pre-done image boxes) and adjusted the image and text boxes based on the number of photos I had chosen for that portion of my day.

Let’s just say there was a lot of repetition in this project – duplicating spreads, replacing photos and adding new text.

As far as planning, other than the basic design of the master pages, I didn’t have all my pages planned out in advance. I just moved the boxes around as I saw fit based on how the overall album was coming together. One of the great advantages of InDesign is you can see ALL of the spreads at once and really get a birds-eye view of how it’s all flowing together.

Now here’s the part in the cooking show where I miraculously pull my pre-made finished dish out of the oven. *cue the wavy time-is-passing lines*

Here’s what my finished album looked like in InDesign after all the moving and replacing:

Awitl indesign lines2

One of the finished square photo pages (if you look closely you can see how the big photo bleeds across the book spine and onto the second page):

Awitl indesign square

A little bit more of a close up:

Awitl indesign full2

So you can see all my text is within that gray safe zone and all my photos bleed to the very edge where the red line is because I didn’t want any white space at the edge.

Here’s what the finished page will actually look like in the photo book (minus the grey background):

Awitl indesign nolines

It’s kind of hard to tell from the screenshot, but everything outside of the black trim line has been basically “trimmed” to give a more realistic look of what the book will actually look like in print.

I haven’t received my printed Blurb book yet (possibly Friday!) so I’m not sure how much will really be trimmed off but I’m hoping it’ll be similar to this look. I’ll definitely be sure to share whatever happens!

Anyway, I hope you enjoyed this little long peek into the inner workings of InDesign, Aperture and my A Week In the Life album. If you have any questions or anything, feel free to leave me a note in the comments section!

Psst…want more A Week In the Life 2011 goodness? See all my AWITL posts here.

Can I take Levitra if I am taking other remedies at the same time

POSTED IN A Week In the Life, A Week In the Life 2011, Digital Scrapbooking, Tips & Tricks

A Week In the Life 2011: The Completed Album

POSTED ON September 13, 2011 IN A Week In the Life, A Week In the Life 2011

Woohoo, I have done it!

My A Week In the Life 2011 album is officially finished. In about 3 short days I should have a nice and shiny Blurb photobook arriving on my doorstep.

And I could not be more excited.

Not only because I’m absolutely in LOVE with the finished album but because for the first.time.ever I have completed an Ali Edward’s inspired project.

Yes, that’s right, unlike my previous attempts at December Daily or A Week In the Life, this time around, my AWITL album will not be sitting on a shelf or in a folder on my harddrive mocking me in all it’s unfinished project glory.

Cue scrapbooking happy dance.

I’ll be the first to admit this project was a TON of work. Between spending a week documenting everything, selecting and editing photos, putting it all together, journaling, well…there’s a reason I just put the finishing touches on this album in September.

But I am head over heels in love with the end result, so all that hard work? Totally worth it.

As I mentioned in my pre-AWITL planning post back in July, my plan for my AWITL album was to create an 8×10 Portrait photobook through Blurb which I would design using Adobe InDesign. And I have to say, that plan worked out swimmingly.

When I started brainstorming for my album, I knew I wanted the album design to be focused on words + photos with a clean, magazine style design and I also knew that I wanted to break my day into chunks (like morning, afternoon, evening) in order to simplify the documentation process.

But I wasn’t entirely sure about the exact design for my album until I came across this spread from an old West Elm catalog I had saved…

Magazineinspiration

Not only did I love the clean design, the large focal photo and the fantastic use of type, but the theme for this particular edition of the catalog was exactly what I was looking to do with my AWITL album. The catalog was broken up into daily sections, with each spread themed around the idea of what furniture and accesories would be perfect for that part of the day (above is Saturday afternoon).

So I chose to use that page as inspiration and run with it for my album.

So with that in mind, I bring you my 2011 A Week in the Album…

2011 Completed A Week In the Life Album

Below you’ll find the pages from my AWITL 2011 album. Each image represents a two-page spread made up of two side-by-side 8×10 pages. Since the spreads are rather small in order to fit on the blog, I’ve linked each image to a larger image on my Flickr account, in case you want to see the details or journaling.

Just a bit of warning, Adam and I are pretty awesome so try not to be too jealous of our super exciting life (and slankets), haha.

Cover + Intro

AWITL cover 600

This may just be my favorite page from the album. Clean blocked design, yes please. It really brought everything all together.

AWITL 20111 600

I included our location, along with the date, on the intro page because, as a military family, where we live changes so often that it’s kind of necessary to document it, especially considering had I done this project in July 2010, we would have still been living in Colorado.

Monday

AWITL 20112 600

AWITL 20113 600

AWITL 20114 600

Tuesday

AWITL 20115 600

AWITL 20116 600

Wednesday

AWITL 20117 600

AWITL 20118 600

Thursday

AWITL 20119 600

AWITL 201110 600

Friday

AWITL 201111 600

AWITL 201112 600

AWITL 201113 600

Saturday

AWITL 201114 600

AWITL 201115 600

AWITL 201116 600

Sunday

AWITL 201117 600

AWITL 201118 600

AWITL 201119 600

A couple of notes about the design:

  • Some days have more spreads than others, with a max of three spreads per day (morning, afternoon, evening). I didn’t plan which days would have more spreads ahead of time, it really just came down to which photos I felt told the whole story over the course of the week.
  • It’s hard to tell without the page break line but the large square photos spread across two pages.
  • I used a consistent accent color, pink, to tie all the spreads together. I’m not usually a pink girl but for some reason here I liked it.
  • All the journaling is themed around time. I didn’t document the time as I went – I just used the time stamps from the photos and rounded to a nice number.


Highlight Pages

At the end of the album, I included some highlight pages that document some of the broader themes from our week, like food, clothing, etc. I figure it’ll be fun to look back on these pages years from now and remember laugh at all the things we use that no longer exist, haha.

AWITL 201120 600

Weekly Highlights: the journaling on this page came directly from a set of lists I kept in Evernote during the week. I loved the idea of capturing these items now knowing one day some of these items/brands will no longer be around.

AWITL 201121 600

AWITL Fashion: One of my goals for the week was to take a daily photo of myself in the mirror. I’m sure this page will be one of those that I cringe at years from now which is partly why I wanted to include it, haha. I mean, could you imagine if you had a page like this from high school? It’d be craziness.

AWITL 201122 600

AWITL Food: A simple list of the food we ate during the week. Again, I kept track of all this in Evernote so I just had to copy and paste it into InDesign.

AWITL 201123 600

AWITL Technology: A look at some of our most used tech stuff. I figure it will be funny to look back someday at what technology was considered “cool” in 2011. The future generation will probably be laughing at this page from their flying cars and in-brain computers, haha.

On the last page I included a little summary about who we are and what this album is about. It would have been a great intro page as well but since Blurb requires the first and last pages to be single pages, it worked better to include it here. I think it’s a nice little ending to the book.

AWITL 201124 600

And that’s my A Week In the Life 2011 album! In the end I ended up with 46 pages and I’m super thrilled with how it turned out.

This was my first attempt doing a photobook and I absolutely loved the simplicity and clean design of this format. Definitely something I’ll be doing again!

Lessons Learned from the Week In the Life 2011 Process

So what lessons can I take away from my first completed A Week In the Life album?

1) Having a plan is key

Having a clear design and plan before the week started made things SO much smoother.

Not only did I know what types of photos I needed (like the big focal photos) but it freed me up from feeling I had to capture every moment of every day.

2) Go with the best tools for the job

I’m sure I could have put together this album in Photoshop but using InDesign made it so much easier, especially when combined with the Blurb InDesign plug-in.

3) Take more detailed notes during the week

Next time I’d love to do more in-the-moment journaling rather than just keeping lists. Plus, trying to remember all the details a month later is tough.

4) Schedule time to complete the album

My biggest mistake this time around was underestimating just how much time and work it would take to put the album together. Next time I’d like to schedule time for working on each section of the album so I guarantee I can finished it in a reasonable amount of time.

5) Keep things simple

I know myself well enough to know if I tried to scrap all the pages for this album in my signature paper-lovin’ scrapbooking style, the album would never get done.

Which is exactly why I chose to keep things simple this time around. No fancy scrapbook products. Just words + photos. I LOVED it.

Having a clean, well-designed finished album definitely beats the pants off of an unfinished but super detailed scrapbook album any day.

A Week In the Life: Done and Done

And that’s it for my 2011 Week In the Life album!

By far my biggest take away from this project is I am actually capable of completing one of these major projects. That’s a pretty big exciting step for a girl who gets really excited about projects like this but then FAILS in the execution of them.

How about you? Did you learn any fun lessons from your finished (or unfinished) A Week In the Life album? Anything you would do differently? And is anyone else convinced like I am that Ali Edwards must have scrapbooking elves who come in the night to help her complete these projects? I love her projects but man are they a lot of work, haha.

If you have any questions about my album, please feel free to ask those in the comments section as well.

Can diabetes cause erectile dysfunction

POSTED IN A Week In the Life, A Week In the Life 2011, Digital Scrapbooking

A Week In the Life 2011 Sneaky Peek

POSTED ON August 25, 2011 IN A Week In the Life, A Week In the Life 2011

Hello everyone! Did ya miss me? My apologies for being a bit MIA on the blog front this month.

In addition to putting out some awesome new products this month (which you can check out here & here), I had to take a bit of a family emergency trip back to California last week when both of my grandmothers ended up in the hospital.

While it was great to spend time with my family, it was a pretty stressful trip overall – the kind that makes you feel like you need a vacation to recover from your vacation.

But the good news is things have finally calmed down and I’m ready to jump back onto the blogging and scrapbooking bandwagon.

Which is why I popped in today to show you a little peek at what I’ve been working on the last few days…

That’s right. I am in full on A Week In the Life album creation mode around here. Sure it took me a few extra weeks to get to it but better late than never, right?

As I mentioned before, my plan for my AWITL album was to keep the design really clean and simple and focus on just the words and the photos and I have to say, I am loving the result.

I’m getting really excited to see the finished product, which considering I only have the journaling and a final overview page to go, I’m hoping that will be in the next day or two. So be on the lookout for future post with all the juicy details of my AWITL adventure sometime next week.

So what about you? Anyone else still chugging along on your AWITL album like me? Anyone finished their album and want to share? Feel free to share your AWITL thoughts and links in the comments!

Benefits Of Using Canadian Pharmacy

POSTED IN A Week In the Life, A Week In the Life 2011, Digital Scrapbooking

  • « Previous Page
  • 1
  • …
  • 14
  • 15
  • 16
  • 17
  • 18
  • Next Page »
HI I'M LYNNETTE. Graphic designer, tech-lovin’ memory keeper and lover of bold colors & patterns, good food and the great outdoors. Here at Nettio Designs, I share a behind the scenes peek at my own creative & life adventures. Read more...

KICKSTART YOUR CREATIVITY


By popular demand, photo book templates are back! Grab all three sets in the shop.
ADVENTURES IN ORGANIZING
GOAL-SETTING
MEMORY KEEPING
PROJECT LOVE
LIFE ADVENTURES
TIPS & TRICKS
BEHIND THE SCENES

POPULAR PROJECTS

TO SEE ALL MY PROJECTS, CLICK HERE

MUST READ POSTS

  • WHY EVERY SCRAPPER SHOULD SCRAP A FAVES PAGE
  • HOW TO CREATE A SCRAP-WORTHY MAP WITH PHOTOSHOP
  • REMEMBERING THE IMPORTANCE OF TELLING YOUR STORY
  • WHAT DOES IT MEAN TO CREATIVELY CAPTURE YOUR LIFE ADVENTURES?
  • BROWSE BY CATEGORY

    BROWSE THE ARCHIVES

    GET IT FOR FREE

    Copyright © 2025 ·Dynamik Website Builder · Genesis Framework by StudioPress · WordPress · Log in