Nettio Designs

Design + Creativity + Adventure = LOVE

  • HOME
  • JOIN THE 2023 MONTHLY FAVES
  • THE SHOP
  • ABOUT
  • CONTACT
You are here: Home / Archives for Project Love

Counting Down My Top 5 Faves From NettioDesigns’ First Year

POSTED ON February 28, 2012 IN 1st Anniversary, Announcements, the Faves

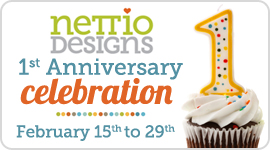
With the NettioDesigns 1st Anniversary celebration coming to an end this week, I wanted to spend today sharing some of my favorite NettioDesigns related-moments from the past year. I have to say, going back through my blog archives was a fun reminder of just how much I have done this past year, so I hope you enjoy this trip down memory lane!

Fave #1: Opening Day of NettioDesigns

20110215 Opening Day web 600 coupon

I don’t think any faves list for the past year would be complete without starting at the very beginning: February 16th, 2011, NettioDesigns’ official grand opening day. The circumstances surrounding the grand opening were well, crazy.

In the midst of getting everything ready for the shoppe opening, I’d also volunteered to help my little sister drive back from Florida to California (I was on call for the Florida to Texas leg). Which meant behind the scenes, not only was I furiously working to create new product and get the shoppe up and running, but I was also driving long days and dealing with some of the craziest weather I’ve ever encountered – 30 degree weather in Florida, tornados and crazy rain in the South and snow and ice in Texas.

In the end, it simply wasn’t possible to get everything done in time and I had to postpone the grand opening by a week. But all the waiting and hard work proved to be worth it because I’ll never forget the sense of pride I felt in seeing those first sales come through and realizing that hey, maybe this crazy idea of mine may just actually work.

Fave #2 – Blog-tastic Events

5thscrapiversary logo web

Two of my favorite blog-related moments from the past year would have to be the Great Computer Spring Clean-a-thon I did last March and my 5th Scrap-i-versary celebration last April. In both cases, I came up with this idea for a week-long series of posts for the blog and while things didn’t always go exactly as I planned, the posts from both of those series are still some of my favorites. There’s a quirky honesty and joy to those posts that feels 100% me. I may even have giggled a time or two as I read through them all again, hehe.

Fave #3 – A Week In the Life 2011

Nettio blurb01

It’s hard to deny that my A Week In the Life photo book wasn’t a bit of turning point for my this little website of mine. It got me noticed by a larger audience and as a result, opened doors for some fun opportunities that probably wouldn’t have happened otherwise. The icing on the cake? It’s still my absolute favorite scrapbooking project from 2011.

Fave #4 – Teaching at Masterful Scrapbook Design

Nettio masterful

Teaching has always been something I’ve wanted to do as part of NettioDesigns but I’ll admit the large upfront time cost compared to creating a set of digital scrapbooking templates kind of scared me. So when the lovely Debbie Hodge asked me if I would be interested in guest teaching at Masterful Scrapbooking Design, I jumped at the chance. And I have to say, I loved it. Not only did it make me realize just how much I love chatting about the process and design side of scrapbooking, but it was a nice little reminder that maybe my goals and dreams aren’t as so out there after all. (And yes, the fact that I taught a class alongside one of my fave paper scrappers, Kelly Purkey, totally boggles my mind.)

Fave #5 – The Faves 2011

Nettio 09 2011faves 10oct

If there was one product line for NettioDesigns that represents year 1 it would have to be my Monthly Faves and Holiday Faves Mini Album templates. But the reason the Faves makes this list is not so much for the Faves themselves but because they represent the heart behind NettioDesigns – the importance of taking time to document and celebrate your awesomeness in a fun and unique way.

The Faves are what pushed me to begin this crazy adventure in the first place and so it seems only fitting to end the 1st anniversary with my final installment of the Faves template series, FAVE-O-RITES Vol 5: Sept, Oct, Nov & Dec Faves.

Nettio favesv5 pack

These templates are up in the NettioDesigns Shoppe now and like everything in the shoppe are 20% off (30% off if you’re a subscriber!) through the end of February in honor of the 1st Anniversary Celebration. Go check them out here!

And of course my final fave on this list would have to be getting to chat with all of you. Like most bloggers there are definitely days when it feels a bit like I’m rambling to myself, but those moments when someone shares a layout or leaves a comment and totally gets it makes this crazy adventure all worth it. So at the risk of being mushy for a sec, I hope you know just how much it means to me when you take time out of your busy day to stop by and share your thoughts and layouts with little ol’ me.

So with that, that wraps up my 5 Faves from the 1st year of NettioDesigns! I’ll be back tomorrow with my final 1st Anniversary post and to announce the winners of the Show Off Your Awesomeness Contest. In meantime, if you’ve been eyeing something in the shoppe, make sure to pick it up before the anniversary sale ends tomorrow!

Fraudulent Drugs Are A Huge Global Problem

POSTED IN 1st Anniversary, Announcements, the Faves, Template-y Goodness

It’s Time to Party, 1st Anniversary Style!

POSTED ON February 15, 2012 IN 1st Anniversary, A Week In the Life

That’s right! The NettioDesigns 1st Anniversary celebration is finally here!

Woohoooo, I’m so excited!

If you’ve been wondering where I’ve been hiding last two weeks, well, I suspect the new look of the site may be a big clue, haha, but yes, for the last two weeks I’ve been buried under a pile of code working hard to spiffy up NettioDesigns for her very first birthday party.

As I’ve been telling my team, this was meant to be more of a revamp than a complete redesign but looking at it now, I’m realizing other than the background, the colors and some fonts, almost everything has changed in some way, haha. There’s still a few things that need tweaking (aren’t there always?), but I think she’s looking pretty good so if you’re viewing this post in a feed reader or email, be sure to stop by and check out the new look!

Of course the new design is only the kickoff to the 1st anniversary celebration so over the next two weeks, we’re going to be partying it up here at NettioDesigns with new products, a contest and more!

And to get things started today, I’ve got a much-requested NEW product up in the NettioDesigns Shoppe…

Photo Book Frenzy: A Week in the Life 8×10

Yes, that’s right, the modern, magazine-style design I used for my popular A Week in the Life Blurb photo book is now available in template form!

You can read all of the details in the shoppe but included in the template set are 18 two-page 10×16 page spreads, including 8 photo-style pages and 2 A Week in the Life highlight pages. Each photo spread comes in both a left and right version so you can mix and match the spreads to your hearts content.

And for all my square-loving friends out there, I also put together a 12×12-inch version of the templates…

Photo Book Frenzy: A Week in the Life 12×12


Both sets of the Photo Book Frenzy: A Week in the Life Templates are up in the NettioDesigns Shoppe now but before you pop over to the shoppe, I’ve got one more little announcement…

It’s time for the NettioDesigns 1st Anniversary Sale-a-bration!

That’s right, starting today through the end of the month you can use coupon code: 1birthday to save 20% off everything in the NettioDesigns Shoppe! Storewide sales aren’t too common around here so if you’ve had your eye on something, here’s your chance to pick it up and save a little $$$.

And of course, if you’re a NettioDesigns News email list subscriber, check your email for an exclusive subscriber only discount code. Want to get in on the subscriber goodness? Sign up here.

And if you want to make sure you don’t miss out on any of the NettioDesigns 1st Anniversary Celebration fun over the next two weeks, look for the image below at the top on the site. It will link you direct to all 1st Anniversary related content:

Well that’s all I’ve got for today! Be sure to stop by NettioDesigns tomorrow where I’ll be chatting more about what it means to “embrace your scrapbooking awesomeness” and how you can get yourself in the running for some free stuff!

Fraudulent Drugs Are A Huge Global Problem

POSTED IN 1st Anniversary, A Week In the Life, Template-y Goodness

My One Little Word for 2012

POSTED ON January 26, 2012 IN One Little Word

Welcome to One Little Word 2012.

If you’re new to the concept of One Little Word, the idea is rather than making a long list of resolutions for you have no intention to keep, you choose a single word to focus on for the year.

My word for the past year and half has been ADVENTURE.

I chose this as my word in the summer of 2009 when Adam was coming home from Afghanistan and we made the big move from Colorado to Texas. I figured new location+new job=new adventures and I wanted to make sure I was in the right mind frame to embrace all the change. And I have to say, I LOVED this word. It’s a word that I know will stay with me for a long time to come.

But after a year and half, it’s time to focus on a new word.

So the word I’ve chosen for 2012 is…

CONNECT.

I’ll admit this word kind of terrifies me a little bit. Ok maybe a lot, haha.

But I also think that’s a sign it’s the right word for me. Because it’ll push me out of my comfort zone.

And if I’m being honest, I definitely need that push.

A year ago when we moved here to Texas, I made the decision to give this little design business a real shot. And so in February I opened up NettioDesigns and for the most part I’ve really loved it.

But what I don’t think I anticipated was how lonely it can get working at home by myself all the time. I mean, it’s not like I’m a stranger to being alone – I’ve done two deployments! But add in the fact that this military base we’re currently stationed at is largely a training base where people only stay for a few months and well, it’s been a bit hard to get motivated to get out and meet people. Even more so when running your own business from home – there’s always something to be done.

Which is why I’ve chosen CONNECT as my word for this year. Because I want to focus more on connecting: with people, with life, and with myself, both online and offline.

And to keep myself extra motivated this year, I’m participating in Ali Edwards’ One Little Word class over at Big Picture Classes.

This month’s prompt was to fill up a pocket page protector with 9 cards – 5 word cards from Ali and 4 cards of our own making. Since I’m doing my layouts all digitally, I used Traci Reed’s 8.5×11 Slip Ins for my pockets and combined them with a brand new collab kit from Shawna Clingerman which will be being released this weekend. I really love how it turned out!

I don’t know where CONNECT is going to take me this year but I sure am excited (and a wee bit nervous) to see how this word-y adventure (like how I worked it in? ) pans out. Should be interesting for sure!

So what about you? Anyone else playing along with One Little Word? What word have you chosen for 2012?

Psst…looking for an awesomely easy way to capture your One Little Word for this year? Check out my It’s Goal-tastic Template Pack in the NettioDesigns Shoppe.

How Can Customers Lower Their Remedy Costs

POSTED IN One Little Word, Digital Scrapbooking, Template-y Goodness

An Update On My 29th Year Project Life Album

POSTED ON January 17, 2012 IN Project Life

Back in May as part of my 29th birthday celebration, I wrote a list of 5 personal goals I wanted to achieve before I turn 30 this year.

29goals 5

Number 5 on the list is to document my 29th birthday year because as I wrote in this guest post over at Sweet Shoppe Designs, turning 29 feels like a pretty big milestone. A rite of passage. The last official year of my twenties.

And as any good scrapbooker will tell you, milestones are made to be documented.

So in July, after a mulling it over for a little bit, I decided jump into the Project Life pool and choose it as my method for documenting this year. I even wrote a post about my plan and shared my first spread.

IMG 34947

With the start of the new year and the ensuing Project Life overload that’s going on right now, I’ve gotten a few requests to share an update on how my Project Life album is coming along. And so I’m back today with a little update…which you may or may not like.

You see…that one lonely little spread up there? That’s all I’ve completed of my Project Life album.

I know, sad.

But before you go assuming this is just another case of #ProjectLifeFail, here’s the deal.

I posted about my plans for Project Life on July 20th. And only five short days later, on July 25th, I embarked on another not-so-little project called A Week In the Life.

AWITL 20119 new

Having never completed A Week In the Life before, I didn’t really know what to expect. But I went into it with a plan and came out of it with an amazingly AWESOME Blurb photo book.

Nettio blurb01

And what I realized once I had this book in my hot little hands is that this AWITL album achieves my goal of documenting my 29th birthday year.

Sure it doesn’t include each and every moment of every day the way Project Life might have, but it does exactly what I wanted to do with my 29th birthday year album:

It captures a snapshot of what our life is like as two child-free married twenty-somethings.

Nettio blurb07

The places we go, the things we do, the technology, fashion, food and so much more we love.

Nettio blurb010

And I LOVE it. I love it in a it-still-makes-me-want-to-do-happy-dances-everytime-I-look-at-it kind of way.

And that’s good enough for me.

So in keeping with my 2012 scrapbooking resolution to trade the busy for the meaningful, I’ve decided to call this goal done and let it go.

I may feel inspired to pick up my Project Life album again, I may not, but either way, I’m happy with my decision.

And with that I leave you with two little reminders:

1) It is OK to change your plans (and not feel any guilt about it).

2) Just because everyone else is doing something, doesn’t mean you have to stick with it too.

So what about you? Anyone else ever start something only to change your plans mid-way? Were you happy with the end result?

Fraudulent Drugs Are A Huge Global Problem

POSTED IN Project Life, Hybrid Scrapbooking

Holiday Faves Mini Album | How to Add a Fabric Spine & My Final Thoughts on this Project

POSTED ON January 13, 2012 IN Holiday Faves, Holiday Faves 2011

Nettio Faves5 10 42 text2

As I mentioned in yesterday’s post I have finished my Holiday Faves 2011 Mini Album. Woohoo!

My final task for finishing the album was to add a fabric covered spine to the mini book. I had seen this tutorial forever ago on Ali Edwards site but I hadn’t had a chance to try it out. Since the fabric spine has to be added after the album is finished, this seemed like the perfect opportunity.

If you want to give it a try yourself, I recommend following the tutorial linked above since she includes more detailed directions, but below is how I did it. Excuse the less-than-stunning photos. I was doing this at night and the overhead light in our office is wacky, haha.

How to Add a Fabric Spine to your Mini Album

Materials you’ll need:

  • Book cloth tape (like this) – I bought mine at Paper Source. It’s 3″ wide.
  • Patterned paper for the inside of your album
  • Super Tacky Tape – I bought mine at Michael’s.
  • A glue stick or tape runner

Step 1: Measure the thickness of your completed mini album. Mine was 2″ thick at the widest part.

Nettio Faves binding 1

Step 2: Cut a strip of book cloth tape a little longer than the height of your album.

Step 3: Trim the width of the book cloth tape to be equal to the width of the album, plus 1/2″. So I trimmed mine my 3″ tape down to 2.5″ (2″+ 1/2″=2.5″) using my paper trimmer. I really expected this not to work at all but it was surprisingly easy to cut with the trimmer – only took one pass!

Nettio Faves binding 2

Step 4: Once you have the book cloth tape trimmed to the proper size, lay the tape flat, fabric side facing up and place your front and back covers overlapping the tape a 1/4″ in on each side.

The space between the covers should equal the thickness of your album from Step 1. I used a cutting mat and ruler to help line everything up.

Nettio Faves binding 3

Now we’re going to attach the covers to the fabric side of the book cloth tape.

Step 5: Flip one of your covers over and attach a small strip of Super Tacky Tape along the edge of the cover.

Nettio Faves binding 4

Step 6: Remove the plastic protector from the tape, flip your album back over so the right side is facing up and attach it to the book cloth tape 1/4″ from the edge. To help keep it lined up, I placed a metal ruler at 1/4″ and line my cover up with it as I pressed down to stick the tape.

Once you’re done repeat steps 5 & 6 for the other half of your cover.

Nettio Faves binding 5

Now that we have the two covers attached to the front of the book cloth tape, we’re going to add the paper on the inside of the cover.

The directions in the tutorial are designed for you to use one big sheet of paper to cover the entire inside of the album but since I didn’t have a big enough sheet of paper on hand, I cut two papers for the sides and a third for the spine. This will make more sense in a minute.

Step 7: Flip your album over so the inside of the covers are shown.

Step 8: Measure and trim to size your papers for inside the cover. If you’re following the tutorial, you’ll only have one sheet of paper but in my case I had three. Since I wanted a little of the red painted album to show, I trimmed my inside cover papers to 5″ x 7.25″ and my spine paper to 2.5″ (the width of the book cloth tape) x 7.75″ (the height of my mini album covers).

Step 9: Remove the paper backing off the back of the book cloth tape so the sticky back is exposed.

Step 10: Add glue using a glue stick or tape runner to the back of your paper and attach it to the inside cover of the album. I didn’t bother measuring for this step, I just eyeballed where I wanted to paper.

It’ll now look like this:

Nettio Faves binding 6

If you used one sheet of paper for the inside, you’re inside cover should be done. Skip ahead to Step 14. If you’re using multiple papers like I am continue to step 11.

Step 11: Repeat Step 10 for the right hand inside paper so it looks like this:

Nettio Faves binding 7

Now we’re going to add the third paper to cover the inside of our fabric spine.

Step 12: Grab the strip of paper you trimmed for the inside spine, flip it over so the backside is facing up and add a small strip of glue to each edge using a glue stick or tape runner. This will make sure the paper sticks to the areas that don’t touch the sticky book cloth tape backing.

Step 13: Flip the inside spine paper over and attach it down onto the sticky backing of the book cloth tape. Smooth it down firmly to make sure all of the paper gets attached to the backing. You want to make sure this paper is nice and attached since it’ll get moved every time you open and close the mini album.

Nettio Faves binding 9

Step 14: Once your glue is nice and dry (I let mine sit for a little bit to be sure), fold in the front and back covers one at a time to make a nice crease on the spine. The tutorial recommends scoring it but since I don’t have a scoring tool, I just used a ruler and folded it using that as a guide. I wanted my spine to be more rounded so I was fine with now having a super sharp crease.

Step 15: Punch holes for where you want the binder rings to go through. Since I already punched holes in my covers when I originally put my album together, I used a screw (a nail would work too) to poke through the paper on the inside of the album. It’s not the cleanest hole ever but since I didn’t have a hole punch that could reach the holes, it worked well enough.

Here’s what the album cover looked like with the fabric spine attached and the holes in place:

Nettio Faves binding 8

And here’s what the fabric spine looks like with the rings added back in. Pretty, no?

Nettio Faves5 10 43

The fabric spine from the other direction. You can see how the spine is rounded:

Nettio Faves5 10 44

I really love the way it finishes off the album. It looks like a real little book now.

Nettio Faves5 10 42 text2

And that’s my final completed version of my Holiday Faves 2011 Mini Album!

Since I know it’s kind of hard to see how it flows all together in the blog post photos, I put together a 1 minute little video of all the pages together:

Holiday Faves Mini Album 2011 from Lynnette Penacho on Vimeo.

My Final Thoughts On My 2011 Holiday Faves Mini Album

So now that I’m officially finished with this album, here are a few of my final thoughts on this project:

1) WOOOHOOO, I’M FINISHED!!!!!!

Umm *ahem* *finishes happy dance* *composes self*

Sorry about that, but after 3 failed attempts at December Daily, I’m really excited that I actually finished this album this year! Which brings me to thought #2…

2) Holiday Faves is WAY easier than December Daily

I have no doubt THIS is the reason I finished this year. As much as I love the concept of December Daily and the numbers and all that jazz, it’s just not realistic for me to do keep up with a page a day and to be honest, I don’t want to commit to that amount of work in December. I want to be able to actually enjoy the holidays and not be hunkered down in my scrap room every night, trying to stay caught up.

That’s what I loved about this project. I was able to include things when I felt like it but not worry about capturing something each and every day.

3) I LOVED this mini album size

In my previous attempts at December Daily, I had done an 8×8-inch album and a 7×9-inch album so I was a little nervous that 5×7 might end up seeming too small.

But I actually think it was the perfect size. Not too big to carry around but still big enough to include memorabilia and photos. I especially loved the full size 5×7 photos – they’re stunning. Plus I loved being able to fit two photos/pages onto one sheet of paper. Yay for saving trees!

And as much as I love the mix and match look of some albums, I have to admit, keeping all the pages the same size definitely makes the album a whole lot simpler to put together.

My Top Tips for Finishing a Holiday Album

If you’re wondering what my top tips for finishing a December Holiday album it would these two:

1) Be honest with yourself about what you can actually get done.

I know, we all love projects. Especially ambitious projects like December Daily, A Week In the Life and Project Life.

But you really need to really ask yourself whether a project fits into your life, and if it doesn’t, figure out a solution that works for you. Don’t be afraid to go against what everyone else is doing if it’s what’s best for you. Doing something different is better than stressing yourself out or doing nothing at all.

2) Start with a plan but keep it flexible.

Starting December with the focus and foundation of your album ready to go is key. Having a clear idea in your head of how much and what exactly you want to capture makes the documentation process so much easier because it allows you to say free yourself from feeling like you need to capture every.little.thing.

And if you find you have to adapt your plan a little along the way, it is ok. Don’t be afraid to let things go or change things up when something doesn’t work out like you had planned. Again, doing something different is better than doing nothing at all.

Well, I hope you’ve enjoyed the 2011 Holiday Faves mini album adventure! I absolutely love how it came out! I did want to send an extra special thank you to everyone who left a comment or sent me a nice thought during this process. I know having people waiting to see what I was up to definitely kept me on track. : )

And with that it’s time to wrap up and move on to some new and exciting projects! Weeee, I can hardly wait!

Psst…if you haven’t shared your Holiday Faves or December Daily album in the comments, feel free to do so! I’d love to see what you’ve done!

Psssst…looking for more Holiday Faves inspiration? Check out all my Holiday Faves posts here.


Benefits Of Using Canadian Pharmacy

POSTED IN Holiday Faves, Holiday Faves 2011, Hybrid Scrapbooking, Mini Albums, Tips & Tricks

Holiday Faves Album | Faves 5-10

POSTED ON January 12, 2012 IN Holiday Faves, Holiday Faves 2011

Nettio Faves5 10 42 text2

Woohoo, I have done it! I have finished my Holiday Faves mini album.

That’s right, stick a fork in this baby because it is done.

And I’m quite thrilled with how it turned out!

When we left off at the end of my last Holiday Faves update in December, I had completed Faves 1-4 and was working on 5 & 6. I had been hoping to squeeze one more update in before we left for two weeks of holiday vacation bliss on December 19th, but Adam seemed to think packing was more important than me working on my album.

I know the nerve, right?

So instead I’ve got a nice big update for you today!

As a nice little recap, here are the Holiday Faves I’ve shared so far:

  1. Thanksgiving
  2. Local Events
  3. Holiday Decorations
  4. December Weather


Holiday Fave #5

For Holiday Fave #5 I chose our anniversary as we celebrated our 6th wedding anniversary on December 10th. Hard to believe it’s been 6 years already!

To celebrate our anniversary, we headed up to Austin for the weekend. Since I had a couple of extra memorabilia type items from our trip I wanted to include, I added them directly onto the foundation page:

Nettio Faves5 10 2

The top card is a business card from the restaurant where we had dinner and underneath that is a post-it from the Westin where we stayed. We love staying at the Westin – their bedding is like sleeping on a cloud, plus they do nice things for anniversaries. Last year we got rose petals and chocolate-covered strawberries, this year it was wedding balloons, chocolate and wine.

Nettio Faves5 10 3

On the right is an anniversary card my mom sent us. I totally agree that the 6 years have flown by!

Nettio Faves5 10 5

The drawing on the front of the card is so cute. I especially love that it has “adventure” on it since that was my One Little Word in 2010 and ’11.

Nettio Faves5 10 4

The back of the card and the accent page. The card is just added in between the foundation page and the accent page.

Nettio Faves5 10 6

On the back of the accent page, I added a photo of Adam and I. We tried to do the whole mirror photo thing but it totally didn’t work (how do you get it to focus??) so this was a quick one we took using the remote on our way out to dinner.

Nettio Faves5 10 7

I printed some text directly on the photo and then added a 6 using a foam alpha from American Crafts. Although I think I’ve officially decided I don’t love these AC foam alphas – they always go wonky on me when I try to stick them down. But I like the subtle dimension it adds to the page.

Nettio Faves5 10 8

On the right side behind the text overlay is a photo of the Zilker Park Holiday tree in Austin. The picture really doesn’t do it justice because it’s seriously huge – like 150 feet tall! It’s made of all light strings and if you stand in the middle and spin around it makes crazy patterns. There were a bunch of people doing that and it was quite hilarious to watch.

Nettio Faves5 10 9

On the back of the tree photo, I added a photo collage of our anniversary day’s events. It was a definitely a day of food bliss as we had Italian at Asti for dinner and then the Melting Pot for dessert. It was delish but we were definitely stuffed by the end of the night!

Nettio Faves5 10 10

Christmas Highlights

In between Faves 5 & 6, I added some photos from our pre-Christmas Christmas. Since we were traveling to California for Christmas, we decided to celebrate early rather than lugging all our own gifts with us on the plane. Believe me we had enough stuff, like Adam’s ski boots, going with us as it was!

Nettio Faves5 10 11

On left side I printed a journaling card from Cathy Zielske and wrote some bits about our early Christmas.

Nettio Faves5 10 14

At the bottom of the card I added a scallop trim from Ormulu and stapled a little accent and word sticker from Making Memories.

Nettio Faves5 10 13

In between the pages, I added a coffee sleeve from Panera. I thought the wording seemed fitting for the day.

Nettio Faves5 10 12

As I was putting the book together, I did end up moving some of the printed transparencies. This numbers in this one seemed to fit better with our early-25th celebration. I added a little 25 chipboard bit from Making Memories onto it.

Nettio Faves5 10 15

Behind the transparency I added another photo collage from the day. I really love the 5×7 photo collage pages because the photos aren’t too small but it’s simpler to print out than multiple photos at once. So glad I included all those photo-page templates in the mini album set because they really came in handy, hehe.

It was a good day filled with hot chocolate, Pioneer Woman cinnamon rolls (so amazing!) and yes a Toy Story puzzle. (Adam bought me Toy Story legos last year so it’s kind of a thing around here, hehe.) Although I have to say it didn’t take us very long to put together that 100 piece puzzle, haha.

Nettio Faves5 10 16

Holiday Fave #6

For Holiday Fave #6, I kept things simple and documented our favorite holiday movies.

This year we watched Meet Me in St Louis which I love but Adam had never seen. It’s not specifically a Christmas movie per-se but it’s hard not to feel Christmas-y when Judy Garland starts singing Have Yourself a Merry Little Christmas.

And of course we watched our other fave, Elf! I’m not always a Will Ferrell fan but oh how I love that movie.

Nettio Faves5 10 17

Travel Highlights

On the accent page on the back of the movie image, I added a few items from our flight out to California. Every time I fly Southwest I always save the drink napkins planning to use the map on them but this is the first time I’ve actually done it and I love how it came out.

*A tip when dealing with napkins, take the napkin apart (they usually have a couple of layers), glue the top image layer onto a piece of card stock and then glue the card stock into the book. If you don’t, the napkin tends to fall apart (learned that the hard way when dealing with the turkey napkin for Holiday Fave #1, haha)

Nettio Faves5 10 18

Here’s a closer look at the map. I used an American Crafts Slick Writer and a ruler to draw our route and then added some word strips for the places we went. The Southwest tag was an extra luggage tag I grabbed at the airport. All of the journaling strips are from October Afternoon.

Nettio Faves5 10 19

Holiday Fave #7

Cookie baking is a huge deal with my mom’s side of the family down in Southern California (although my aunt and uncle refer to it as “Cookie Gulag” which I think scared Adam a bit, haha), so for Holiday Fave #7, I chose Cookie Time as it’s not Christmas without cookies!

We were lucky enough to be there for cookie decorating day which in my opinion is the best day:

Nettio Faves5 10 20

My sister with one of her super adorable cookies:

Nettio Faves5 10 21

Holiday Fave #8

Adam and I ended up being in California for a few days before the rest of the family arrived so on our second day there, we decided to make an impromptu trip to Disneyland, which is Holiday Fave #8. Yeah, it was tough being in California for Christmas, haha.

On the foundation and accent spread, I added our tickets and the map from our day. I always love saving the Disney maps since things change every so often around there.

Nettio Faves5 10 22

The back of the map and accent page:

Nettio Faves5 10 23

Adam and I in front of the castle. This photo must have been a Christmas miracle because it’s the first time I’ve managed to hand over my DSLR and not get a blurry photo back. So a big thank you to the random guy who offered to take our photo! This shot came out way better than the hold-the-camera-out-try-not-to-squint-but-still-get-the-castle-in-the-background photo I was trying to take would have.

Nettio Faves5 10 24

On the right is the giant Disneyland tree. I love Disney at Christmas, it’s so pretty and festive. Crazy crowded but the pretty and festive makes up for it. I’ve been several times at the holidays before but this was Adam’s first Disney Christmas trip.

Nettio Faves5 10 26

On the back of the tree photo I added another photo collage. (Are we sensing a theme here?) I still feel a little bad about eating that gingerbread man. He was almost too adorable to eat. Almost.

Nettio Faves5 10 27

Holiday Fave #9

After spending several days with my mom’s side of the family out by the coast, the fam and I headed out towards the desert where my 94 year-old grandma lives. The town where my dad grew up isn’t the most exciting place ever but it was Adam’s first trip out there so we had to show him some local culture, which on this trip included the local Holiday Lights Tour, which is Holiday Fave #9.

It’s hard to tell in this photo but the display in that bottom photo had a working ski lift full of super cute little animals and fake snow that would blow when you parked near the display. Considering the size of the town it was actually rather impressive!

Nettio Faves5 10 28

Here’s the Holiday Faves #9 journaling card. On the right side is the holiday lights tour map from the local paper.

Nettio Faves5 10 29

I’d say it’s a sure sign you’re in an old school town when they include a map of the lights tour in the local paper. It was really fun though and we saw some parts of town we had never seen before. We only did part of the tour and we were still gone for almost 2 hours.

Nettio Faves5 10 30

On the foundation page on the back of the map page, I kept things simple and added a Christmas tag from Ormulu.

Nettio Faves5 10 31

Holiday Fave #10

And finally we’re at the very final Holiday Fave, #10!

For Holiday Fave #10, I went with Family Time as getting to see both sides of my family was my favorite part of the holiday. When you live so far away all the time, it’s nice to get to spend time with everyone. Since Adam has been gone so often, this was the first time a lot of them had seen him since our wedding!

In addition to whale watching, cookie baking and decorating, family time included hopscotch with the cousins:

Nettio Faves5 10 32

On the printed transparency I added a little holiday accent by Making Memories:

Nettio Faves5 10 34

My final journaling card. I wasn’t so sure at first about the handwritten nature of the cards but it was definitely nice to be able to have my journaling completed as the month went on. Much better than trying to remember everything all at once.

Nettio Faves5 10 35

Adam and I also got in on some bowling action. And yes the weather was gorgeous in California. We didn’t even need coats most of the time!

Nettio Faves5 10 36

In between the pages I added a card from my aunt and uncle:

Nettio Faves5 10 37

And as my final photo entry, another collage, this time of all the family. It was a fun time seeing everyone!

Nettio Faves5 10 38

The final accent page and back cover:

Nettio Faves5 10 39

And that’s the end of my Holiday Faves mini album! Since this post is already crazy long, I’ll be back tomorrow to share a little bit more about how I finished up the cover binding and my final thoughts on this project overall.

Now It’s Your Turn

In the meantime, I’d love to hear how things went for you!

How did your holiday scrapbooking go? Did you finish up your Holiday Faves or December Daily album?

Let me know in the comments!

Psst…looking for more Holiday Faves Mini Album goodness? Check out all of the Holiday Faves posts right here.

How Can Customers Lower Their Remedy Costs

POSTED IN Holiday Faves, Holiday Faves 2011, Hybrid Scrapbooking, Mini Albums

  • « Previous Page
  • 1
  • …
  • 12
  • 13
  • 14
  • 15
  • 16
  • …
  • 18
  • Next Page »
HI I'M LYNNETTE. Graphic designer, tech-lovin’ memory keeper and lover of bold colors & patterns, good food and the great outdoors. Here at Nettio Designs, I share a behind the scenes peek at my own creative & life adventures. Read more...

KICKSTART YOUR CREATIVITY


By popular demand, photo book templates are back! Grab all three sets in the shop.
ADVENTURES IN ORGANIZING
GOAL-SETTING
MEMORY KEEPING
PROJECT LOVE
LIFE ADVENTURES
TIPS & TRICKS
BEHIND THE SCENES

POPULAR PROJECTS

TO SEE ALL MY PROJECTS, CLICK HERE

MUST READ POSTS

  • WHY EVERY SCRAPPER SHOULD SCRAP A FAVES PAGE
  • HOW TO CREATE A SCRAP-WORTHY MAP WITH PHOTOSHOP
  • REMEMBERING THE IMPORTANCE OF TELLING YOUR STORY
  • WHAT DOES IT MEAN TO CREATIVELY CAPTURE YOUR LIFE ADVENTURES?
  • BROWSE BY CATEGORY

    BROWSE THE ARCHIVES

    GET IT FOR FREE

    Testing testing

    links goes here

    Copyright © 2026 ·Dynamik Website Builder · Genesis Framework by StudioPress · WordPress · Log in