Nettio Designs

Design + Creativity + Adventure = LOVE

  • HOME
  • JOIN THE 2023 MONTHLY FAVES
  • THE SHOP
  • ABOUT
  • CONTACT
You are here: Home / Archives for Project Love / Project Life

Project Life 2013 | Weeks 9 & 10

POSTED ON March 22, 2013 IN Project Life

Welcome to Project Life, Weeks 9 & 10.

My apologies for the delay in getting this posted this week. I decided to try something different this time and sent all of my photos and cards out for printing through Persnickety Prints and well, waiting 5 days for shipping kind of through me off my game. I’ll share more of my thoughts on sending my Project Life prints out at the end of the post, but for now let’s get on to the pages!

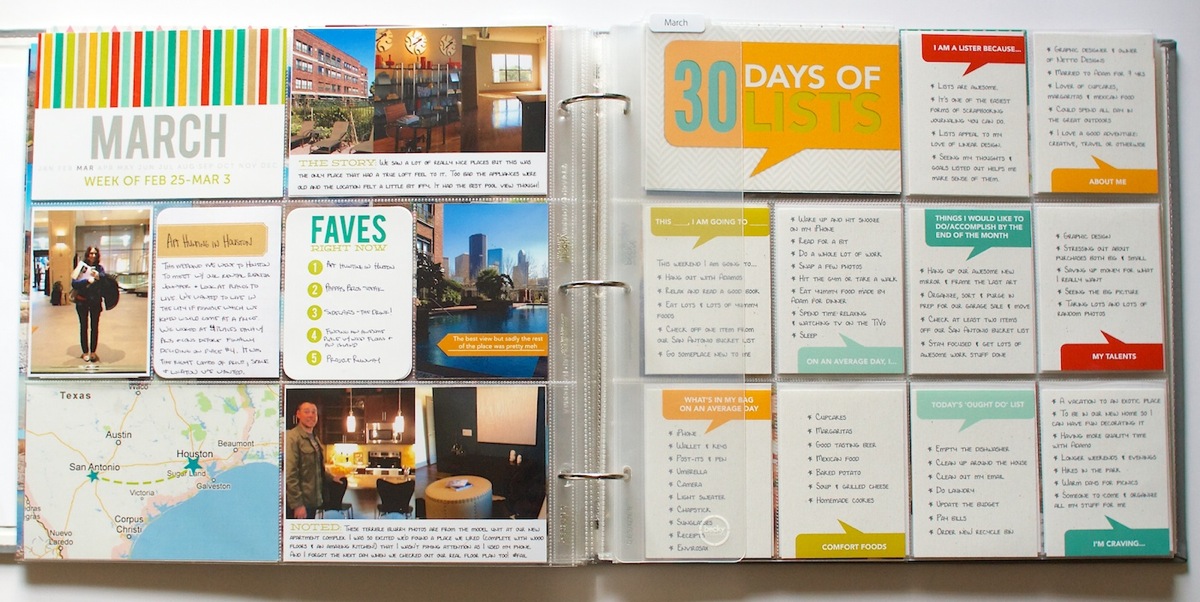
I mentioned in my 30 Days of Lists post that I was going to be incorporating my lists into my Project Life. Well here’s a look at how I’m doing that. Since I needed three page protectors for my 30 Days of Lists, I decided to create a half page for my Week 9 and use the right side of the Week 9 spread for the start of the lists.

Week 9: Feb 25-Mar 3
Nettiodesigns ProjectLife Wk9 10 7

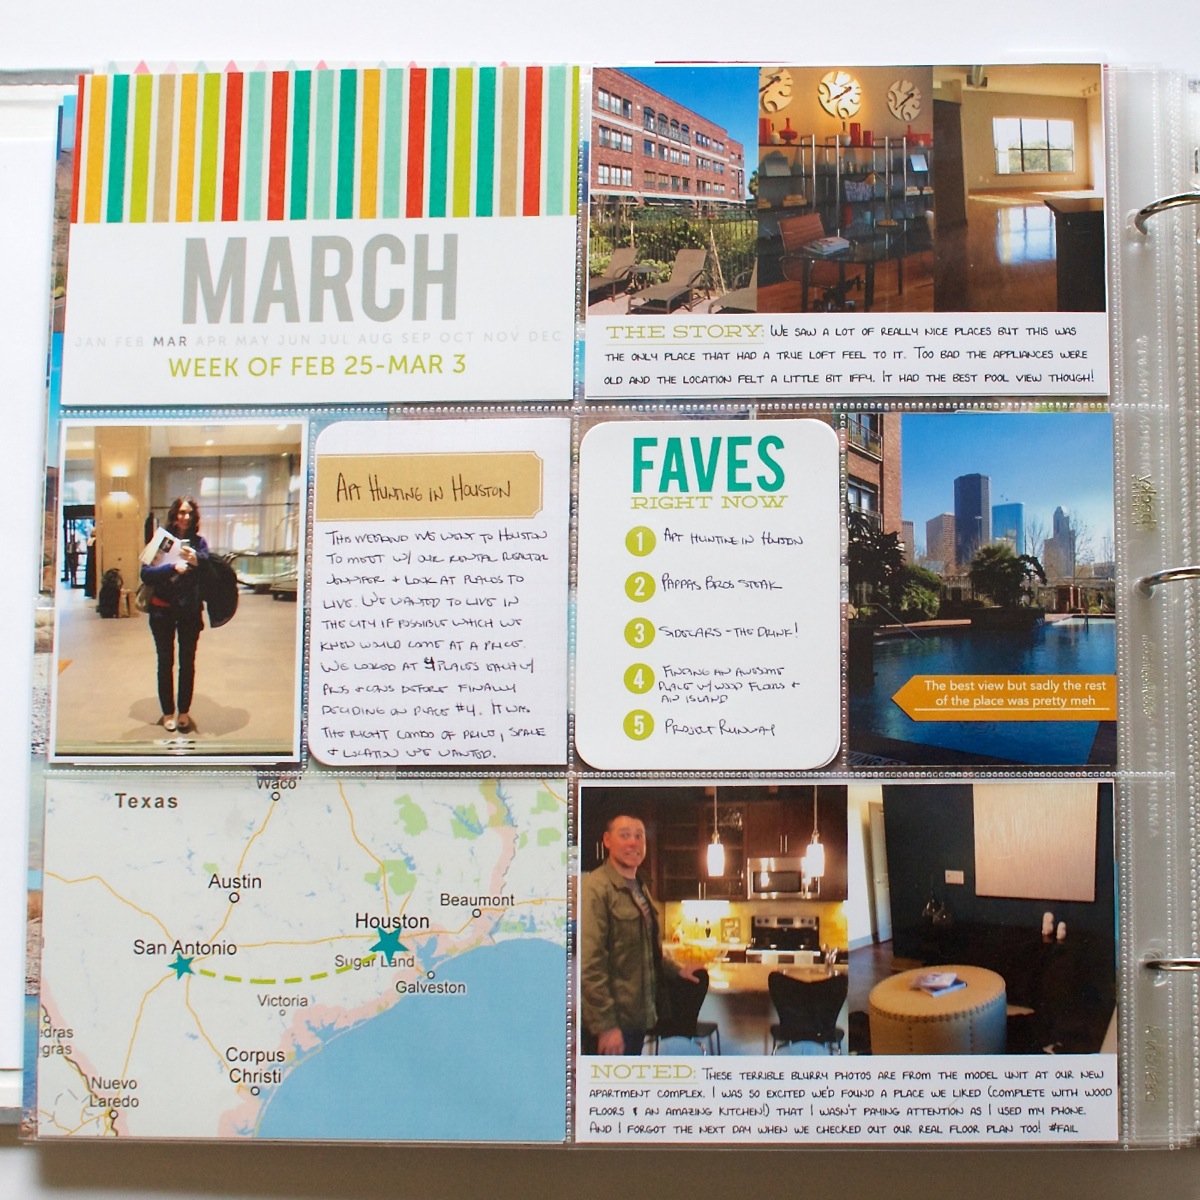
Here’s a closer look at my Week 9 page. Since I didn’t take a ton of regular photos this week, I decided to focus on our weekend apartment hunting trip to Houston.
Nettiodesigns ProjectLife Wk9 10 9

Both the story & noted cards are from my Bits & Bytes: 4×6 Journalers – Graphic mini template set. I can definitely see these becoming one of my most used products this year. The March title cards are all from my Bits & Bytes: 4×6 Weekly Title Card mini templates and all the digital papers from those are from the Oh Snap! digital scrapbooking kit by Libby & Shawna. The yellow arrow, which I added a drop shadow to and had printed directly on the card, is from Mari’s Today 2.0 Arrows digital element pack.

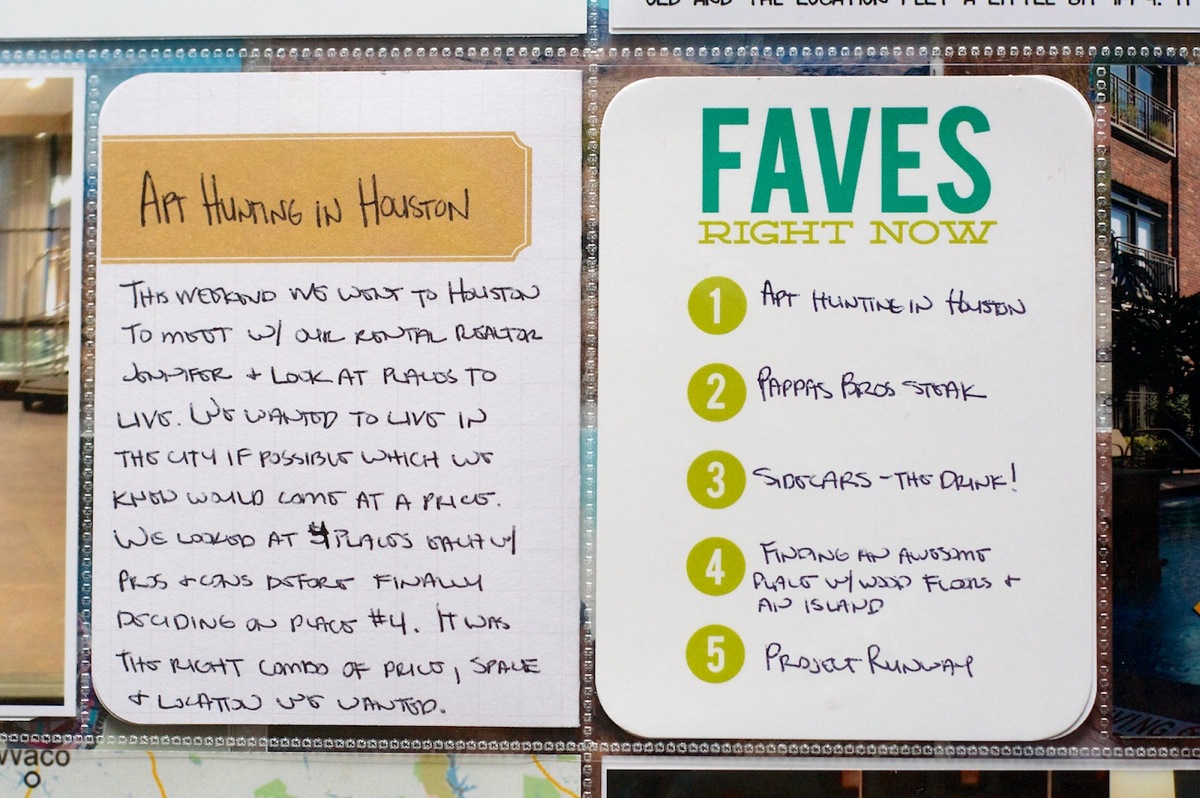
One of the things I decided to try when I sent out my prints was having a bunch of blank Faves cards printed and then handwriting my Faves onto them. What I didn’t love is that their “cardstock” isn’t what I’d call cardstock. It has a coating on it that made it really tough to write on with a pen which kind of defeated the purpose.
Nettiodesigns ProjectLife Wk9 10 10

As much as I love the bolder colors on the Faves card and the simplicity of writing my lists out, I’m not sure I’d have these printed like this again. I may even go back and reprint them with my lists already on them just to keep things consistent.

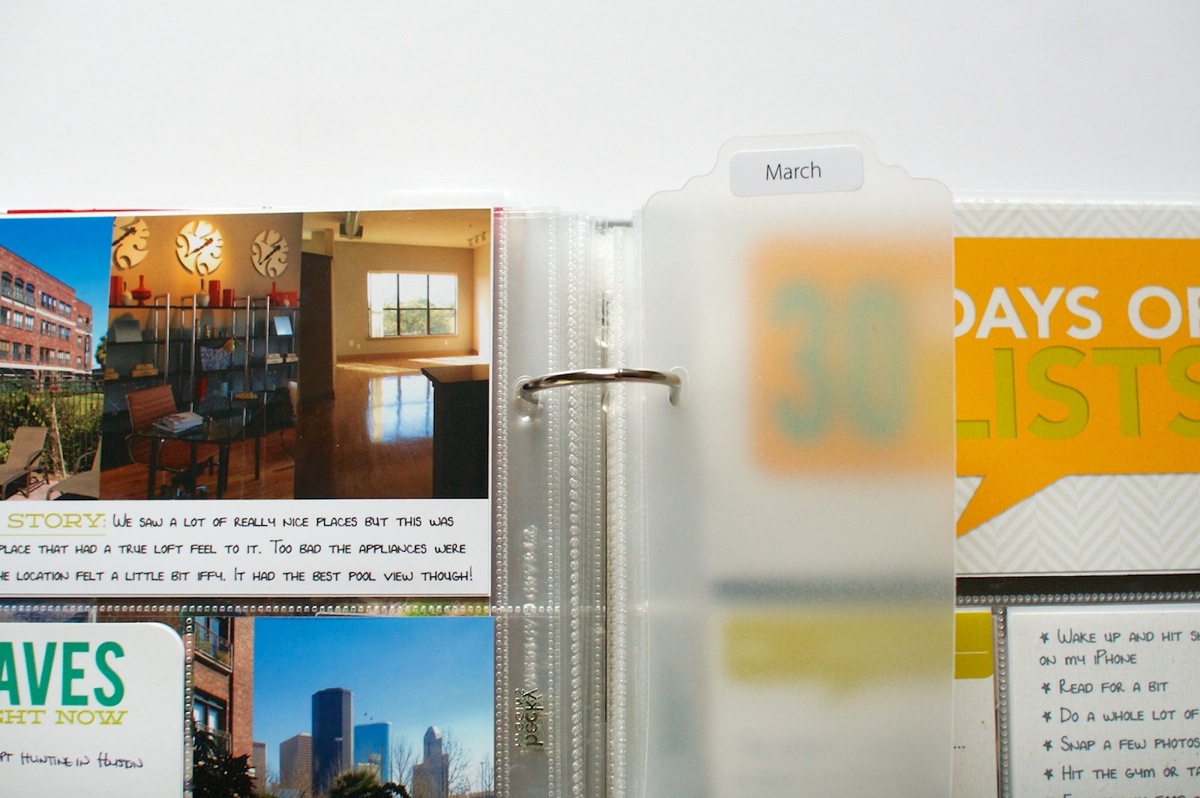
This week I also decided to add back in the monthly Project Life section dividers. I had them in my album originally and took them out since I didn’t feel like I needed them but after 3 months of Project Life, they’re definitely helpful in getting to the correct section.
Nettiodesigns ProjectLife Wk9 10 8

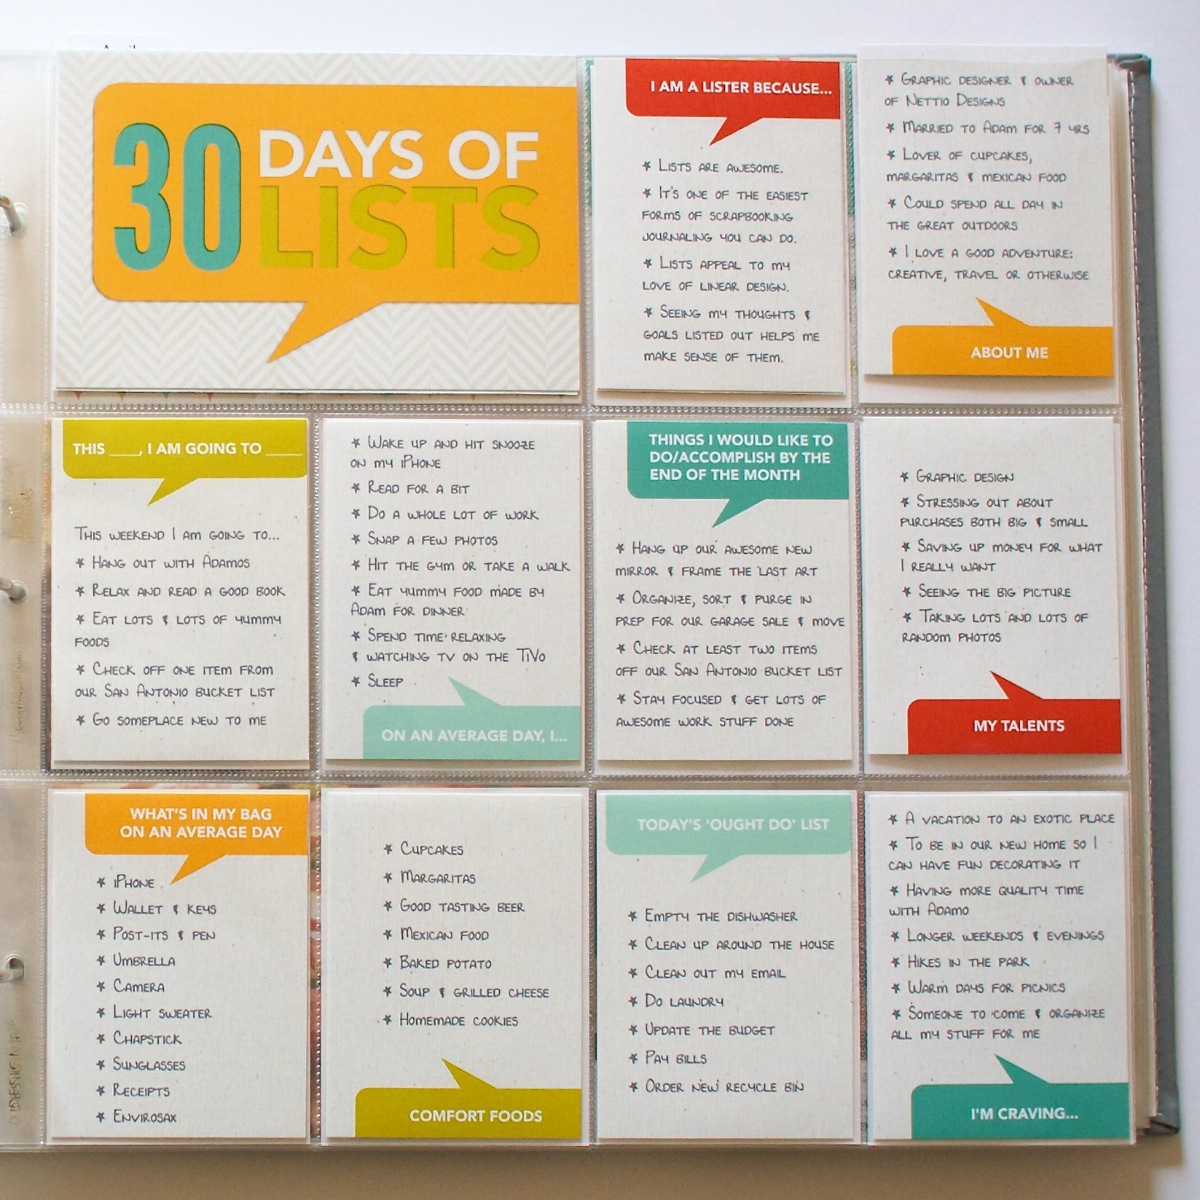
Here’s another look at the right side of the spread – the 30 Days of Lists cards. If you missed my original post about the 30 Days of Lists project, you can find my original post here. All of these cards were made using the templates from my Bits & Bytes: Say What 3×4 Card mini templates in case you’d like to make your own.
Nettiodesigns ProjectLife Wk9 10 11

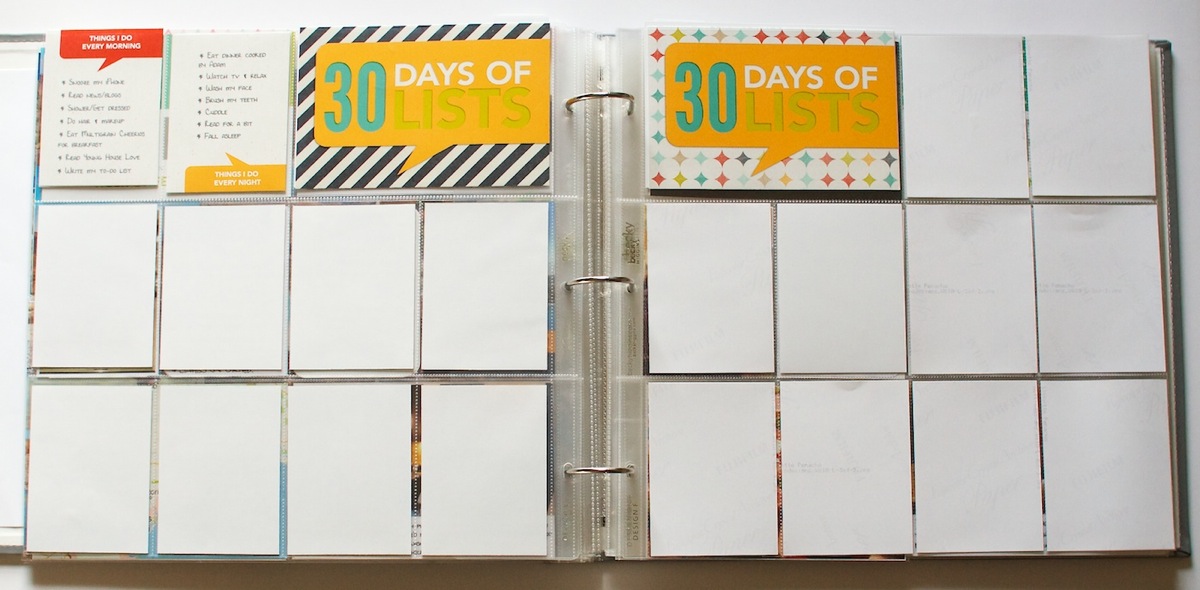
Here’s what the other two pages of 30 Days look like. I’m batch printing my cards so I haven’t added any additional ones just yet.
Nettiodesigns ProjectLife Wk9 10 12

Week 10: Mar 4-10

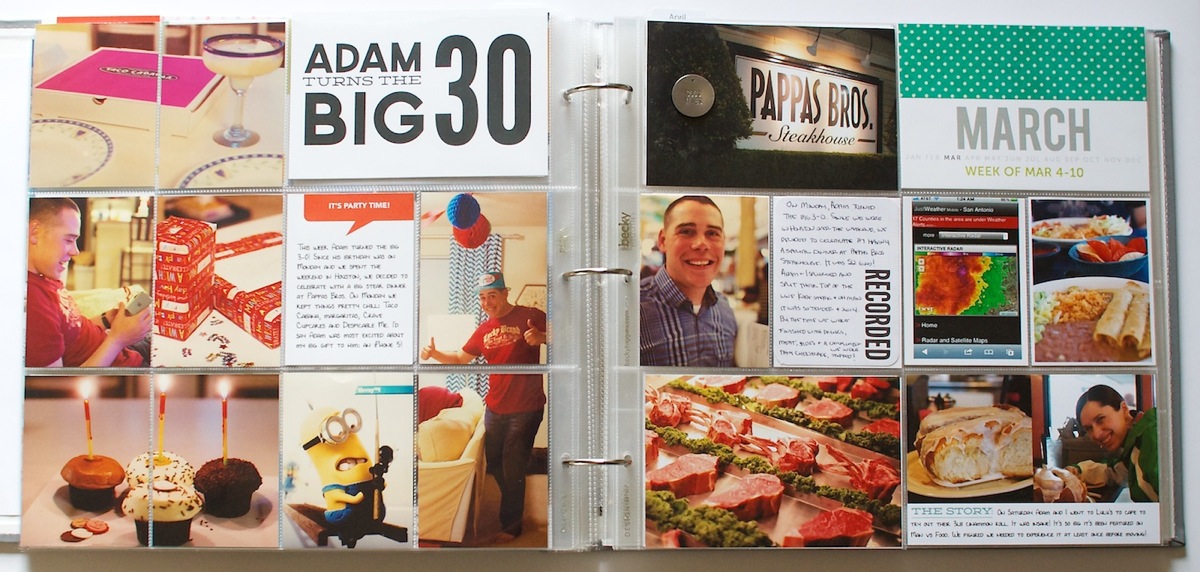
The big event this week was Adam turned the big 3-0 on March 4th! Since his birthday was on Monday, I devoted the entire left side of the spread and an insert for the invent and then used the right side of the spread for regular photos from the rest of the week.
Nettiodesigns ProjectLife Wk9 10 13

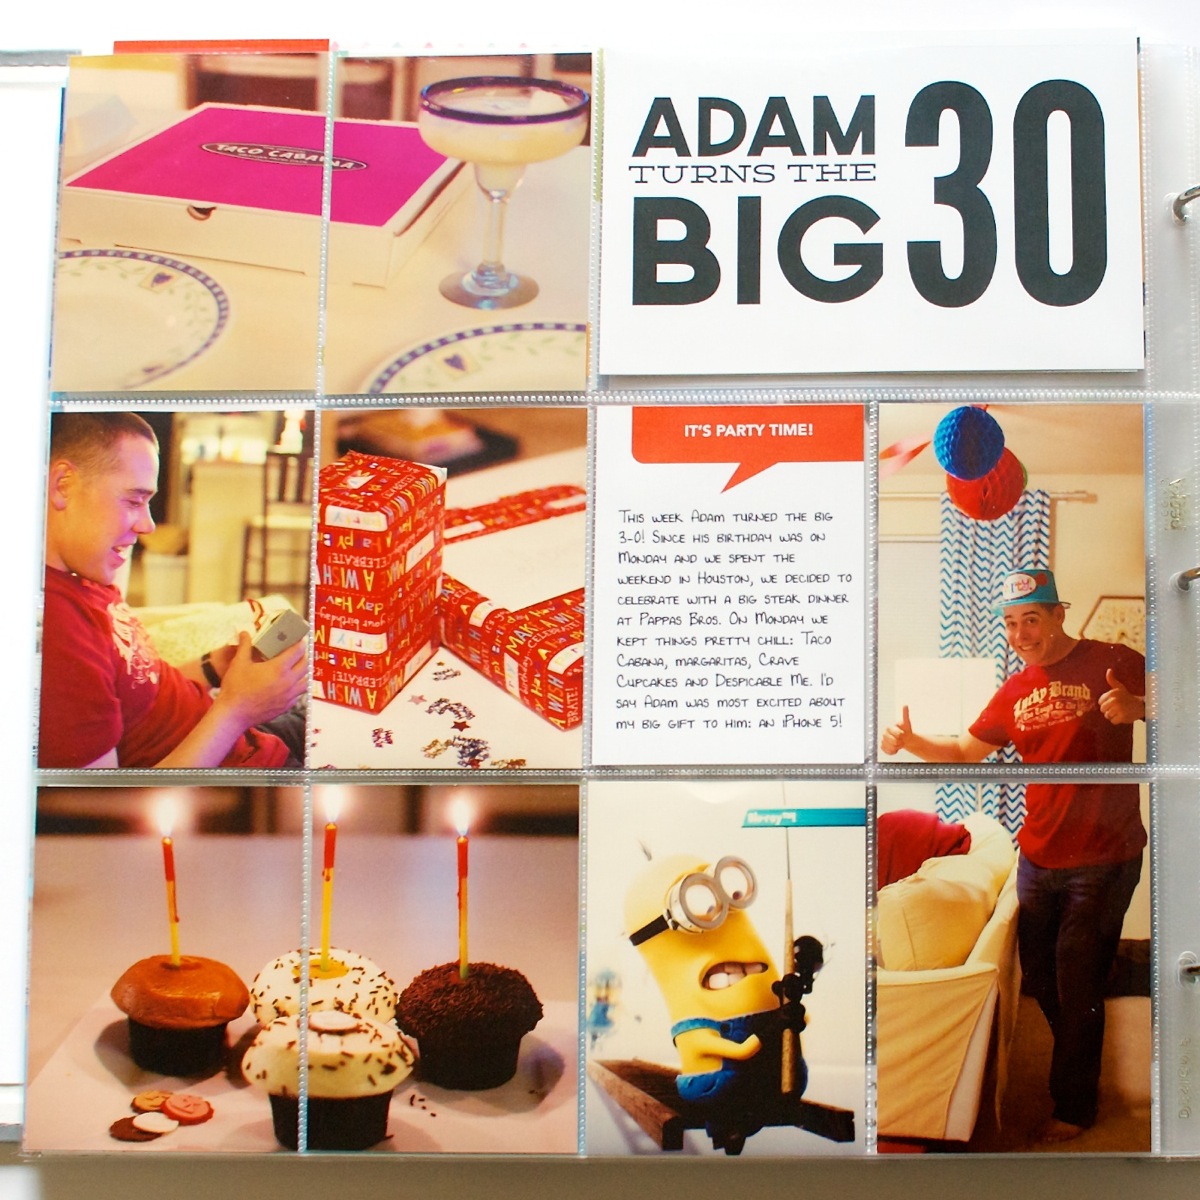
Here’s a close up of the left side 30th birthday spread:
Nettiodesigns ProjectLife Wk9 10 14

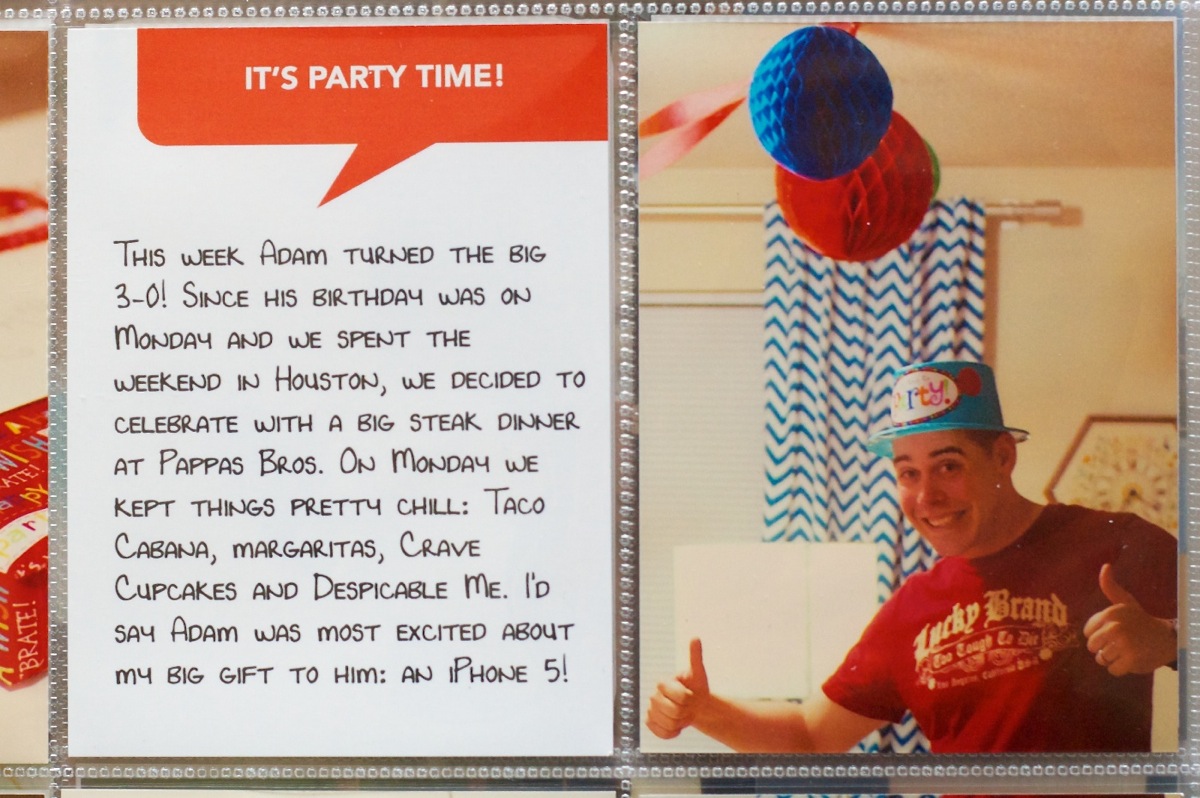
Our big birthday celebration meal happened over the weekend so Monday night we kept it pretty low key: Taco Cabana fajitas, margaritas, Crave Cupcakes (which we’d picked up the day before in Houston) and Despicable Me which Adam picked to watch. I bought him a new iPhone 5 for his birthday and he was really excited to be upgrading from my old iPhone 3GS finally.

Scrapbooking-wise: I’m totally diggin’ the chopped vertical 3×4 photo – will definitely be using that technique again.

On this page I also included another one of my Bits & Bytes: Say What 3×4 Cards in his fave color: red.
Nettiodesigns ProjectLife Wk9 10 15

In the middle of the spread I included a Project Life insert showcasing photos from his big 30th birthday dinner. Since it technically happened on Saturday, it should be in Week 9 but I decided it made more sense to include it with the other birthday stuff in Week 10.

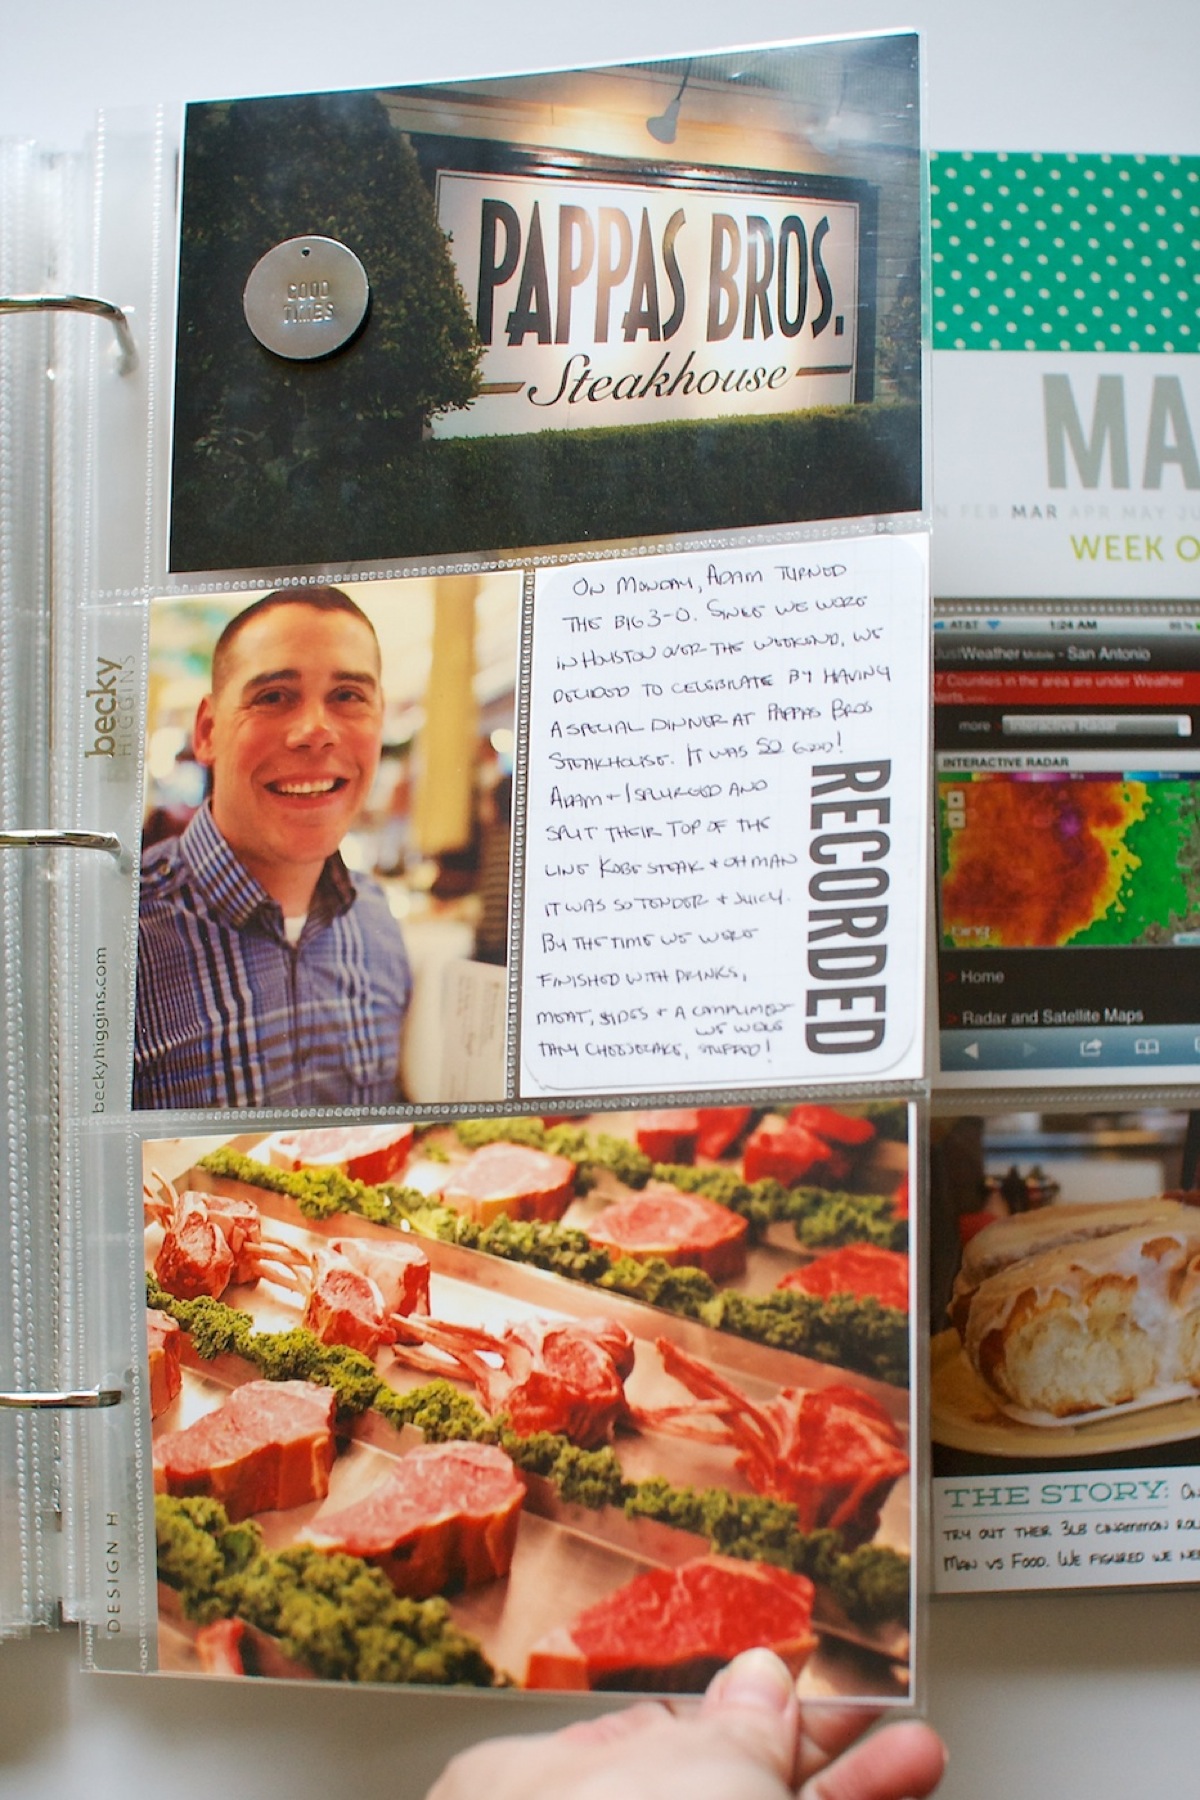
One of our 30th birthday traditions has been to celebrate with a fancy expensive meal. For my 30th birthday last year we went to Uchiko in Austin (which is Top Chef winner Paul Qui’s restaurant). For Adam’s birthday he chose to go to Pappas Bros. Steakhouse in Houston. We’d been once before but it was fun to go back!
Nettiodesigns ProjectLife Wk9 10 16

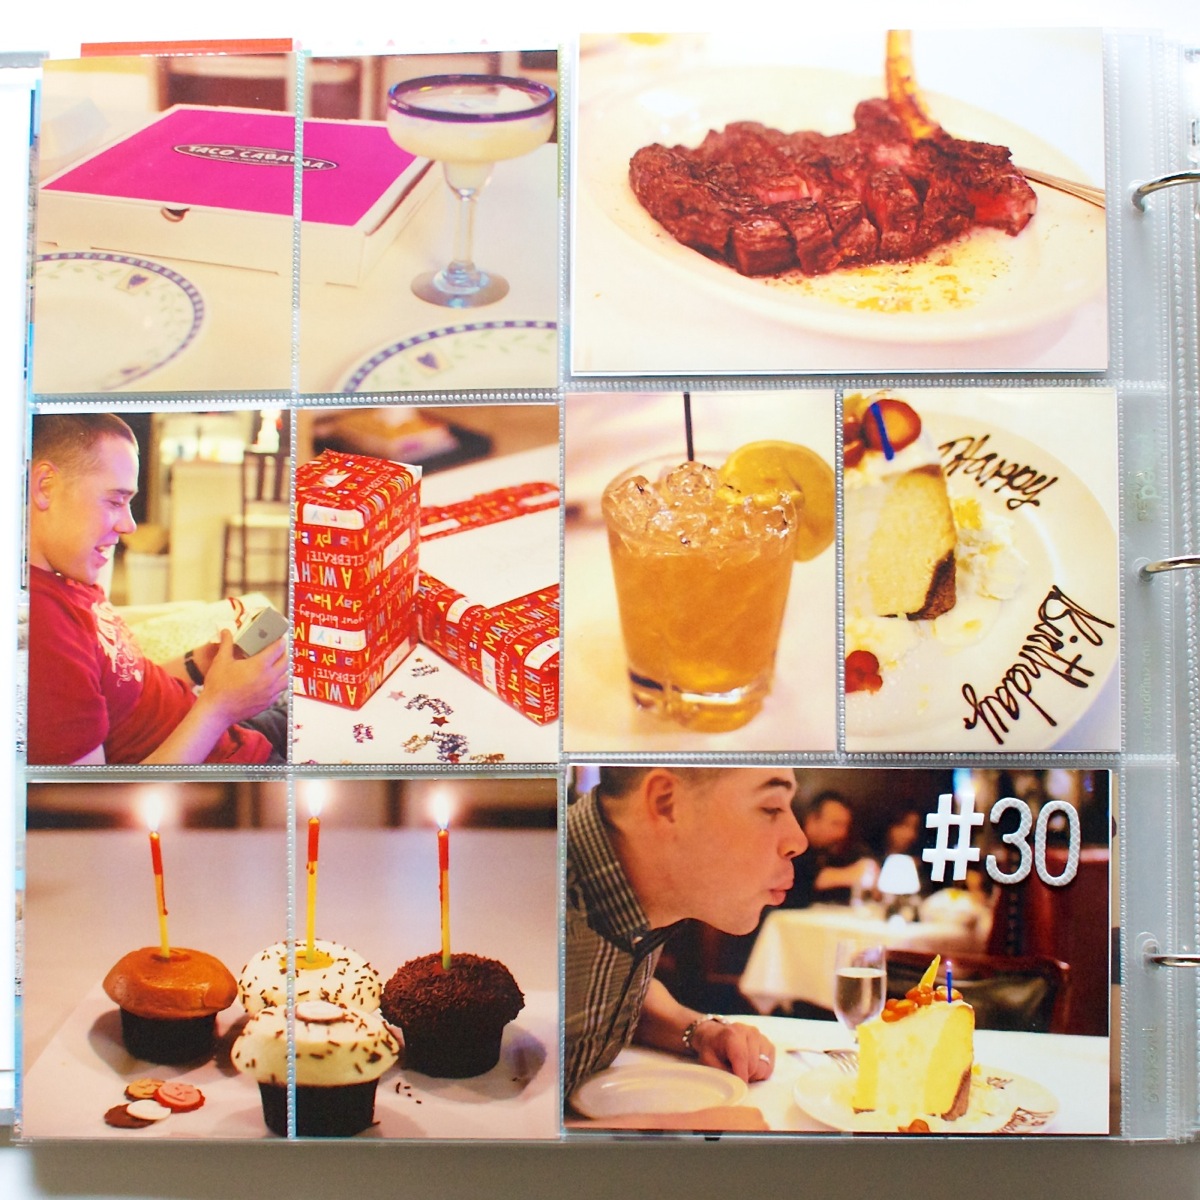
The photos on the right side of this image are the backside photos of the insert. Adam and I split one of their Kobe beef steaks and OMG, it was SO good. By the time they brought him complimentary dessert we were stuffed.
Nettiodesigns ProjectLife Wk9 10 17

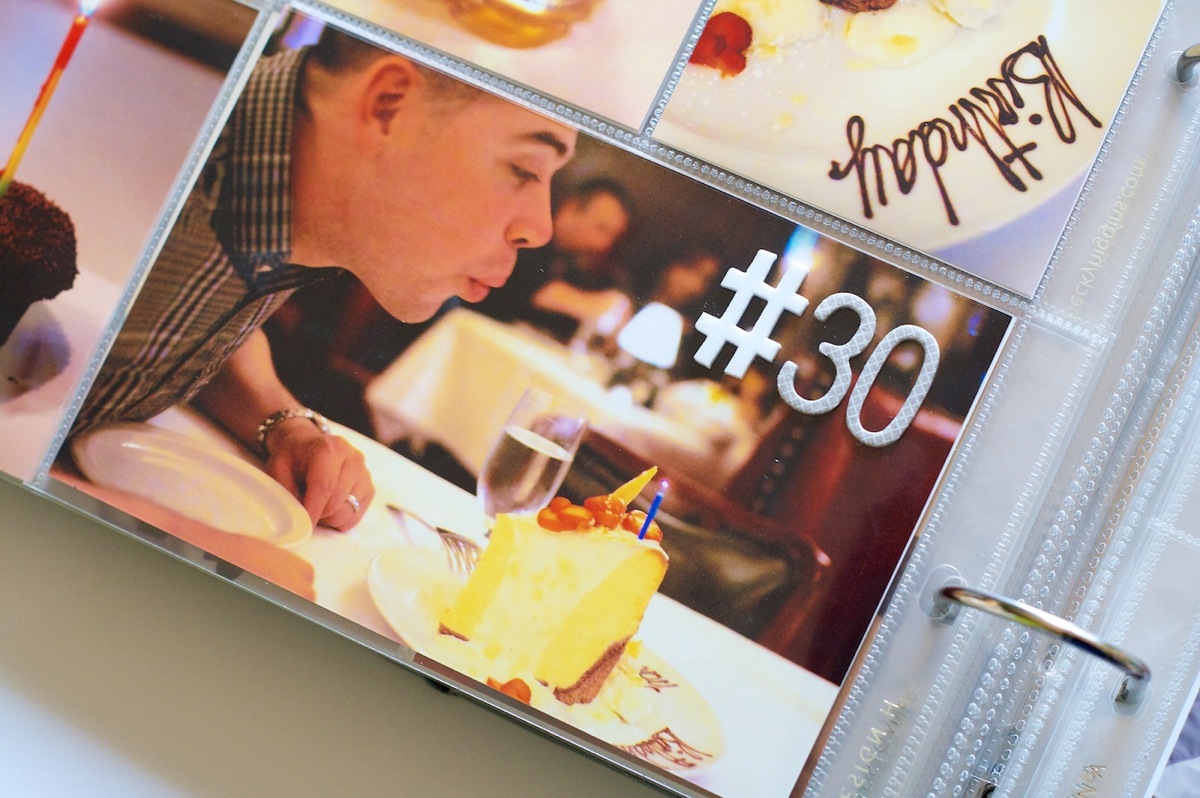
I added a couple Thickers on here to mark his birthday. I didn’t realize so many alphas didn’t include the number symbol! This was the only one I found in my stash.
Nettiodesigns ProjectLife Wk9 10 18

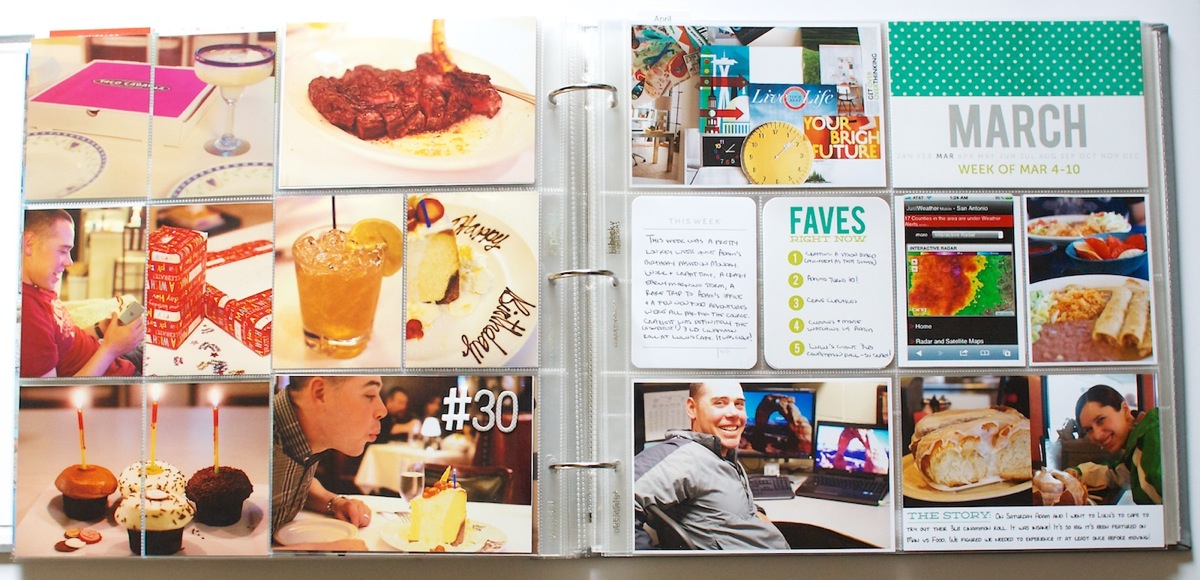
Here’s a look at the completed Week 10 spread:
Nettiodesigns ProjectLife Wk9 10 19

And a closer look at the rest of Week 10. It was a pretty low key week filled with craftiness, a crazy 1am storm, a random stop at Adam’s office (1st time I’d been there!) and of course new food adventures because we love our good eats, haha.

The This Week card came from the March Studio Calico kit and The Story card is from my Bits & Bytes: 4×6 Journalers – Graphic mini template set.
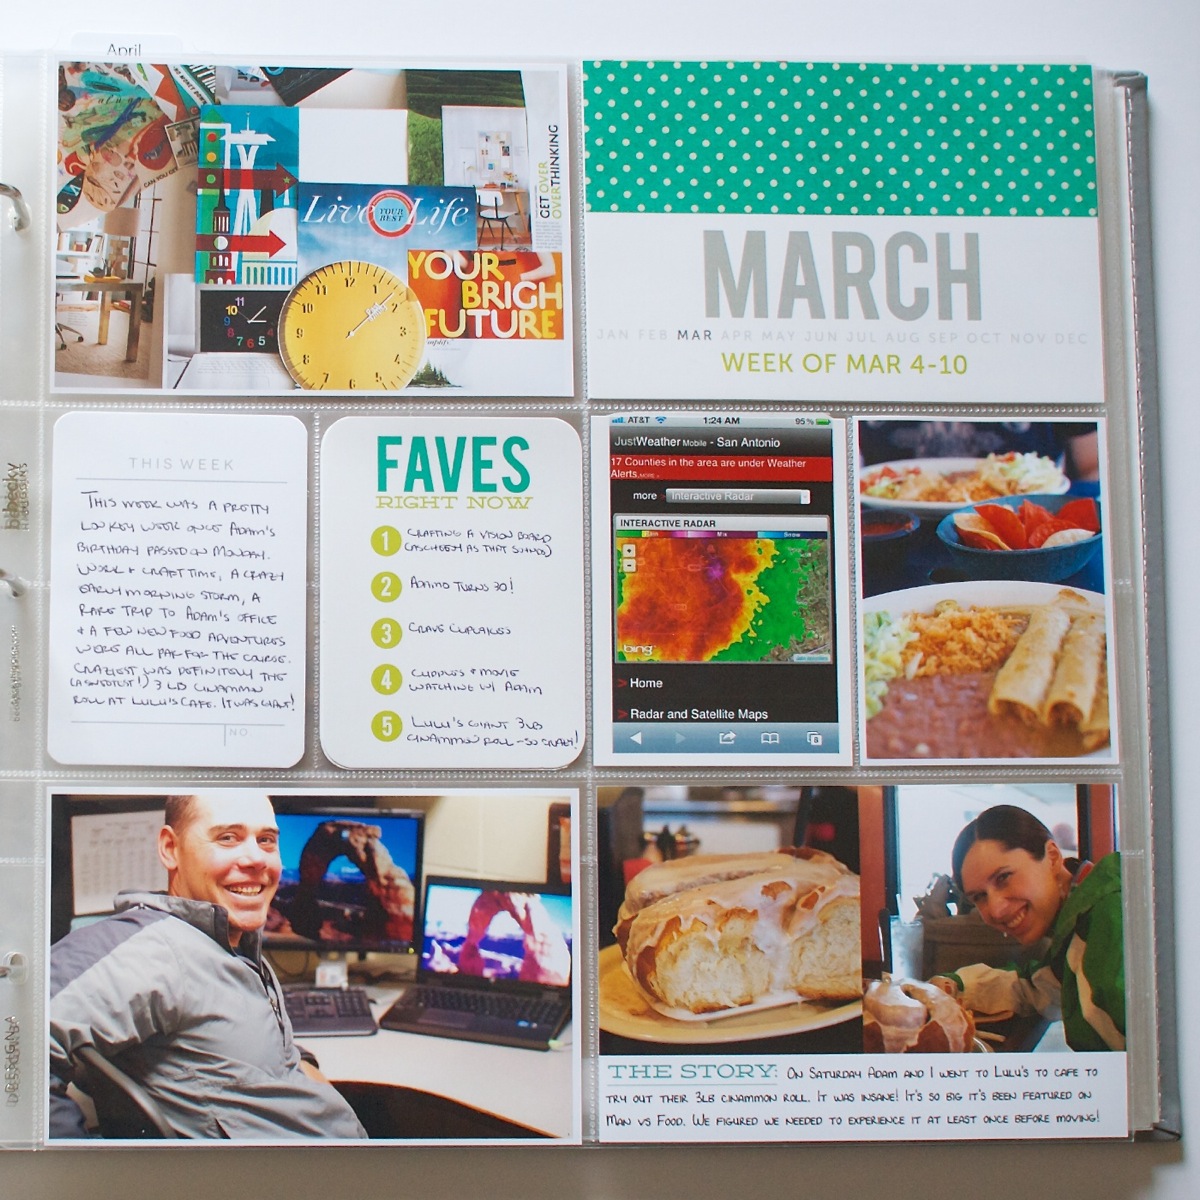
Nettiodesigns ProjectLife Wk9 10 20

I just have to point this out because it’s so awesomely hilarious to me. One of my goals for March was to check two items off our “Before We Leave San Antonio” bucket list and getting the 3 pound cinnamon roll at Lulu’s Cafe was one of the items on our list. This place has been featured on Man vs Food and well, how can you go wrong with a cinnamon roll bigger than my head? It was the height of gluttony and no we didn’t finish it all in one sitting. We ended up having it with eggs for dinner that night and again for breakfast the next morning. And no, it was definitely not Paleo, haha. It did however taste almost exactly like the Holiday Inn Express cinnamon rolls which was pretty funny.
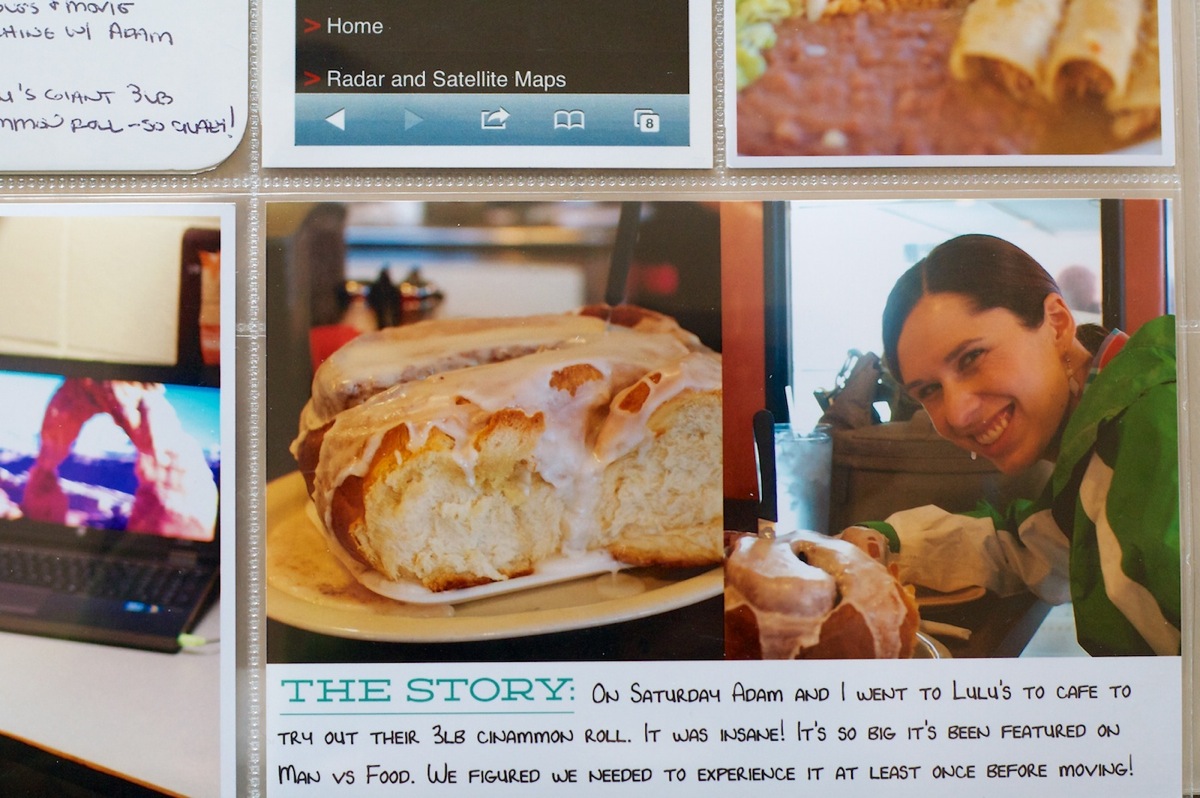
Nettiodesigns ProjectLife Wk9 10 21

Random thoughts this week:

As I mentioned at the beginning of the post, I decided to try printing all of my Project Life photos and cards through Persnickety Prints and I have mixed feelings about that decision.

On the one hand the prints are GORGEOUS. The colors of the photos and cards were 100% true to what I see on my screen which isn’t true when I print from home or printed from Target.

On the downside, I hated waiting for shipping. I ordered my prints on Wednesday and while Persnickety processed my order really quickly – within in a few hours – they didn’t ship out until Thursday.  With the weekend that meant they didn’t arrive until Monday which made it tough to share my Project Life pages on Monday like I’d planned. So while I loved the quality, I’m not sure it’s something I have time wait for every week, but we’ll see.

Here’s a few pictures from my order. One thing I didn’t love was the envelope of images itself was heavily taped within the box. I know they do this so the prints don’t move in shipping but I don’t know if I just didn’t open the box properly or what because they were a pain to get out. The poor outer envelope didn’t survive the process, haha.
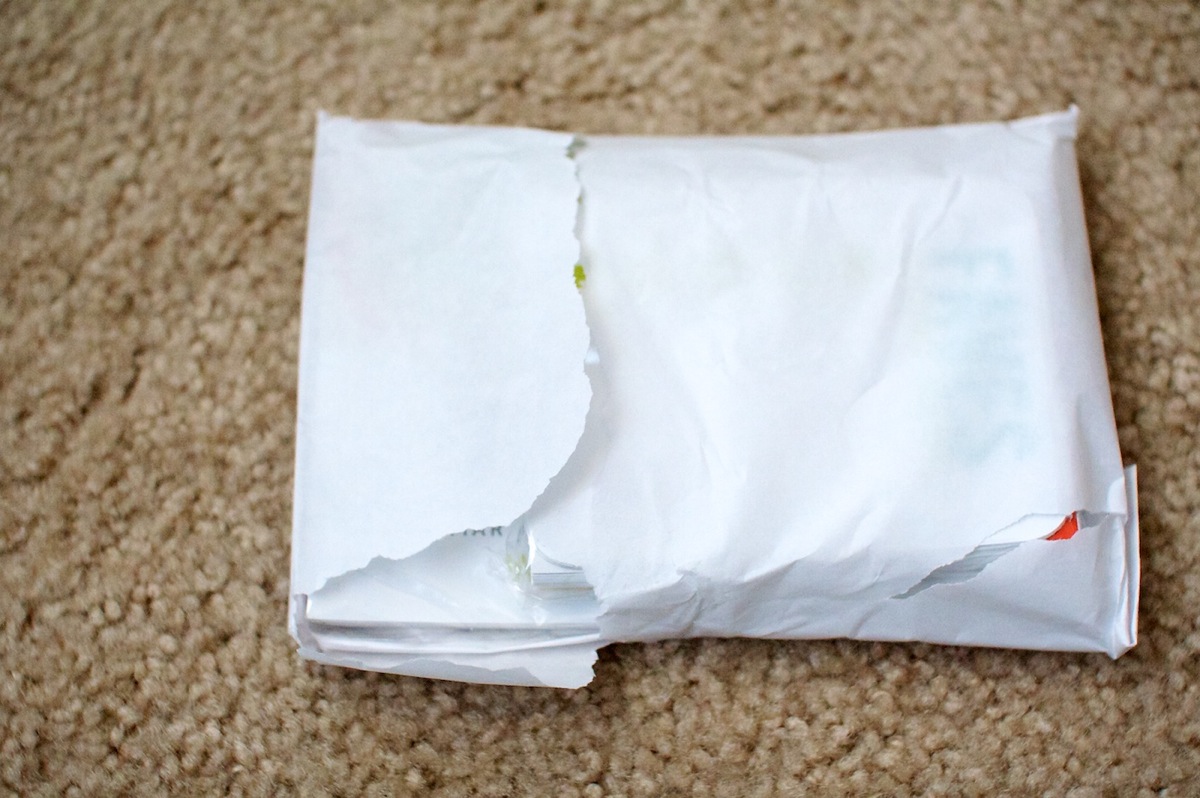
Nettiodesigns ProjectLife Wk9 10 1

They came packaged in two sizes: 4×6 & 3×4 with all the photos and card stock cards mixed together:
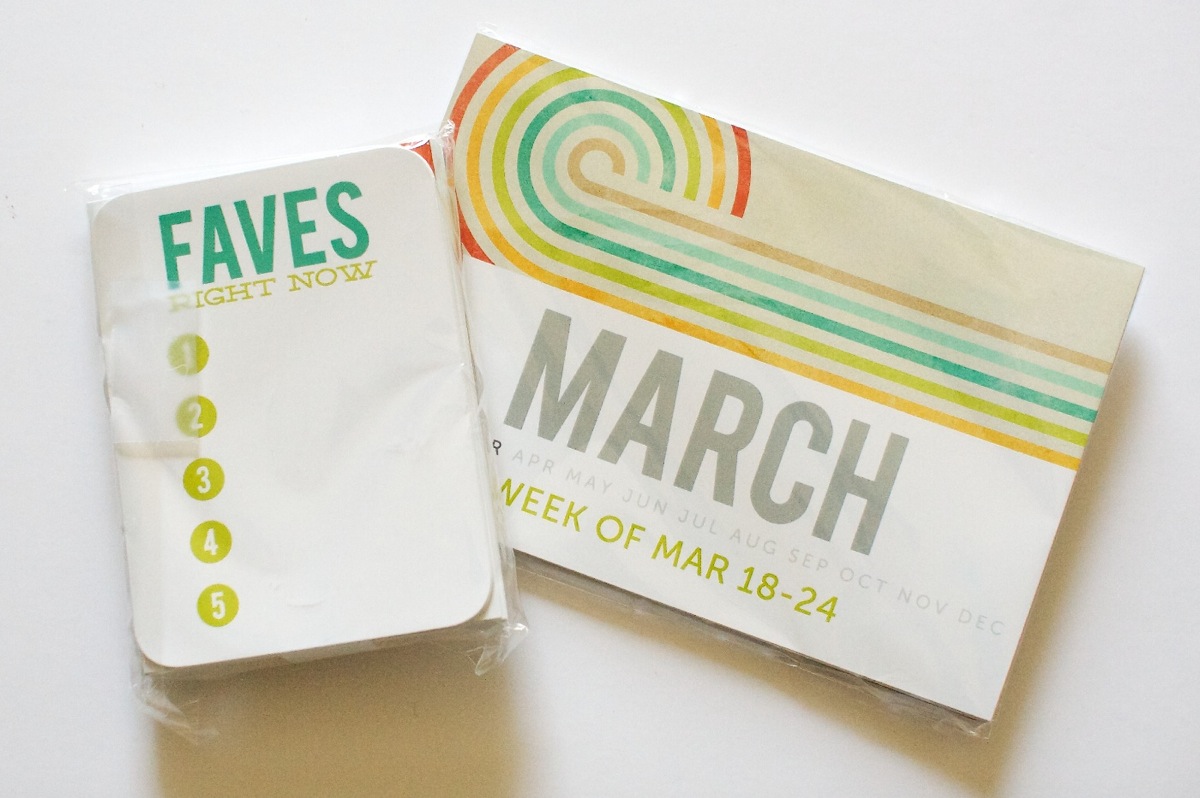
Nettiodesigns ProjectLife Wk9 10 2

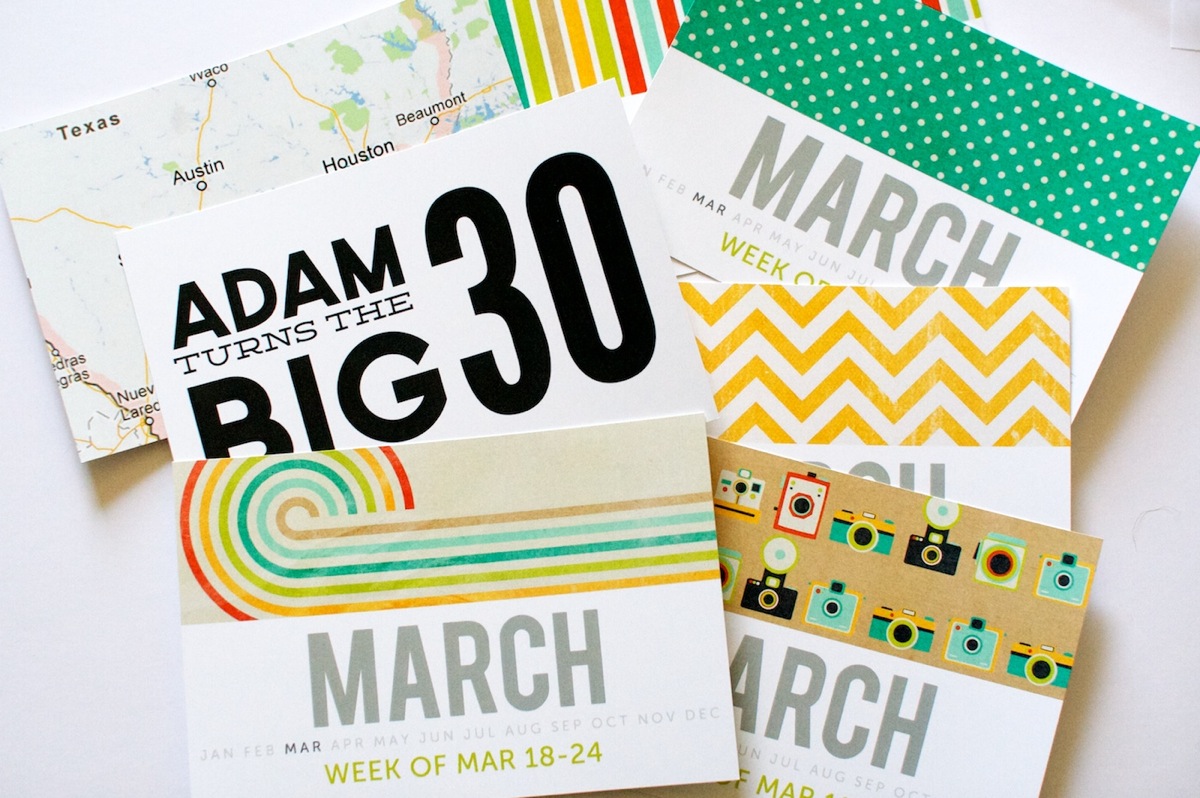
Here’s what all the 4×6 card stock printed images looked like. I loved how bold and saturated the colors looked – I’d definitely consider having my weekly title cards batch printed there again next month. All the digital papers used on my title cards are from Oh Snap digital kit by Libby & Shawna.
Nettiodesigns ProjectLife Wk9 10 3

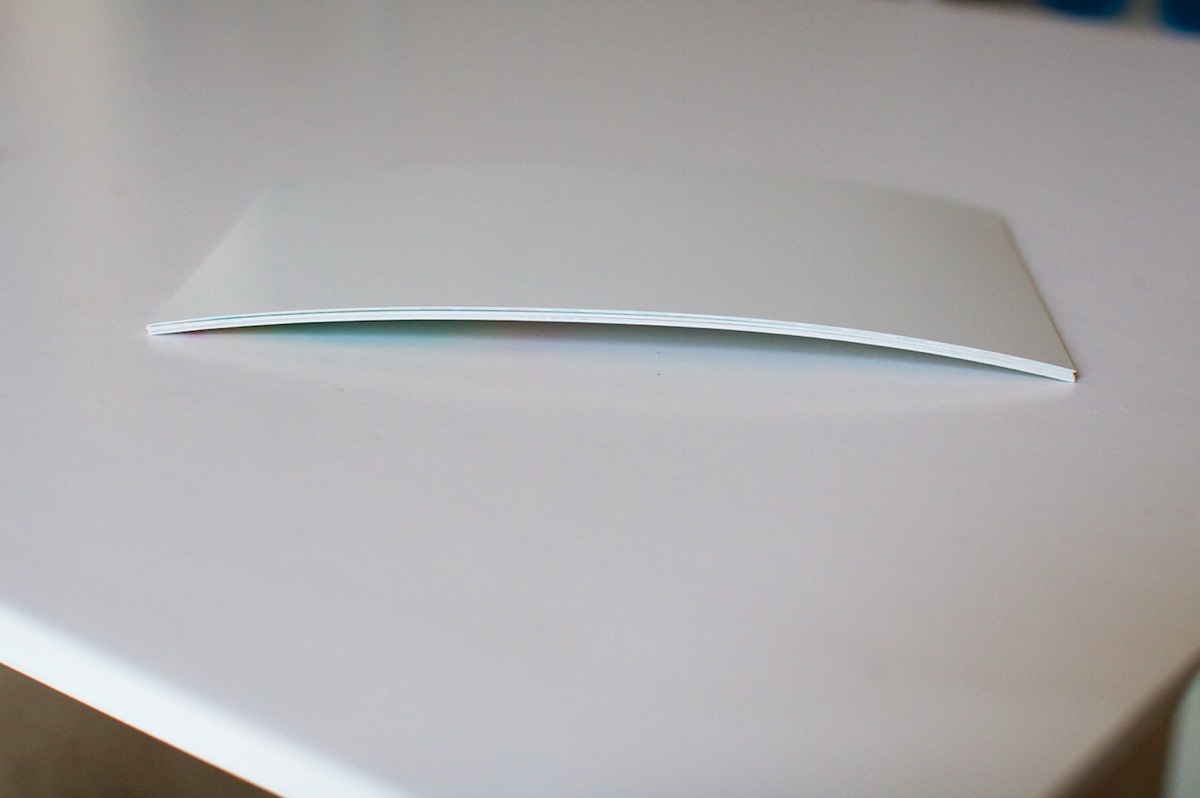
One other downside to the card stock cards was all of them came pretty significantly curled. It wasn’t really an issue for the cards I was putting into the Project Life page protectors but I’d also ordered a bunch of the Instagram Polaroids which I’d planned to clip and hang and they’re currently sitting under a pile of books in hopes I can flatten them out.
Nettiodesigns ProjectLife Wk9 10 5

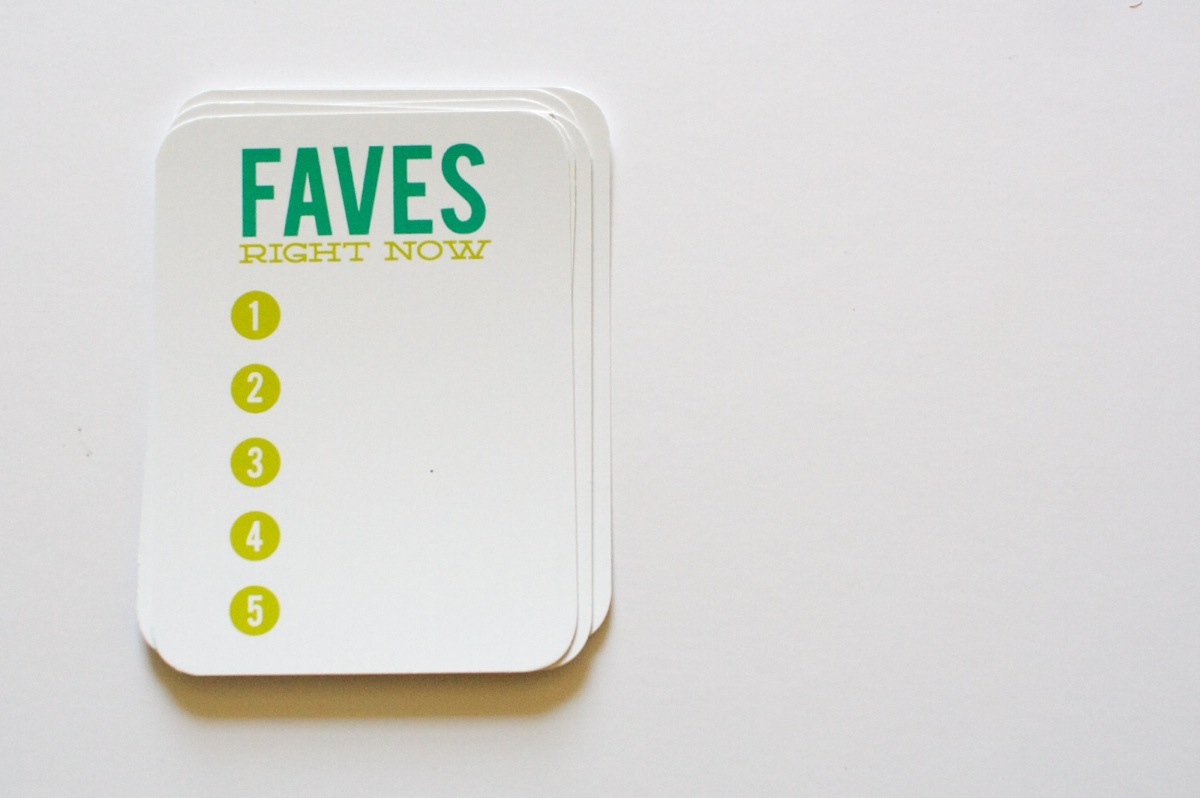
Here’s what the 3×4 card stock Faves cards looked like without the writing on them. I LOVED the saturated colors but not being able to write on them was pretty much a deal-breaker. It’s possible if I used a different pen it might work better, but being left-handed, I suspect the type of pen that might work would probably result in smudge central if I attempted to write with it.
Nettiodesigns ProjectLife Wk9 10 4

Overall I was happy with my Persnickety Prints Project Life printing experience but I don’t know if it’s something I’ll continue to do every week.

Well that’s it for this Project Life 2013, Weeks 9 & 10 birthday-tastic update! How are you doing with your Project Life album? Can you believe Week 10 means we’re almost 1/5 of the way done? I’m quite proud of myself for keeping up with it this long.

Supplies used this week: Project Life Design A & Design F page protectors, Project Life Photo Pocket Pages – Small Variety Pack 1,  Seafoam core kit, Nettio Designs Bits & Bytes 2013 4×6 Weekly Title Cards, 4×6 Journalers – Graphic and Say What 3×4 Cards, Nettio Designs free Top Five Faves 3×4 card, Studio Calico March Project Life kit, Oh Snap! digital scrapbooking kit by Shawna Clingerman & Libby Pritchett, Today 2.0 Arrows digital element pack by Mari Koegelenberg. Photos/elements printed by Persnickety Prints.

Project Life is a memory-keeping system created by Becky Higgins. New to Project Life? Learn more here & find all my Project Life  posts here.

Can diabetes cause erectile dysfunction

POSTED IN Project Life

Creative Adventure #6: 30 Days of Lists

POSTED ON March 12, 2013 IN 30 Creative Adventures, 30 Days of Lists, Project Life

I’ve known since I started this Creative Adventures project last May that one of the adventures I wanted to include this year was 30 Days of Lists.
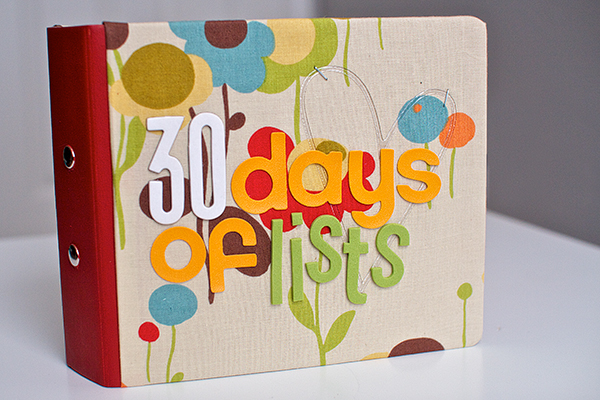
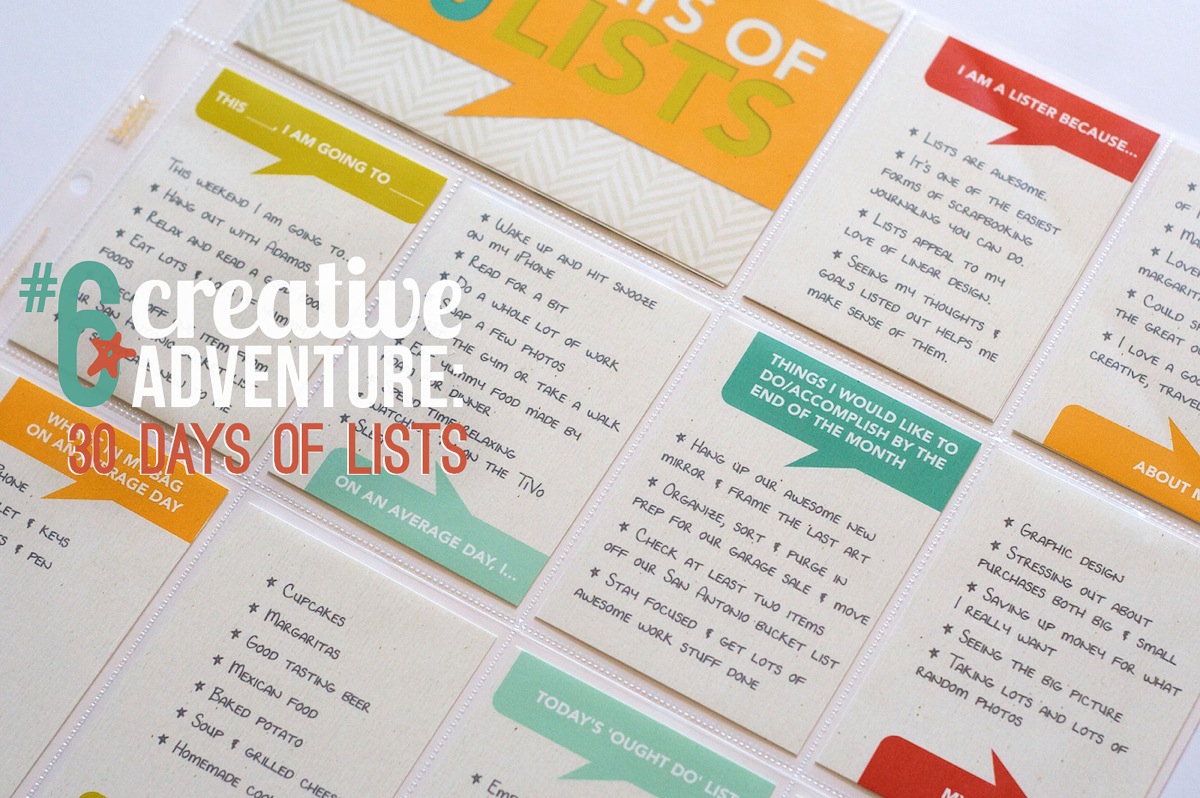
If you haven’t heard of 30 Days of Lists before, it’s pretty much exactly what it sounds like it would be. It’s a month long event hosted by the lovely Kam of Campfire Chic and Amy of Lemon & Raspberry. It costs $8 to participate and then every day during the month of March you receive one list prompt posted on a private blog, covering anything from weekend goals to celebrity crushes. At the end of the 30 days you’ll have a collection of entries capturing a snapshot of your life right now.

Let’s be honest, a project featuring lists that captures a snapshot of my life right now? You know I’m all over that.

Last March I played along with 30 Days of Lists and created this 6×6 mini album for my lists:

Nettio 30Days cover1

Here’s what the design for each page looked like:

Nettio 30Days 5

You can see my all my completed pages here: #1-5 and here: 6-11.

I LOVED how the pages turned out, but I only ended up making it through about Day 11 and I can tell you right now why: because as much as I loved my pages, they were too complicated. Too many details and decisions needed to be made for each one.

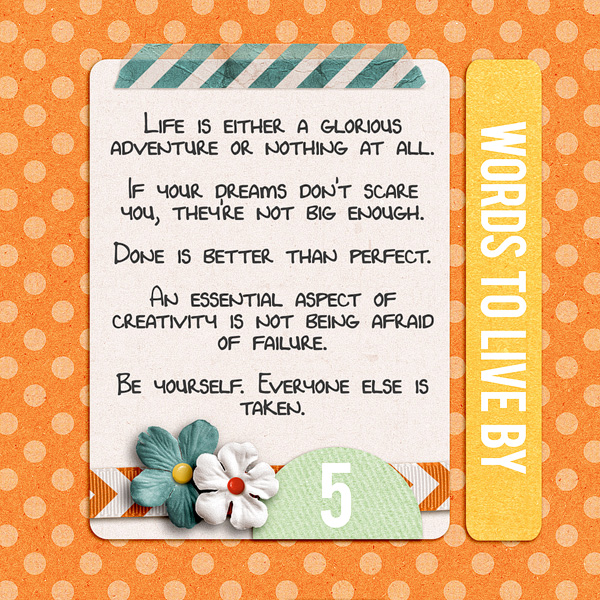
If there’s one thing I’ve learned in 7 years of scrapbooking it’s this: the more times you have to repeat something, the more simple the design should be or else you aren’t going to finish it. #wordstoliveby

Creative Adventure #6: 30 Days of Lists

So for 30 Days of Lists, the March 2013 edition, I decided to keep things super simple. And since I’ve been enjoying Project Life so much, I decided this year I’d include my lists as 3×4 cards as part of my Project Life album by including them in a series of Project Life Design F page protectors.

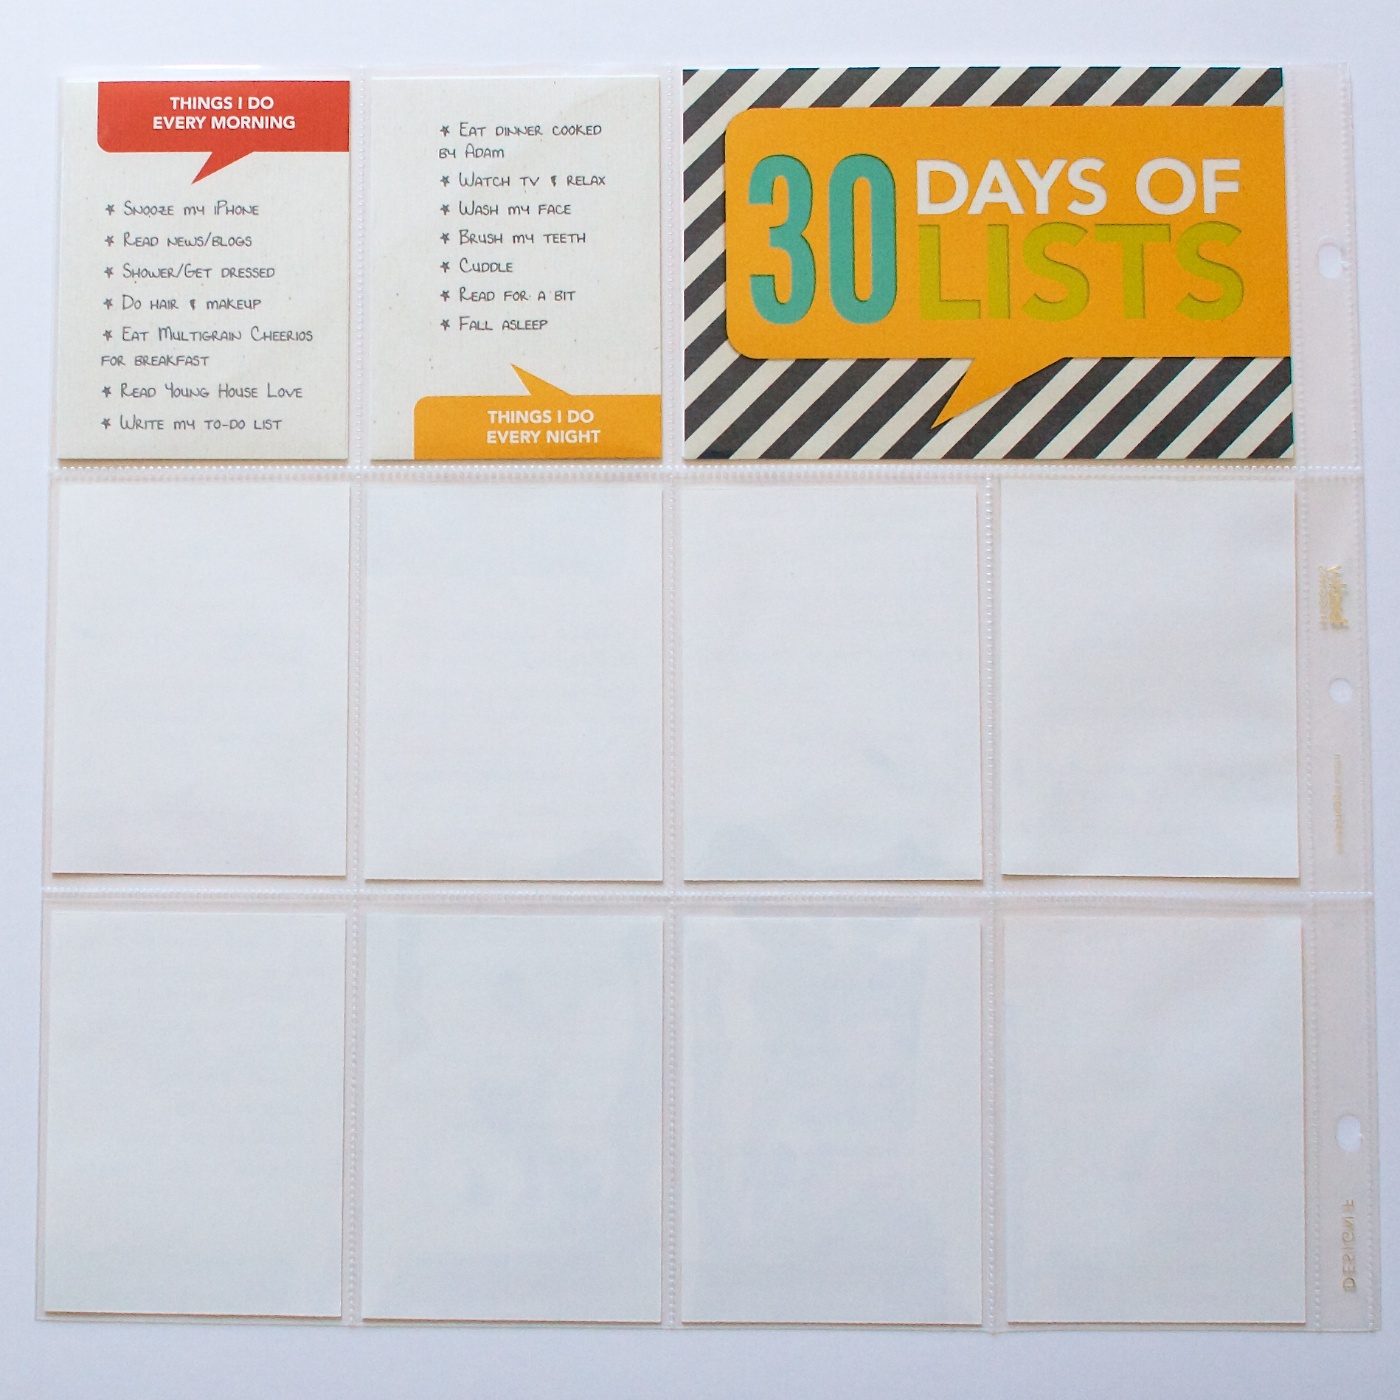
Nettio CA6 30 Days of Lists title

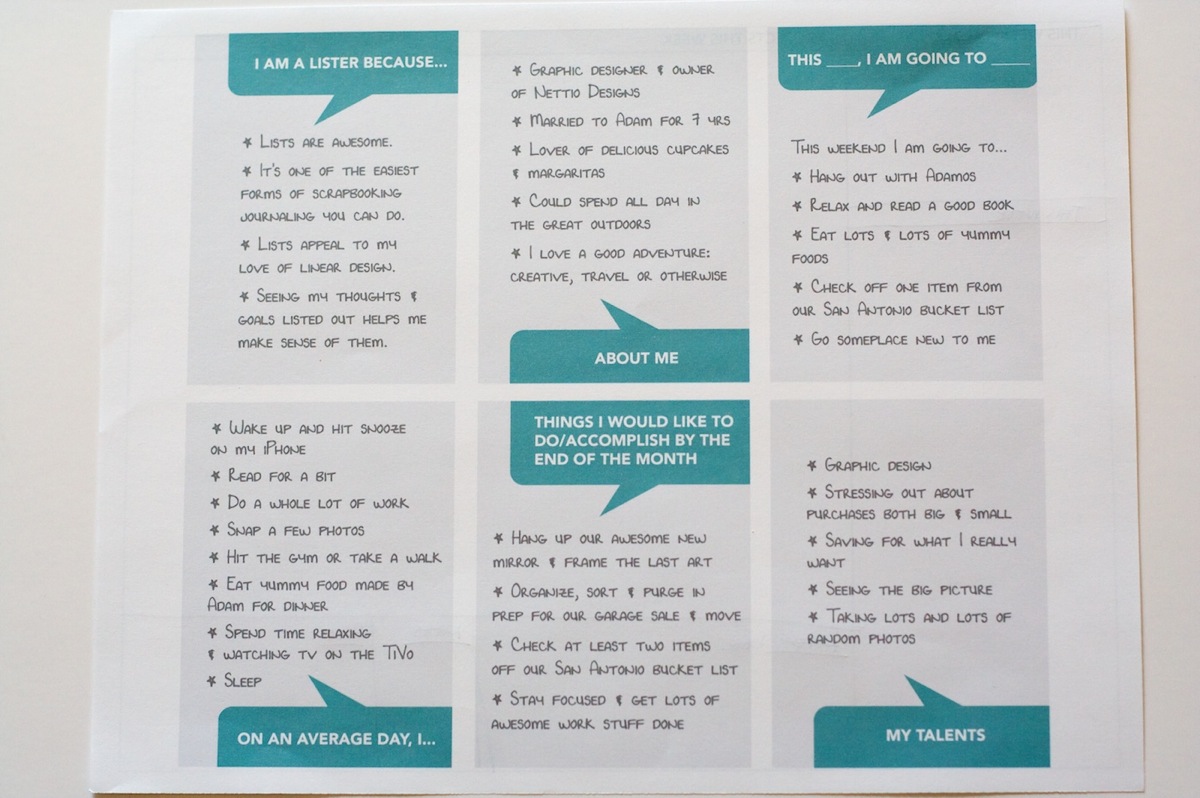
I started by designing a mock-up template in Photoshop and then printing it out to check the sizing of the type. I almost always start with a mockup when I know I’m going to be design multiple copies of something since the last thing I want to do is design a bunch of cards and then have to change them all. I designed all of the talk bubbles using the shape tool in Photoshop.

Nettiodesigns 30 Days of Lists 1

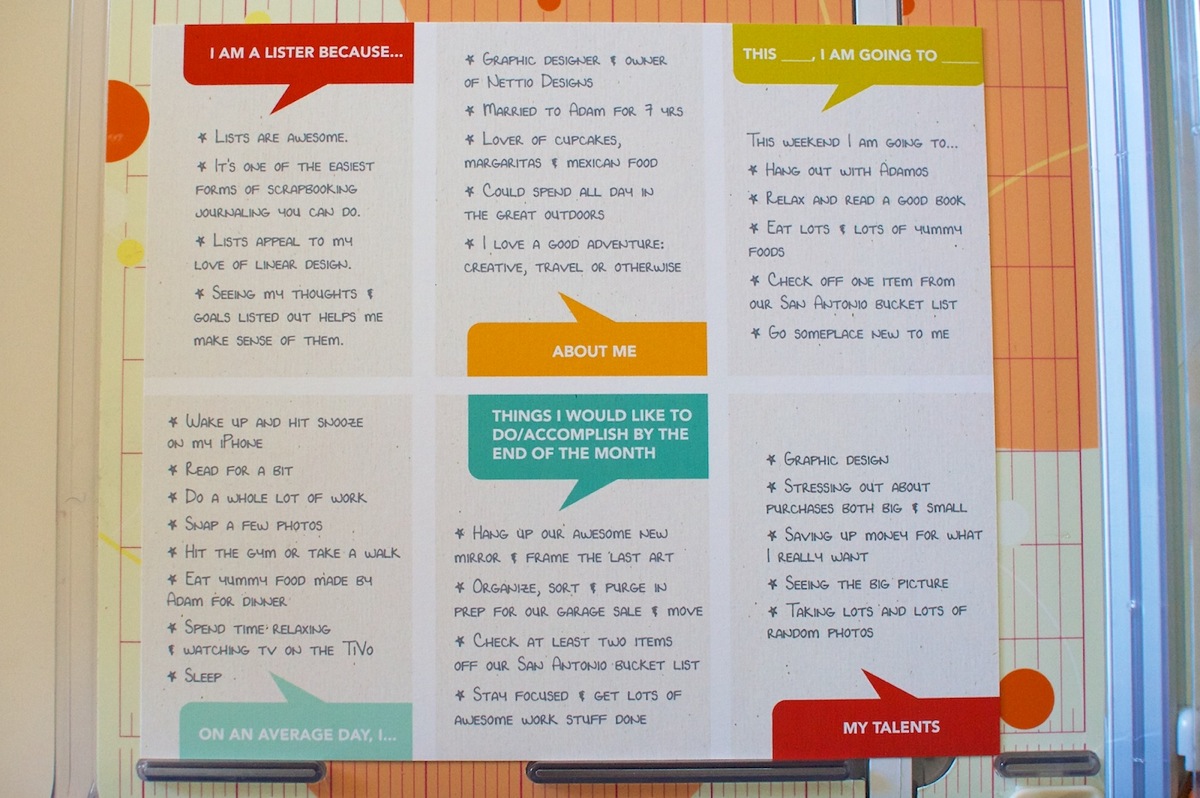
Once I was happy with the overall design, I started playing around with colors and papers. Since I knew I wanted to tie my color scheme into my March Project Life pages, I chose to use a background paper and colors from Libby & Shawna’s Oh Snap! kit which I plan to use for my March Project Life weekly title cards.

Once I had a design I liked, I printed everything on Epson Matte Premium Presentation Paper and then trimmed everything out with my Fiskars paper trimmer:

Nettiodesigns 30 Days of Lists 8

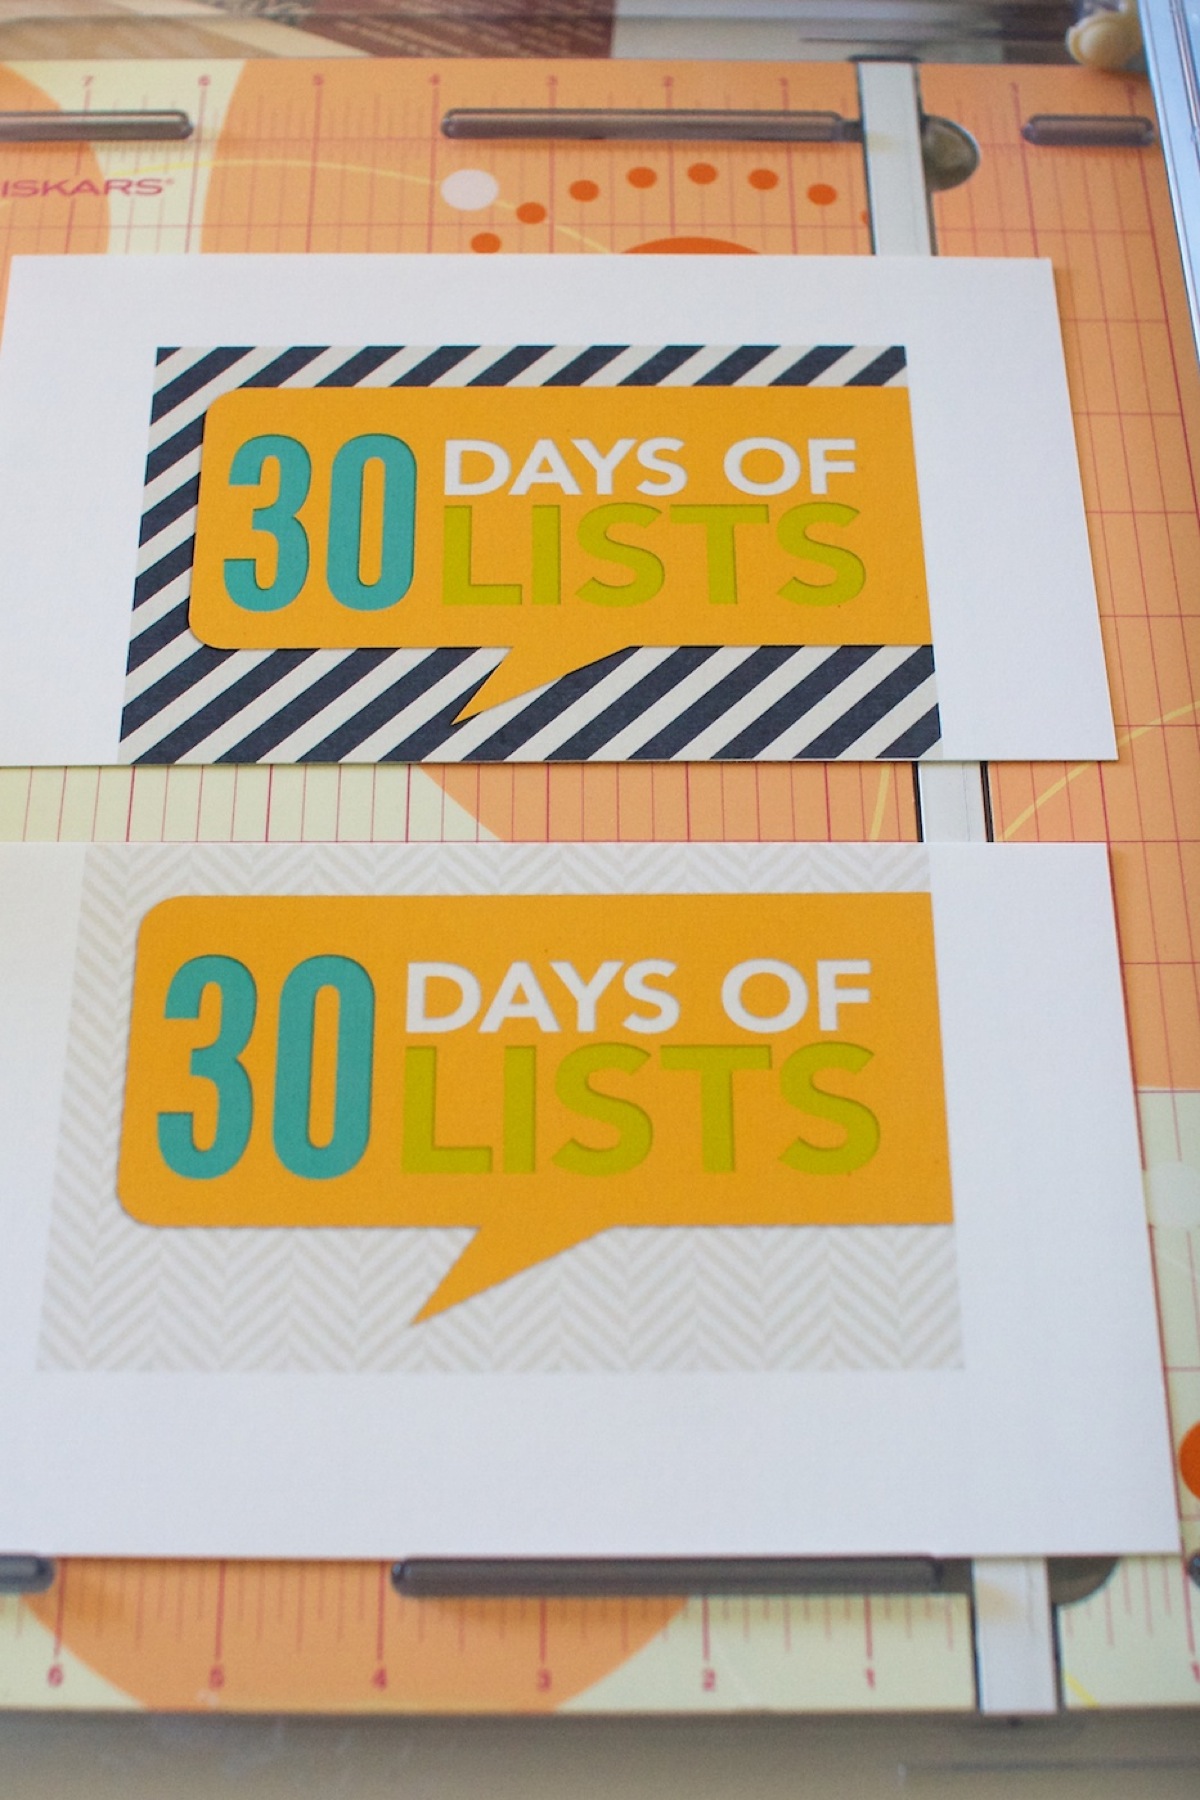
I also printed a couple of title cards to use in the 4×6 slot in the Design F page protectors. All of the patterned papers for these came from Libby & Shawna’s Oh Snap! kit as well.

Nettiodesigns 30 Days of Lists 4

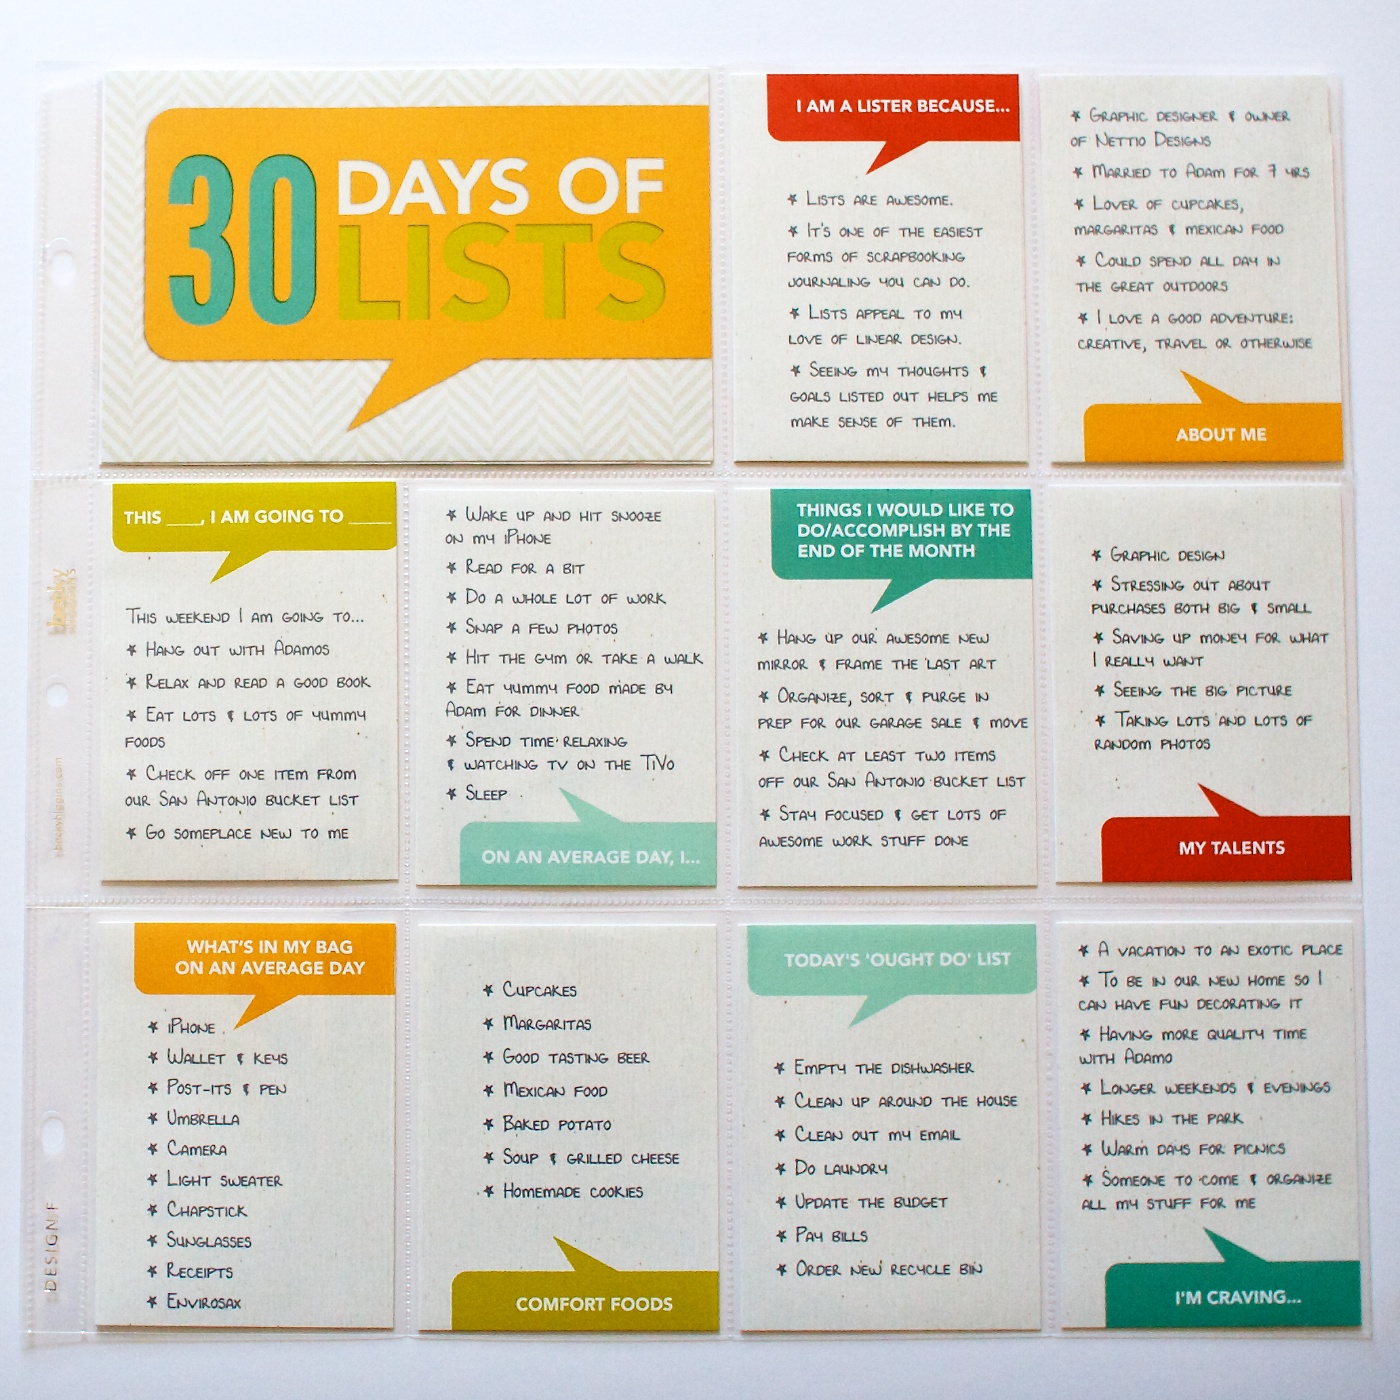
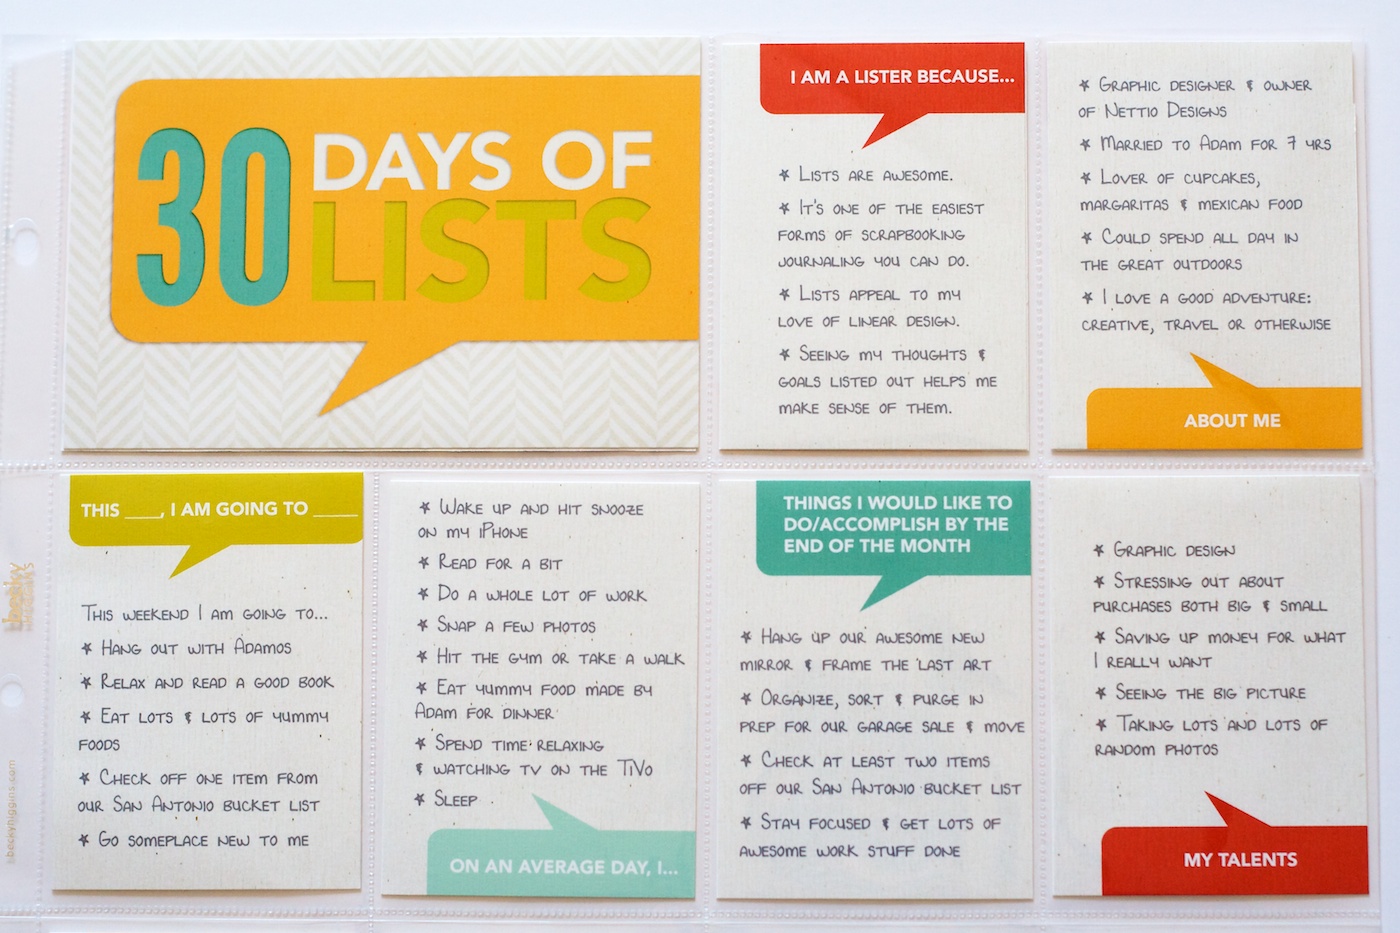
Here’s what all the cards looked like once I added them to the page protector. I’m not going to lie, I’m totally in love with the talk bubbles – they’re so fun! I can definitely see using them again as part of my regular Project Life pages.

And here’s what the back of the page looks like right now. Since I’ve only done up through Day 12, the majority of this page is blank.

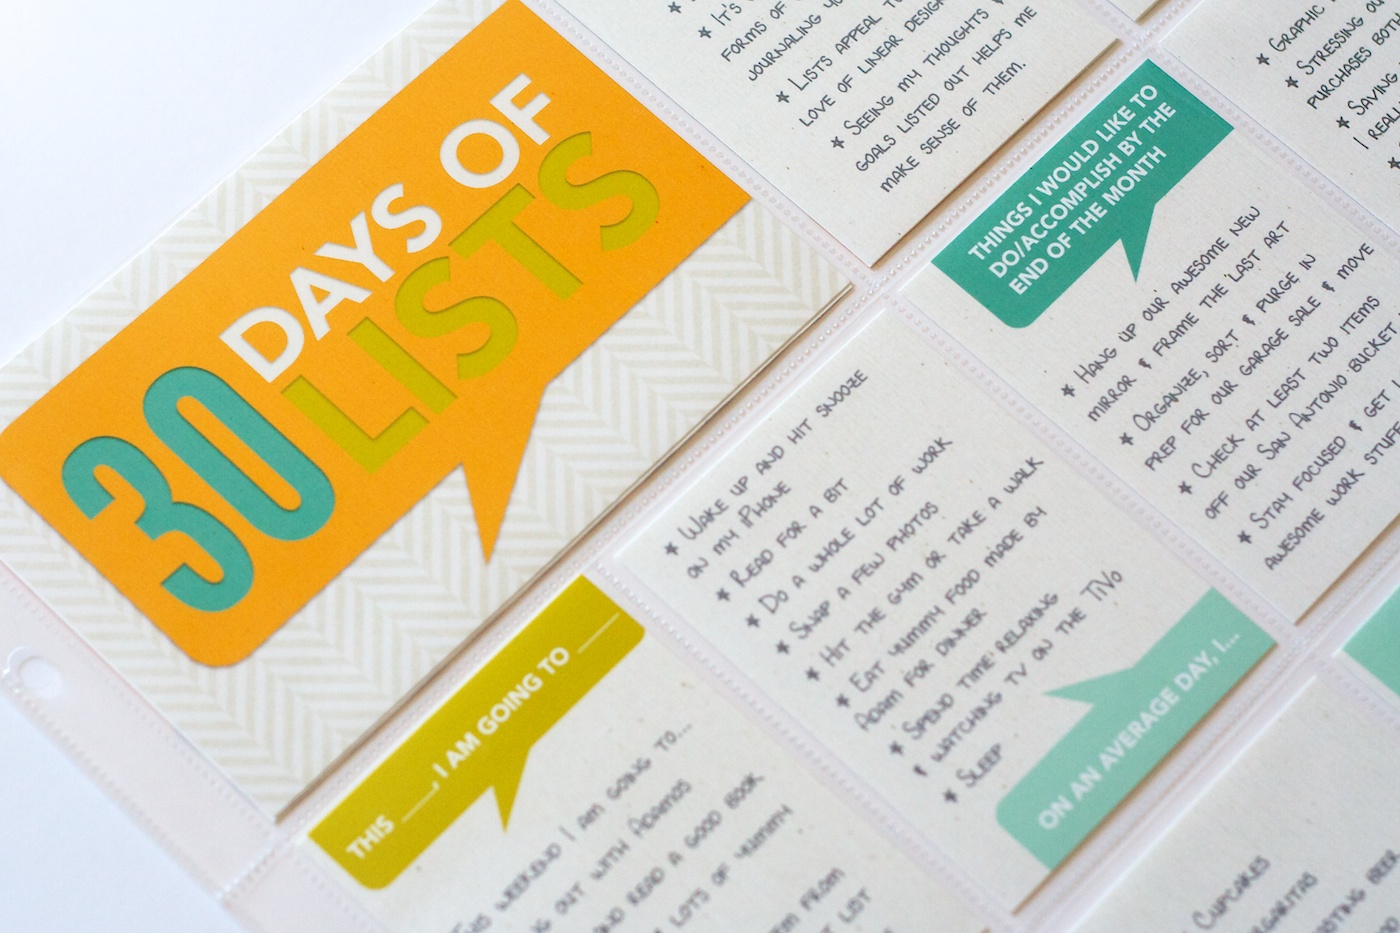
I purposely went with a textured off-white digital paper for the background of the cards because I wanted them to stand out from the regular bright white 3×4 cards I use for Project Life.

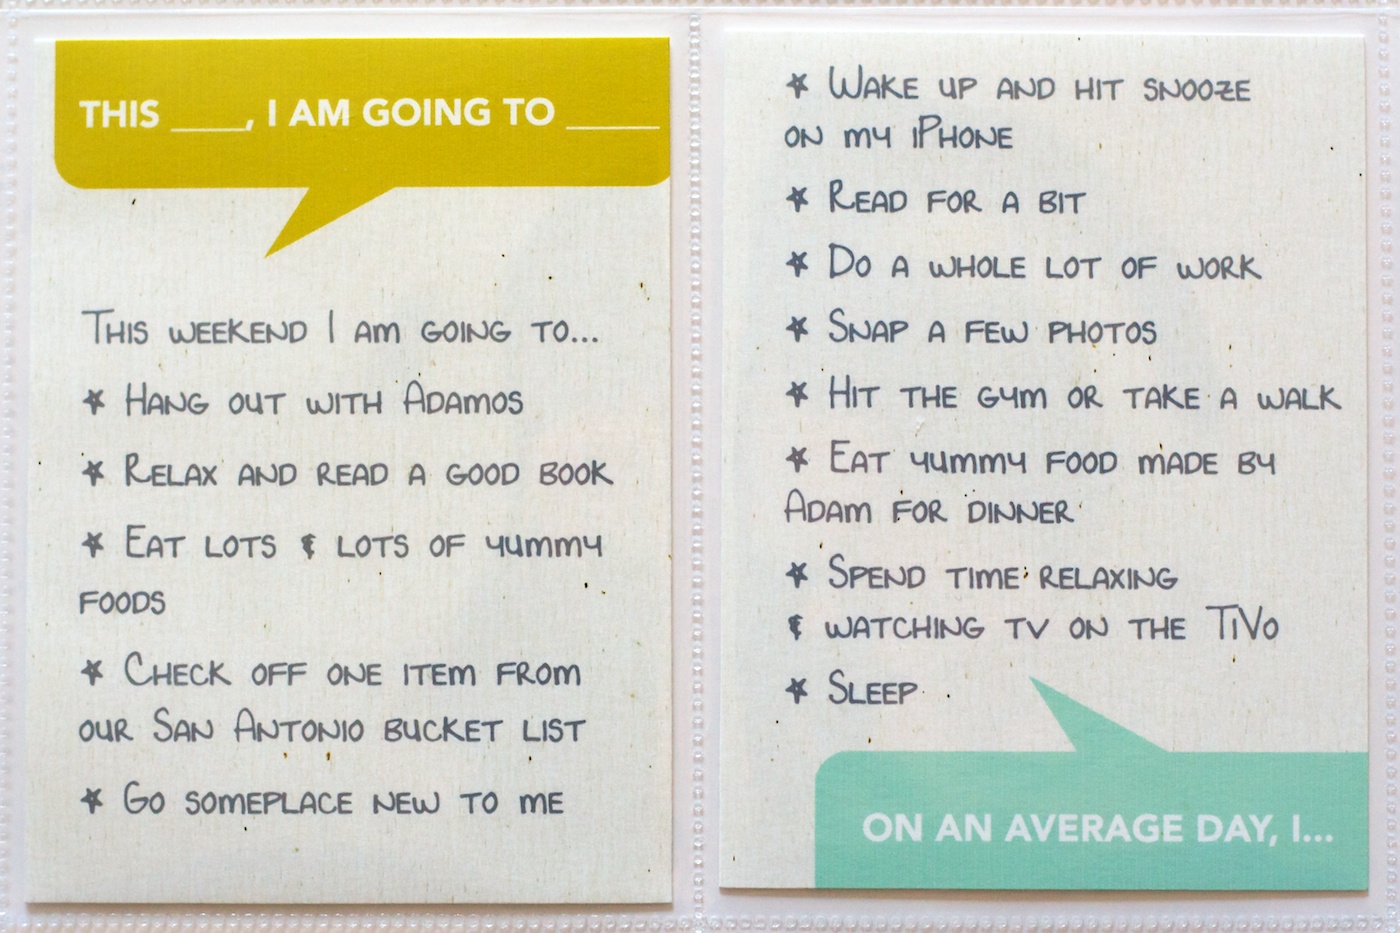
For all of the list titles I used the font Avenir and for the lists themselves I used my own journaling font Darcy Baldwin made for me. I love the way the handwriting font makes it feel so much more personal without me having to actually write everything by hand.

If you don’t already have a custom handwriting font by Darcy, RUN, don’t walk or wait for a sale, and get yourself one because they are awesome.

Here’s a close up of the texture of the cards. I really wanted the colored talk bubbles (which I made using the shape tool in Photoshop) to look like they were actually printed on the textured background paper, so I added a duplicate copy of the paper above the talk bubble layer and changed the blend mode to Color Burn. Because the paper was fairly neutral, it added a nice texture without altering the color too much.

If you’re wondering how I’m planning to incorporate my 30 Days of Lists pages into my Project Life album, the answer is I have a plan, but you’ll have to wait until my next Project Life update to see it in action.

And that’s pretty much it for this list-tastic Creative Adventure! I will be back to share an update of my album once I have it all completed but I have to say so far, I’m so very glad that I took the simple route this time around. This project is definitely a case where less is more.

______________________________________________________________________

ABOUT THIS PROJECT

In honor of my 30th birthday, I’m challenging myself to go on 30 creative adventures before the end of 2013. This is Creative Adventure 6 of 30. You can read all the details behind this project here and find links to all my completed adventures here.

Can I take Levitra if I am taking other remedies at the same time

POSTED IN 30 Creative Adventures, 30 Days of Lists, Project Life, Hybrid Scrapbooking

Project Life 2013 | Weeks 7 & 8

POSTED ON March 5, 2013 IN Project Life

Welcome to Project Life, Weeks 7 & 8.

I realized this past week that I need to give myself a bit more time to put together these Project Life sharing posts. As much as I love sharing my pages, these posts take practically as long to put together as designing the pages themselves! So starting now my goal is to share my Project Life pages every other Monday but with a week in between – so Weeks 7-8 are being shared now at the start of Week 10 and Weeks 9-10 will be shared at the start of Week 12.
Up to this point I’d been trying to put together my two weeks of pages, take & edit photos and write the post all in one day and well, it was so.not.working. So I’m hoping this’ll give me time to play and send my photos out for printing since I know printing at home has been a major sticking point for me. But I do reserve the right to change my mind at any point if this totally doesn’t work either, haha.

With that out of the way, let’s get to Weeks 7 & 8, shall we?

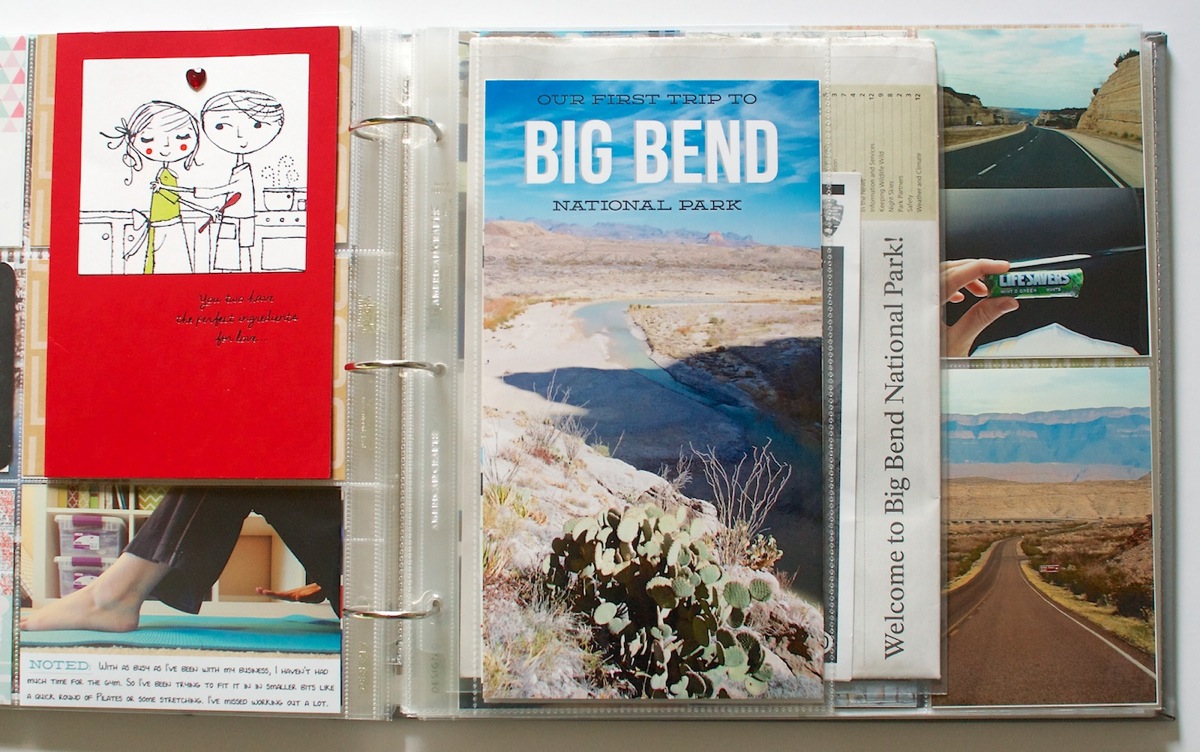
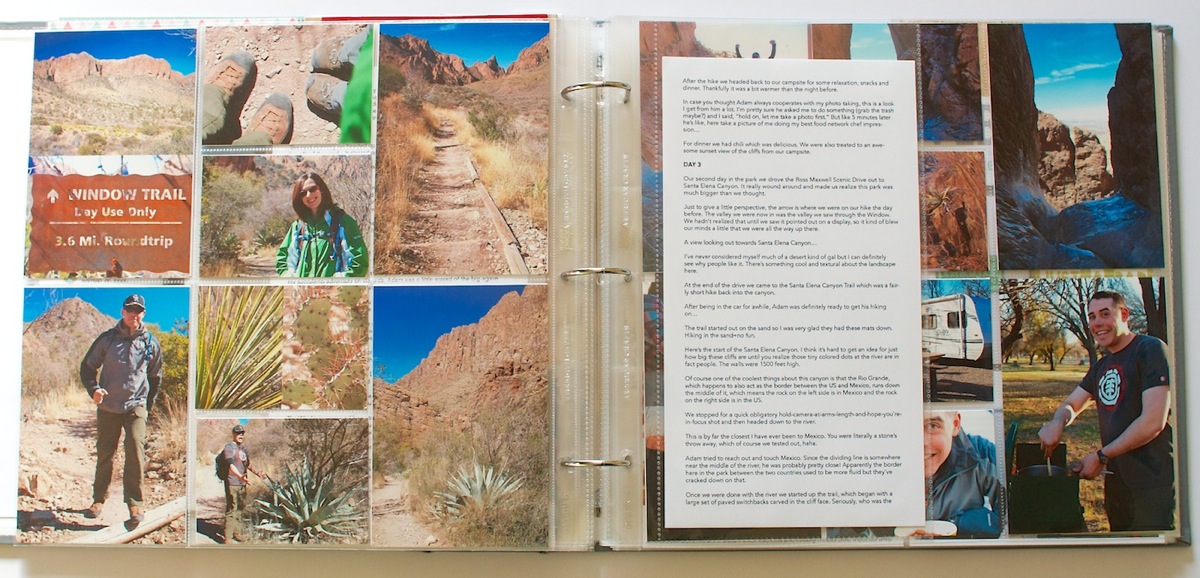
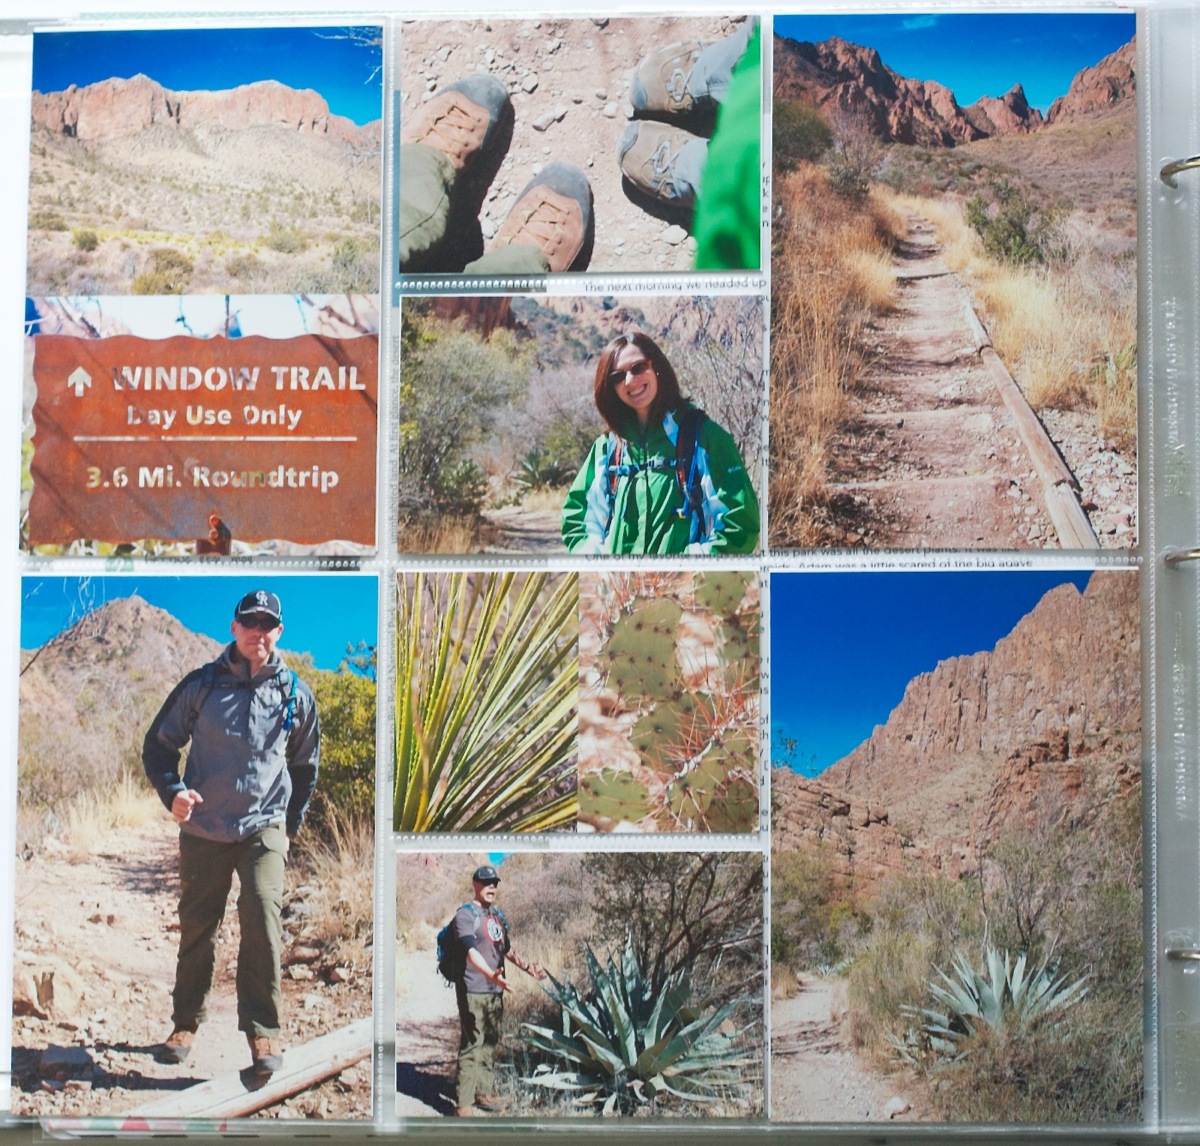
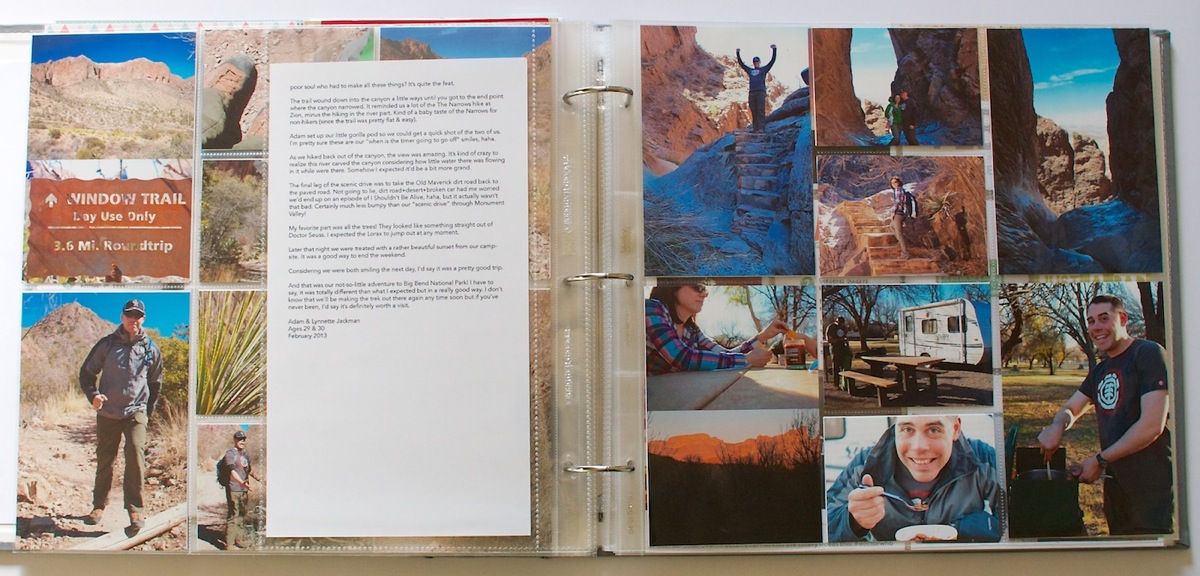
These two weeks were so much fun to put together because it was my first time adding additional inserts to my weekly spreads. I knew I wanted to capture our weekend adventure to Big Bend National Park and since the trip loosely spanned across two weeks (we drove home on Monday of Week 8), I decided the easiest plan was to create a single page each for my everyday type stuff and then use the extra pages and some additional insert for the trip. I LOVE how it turned out.

Week 7: Feb 11-17

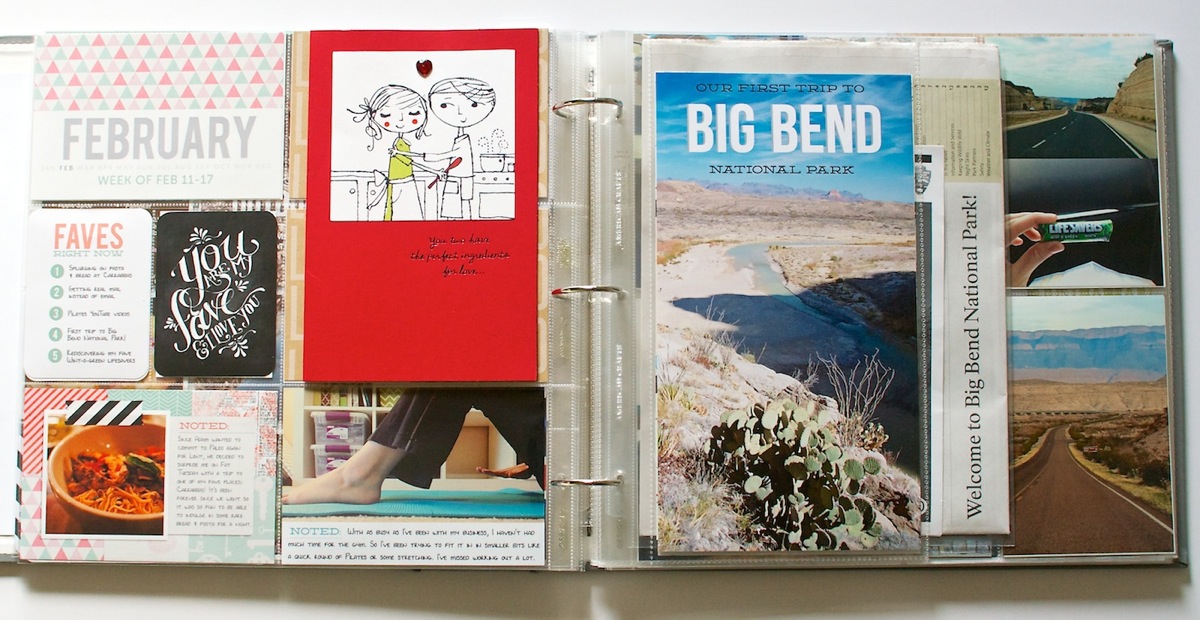
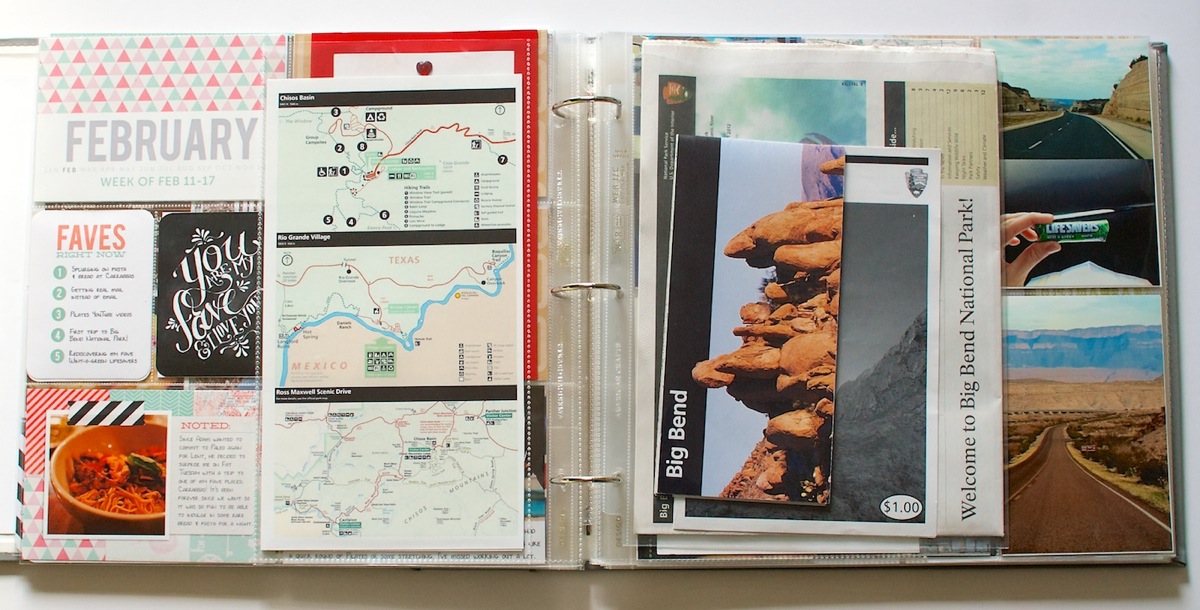
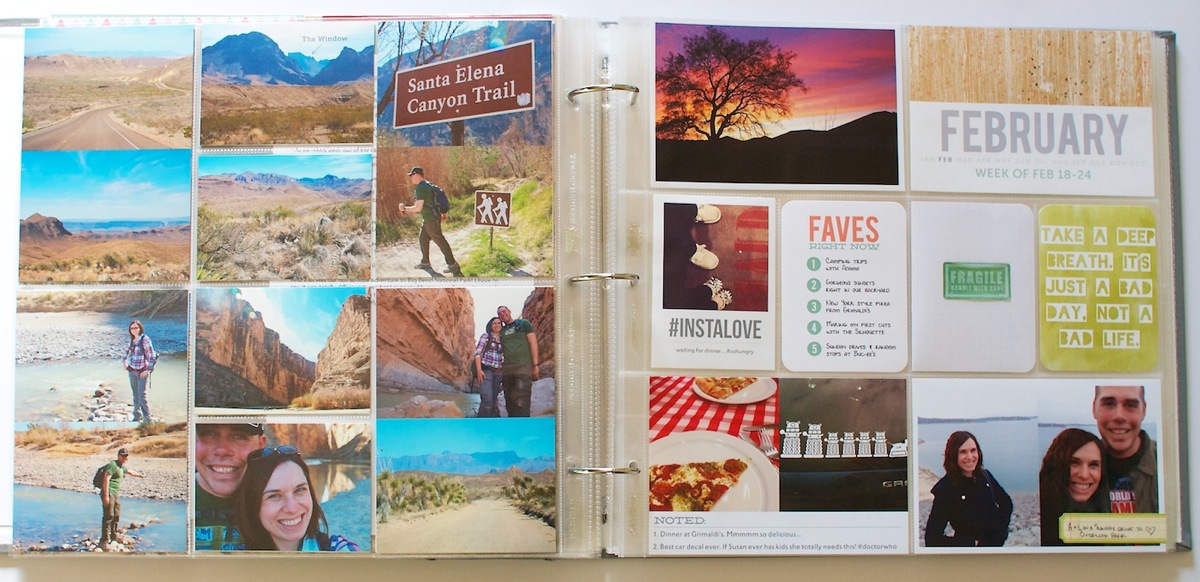
Here’s a look at the Week 7 spread. On the left is everyday stuff from Week 7 and on the right is the start of the trip pages.

Nettio ProjectLife Wk7 8 1

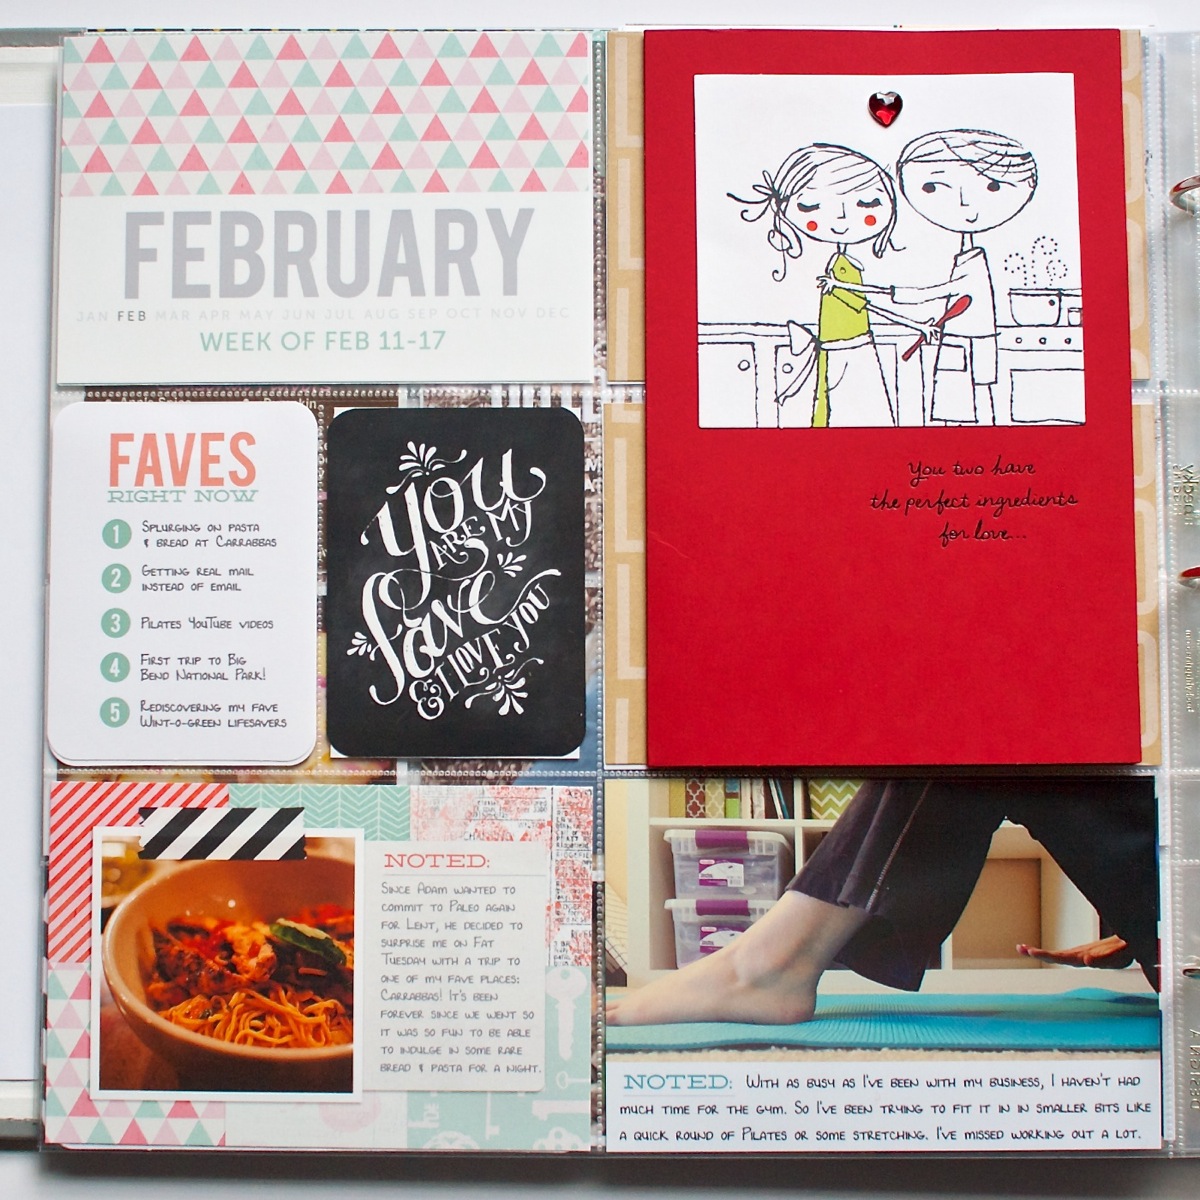
Included in this week are all 3 of my new Bits & Bytes Project Life themed products released this past weekend at Sweet Shoppe Designs: 2013 Weekly Title Cards, 4×6 Journalers – Paper Love and 4×6 Journalers – Graphic Love. The black accent card was a printable freebie from Studio Calico for those on their Project Life wait list. I thought it seemed fitting for Valentine’s Day plus “you are my fave” – you know I’m going to be all over that. #faveslove

Nettio ProjectLife Wk7 8 2

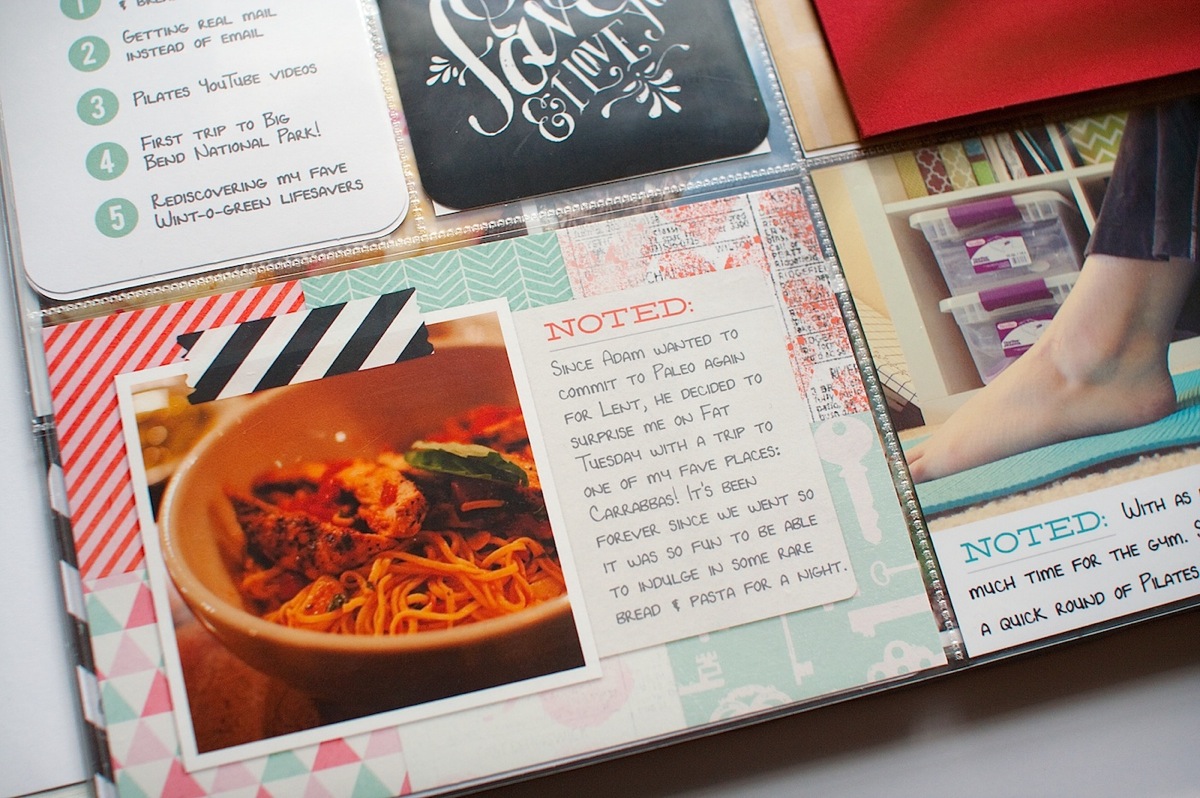
Here’s a closer look at the 4×6 Journalers – Paper Love card. These templates made these cards SO easy to put together and I love the little pop of pattern and color they add to the page. I chose papers from the same kit I’m using for my February title cards (You Hold the Key to My Heart by Zoe Pearn & Jenn Barrette) to keep things cohesive.

In the right corner you can see one of the 4×6 Journalers – Graphic Love. I love the balance of the clean & graphic vs the scrappy and paper-lovin’.

Nettio ProjectLife Wk7 8 3

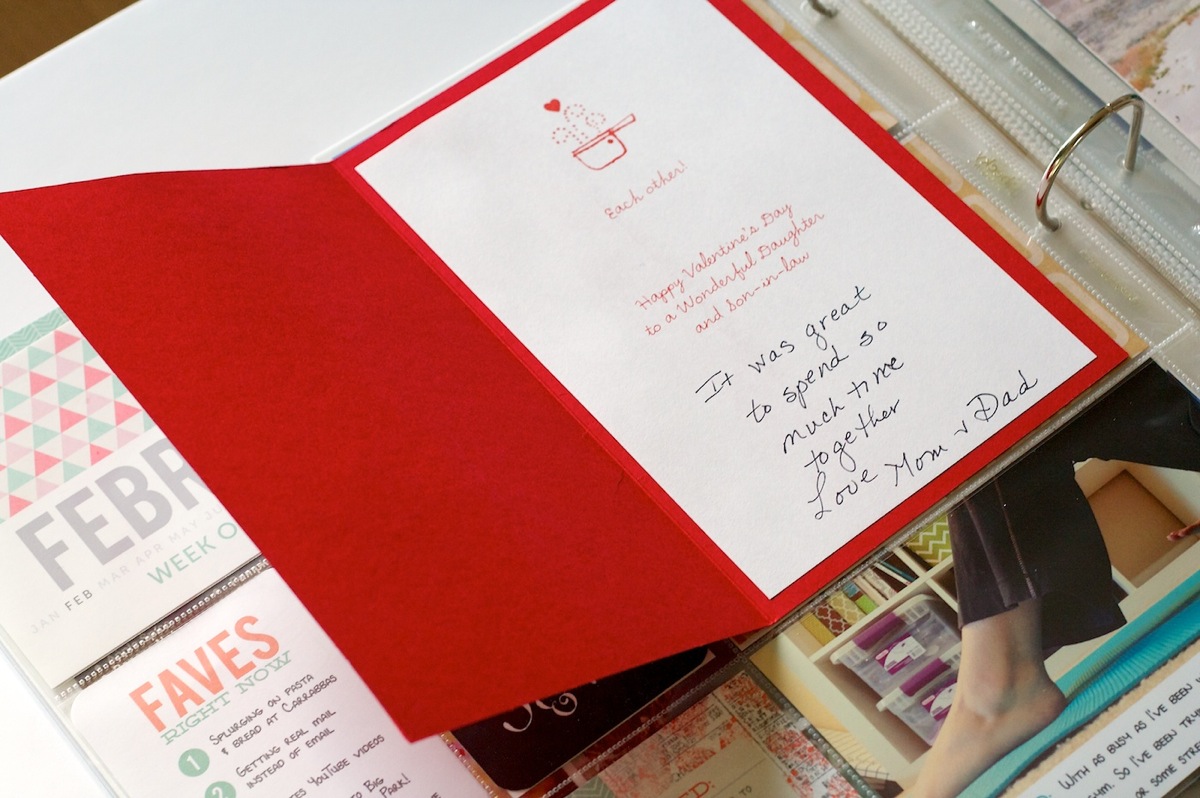
My mom mailed me a Valentine’s Day card and since I wanted to be able to open it and not chop it up to fit in the pockets, I ended up using some tape runner (Scotch Adhesive Dot Roller) to attach it to the front of the page protector.

Nettio ProjectLife Wk7 8 5

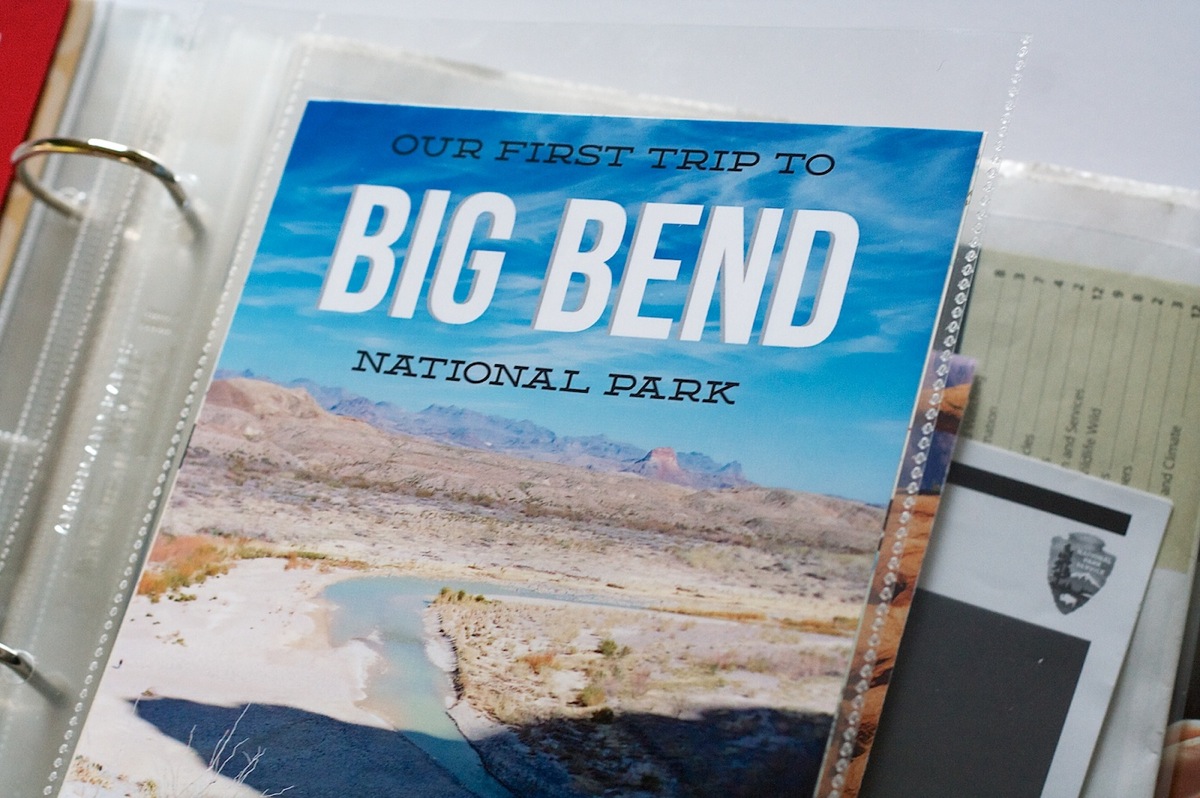
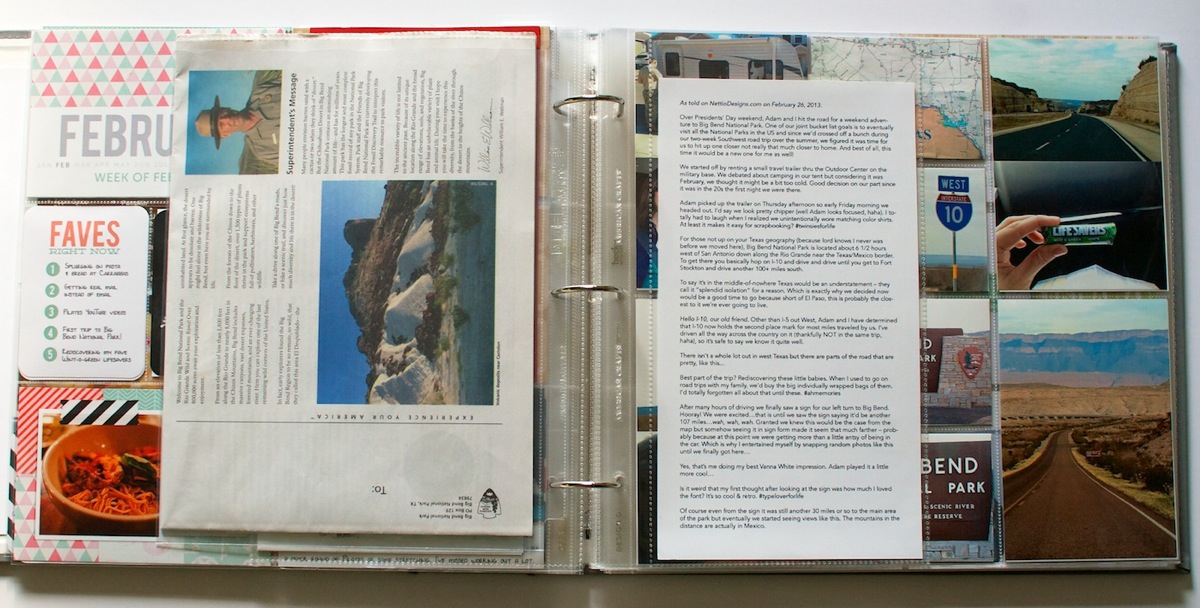
Here’s a look at the start of the right side of the Week 7 spread. Since the trip was kind of a big deal, I decided to make it it’s own title page to signify that this was the start of the trip. It’s 6×11 and I just added it to the album using an American Crafts 6×12 page protector.

Nettio ProjectLife Wk7 8 6

Playing with type and especially adding text directly to photos may just be my favorite part of Project Life.

Nettio ProjectLife Wk7 8 7

When you turn the title page, you’ll find a map of the park as well as an 8.5×11 page protector (from We R Memory Keepers) that holds some of the papers we were given at the park.

Nettio ProjectLife Wk7 8 8

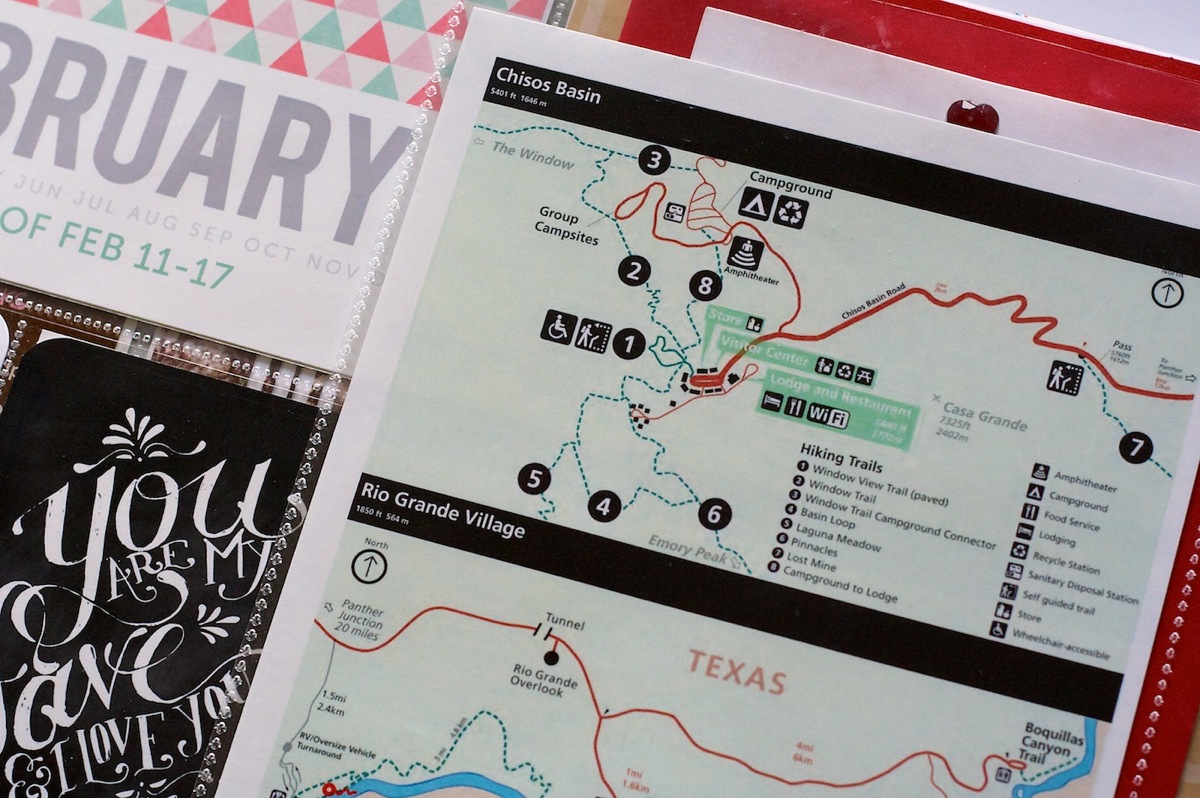
On the back of the 6×11 title card, I added a printed version of the map of the park. The National Park Service has downloadable PDFs available on their website so I just downloaded that, placed it into Photoshop, cropped and printed.

Nettio ProjectLife Wk7 8 9

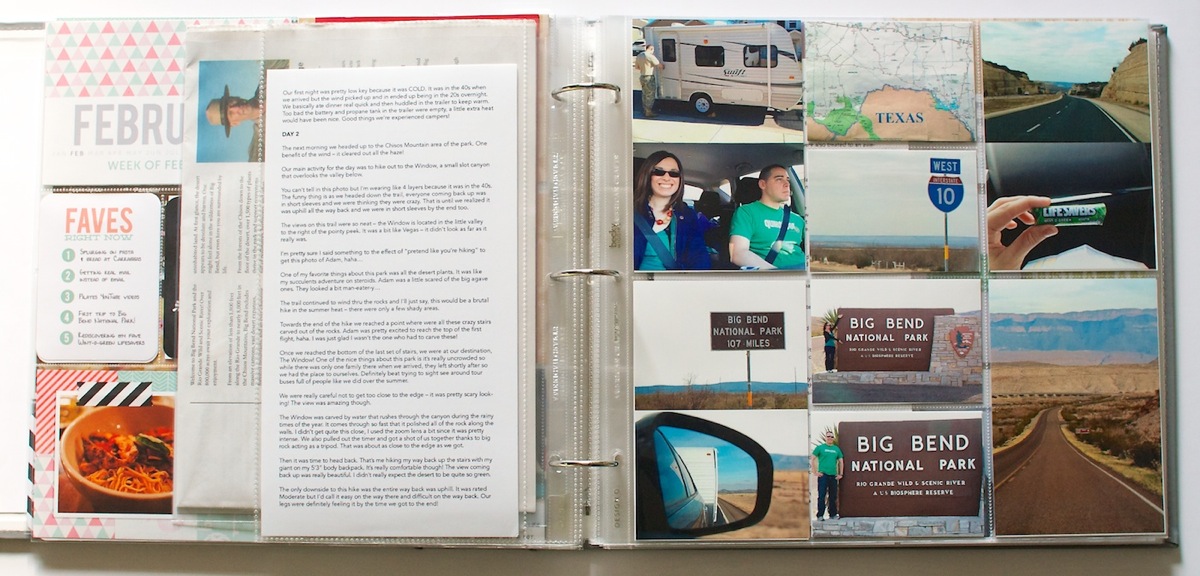
For my trip journaling, I added two additional 6×12 page protectors to hold four 6×11 journaling cards. To make my journaling cards, I copied the text directly from this blog post and then formatted it using Adobe InDesign. SUPER easy and saved me the trouble of having to rewrite what we did on the trip.

Nettio ProjectLife Wk7 8 10

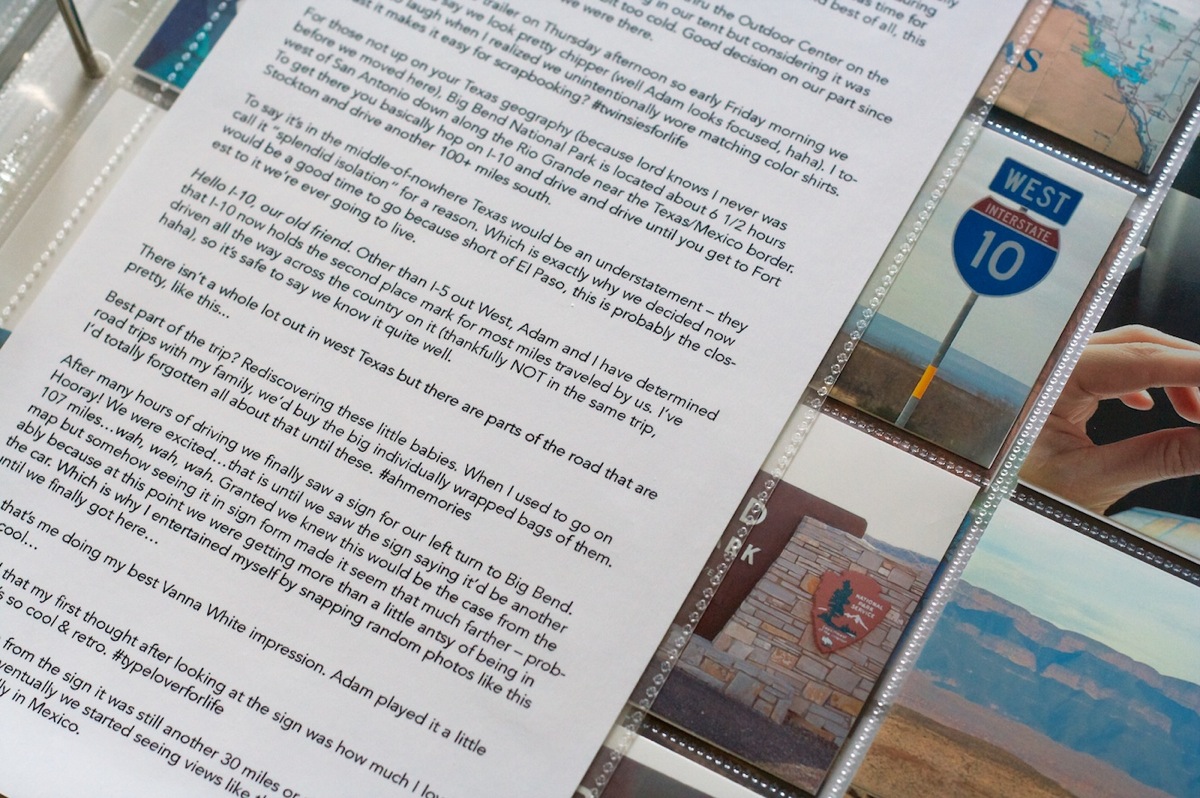
Since the Epson Premium Presentation Paper Matte I have is double-sided, I decided to try printing my journaling double-sided on a single sheet of 8.5×11 paper. A tip for doing this if you’re printing 6×11, make sure you align the text on the backside of the card opposite from the front side – front aligned to the left of the page, back aligned to the right. Otherwise when you go to trim the 8.5×11 sheet of paper down to 6×11, the journaling will be cut off.

Here’s a closer look at my printed journaling. I can definitely see using this format again as a way to get longer stories into my album. I love the way the photos peek out from behind the text like a little preview of what’s to come.

Nettio ProjectLife Wk7 8 11

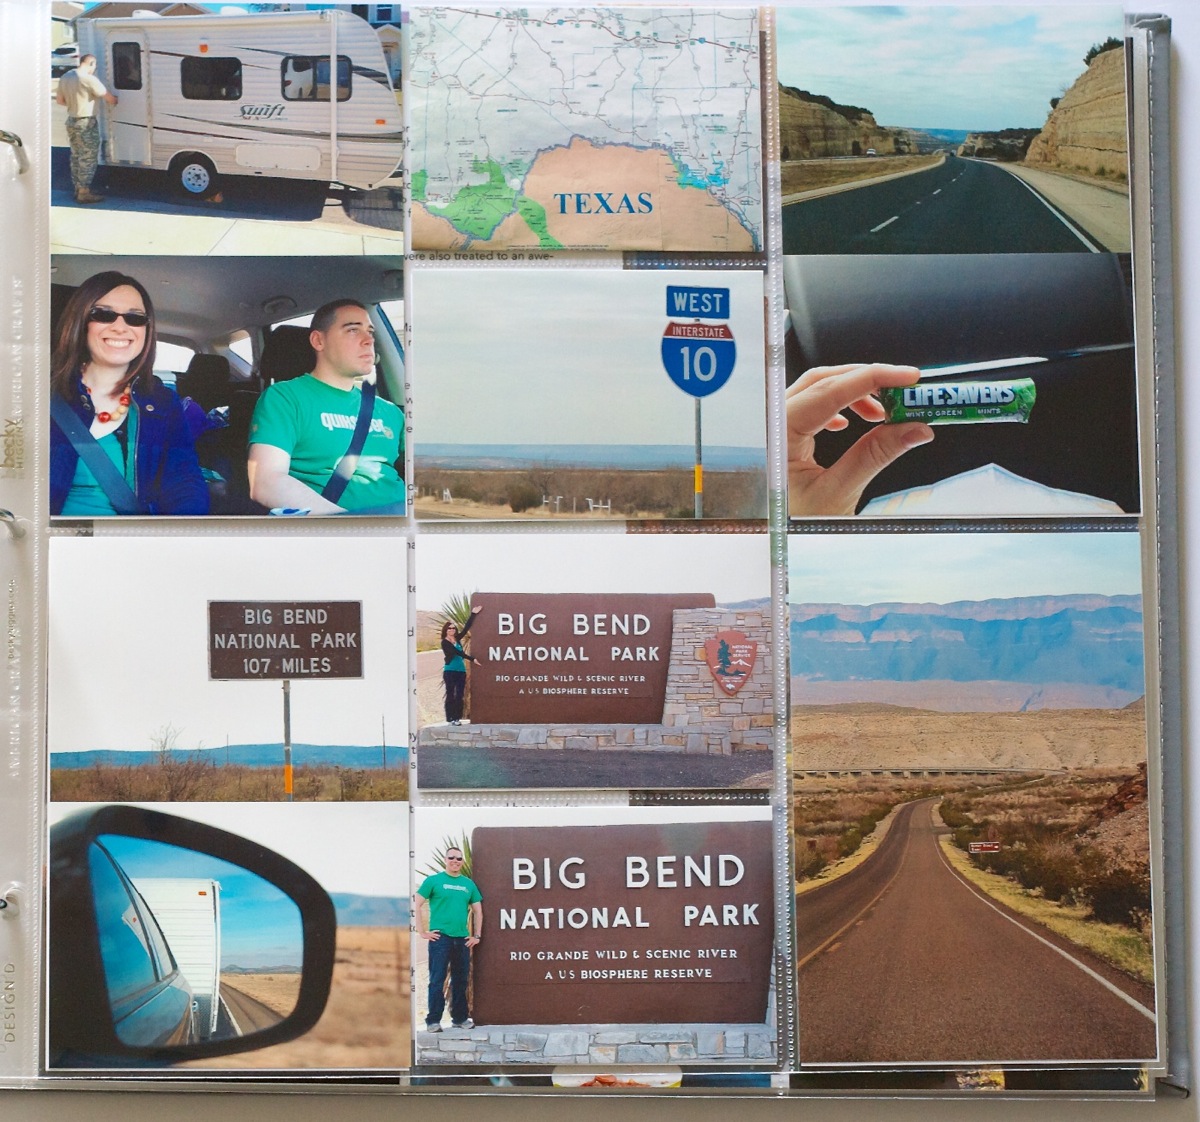
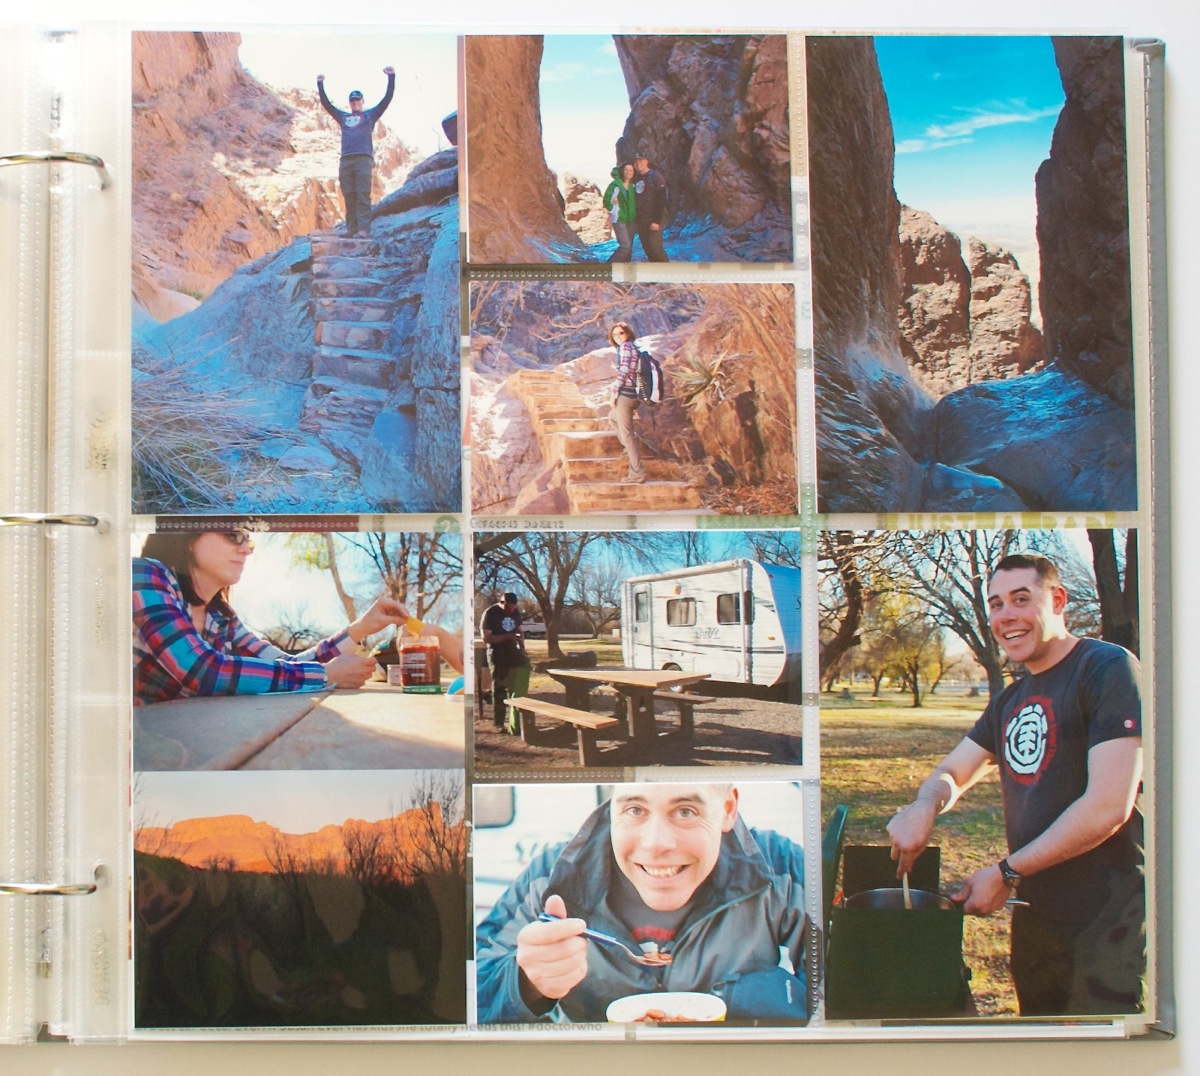
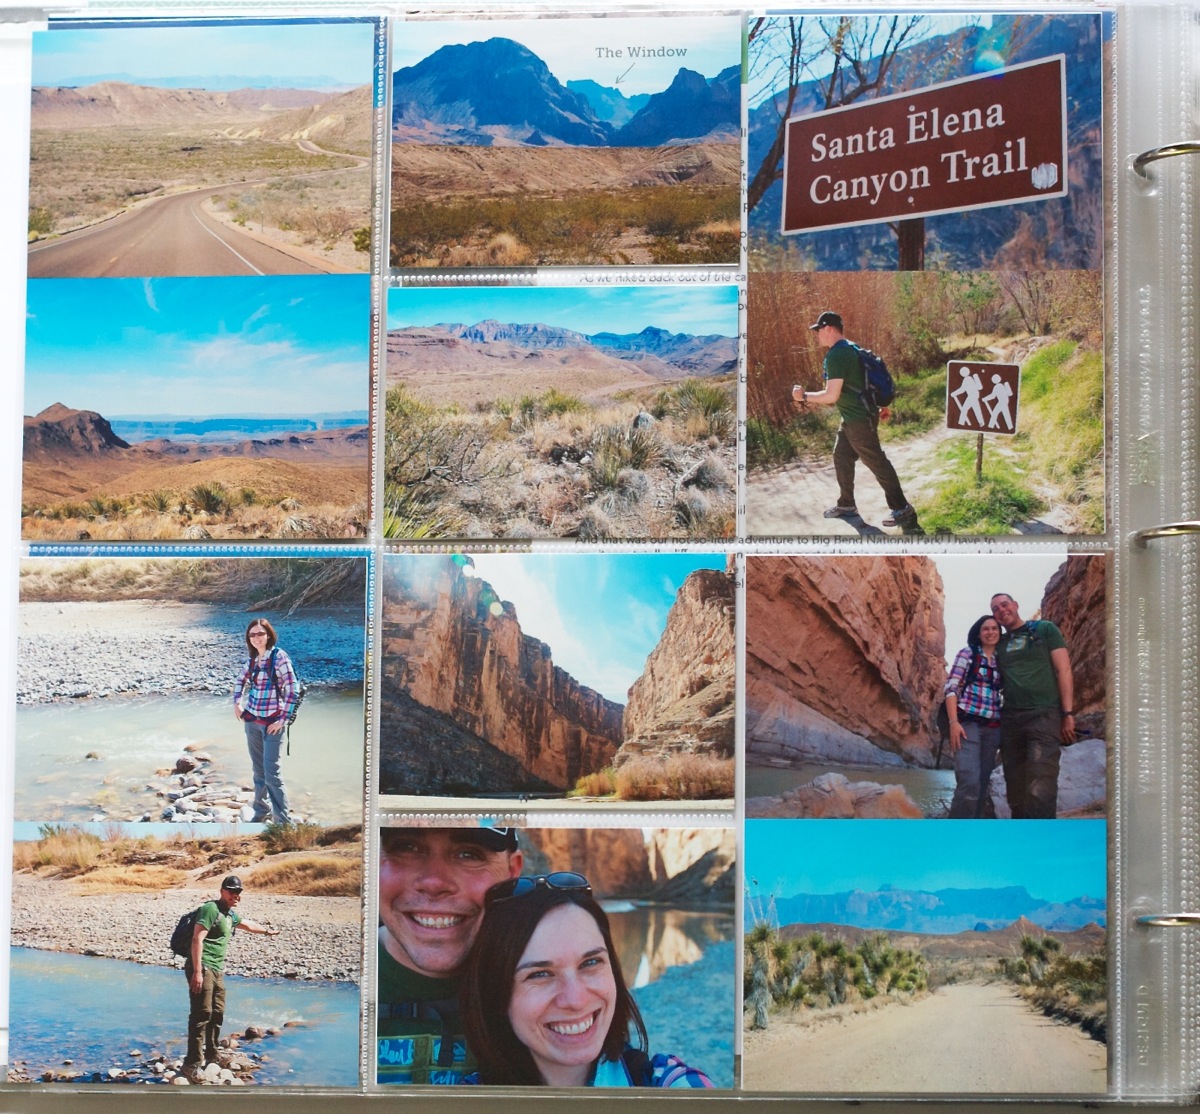
The right side of the Week 7 spread. I used two Project Life Design D page protectors for my trip photos since I loved the mix of vertical 4×6 and smaller horizontal pockets. They worked really well for my photos.
Nettio ProjectLife Wk7 8 12

A closer look at the photo page. Since I had more photos than I had pockets for, I ended up printing two 3×4 photos on a single 4×6. I love it plus it reduced the amount of trimming needed!
Nettio ProjectLife Wk7 8 13

Here’s the second half of my journaling and photos. I decided to space the journal pages out since the spacing worked out that the journaling on the first card fit with photos on the first two pages and the journaling on the second card fit with the second set of photo pages.

Nettio ProjectLife Wk7 8 14

Close up of the left side photo page. These pages are the first ones I’ve done where I’ve laid everything out in Photoshop first and then printed. It was definitely faster than my previous post-it note method!

Nettio ProjectLife Wk7 8 15

Back of the second journaling card and more photos:

Nettio ProjectLife Wk7 8 16

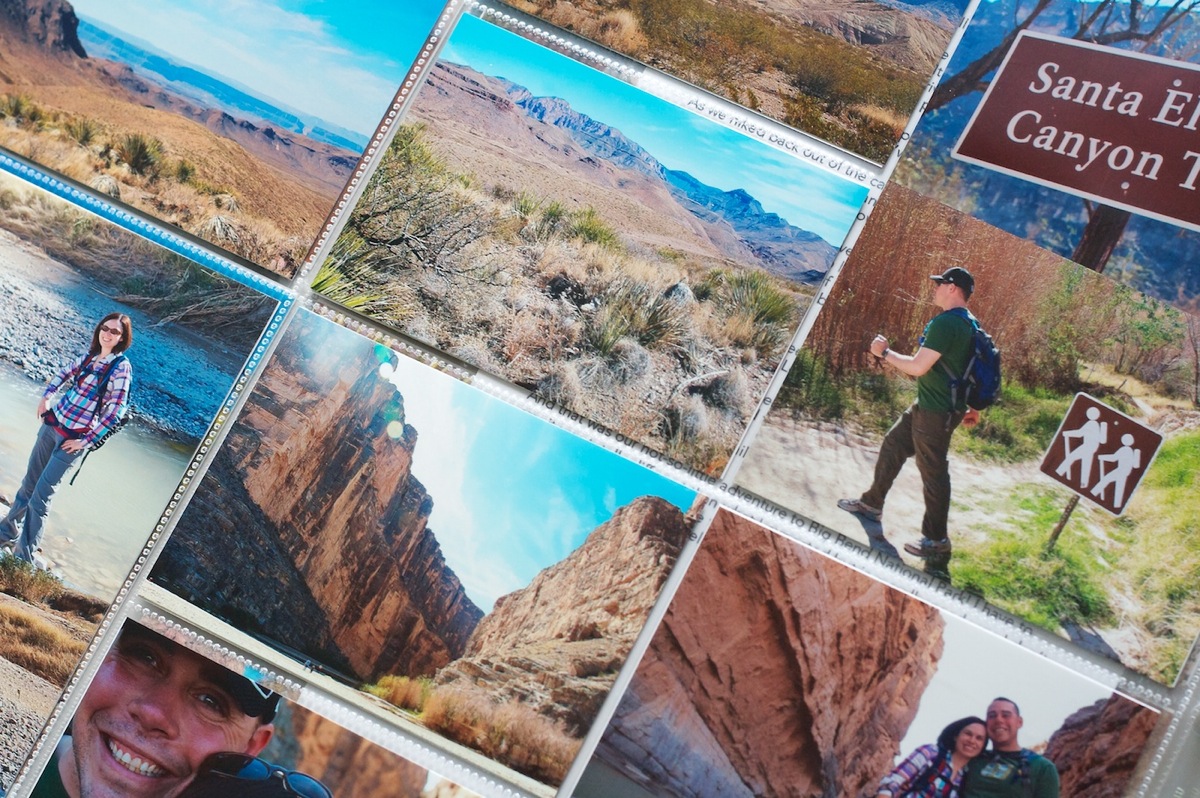
Close up of the photo spread. I tried to feature a good mix of photos in my larger vertical 4×6 pockets.

Nettio ProjectLife Wk7 8 17

Week 8: Feb 11-24

And here’s the Week 8 spread. On the left is the final set of photos from the trip and on the right is everyday stuff from Week 8. It was a little tricky narrowing down 6 days into one page but I’m happy with how it turned out.

Nettio ProjectLife Wk7 8 18

Close up of the final photo page from our trip. This page didn’t actually end up having any true 4×6 photos – they all were two 3×4 photos on a 4×6 sheet. I really wish there was a Project Life page protector design that had horizontal 3×4 photos like this!

Nettio ProjectLife Wk7 8 19

The trip photos are the first set of prints I’ve sent out for printing since starting Project Life and I have to say, as much as I like the flexibility of printing at home, I love the ease of uploading and slipping in printed photos even more. Sure beat babysitting my printer for 24 photos! I sent them to our local Target and while the blues came back a little too saturated overall I was happy with the quality of the photos.

Nettio ProjectLife Wk7 8 20

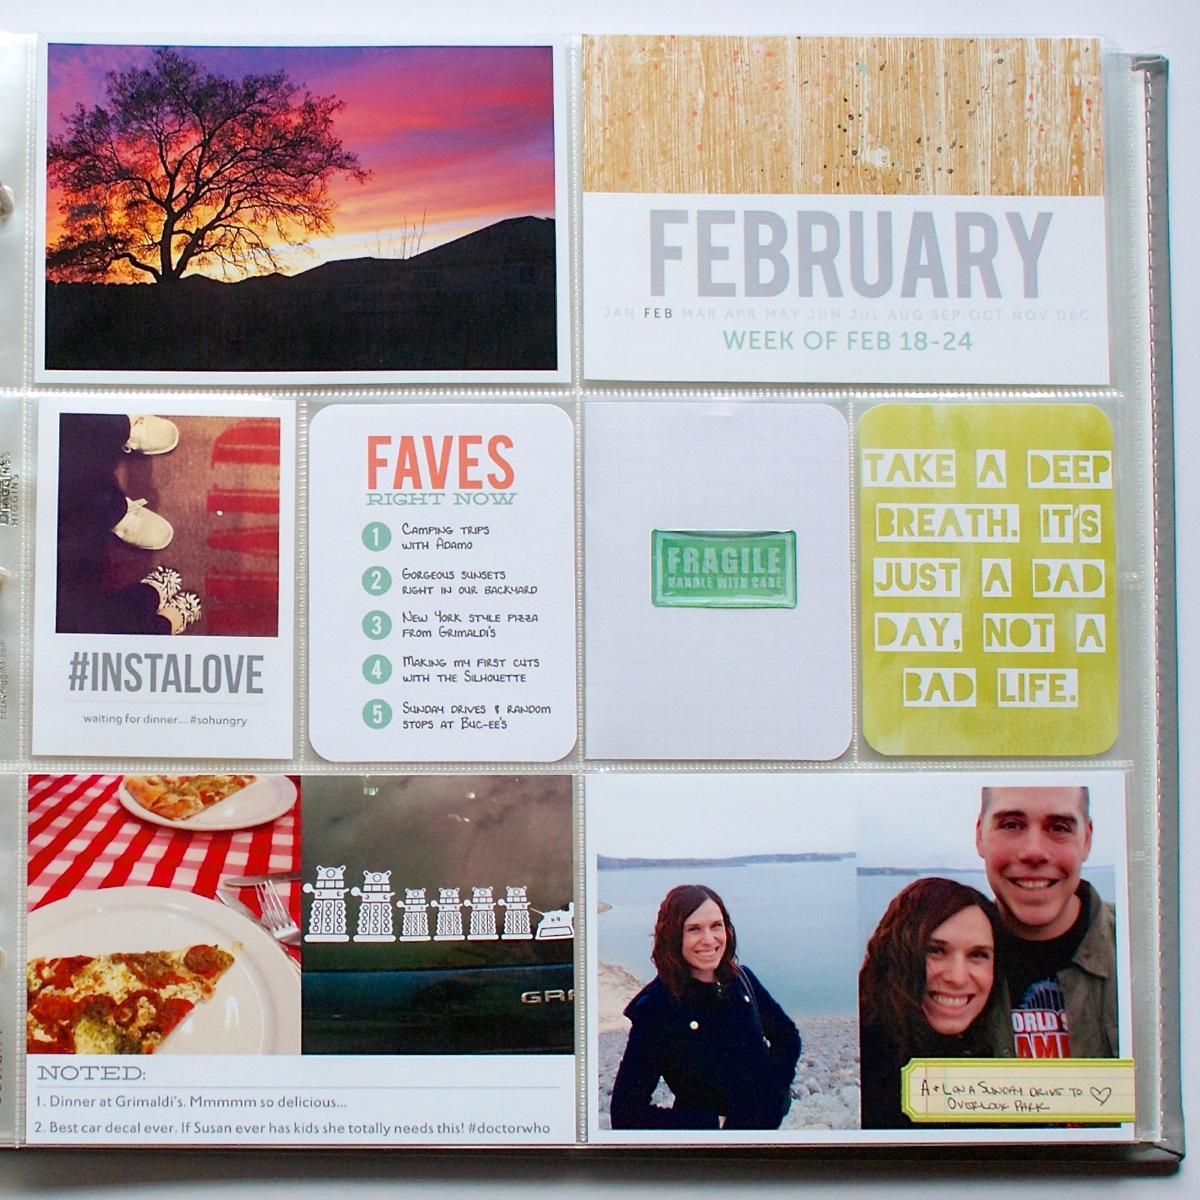
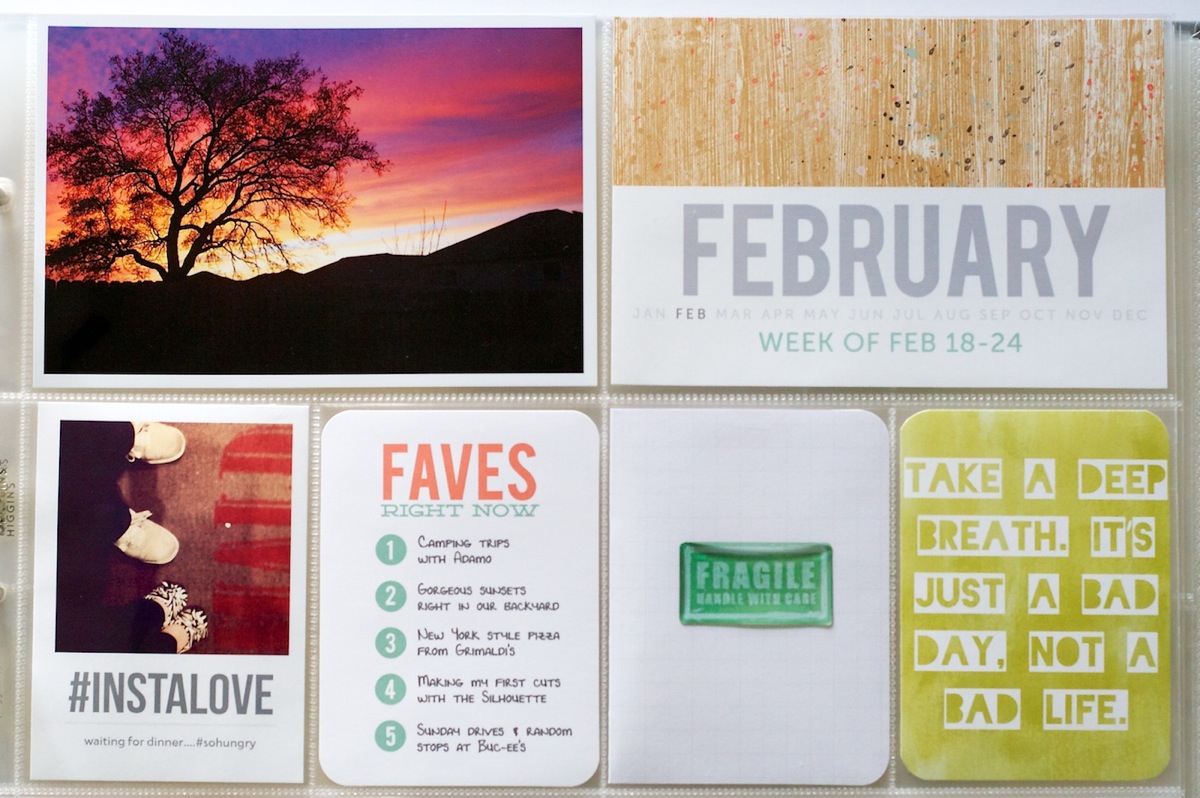
Here’s a closer look at the right side of the Week 8 spread. Everything this week was fairly normal: Monthly Title Card, Faves card (available for free here), another 4×6 graphic journaler and a couple of photos. The sunset photo was taken one night from our backyard – other than deepening the blacks a little, it’s pretty much straight out of the camera. The sky was really those colors!

Nettio ProjectLife Wk7 8 22

The Fragile Handle with Care card is actually a folded 4×6 journal card from the Project Life Seafoam core kit which includes some personal journaling I wanted to capture but didn’t want out for just anyone browsing my album to read. This seemed like a good compromise. That’s also the only card from the Seafoam kit I used this week. Everything else was either photos, my templates or printable accent cards. The take a deep breath card is from Jenn Barrette’s Resolutions: Patience, Relax, Breathe 3×4 cards set.

Nettio ProjectLife Wk7 8 23

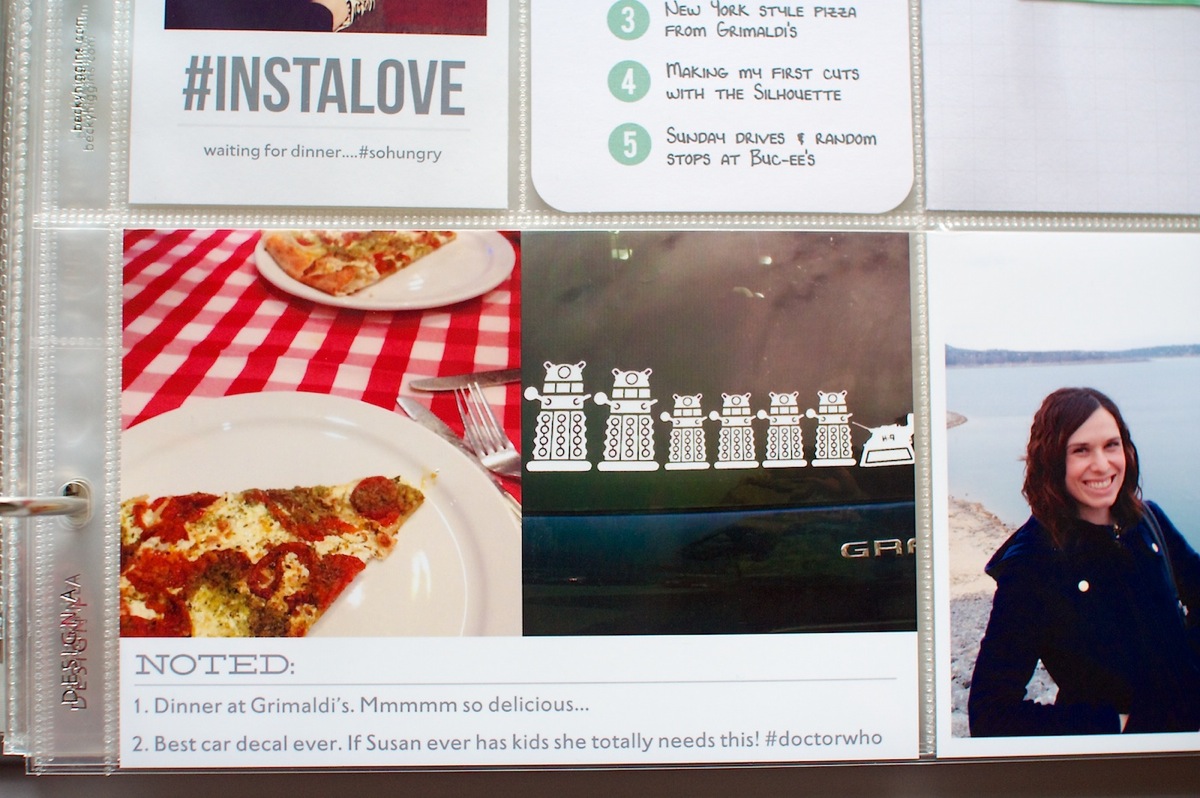
The InstaLove hashtag card is something I whipped up real quick (and am totally in love with) and the Noted photo card is from my 4×6 Journalers – Graphic Love templates. The Doctor Who themed car decal photo is actually a photo Adam sent me from the parking lot at his work. It was too awesome not to include!

Nettio ProjectLife Wk7 8 24

Random thoughts this week:

  • After 8 weeks of doing this (minus Week 1 which I still have to go back and add), I am starting to see the bigger picture of the album come together and I am so in LOVE with it. It’s a ton of work but so worth it when I watch Adam flip through the weeks and smile at all these small stories captured. I asked him if he thought this format was more approachable than my digital pages and he said he thought so. I think it’s because it’s more clean & streamlined and less product focused. I still love digital pages for more personal journal-type pages but I love this format for these types of stories even more.
  • This is by far the quickest I have ever scrapped travel photos from any of our trips. In fact, it may be the only complete trip I’ve ever scrapped. #craziness #thanksbeckyhiggins
  • Slipping printed Target photos into the pockets totally reminded me of the days when I’d drop my film off at Target and add my photos into regular photo albums. #goodtimes
  • I’m definitely considering sending all my regular sized photos out for printing moving forward. While it’s not quite as immediate, it’s pretty inexpensive and a lot less hassle for me than printing at home.

Supplies used this week: Project Life Design A & Design D page protectors,  American Crafts 6×12 page protectors, We R Memory Keepers 8.5×11 page protector, Seafoam core kit, Nettio Designs Bits & Bytes 2013 4×6 Weekly Title Cards, 4×6 Journalers – Paper Love, 4×6 Journalers – Graphic Love, Nettio Designs free Top Five Faves 3×4 card, Studio Calico February Project Life kit, Resolutions: Patience, Relax, Breathe 3×4 Cards by Jenn Barrette, You Hold the Key to My Heart digital scrapbooking kit by Zoe Pearn & Jenn Barrette. Photos/elements printed at home are printed on a mix of Epson 4×6 Premium Photo Paper Glossy & Epson 8.5×11 Premium Presentation Paper Matte and the Project Life 3×4 White Cards.

And that’s it for this Project Life 2013, Weeks 7 & 8 update! How are you doing with your Project Life album? Have you learned anything new after 8 weeks? Are you starting to see the big picture come together?

Project Life is a memory-keeping system created by Becky Higgins. New to Project Life? Learn more here & find all my Project Life  posts here.

How Can Customers Lower Their Remedy Costs

POSTED IN Project Life

Project Life 2013 | Weeks 5 & 6

POSTED ON February 14, 2013 IN Memory Keeping, Project Life

Welcome to Project Life, Weeks 5 & 6.

I’m quickly realizing I need to get a better system in place or I’m going to make it through the year, haha. These weeks were both fairly simple and it’s still taking me forever to print everything and complete the pages. But I’m loving the finished pages and having these stories documented so I’m hoping I get more comfortable with this project, I’ll get into a better flow. It’s all still pretty new right now, especially having never been a paper scrapbooker.

Week 5: Jan 28-Feb 5

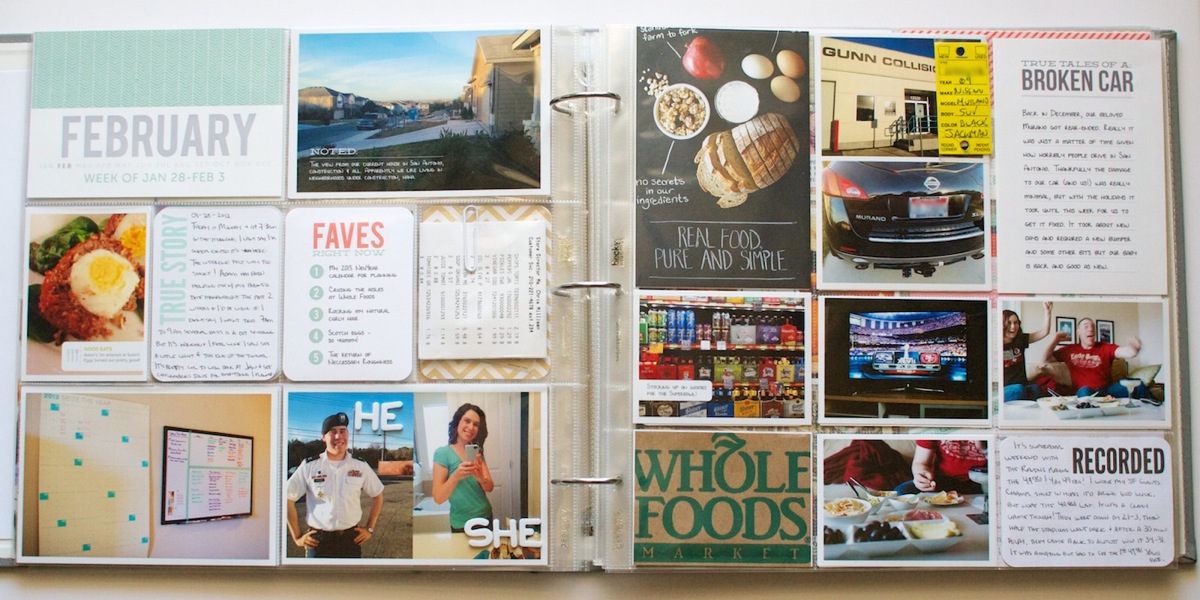
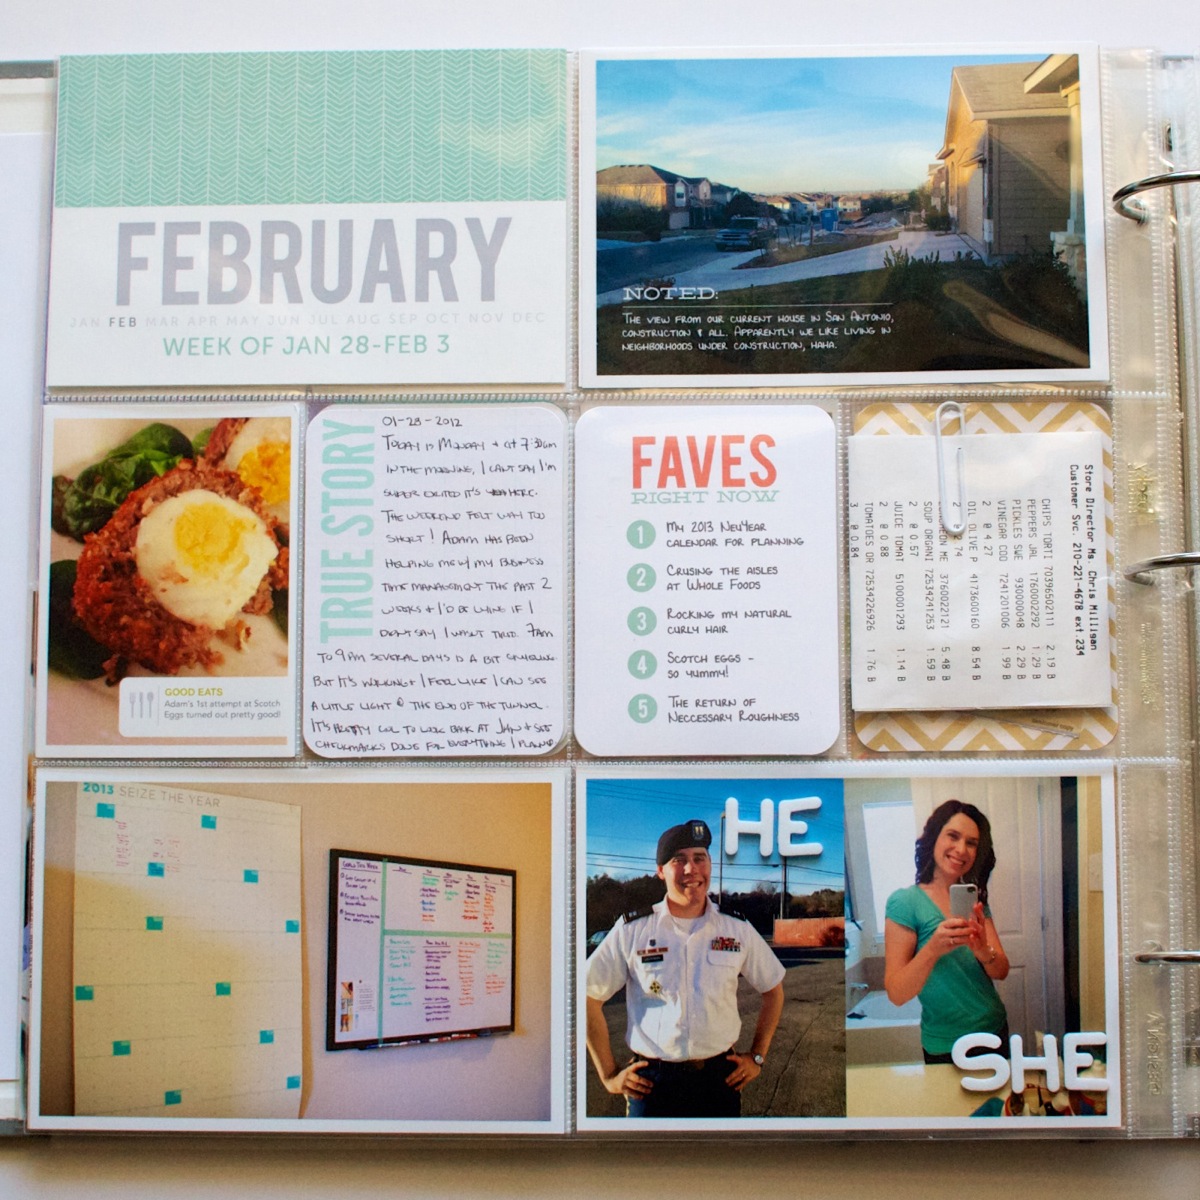
Here’s a look at my Week 5 spread. Since some weeks span across two months, I’m just counting those weeks in the next month. So even though this is Jan 28-Feb 5, I’m counting it as February. I figure as long as I’m consistent, it won’t matter.

Nettiodesigns Project Life Wk5 6 11

Other than the Superbowl, this was a pretty low-key week. One good thing: I finding that even the weeks where I think I’m not taking enough photos in the moment, I still end up with plenty to choose from when I’m putting my pages together at the end of the week. The ratio of iPhone to DSLR photos is definitely skewed toward iPhone though – it’s just so handy! All but the bottom left photo on this page were taking with my iPhone.

Nettiodesigns Project Life Wk5 6 9

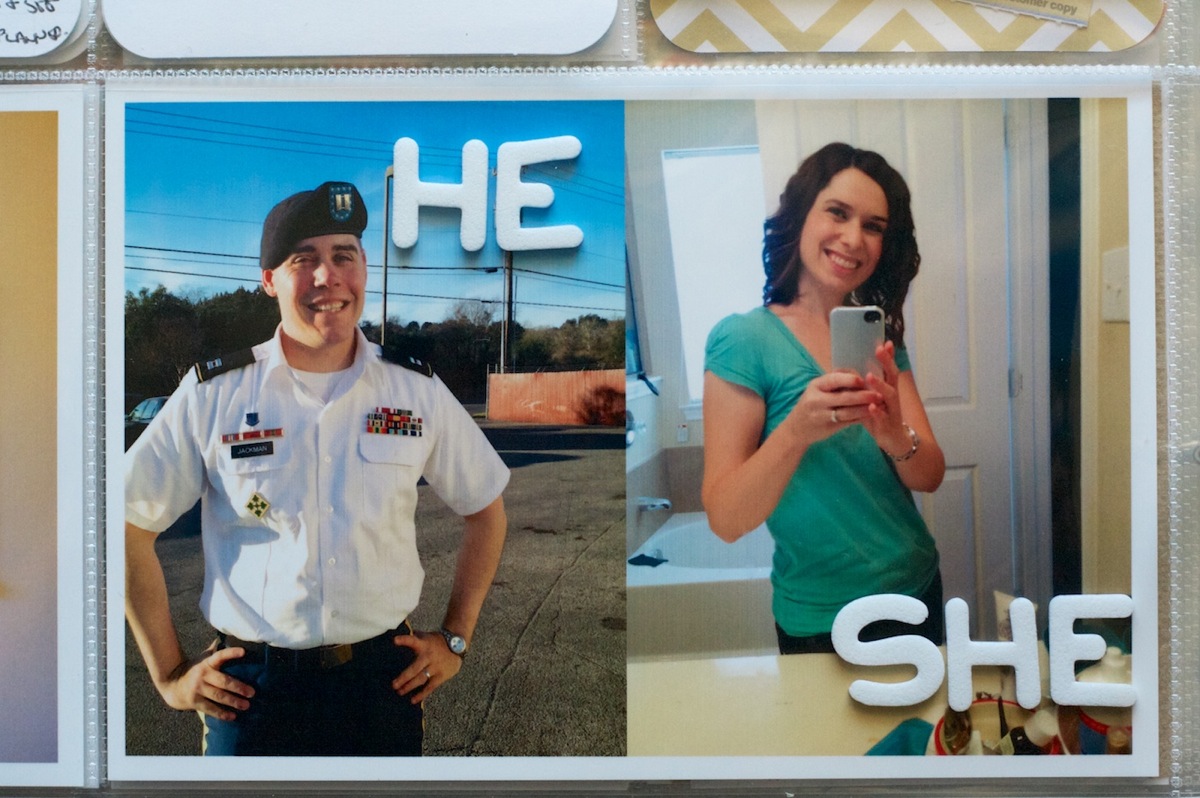
This he/she card was a total happy accident. I didn’t even realize I’d taken portraits of both us of until later but this seemed like a fun way to include them. If you’re wondering why Adam’s all dressed up, it’s because his unit here has what I call “non-casual Fridays” where they have to where their dress uniform on Fridays. In 7 years in the military, this is the most action any of his dress uniforms have gotten, haha.

Nettiodesigns Project Life Wk5 6 12

The only thing I’m not totally loving about this card is the wonky foam Thickers. Anyone have any tricks for getting these to stick nicely? I always have this problem with the foam ones – they go all crazy and skewed on me as I’m sticking them down.

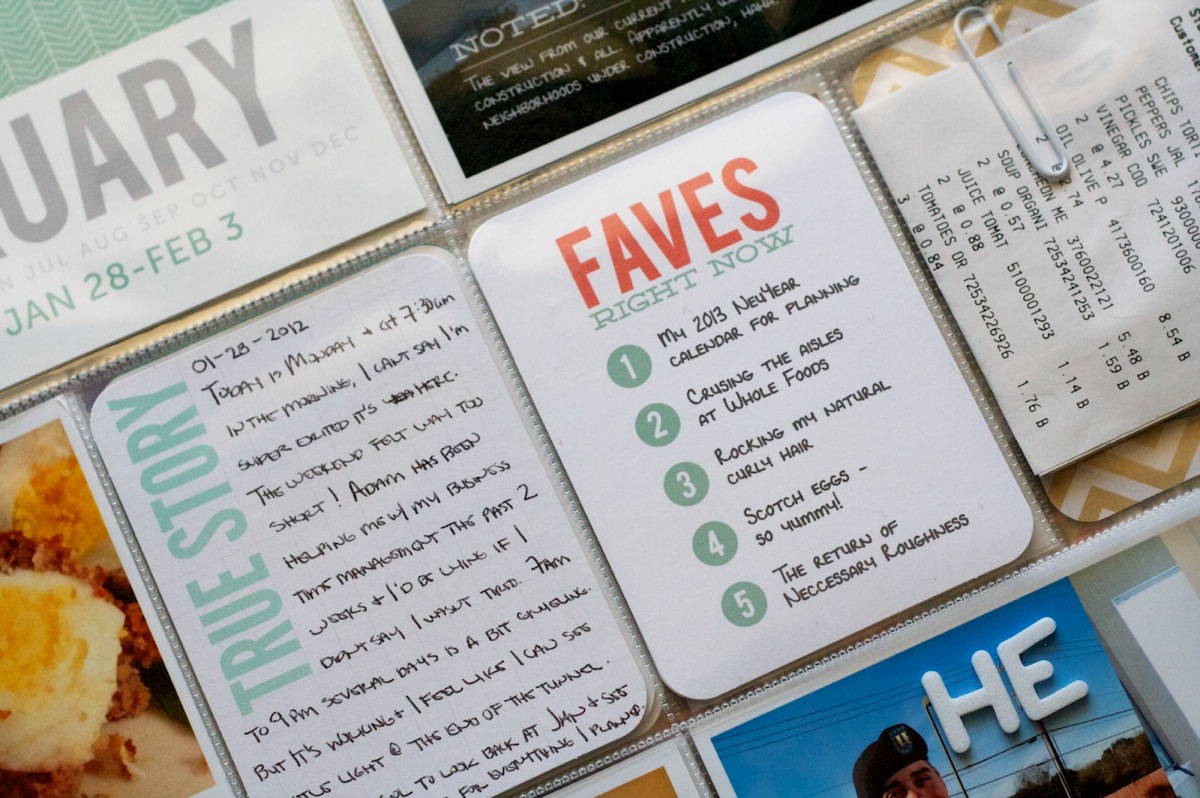
Faves card of course. If you missed it in my last update, you can download a free template to make your own Faves card here. I print mine directly on the Project Life blank 3×4 cards.

Nettiodesigns Project Life Wk5 6 13

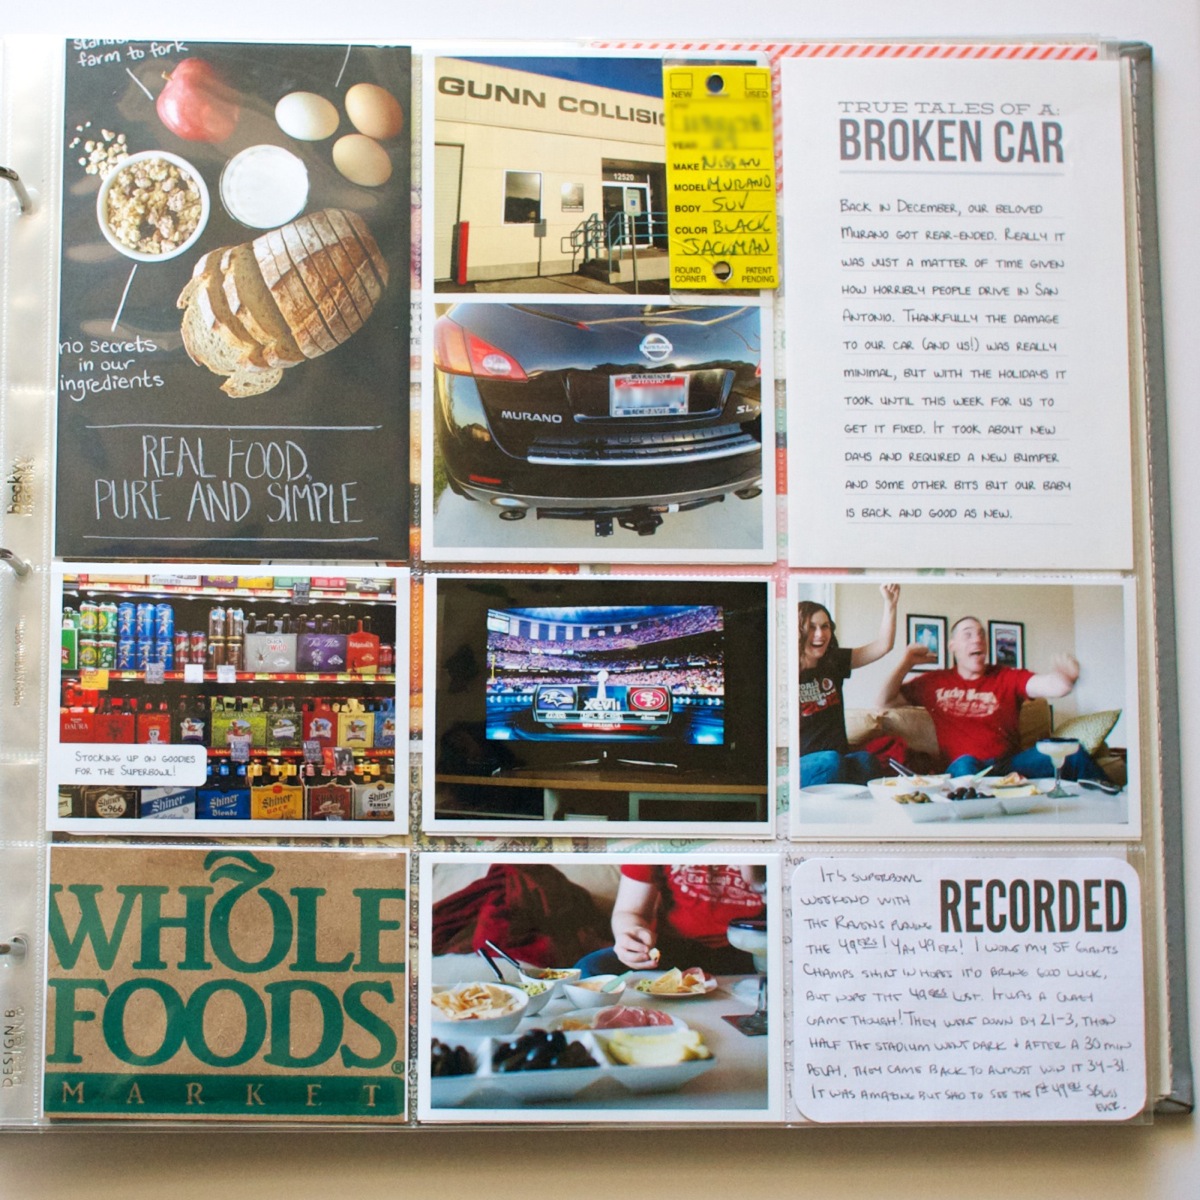
Right side of the Week 5 spread. Most of this page is Superbowl-related which probably would have been WAY more exciting to design if our beloved 49ers hadn’t lost the game, haha. Almost all of my photos were taken at the beginning of the game. Probably because I spent the entire 2nd half covering my eyes – it was SO stressful to watch!

If you’re wondering about the action shot, no I’m not that awesome of a photographer or game-time mind reader.  We totally staged it before the game – but I’d say it’s pretty accurate to reality. There may have been a bit more dorky high-fiving though.

Nettiodesigns Project Life Wk5 6 10

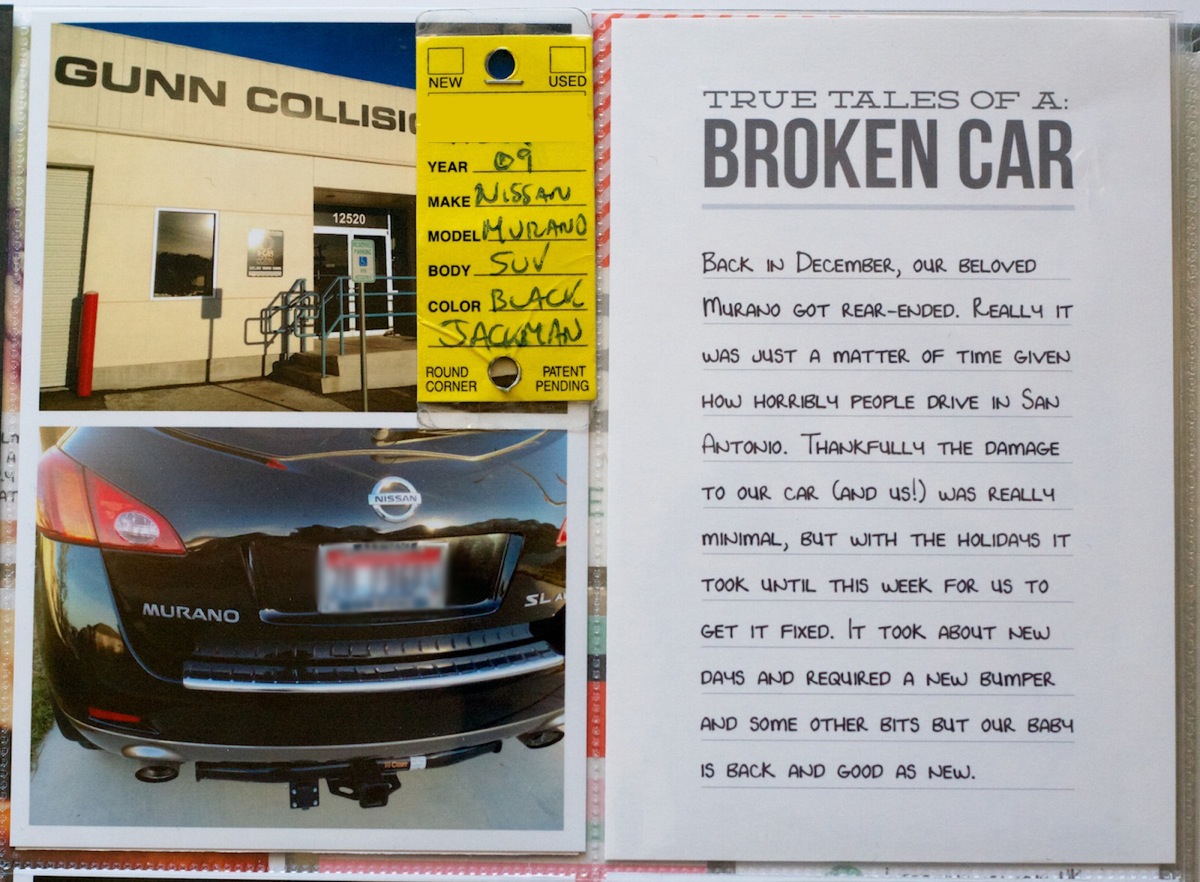
The top two blocks of this page is the story of our car being repaired. We got rear-ended back in December and thankfully the damage was minor – you wouldn’t have noticed it really if you didn’t know it was there. But since the person who hit us admitted fault right away and agreed to pay to have it all fixed, we went ahead and fixed it up this week. Really I’m just surprised it hadn’t happened sooner given how ridiculously terrible drivers Texans are, haha.

One thing I’m realizing I don’t like is how few 4×6 vertical and 3×4 horizontal journaling card options there are in the Project Life Seafoam kit. I’m guessing this is probably true for all the kits? I’m having to make my own a lot and I know that’s partly why it’s taking me so long to put things together.

Nettiodesigns Project Life Wk5 6 14

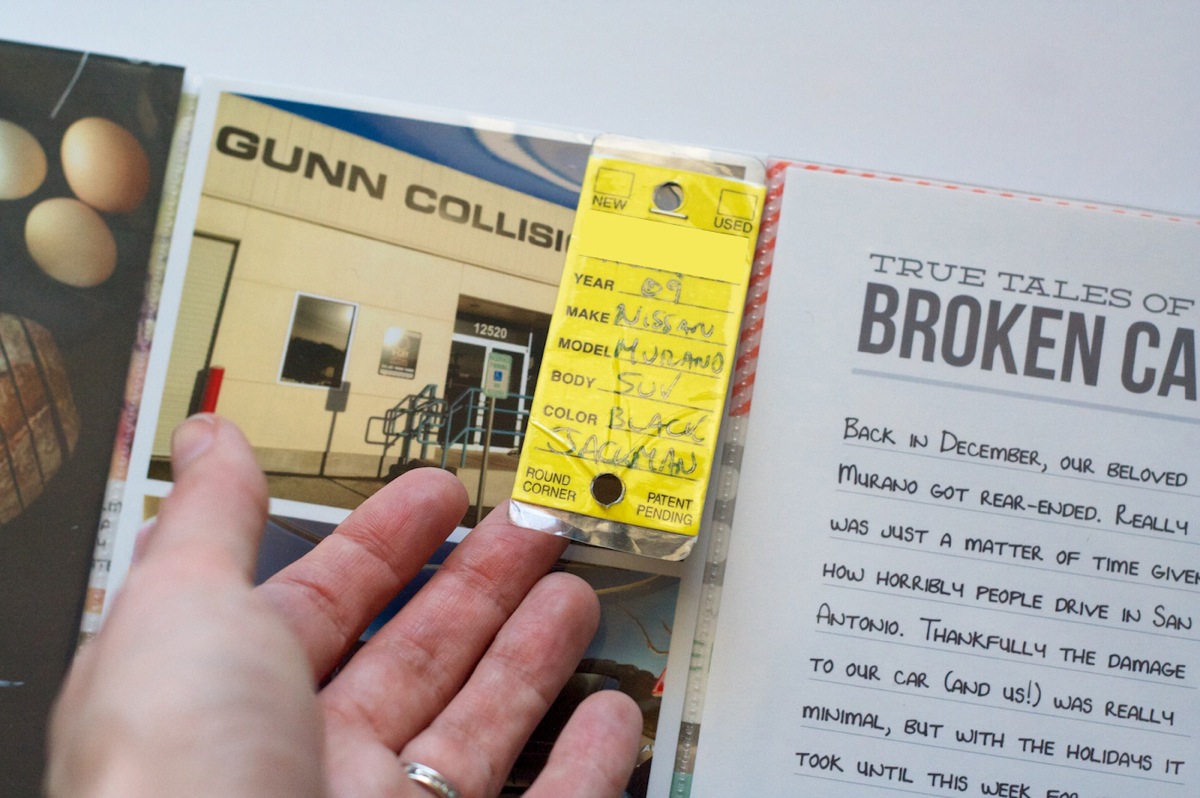
I used my Tim Holtz Tiny Attacher to attach the tag that was attached to our key:

Nettiodesigns Project Life Wk5 6 15

Week 6: Feb 4-10

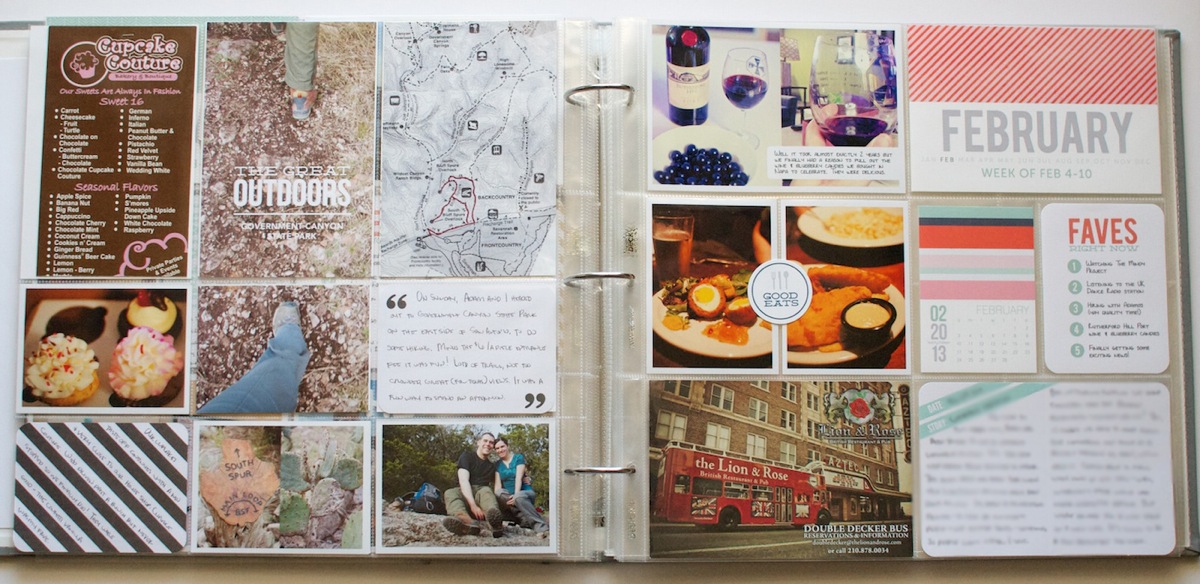
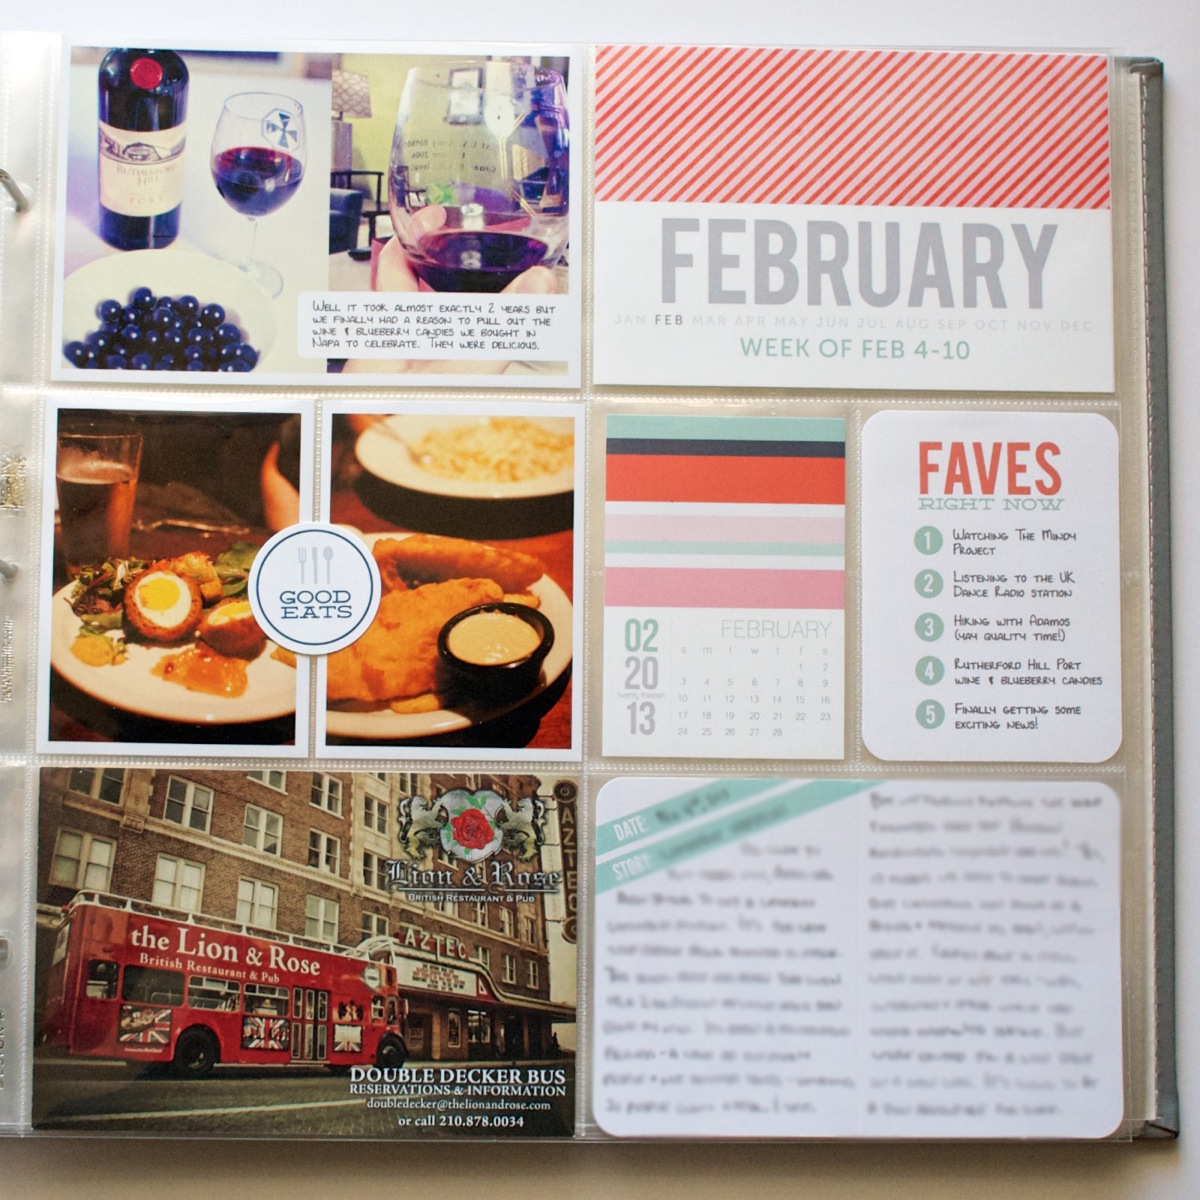
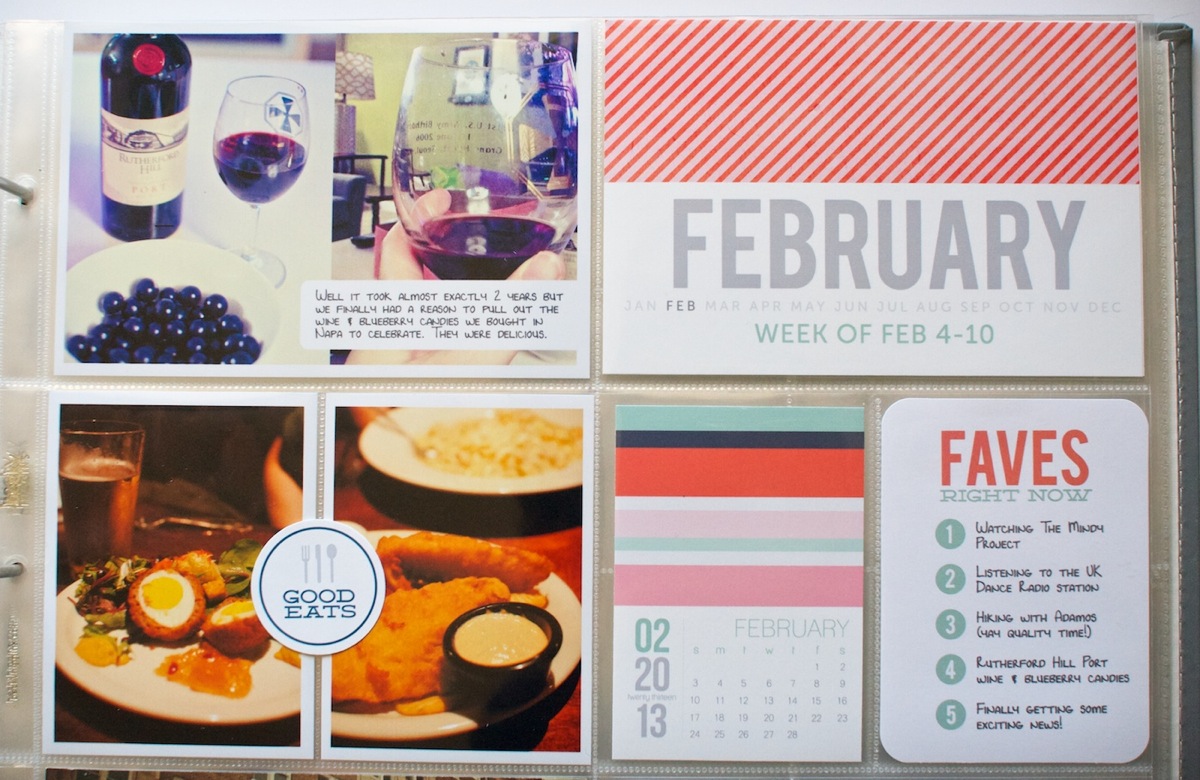
Here’s my Week 6 spread. Another pretty low-key week around here. The blurred journaling card in the right hand corner was some good news received but aren’t ready to share with the entire internet quite yet. And no, I’m not pregnant nor is it in any way related to that, haha.

Nettiodesigns Project Life Wk5 6 7

I did decide to try my hand this week at a photo spanning across multiple pockets. I wasn’t sure about it at first but it’s growing on me. Definitely something I’d like to try again on a grander scale.

Nettiodesigns Project Life Wk5 6 5

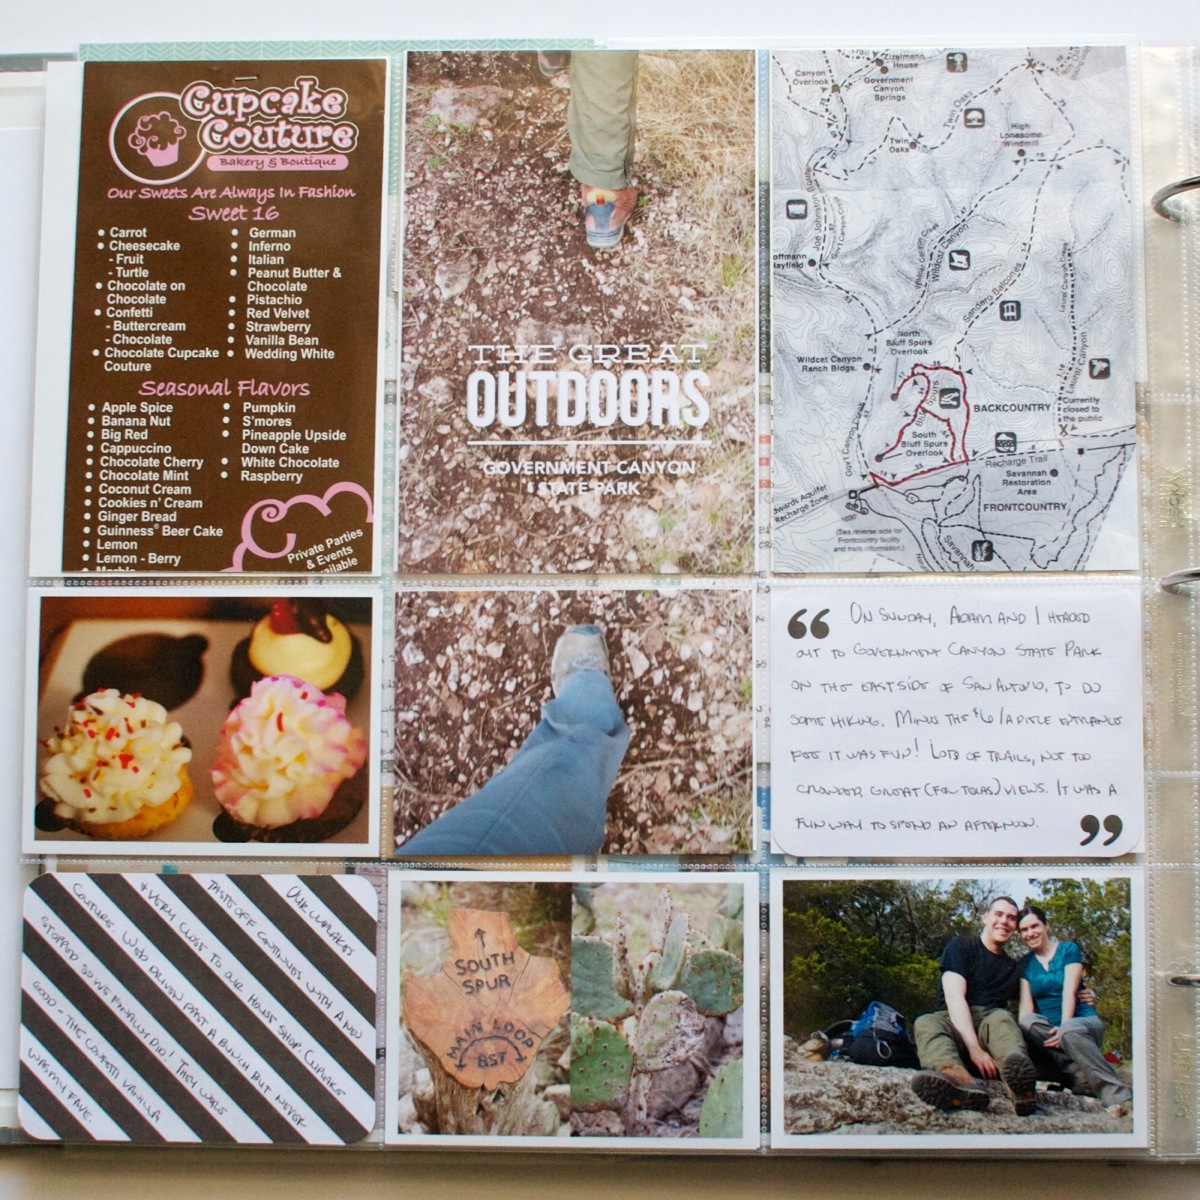
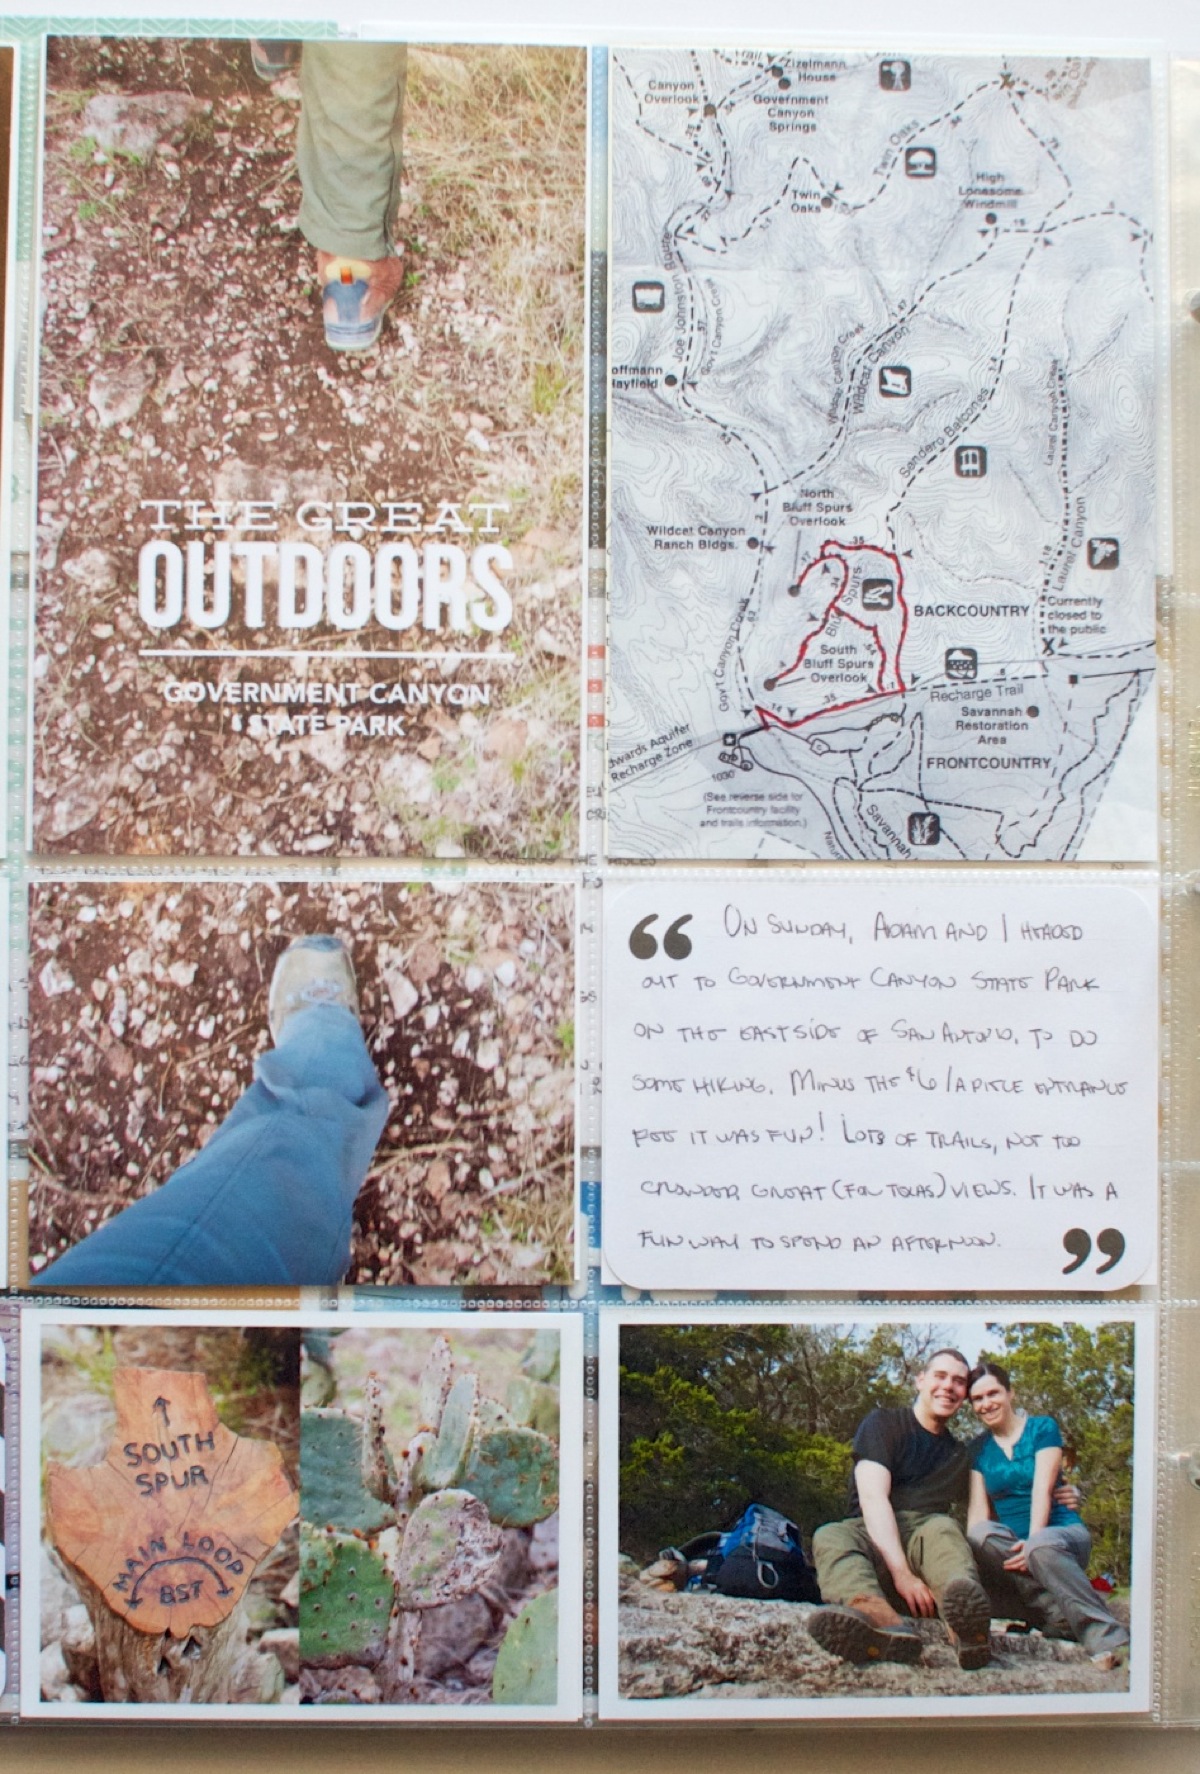
Here’s a closer shot of the hiking section of the page. I used a Sharpie to draw the hike we went on – the park is huge! Even that little part we did was like 4 miles.

Nettiodesigns Project Life Wk5 6 2

Best thing that happened this week is I figured out how to print multiple photos on a single sheet from within Aperture – no exporting and messing with Photoshop. I’m thinking it’s tricks like these that are going to make this project doable in the long run.

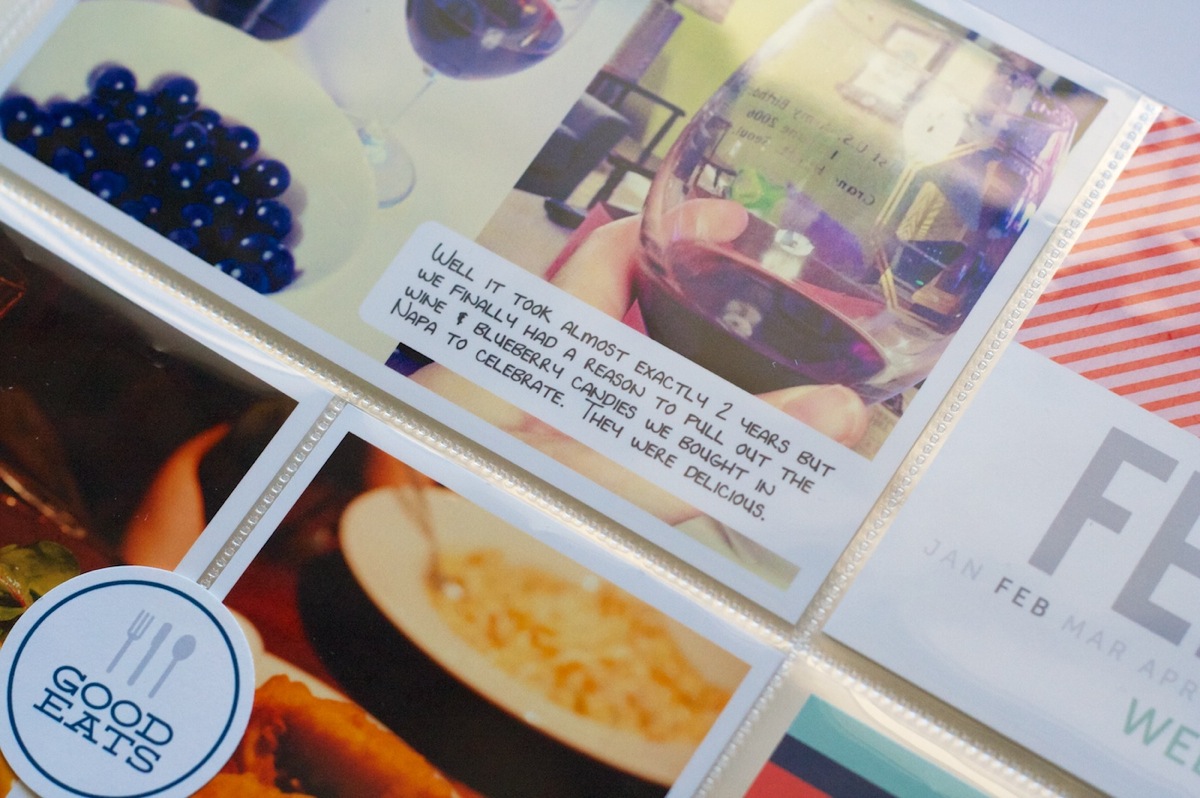
Here’s the right side of the spread. See that glass of wine in my hand? Totally not pregnant, people, haha. But we did break out the wine as part of our celebration…

Nettiodesigns Project Life Wk5 6 1

Here’s a look at my February color scheme – I’m using papers from Zoe & Jenn’s You Hold The Key To My Heart kit. For those of you who asked me about getting title card templates, those will be coming to the Sweet Shoppe next week.

Nettiodesigns Project Life Wk5 6 3

A common thread this week: text printed directly on photos. It’s a little extra work to open everything in Photoshop but I’m loving the clean look.

Nettiodesigns Project Life Wk5 6 16

I’ve also been playing around with adding elements outside the page protects like with these photos:

Nettiodesigns Project Life Wk5 6 8

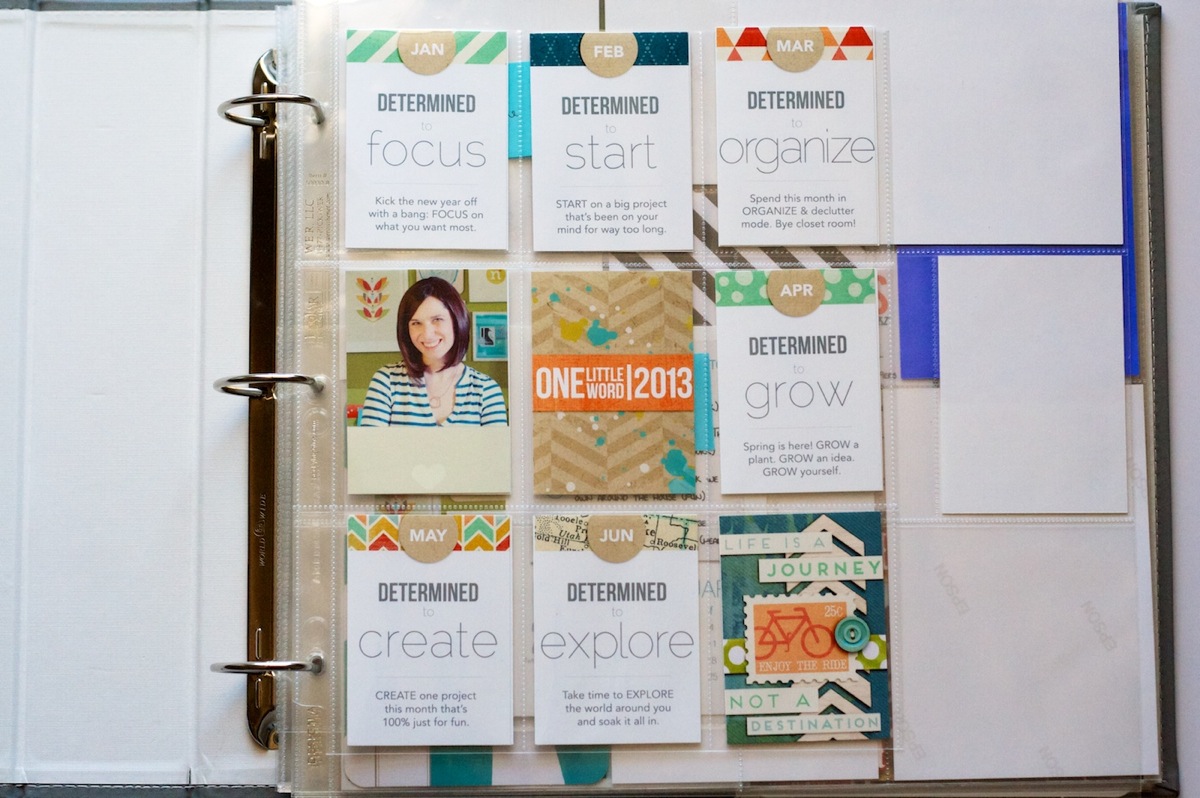
I mentioned in my One Little Word February Goal-Setting post that I was planning to include some of my OLW class stuff in my Project Life album. Well here’s a peek at what that looks like. I haven’t decided if I’m going to keep it here long term since I haven’t done my title page yet but I like that every time I open the album I see these little reminders.

Nettiodesigns Project Life Wk5 6 4

Random thoughts this week:

  • Definitely need to streamline my system a bit more. I’m currently trying to do two-weeks in one sitting and it’s just taking too long to do it that way.
  • Am still loving my mix up page protectors plan – I love seeing what styles are coming up next in the rotation
  • Still need to pull my Silhouette out of it’s box – I think I’m a little scared of it!
  • I’m probably one of the few scrapbookers to ever need to admit this, haha, but I could actually using some more supplies. Having never been a paper scrapper my options are pretty limited and I’m thinking if I had more on hand, it’d go a bit quicker. Hoping my Studio Calico Project Life kit in March will help some with that…or maybe I just need to take a trip to Archivers, hehe.
  • Really annoyed that my printer is printing my photos with subtle streaks on them. I’ve already cleaned the print heads a couple of times – anyone have any other suggestions? It’s an Epson.

Ok all you fellow Project Lifers, we’re 6 weeks in – how are you doing? Any veterans have tips for streamlining the process? I can use all the help I can get I think, haha.

Project Life is a memory-keeping system created by Becky Higgins. New to Project Life? Learn more here & find all my Project Life posts here.

Can diabetes cause erectile dysfunction

POSTED IN Memory Keeping, Project Life

Project Life 2013 | Weeks 2-4 & A Faves Freebie For You

POSTED ON January 29, 2013 IN Free Stuff, Project Life

Welcome to Project Life 2013, Weeks 2-4.

If you’re thinking you somehow missed Week 1, well you haven’t. Ha! The week of Dec 31st to Jan 7th, we were still out in California (we flew home on the 4th) so we did a TON of stuff in those days. And since I chose to wait to start my album until my Seafoam kit arrived mid-month, I decided to start with the most recent week and work my way back. So I will share Week 1 once it’s finished, hopefully by my next update.

But I wanted to share what I have finished today.

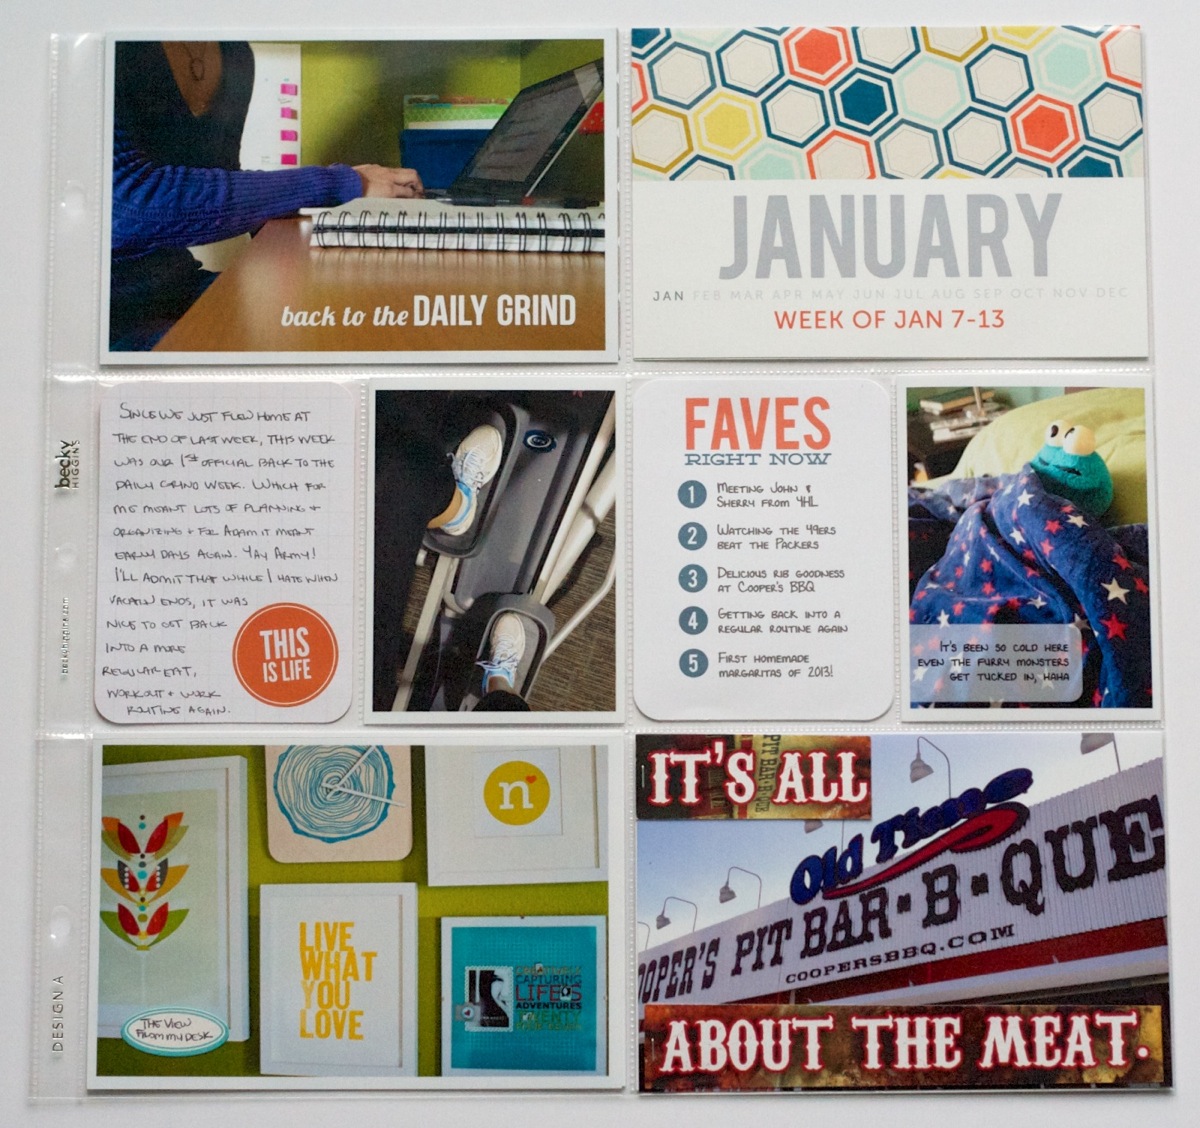
Project Life 2013 Week 2: Jan 7-13

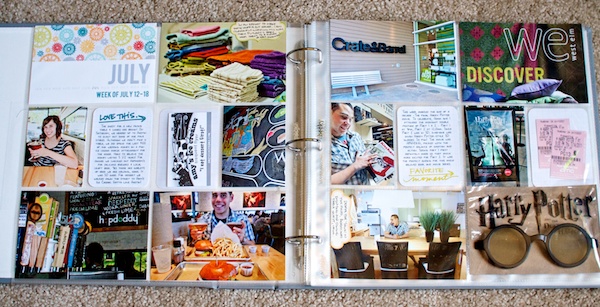
Here’s a look at Week 2 spread. I mentioned in my Creative Adventure: Project Life post that I’m mixing Design A page protectors with a variety of other designs. You can see that in action here – the left page is Design D, right page is Design A.

Nettio Project Life Wk2 4 1

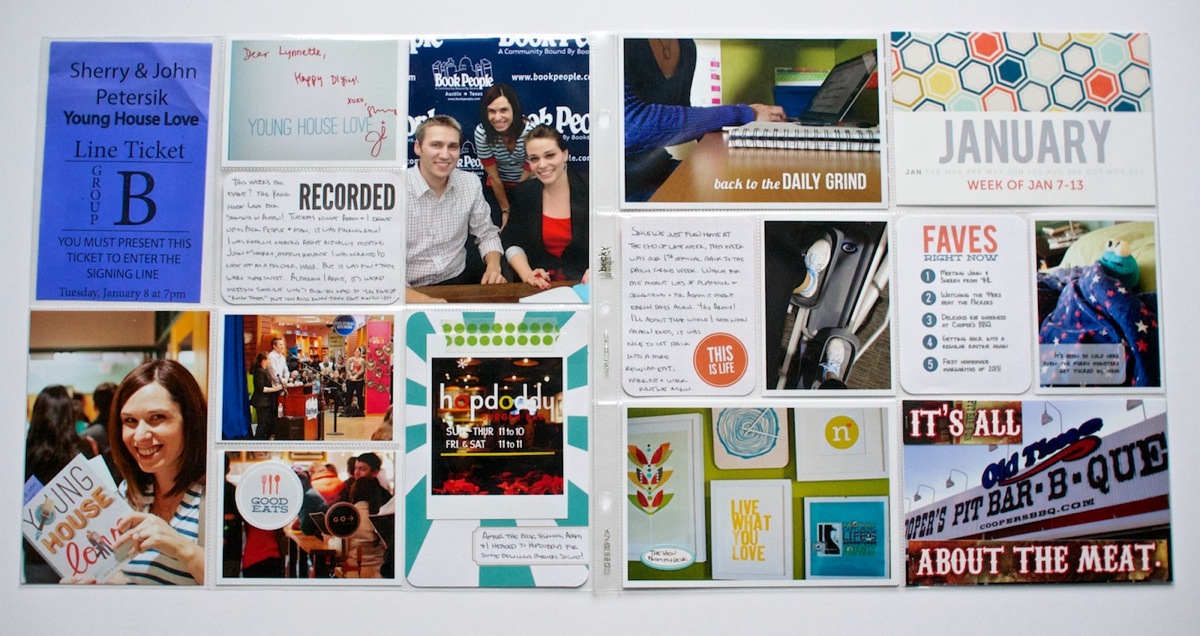
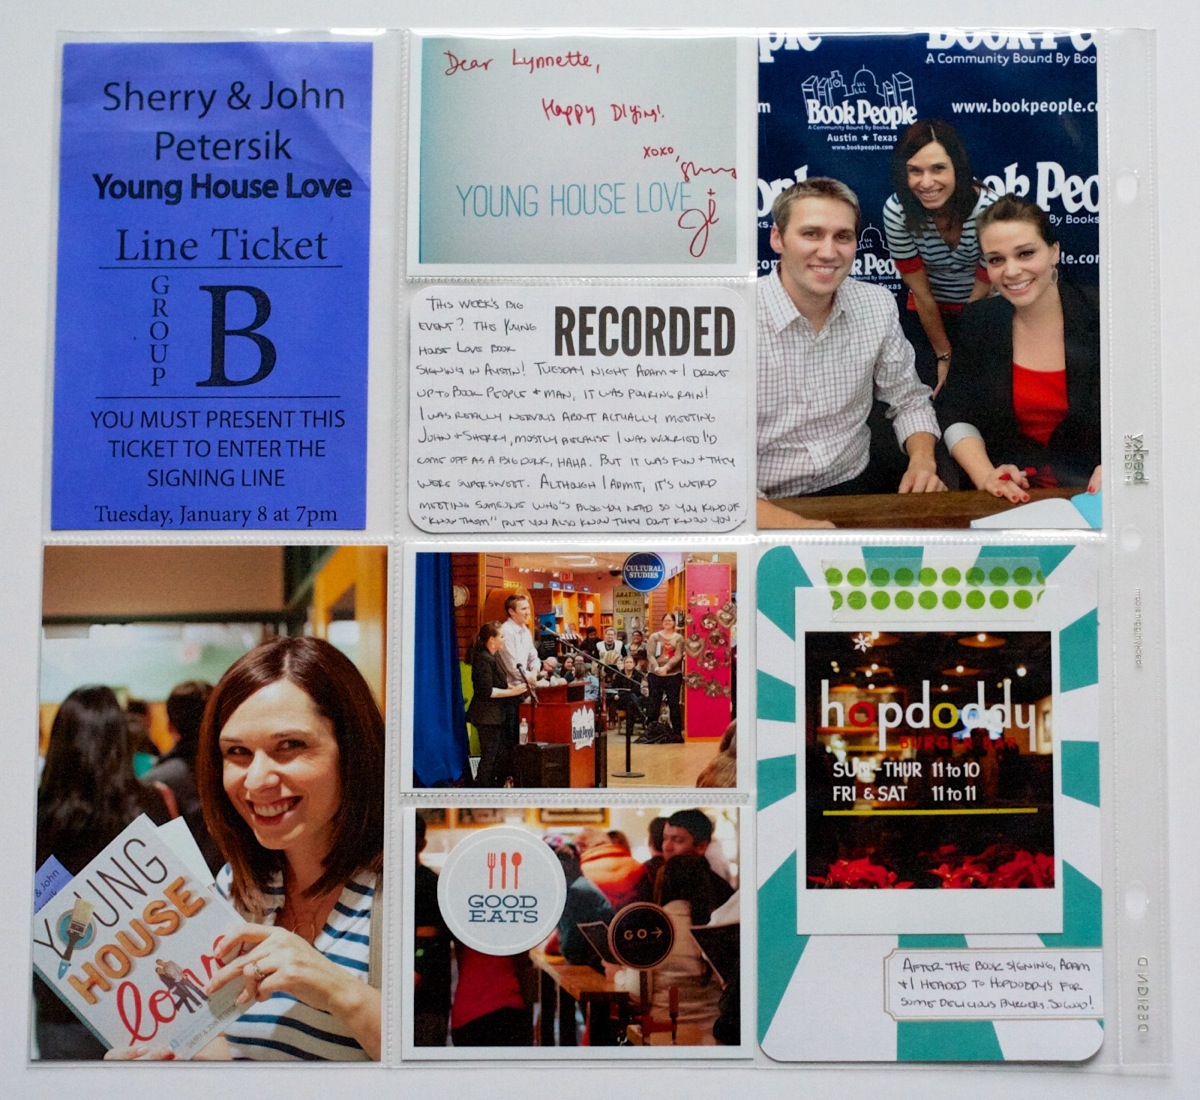
Closer view of the left side of Week 2:

Nettio Project Life Wk2 4 2

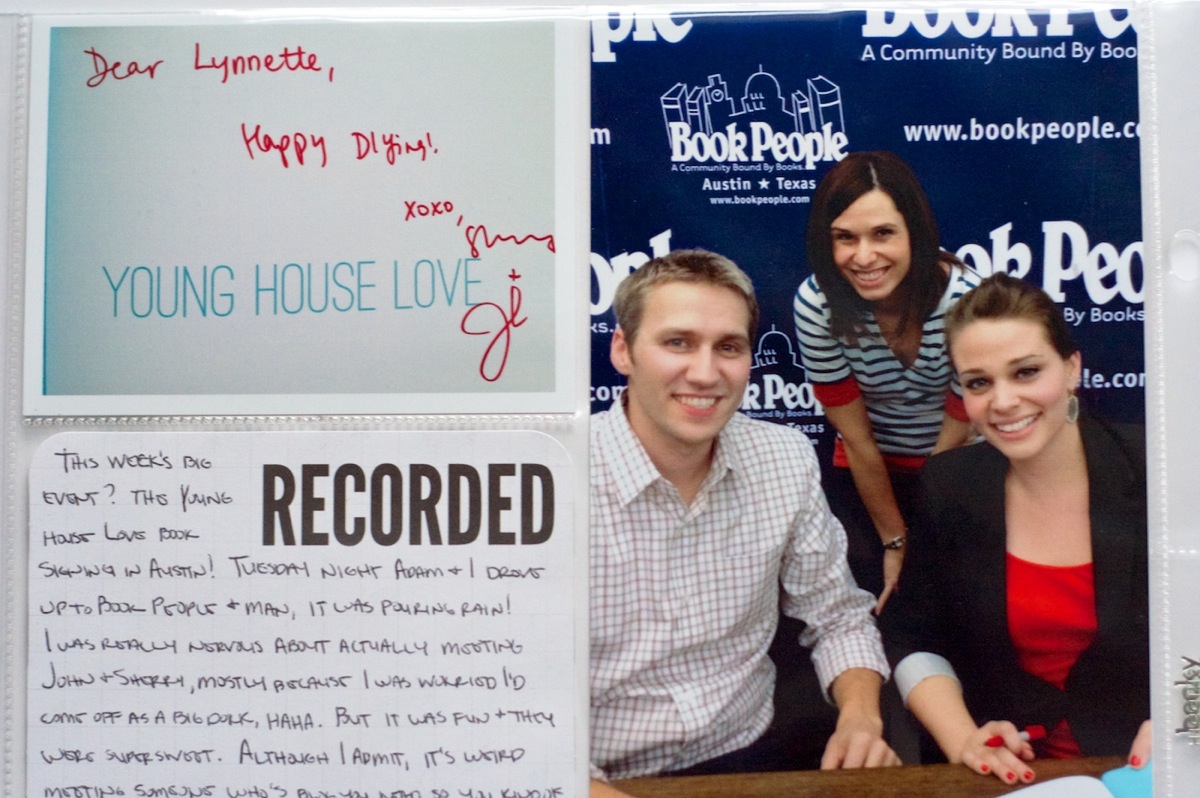
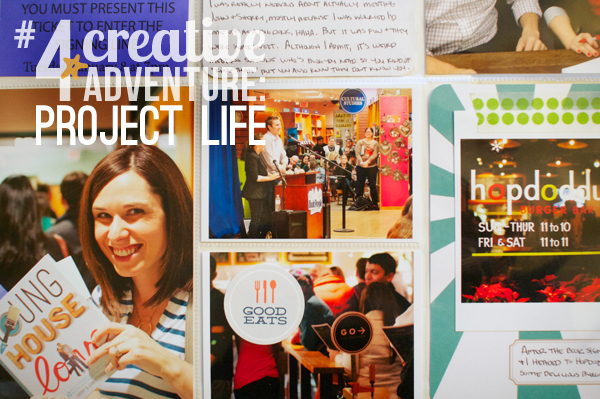
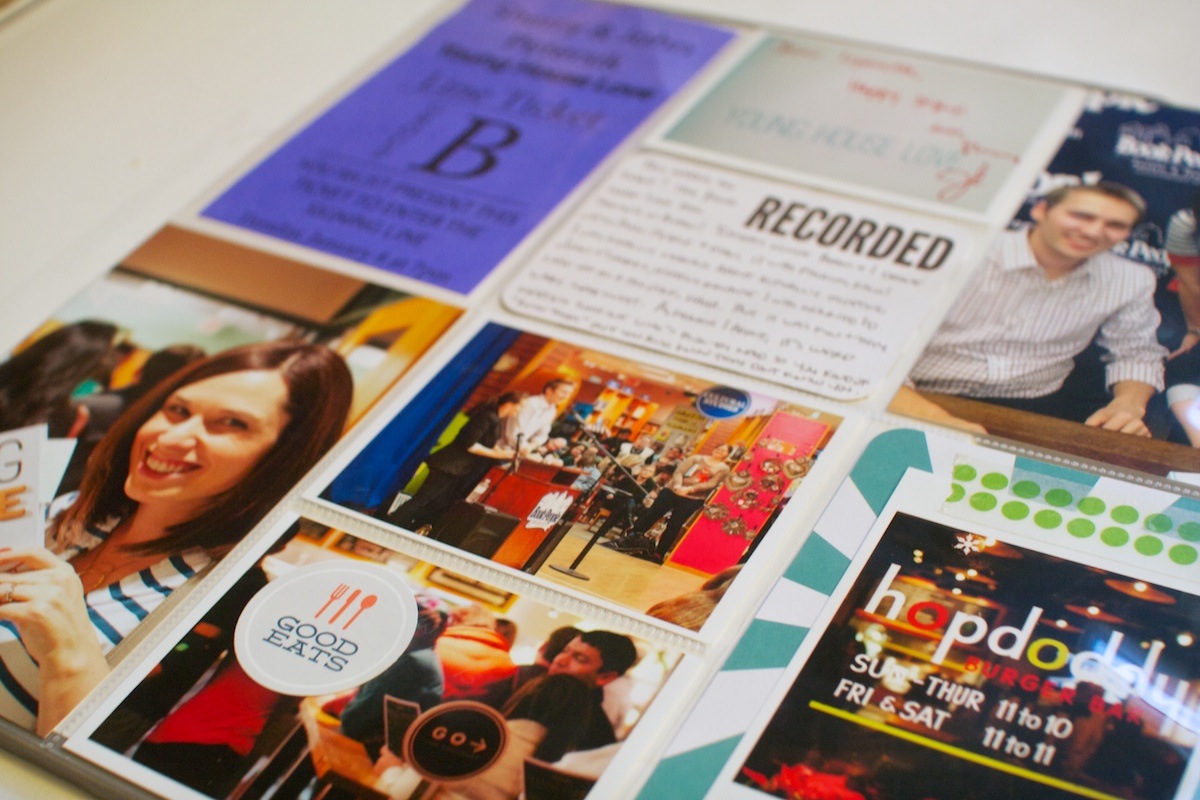
Why yes, that is me meeting John & Sherry from Young House Love (points to Jen for catching this in my peek last week!). They came to Book People in Austin for a signing so Adam and I went (even though he had no idea who they were, haha).

I admit I was really nervous – what exactly do you say to someone when you”know” all about them from their blog but they have no idea who you are? LOL! But they were super sweet though and just as fun in person as in their blog. And I have to say major points to Book People because they ran that signing like a well-oiled machine.

The photo on the left is of my signed copy of their book:

Nettio Project Life Wk2 4 2Detail 1

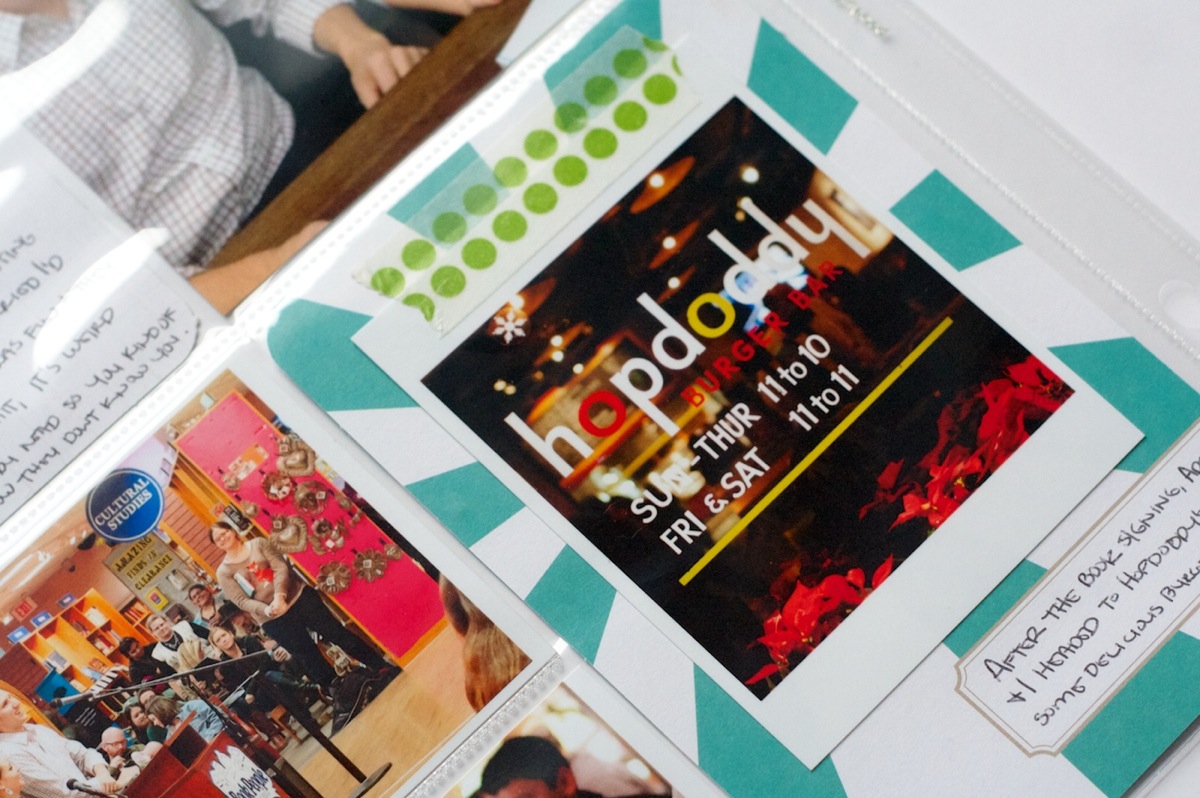
After the signing Adam and I headed to one of our fave Austin eateries Hopdoddy Burger Bar. Even though it was almost 9 on a weekday when we got there, there was still a line!

I made a little accent card using one of the 4×6 cards from the Seafoam core kit and some washi-type tape from Target:

Nettio Project Life Wk2 4 2Detail 2

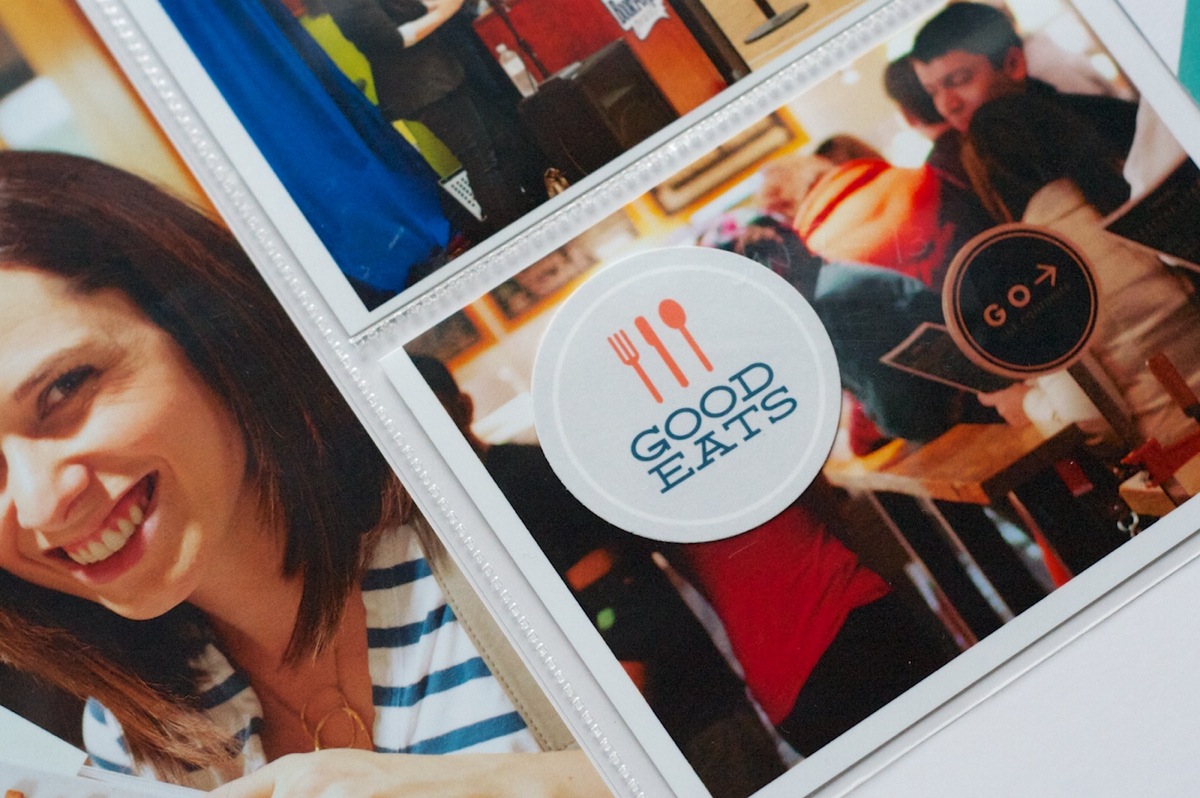
And I also made a little foodie accent as well:

Nettio Project Life Wk2 4 2Detail 3

Here’s a closer look at the right side of Week 2:

Nettio Project Life Wk2 4 3

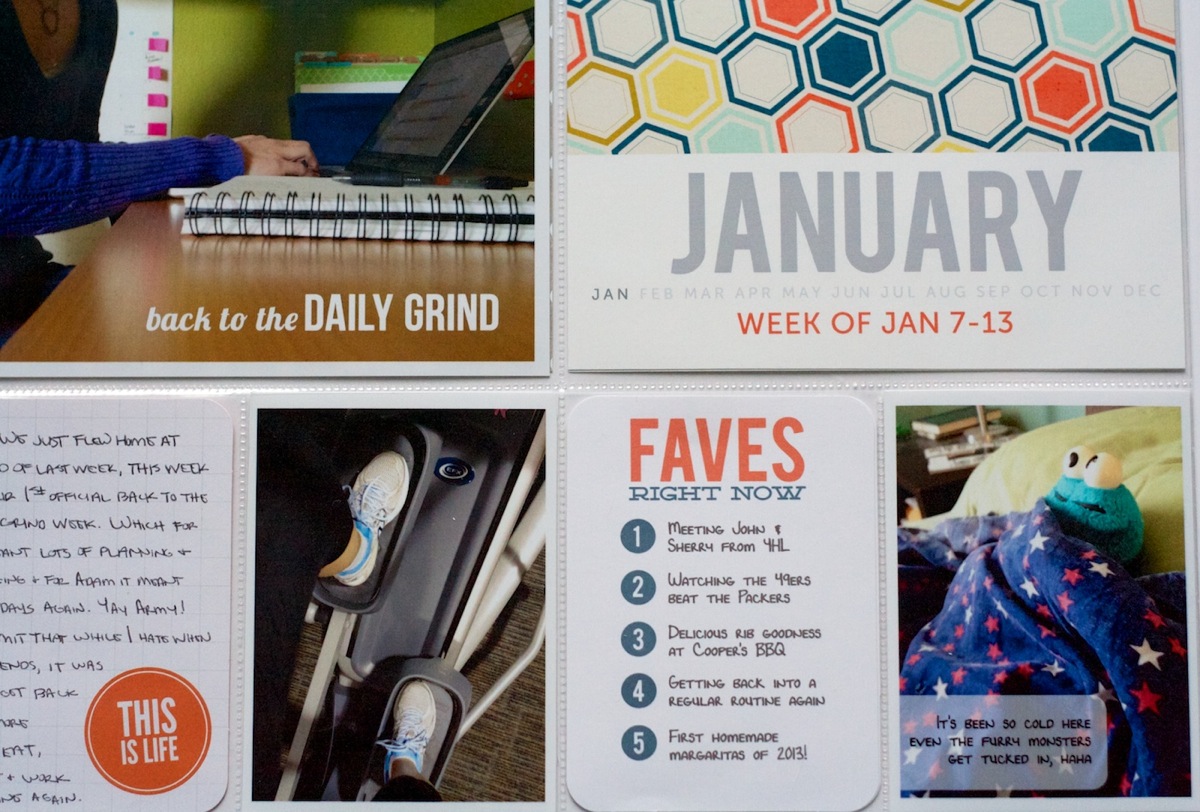
I mentioned in my intro post that I’m planning to have some items that repeat every week. Well here’s an example of the two main ones: my Weekly Faves card and the Month/Week title card:

Nettio Project Life Wk2 4 3Detail

I know, the Faves are hitting Project Life, surprise, surprise right? I do love my faves, haha.

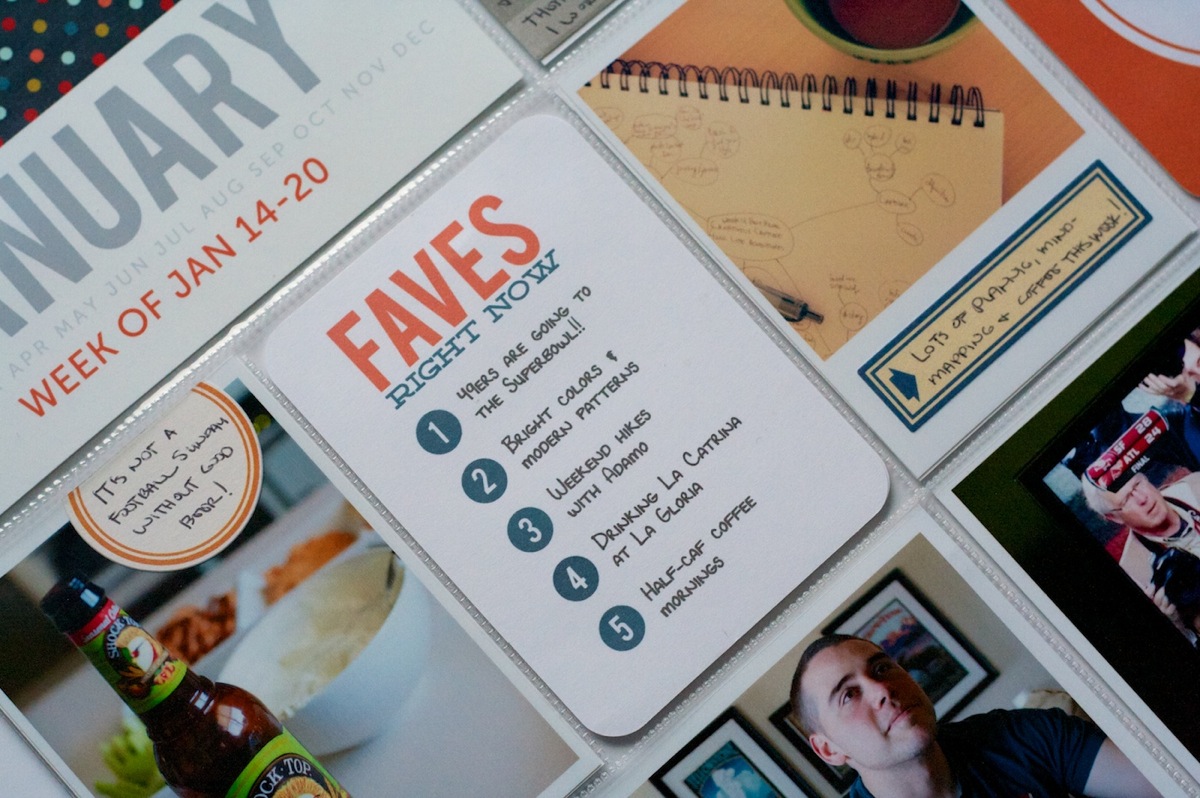
My plan is to use papers/colors from the same kit for each month so all the titles, Faves cards and any accents I make will all match. I think it’ll add some nice continuity to the album since the colors in the photos are all over the place. For January I’m using Paislee Press’ More + Less kit. You can see how the same blue & tangerine color tie the title card and Faves card together throughout all the spreads.

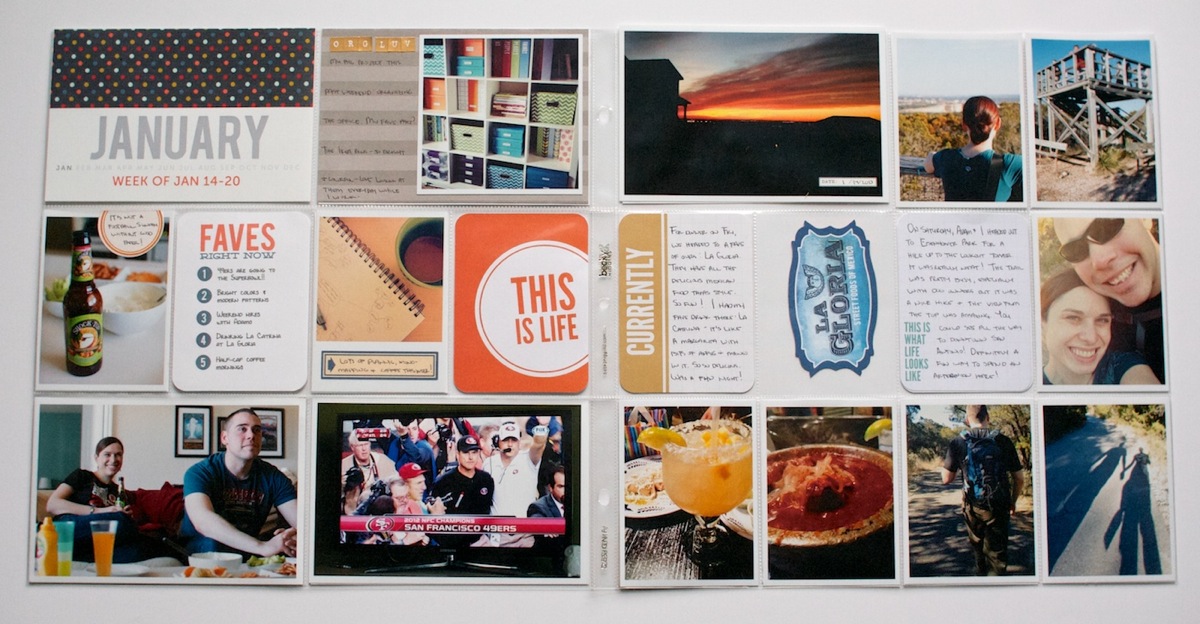
Project Life 2013 Week 3: Jan 14-20

Here’s my Week 3 spread:

Nettio Project Life Wk2 4 4

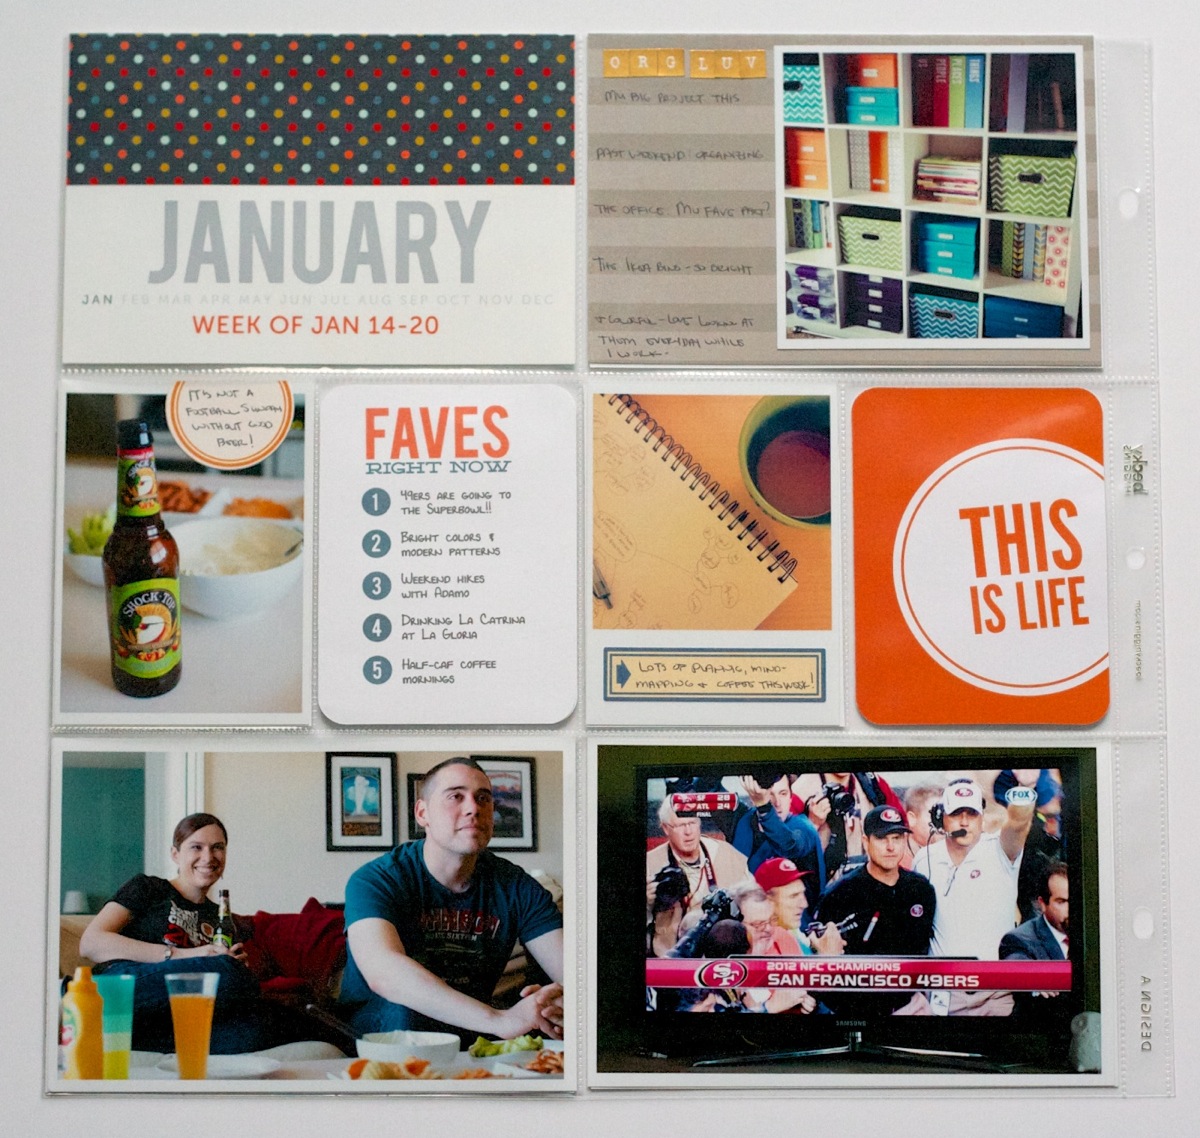
Left side Week 3. You can see how I swapped out the paper on the title card but kept the same colors for all the text:

Nettio Project Life Wk2 4 5

Orange “This is Life” card is from the Seafoam core kit. Everything else is random scrap stuff I had lying around. This week was the first time I tried adding in Instagram square photos – I have to say, I’m liking them.

And can we just pause for a moment and say, WAHOOOOO 49ERS!! SUPERBOWL HERE WE COME! WAY stressful game to watch, haha, but we were a wee bit excited about how it turned out. It’s hard to tell in the photo but I’m totally wearing my SF Giants World Series Champions shirt in the photo – figured maybe some of the SF Giants luck might rub off on them, hehe.

Another look at this week’s Faves card. I’m totally not stressing about these – I just write out 5 quick items and print them directly onto one of the blank 3×4 Project Life cards.

Nettio Project Life Wk2 4 5Detail

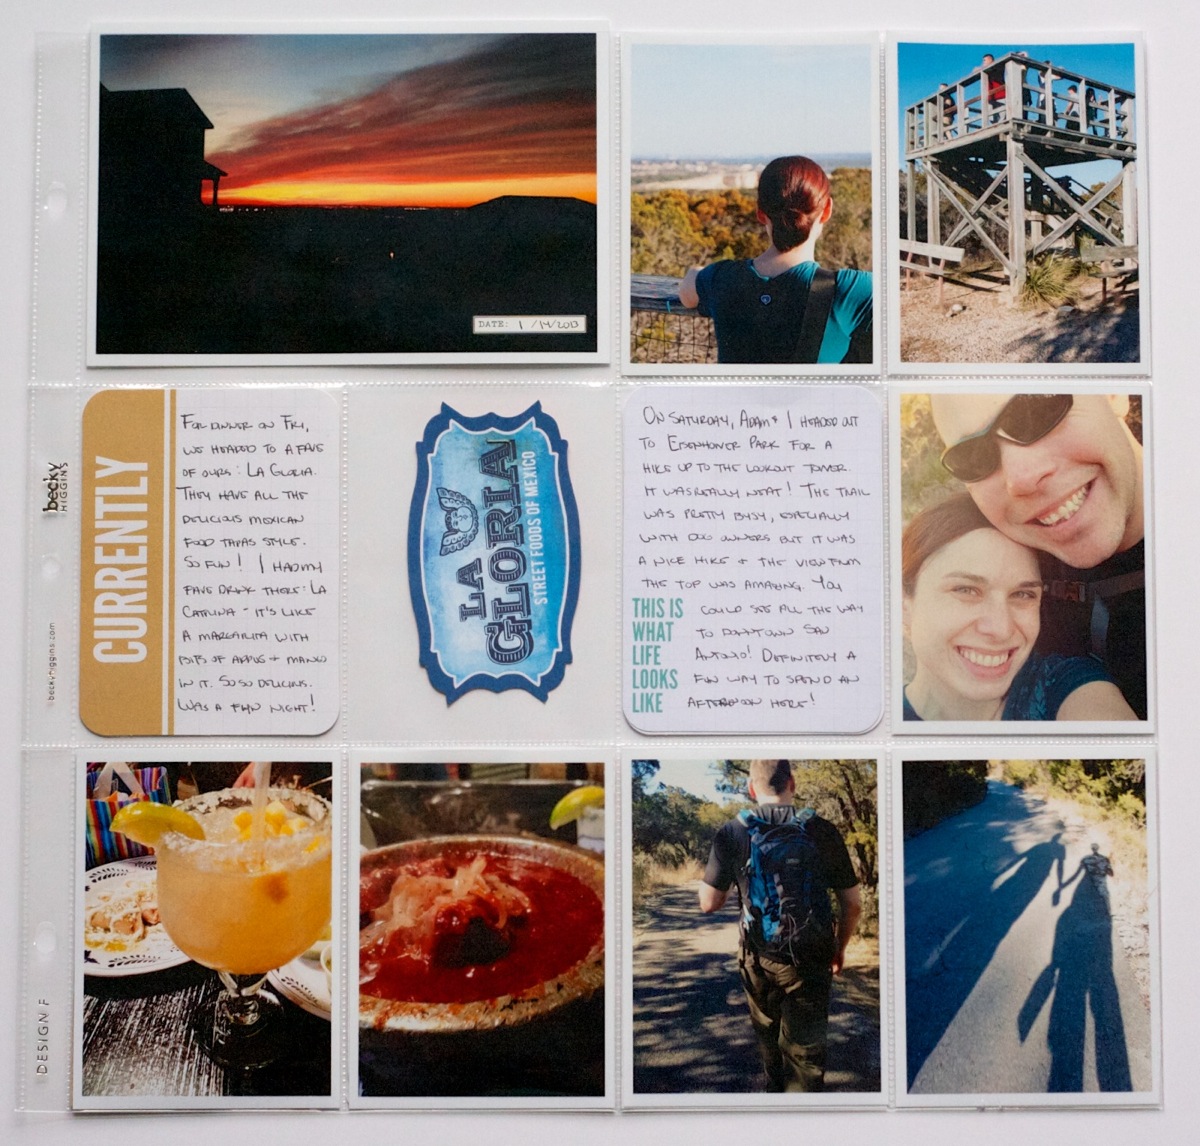
Right side of Week 3. This week is a mix of Design A & Design F page protectors. Saturday we went on a hike here in San Antonio so the entire right side of the page is devoted to photos from that.

Nettio Project Life Wk2 4 6

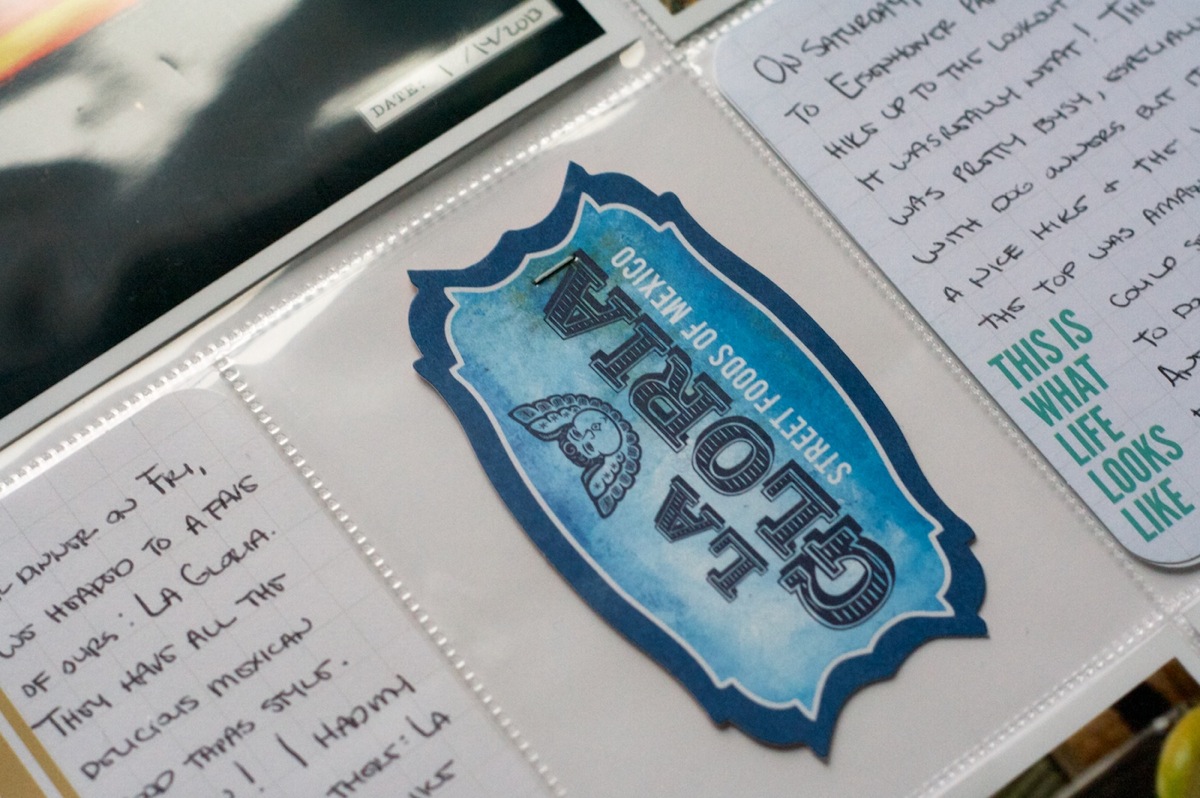
We went out to dinner on Friday so I included one of their cool business cards on it. Since it was too small for the pocket, I just stapled it directly to the page protector using my Tim Holtz Tiny Attacher.

Nettio Project Life Wk2 4 6Detail

Project Life Week 4: Jan 21-27

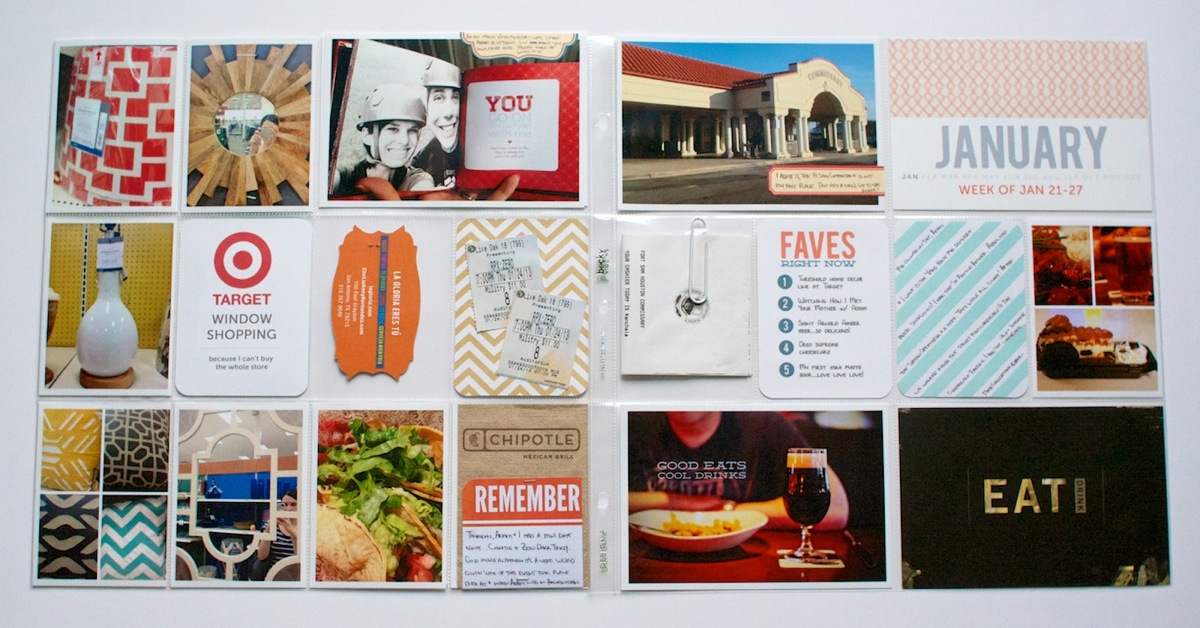
My Week 4 spread – a mix of Design F & Design A page protectors. I’m really thinking Design F may be my fave – I love filling all the little pockets.

Nettio Project Life Wk2 4 7

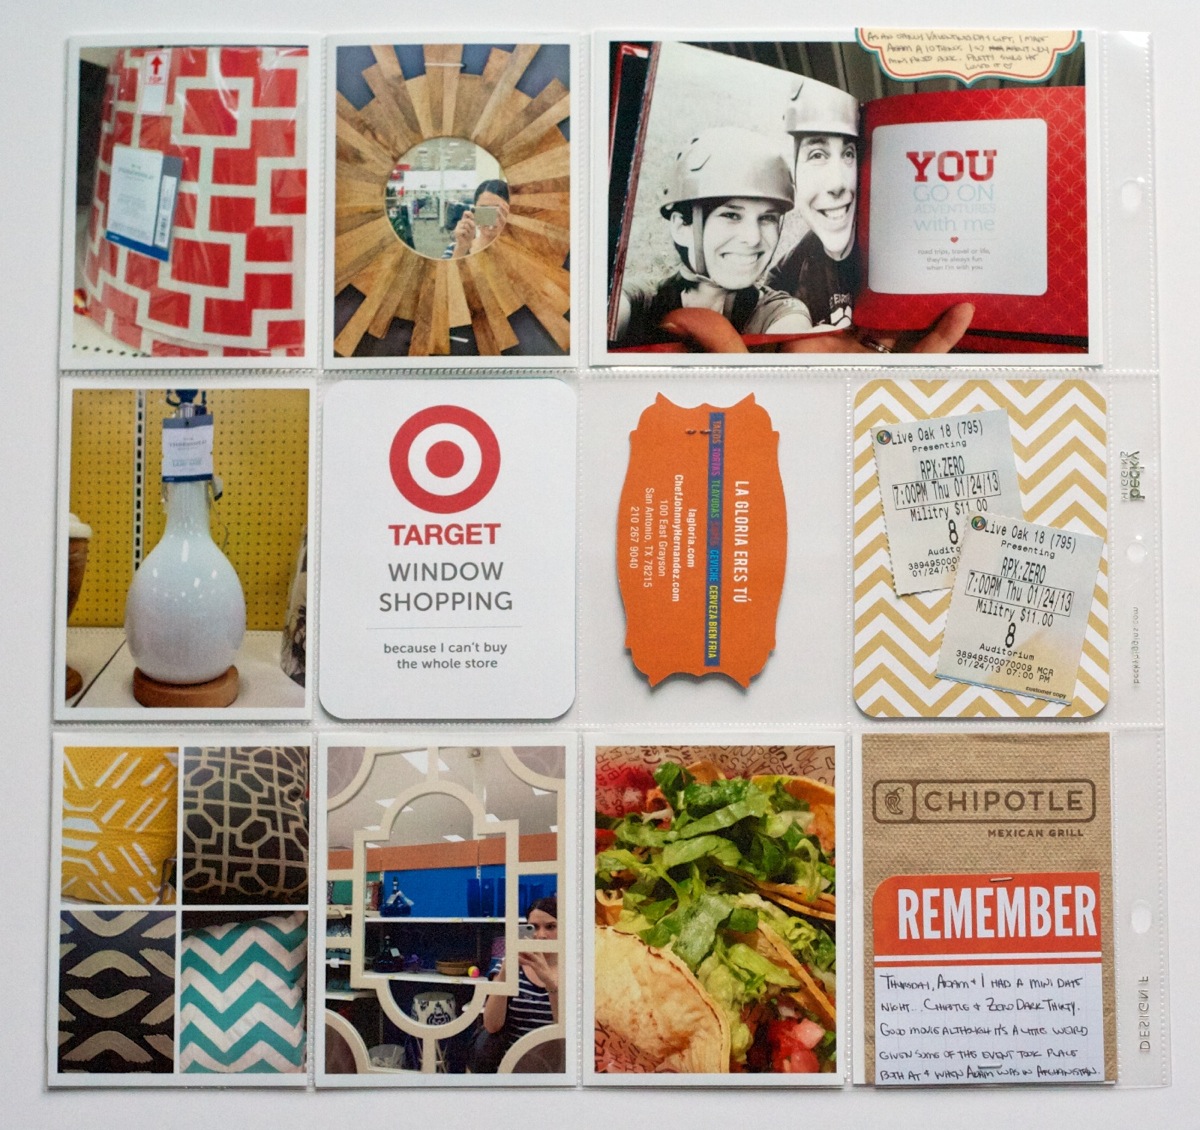
Left side of Week 4. Pretty simple, movie tickets, back of the restaurant business card. The mini photo book in the top right photo is an extra early sneak peek of my product for this weekend.

Nettio Project Life Wk2 4 8

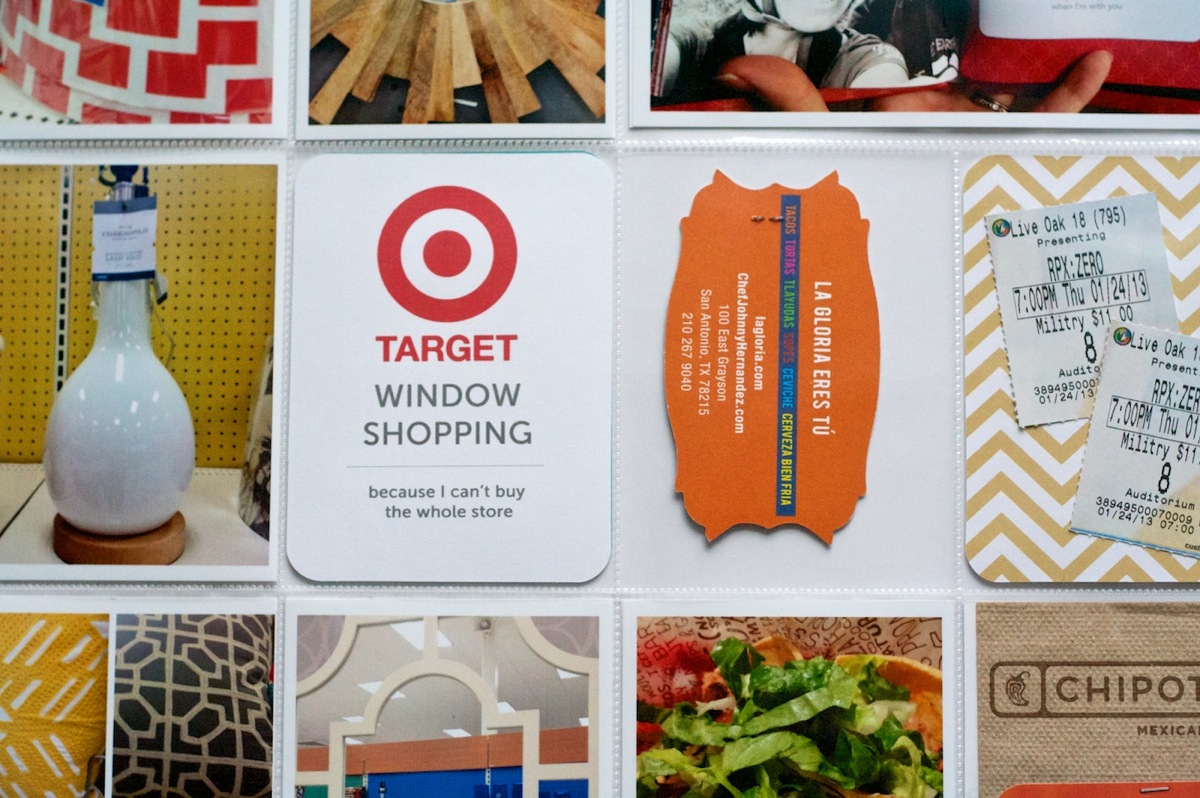
The Target “window shopping” photos were a total happy accident. I went to Target last night to get some frames and since I needed a bunch I knew I couldn’t buy anything else. So I snapped photos with my iPhone of a bunch of stuff I liked so I could “try” them out in our house instead. But when I saw them all together I thought they made for a fun addition to Project Life. Just imagine if you had something like this from the 70s or 80s. It’d be so fun!

For the Target card, I just googled for a logo image that had enough pixels that’d print nicely and then added some text in Photoshop and printed it onto a blank 3×4 Project Life card.

Nettio Project Life Wk2 4 8Detail 1

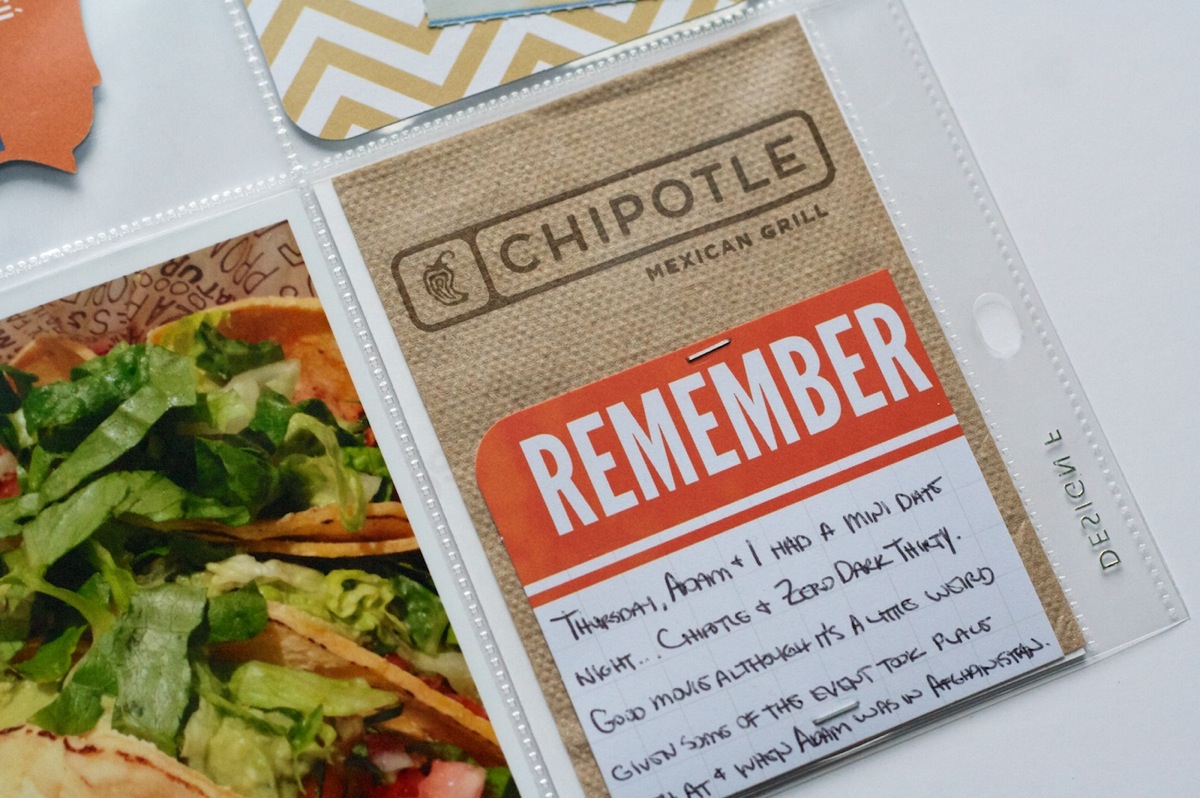
Before we went to the movies we had dinner at Chipotle so I saved one of the napkins to include and then trimmed down one of the Seafoam 3×4 cards for my journaling. We went & saw Zero Dark Thirty which I have to say, we really enjoyed. But it was a wee bit weird considering some of the places and events happened when & where Adam was in Afghanistan. So he kept saying things like, “yeah that’s totally not what that FOB is actually called” or “it doesn’t really look like that at all,” haha.

Nettio Project Life Wk2 4 8Detail 2

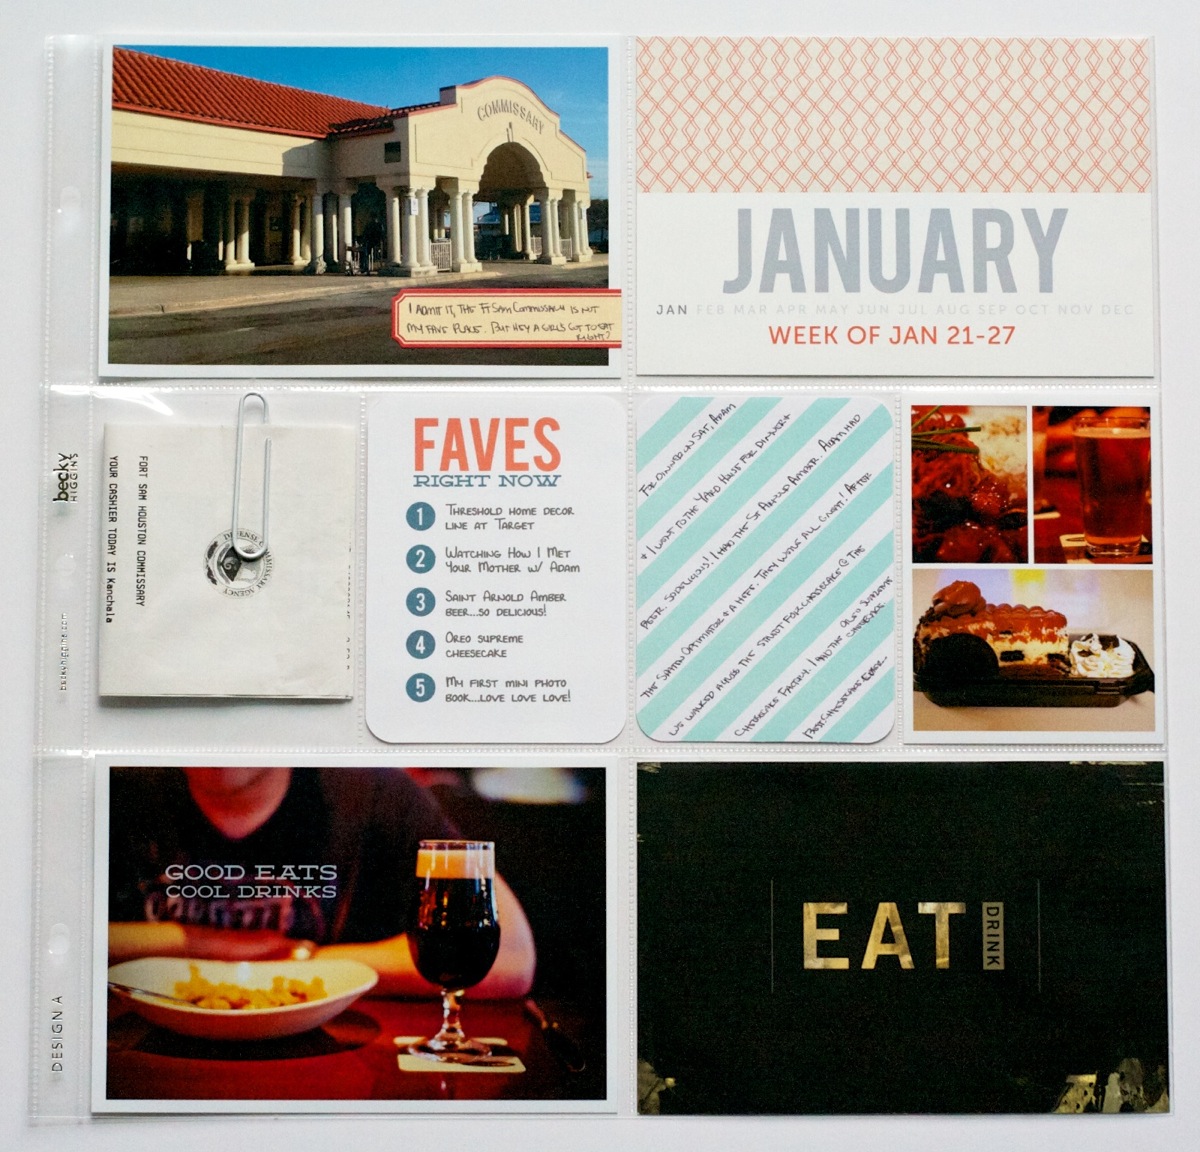
Right side of Week 4. The Eat|Drink card came from a brochure from the Yard House where we ate dinner on Saturday. Diagonal journal card from the Seafoam kit.

Nettio Project Life Wk2 4 9

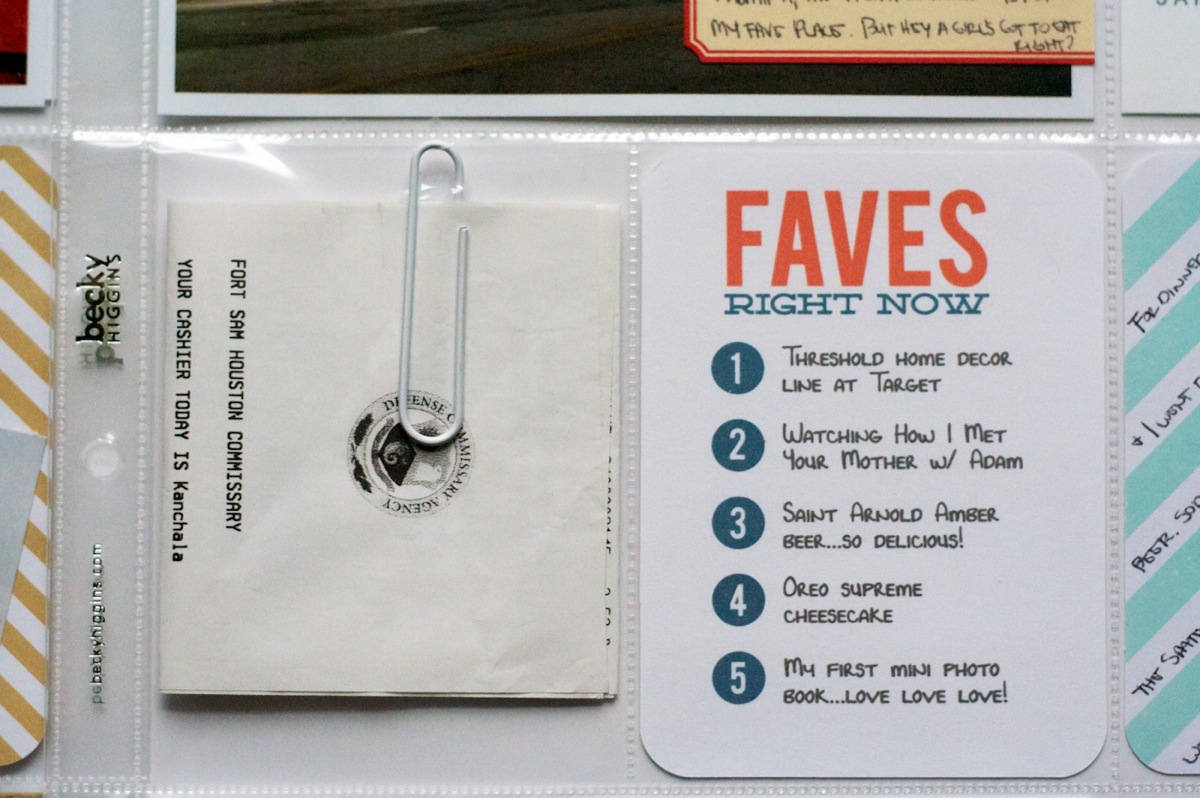
This week’s Faves card. Since we went to the commissary on Saturday (the grocery store on the military base) I included our receipt with a paperclip to hold it in.

Nettio Project Life Wk2 4 9Detail

Well that’s it for Project Life 2013: Week’s 2-4!

Here are my thoughts on this project so far:

  • LOVE the mix of page protectors. So very glad I decided to go that route.
  • Faves cards – always a winner in my book. Loving the repeating title cards & colors too.
  • I was really worried about having enough content for each week, especially since some weeks I felt like I didn’t really take many photos during the week. But I’ve had to cut more than I’ve had to fill so far. That’s the hardest part for me – I want to include it all!
  • Definitely need to streamline my process a bit but I think once I get in a rhythm it’ll be good. Not getting behind is going to be key though.
  • Am already coming up with new product ideas, simply because they’re things I want to use. Love that.
  • LOVE LOVE LOVE-ing all the little stories captured so far in this album. They’re exactly the reason I wanted to do this album this year. SO glad that I took the plunge. I’m loving the completed pages even more than I thought I would.

FAVES 3×4 Journal Card Free Download

Clearly there’s a whole lot of Project Life lovin’ going on here, hehe. And to share a little bit of the love, I’ve got a little freebie for ya!

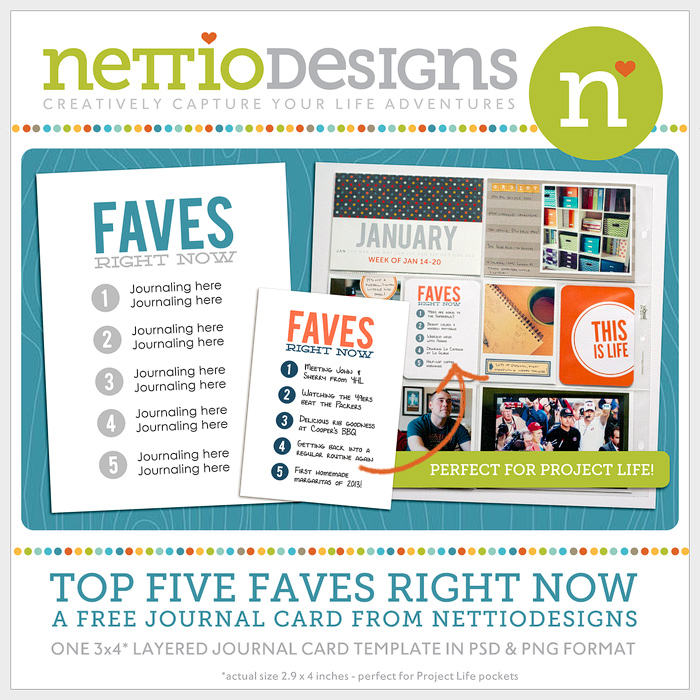
Use the link below to download your own FREE copy of my Faves 3×4 Journal Card. All I ask in exchange is if you like it, pin it, share it & let your friends know they can find it right here at Nettio Designs.

Since the card is designed for Project Life, the actual size is a tiny bit smaller than 3×4 inches – it’s about 2.9×4 inches. File includes a layered, customizable PSD file and a solid colored PNG file.

 Download here

What about you? Are you doing Project Life this year? If you are, how are things going for you so far? We’re almost a full month in, can you believe it?!

Project Life is a memory-keeping system created by Becky Higgins. New to Project Life? Learn more here & find all my Project Life posts here.

Benefits Of Using Canadian Pharmacy

POSTED IN Free Stuff, Project Life, Template-y Goodness

Creative Adventure #4: Project Life

POSTED ON January 22, 2013 IN 30 Creative Adventures, Memory Keeping, Project Life

I bet you thought I’d forgotten all about my 30 Creative Adventures goal, right? I mean, it has been awhile since I last shared an update – all the way back to this one from September. But, I haven’t, not exactly anyway.

Around my half-birthday in November, I made the decision that rather than rush through trying to complete all 30 Creative Adventures before my 31st birthday on May 24 (which would have meant at least 1 a week and then some), I’d rather give myself until the end of this year to finish all 30. That gives me a nice 2-a-month pace which is a lot more reasonable given all I have on my plate already.

Really, my goal with this project was never about the timeline – it was about pushing myself to step outside my comfort zone and try new things creatively. Whether I do that within a year or a year and half, it doesn’t really matter to me.

I’d actually been doing pretty well with this project (I have more adventures completed/in-progress than I’ve shared here so far), up until the point my grandma passed away in August and I spent a month back home in California. It killed my mojo. So I’m giving myself a break on this one. It’s how life goes sometimes and well, it’s my goal after all, so I can change the rules if I want, haha.

The good thing about extending my 30 Creative Adventures to the end of this year is that it allows me to take on one much larger year-long adventure this year: Project Life.

Creative Adventure #4: Project Life

Nettio CA4 projectlife title

For those of you who haven’t heard of Project Life before, Project Life is a memory-keeping system created by Becky Higgins which I’d describe as a photo album on steroids. You start with pre-designed 12×12-inch pocket page protectors and then you slip printed photos and/or journaling cards in it to create your album.

What I love about the Project Life format is that it’s super adaptable to your own life. Most people do Project Life in a weekly format – one two-page spread per week – but because everything is movable, you can easily skip a week or do a single page per month if you like.

From a creative perspective, I love that you can really dress it up or down as much as you want – you don’t have to create an entire scrapbooking layout just to capture that story.  That’s one of the reasons I think it’s become SO popular within the scrapbooking community: because it can really be anything you want.

Those of you who’ve followed my blog for awhile might remember that I started a Project Life album once before, back in May of 2011, when I turned 29, as a way to document the final year of my twenties. I even created and shared this two-page spread:

IMG 34947

And the truth is I LOVED it. But I had just started Nettio Designs a few months earlier and I felt that as a weekly project, it was just more than I wanted to commit to at that point. My focus needed to be elsewhere.

So I put it on the back burner all the while occasionally pulling the album off the shelf to admire that lonely little two-page spread. There’s something about it that just kept calling to me. I don’t know if it’s the larger photos or the the everyday-ness of it but I can’t help but smile every time I look at it. I connect with it in a way I don’t always feel with my digital pages.

When 2013 started drawing near I started thinking again about Project Life. I’d really enjoyed watching Elise’s album take shape this year and the fact that she’s a child-free scrapper as well gave me a bit more confidence that this format could be doable for those of us who don’t have a bunch of kids or pets roaming around.

But what really sold me this year was, back in December, I was looking back through all my photos from this past year and I realized there are so many awesome photos and stories that I’d love to capture, but I have no desire to scrap them digitally.

Which is maybe a strange thing for a digital scrapbooker to admit, haha.

But I’ve always looked at my digital scrapbooking albums more as journals than strict memory keeping. And I’m not sure if it’s partly because I scrap 8×8 which doesn’t leave a ton of room for photos but event scrapbooking has never been my jam.

Plus there’s also the problem of memorabilia. I LOVE collecting bits of paper from the places we go but as a digital scrapbooker, I’m never really sure what to do with them. It’s one of the reasons I love my Holiday Faves album so much – because it gives me a home for all those bits & pieces of life I want to save.

So after thinking and debating and thinking some more I took the plunge and ordered the Seafoam core kit when it finally was released earlier this month. I figured since I already owned an album and a bunch of page protectors, I might as well give Project Life another shot. A fully committed and ready shot this time around. 

And what better way to do that than as one of my Creative Adventures for the year, right?

Because I am really really excited about the creative aspect of Project Life. I’m excited for the chance to dabble in hybrid/paper scrapbooking more than just once a year and umm hello, grid-based page design where you give “homes” to all your elements? SO totally my thing.

Nettio CA4 PLIntro2

My Plan for Project Life 2013

Since I don’t have my first two weeks of Project Life ready to share just yet, I thought I’d share a little bit about my plans and how I went about setting up my album.

As I mentioned, I already owned this American Crafts leather album and the Design A and the Photo Pocket Pages Variety Pack 1. I knew going into this that I wanted to mix up the designs, as opposed to using all of one style for the entire year, but I also knew I wanted there to be a pre-planned method to the madness because I know if I have to decide which page protectors to use each week, this album will never get done.

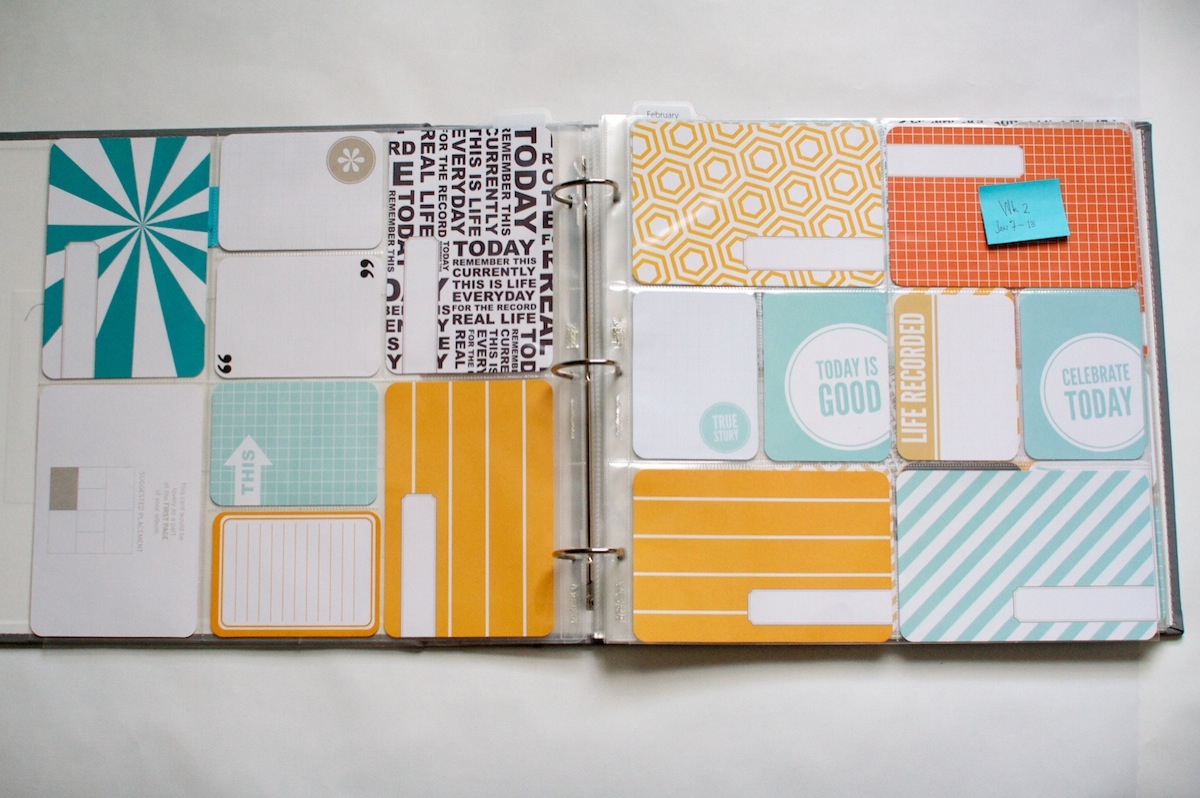
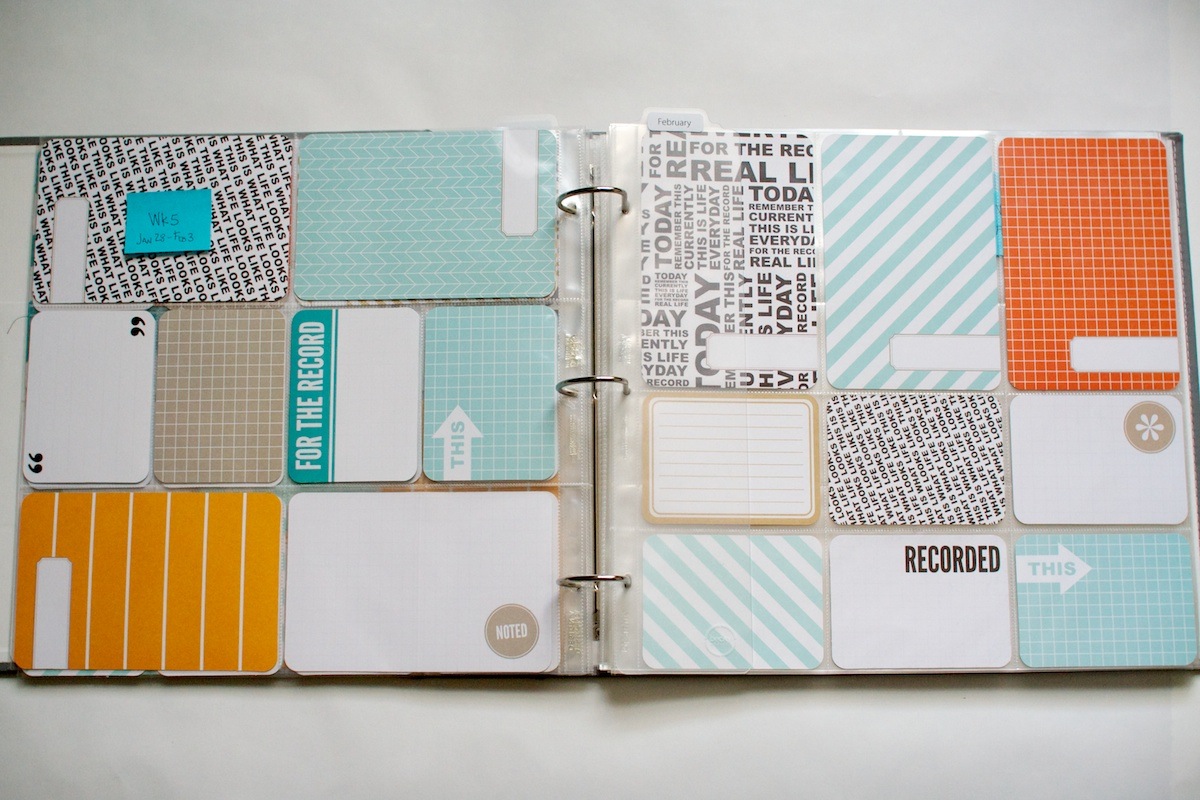
So I started by laying out ALL of the page protector designs in stacks and then mixing and matching them until I got a flow that I liked. And since the page protectors are clear and I was having a hard time visualizing the mix of cards, I temporarily filled a bunch of pages in with the Seafoam cards like so:

Nettio CA4 PLIntro3

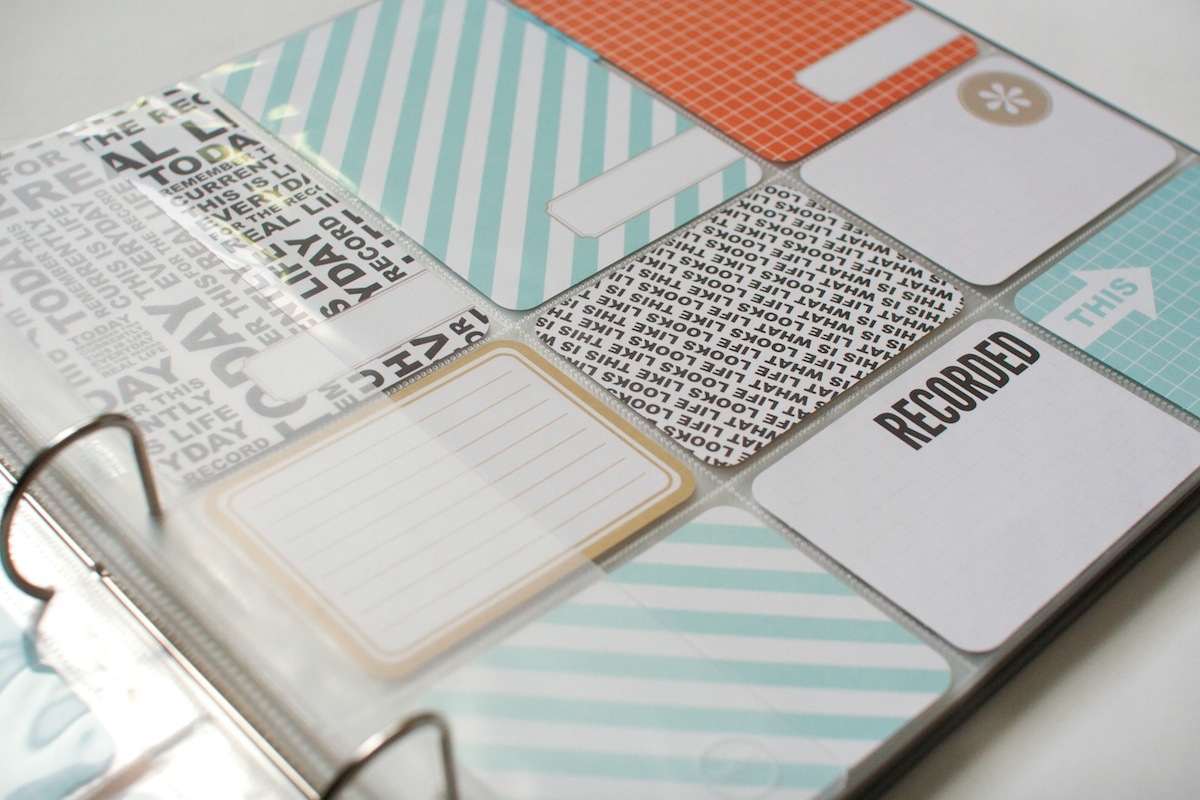
Isn’t this Seafoam kit pretty? I feel like it’s going to mix in really nicely with other products since it’s fairly neutral.

Nettio CA4 PLIntro4

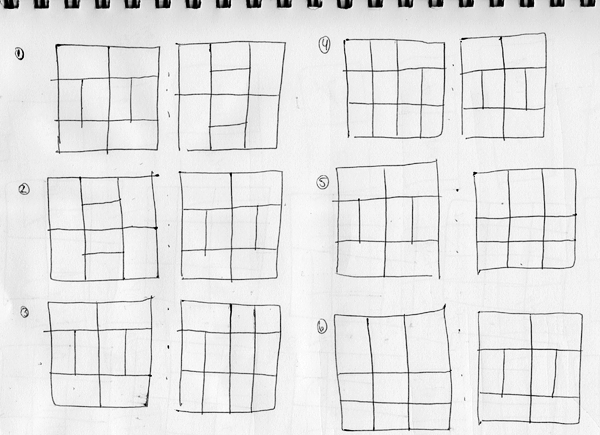
Once I had a flow to the album I liked, I drew a quick sketch of the order of the pages so I could visualize them on paper. Try not to be too in awe of my mad drawing skillz…

Nettio PLsketch

The pattern I liked best ended up including a Design A page protector in each spread with one of 3 different designs for the second page: Designs B, D & F (which I think might only come in the variety pack).

Because of the way the pages work front to back, each two-week period will basically have the same design, just flipped. Which I think will be good since it’ll add consistency to the album but still keep it interesting for me to do it this way. I know from my Project 365 album that if I tried to do only all Design A pages, I’d get bored really fast.

A few other things I’m planning to do for this album:

  • Weekly two-page spreads: I debated a lot about this, whether I wanted to commit to a weekly format or whether it would be too much. But I tend to be a creature of habit and so I thought my best chance for making it through the entire year would be to make it a routine. So I’m currently planning to do weekly spreads but share my pages bi-weekly here on the blog.
  • A mix of hybrid/paper: Much like my Holiday Faves mini album, I’ll be using a mix of printed digital elements and pre-made paper elements. I’m sure I’ll end up designing some of my own stuff as well, which should make you fellow Project Lifers happy.
  • A few repeating cards: I’m currently planning to have a consistent title card for each week as well as one or two other items that’ll repeat every week/month. I think it’ll add some consistency to the design while also allowing plenty of room for creativity.

That’s what I’m thinking so far anyway – how it’ll pan out over 12 months, who knows! But I’m super super excited about this adventure and I have to say, seeing Adam’s reaction when looking at the week I have completed spread, assures me think I’m on the right track. He’s always been supportive of my digital scrapbooking but I just think this format is easier for a non-scrapbooker to “get” than a printed digital page.

And since Adam already got a sneak peek, here’s a little sneak peek of my Week 2 spread for you as well…

Nettio CA4 PLIntro1

I’ll be doing a full Project Life update next week so stay tuned for that.

Anyone else doing Project Life this year? Have any good tips or tricks to share with me? I’d love to hear them so please share them in the comments below! I’m pretty sure I’m going to need all the help I can get to make it through the entire year, haha.

ABOUT THIS PROJECT

In honor of my 30th birthday, I’m challenging myself to go on 30 creative adventures before the end of 2013. This is Creative Adventure 4 of 30. You can read all the details behind this project here and find links to all my completed adventures here.

Fraudulent Drugs Are A Huge Global Problem

POSTED IN 30 Creative Adventures, Memory Keeping, Project Life, Hybrid Scrapbooking

  • 1
  • 2
  • Next Page »
HI I'M LYNNETTE. Graphic designer, tech-lovin’ memory keeper and lover of bold colors & patterns, good food and the great outdoors. Here at Nettio Designs, I share a behind the scenes peek at my own creative & life adventures. Read more...

KICKSTART YOUR CREATIVITY


By popular demand, photo book templates are back! Grab all three sets in the shop.
ADVENTURES IN ORGANIZING
GOAL-SETTING
MEMORY KEEPING
PROJECT LOVE
LIFE ADVENTURES
TIPS & TRICKS
BEHIND THE SCENES

POPULAR PROJECTS

TO SEE ALL MY PROJECTS, CLICK HERE

MUST READ POSTS

  • WHY EVERY SCRAPPER SHOULD SCRAP A FAVES PAGE
  • HOW TO CREATE A SCRAP-WORTHY MAP WITH PHOTOSHOP
  • REMEMBERING THE IMPORTANCE OF TELLING YOUR STORY
  • WHAT DOES IT MEAN TO CREATIVELY CAPTURE YOUR LIFE ADVENTURES?
  • BROWSE BY CATEGORY

    BROWSE THE ARCHIVES

    GET IT FOR FREE

    Copyright © 2025 ·Dynamik Website Builder · Genesis Framework by StudioPress · WordPress · Log in